 |
 |
 |
 |
Week16. Mechine Design
group assignment
- actuate and automate your machine
- document the group project and your individual contribution
* my role : Arduino Code design for actuate and automation
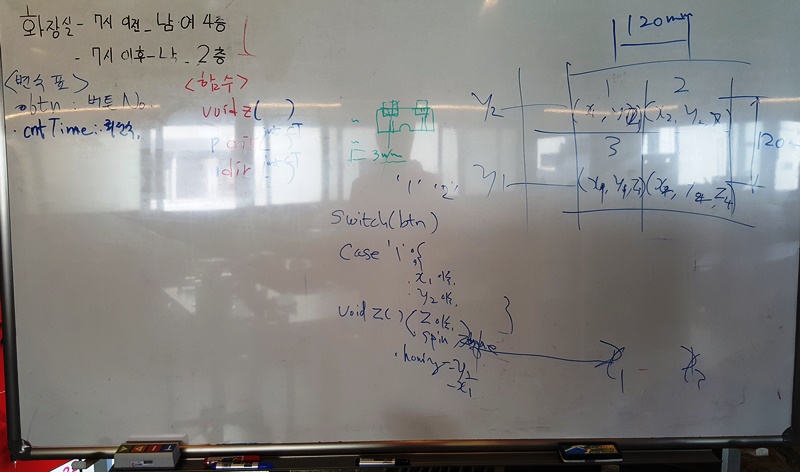
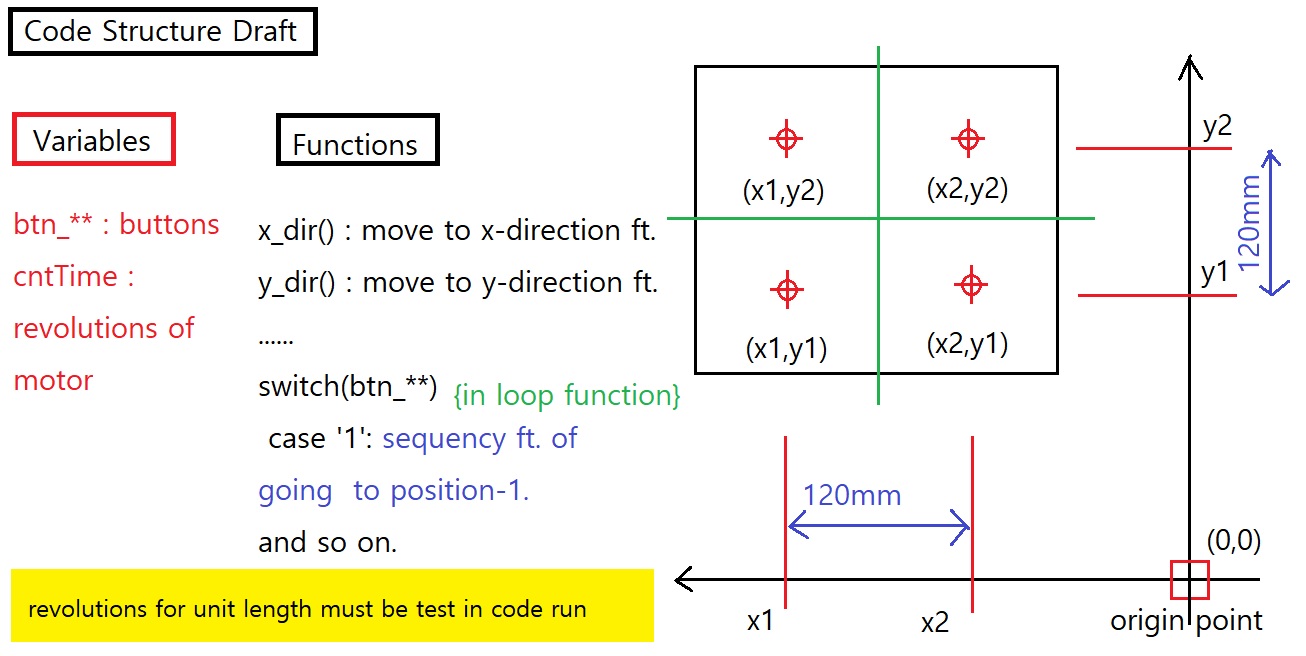
1. Algorithm
-First draft on white board directly make a basic code structure.
-Rewrite and thought about sequencies to run of program.
2. Coding
Here is our Arduino code : bendingM2.ino
Explain about a code.
PreProcessors Setup() Loop() Functions 1. external Libraries
- I2c
- LCD
- keypad
2. configuration
- kepad :
a. set array(2x2)
b. assign as alias
- LCD :
a. assign alias
b. set address(0x27)
3. variables
a. cntTime : motor run counts
b. gkey : keypad number
c. run counts preset for
each position(ex. x2_ct=4000)
d. I/O pin define for each Motors
Initialize
- Serial port : 9600 bps
- LCD :
a. back light on
b. welcome sign
- Motor IO pin preset
a. EstepPin :
-> role = spin to spring
-> state = enable
b. XstepPin :
-> role = move to X-axis motor
-> state = enable
c. YstepPin :
-> role = spin to Y-axis motor
-> state = enable
d. ZstepPin :
-> role = spin to Z-axis motor
-> state = enable
1. Key-in Process
a. waiting for user input button
b. get key to store as a control variable(gKey)
2. actuating Process
- If find a correct position as a gKey
run to each position process
in Switch()..case structure
- the Quantity of revolutions of
each motors defined in PreProcessor area
by experimentally after build of machine.
1. Foward run function
- name : pDir(uint32_t ct, int p_dir, int p_step)
- parameters :
a. ct : destination run count
b. p_dir : motor direction pin
-> set to LOW state to foward
c. p_step : motor run control pin
2. backWard run function
- name : mDir(uint32_t ct, int p_dir, int p_step)
- parameters :
a. ct : destination run count
b. p_dir : motor direction pin
-> set to HIGH to backWard
c. p_step : motor run control pin
3. Hardware assemble and Software Debugging
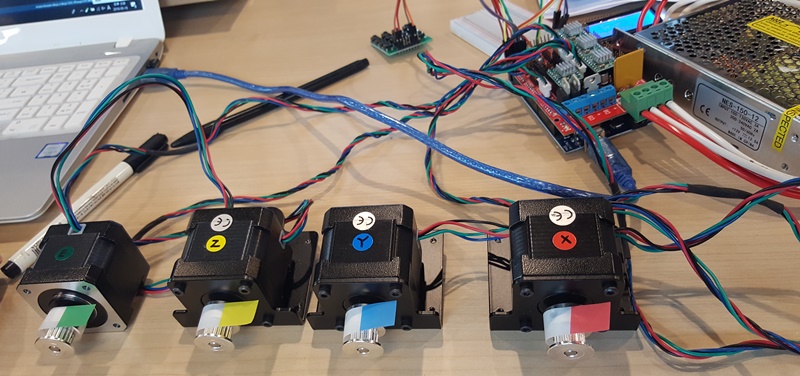
1. Software Code test before Hardware assemble
This test for check about working of each motors correctly.
If any motor not working properly, check about electronics wiring next
change that motor to stable motor.
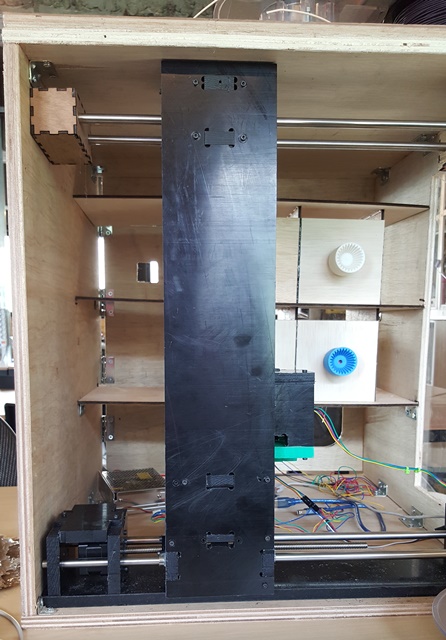
2. Motor revolutions test to convert linear actuating.
This step is a pretest before whole assemble.
At first, 1 axis assemble and manually working state. If it's not smoodly running
check about mechanical joint such as ball screw or frame alignments.
Second, several times tests must be done to take a resoneable test value.
Here is our parameter test results.(There are some offsets where is long distance to go.)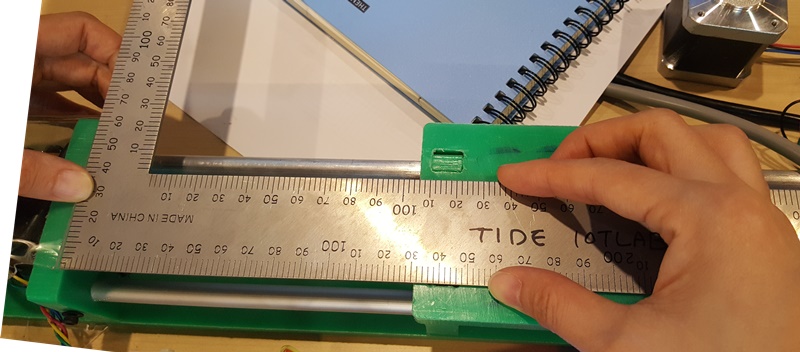
Category Revolutions Length (mm) Note. unit 10,000 (25) x1 51,000 (127.5) x2 4,000 (10) y1 35,000 (87.5) y2 88,000 (220) z 16,000 (40) spin 5,500 (13.75) 3. Electronics assembly
In this step, we consider about cable diameters and lengths while moving motors.
And try to make a good electrical wiring especially to connect high-current lines.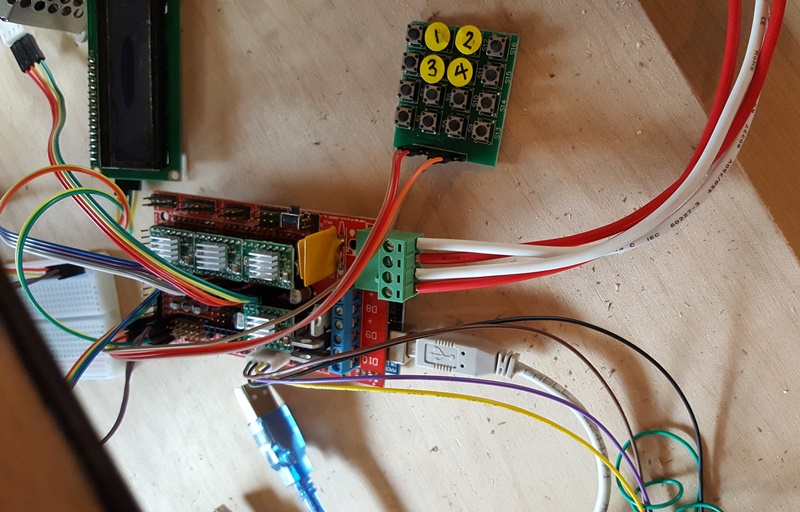
4. Mechatronics assembly
The last move work test for Z-axis left till assemble combine chassis.
Because of it can be find when assembl body frame and spring frame.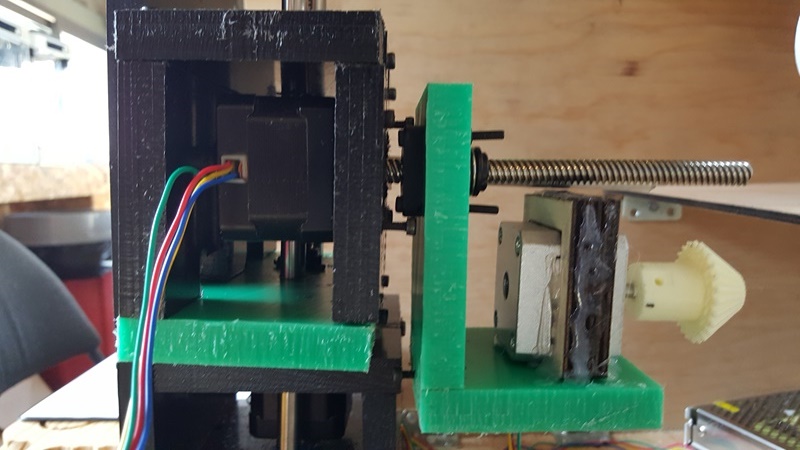
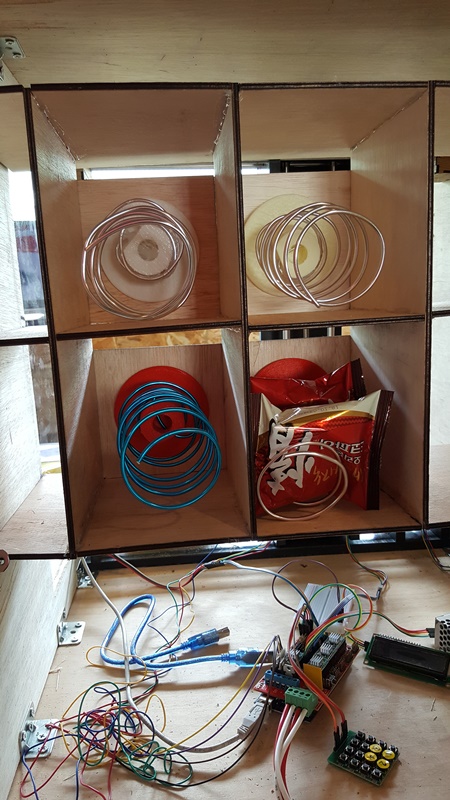
5. Machine assembly
Here we have pre install whole chassis to making completely
I was noticed about wiring and un defined mechanical work
(especially consern about Z-axis linear motion and spinning to handle spring shafts.).