 |
 |
 |
 |
Week17. Composite
group assignment:
test for several layers sheet with epoxy compounding to make composite materials.
individual assignment:
Design and produce something with a digital fabrication process
(incorporating computer-aided design and manufacturing) not covered
in another assignment, documenting the requirements that your
assignment meets, and including everything necessary to reproduce
it. Possibilities include (but are not limited to) composites, textiles,
biotechnology, robotics, and cooking.
1.Used Tools
- FreeCAD for modeling- Aspire for machine data
- Shopbot CNC for machining
2. Overview to make Shell Cover of Speaker
This weeks, I just want to make a skin to cover speakers of audio amps.
Especially, our class take a kind of mold fabric process named known as
FRP(Fiber Reinforced Plastics) process to handle with natural raw materials
(like a Cotton Soft). At first make a inner shape of skin to lap,prepare
epoxy to mold and take a vacuum process to hold shape during to change
to hard.
4. Process
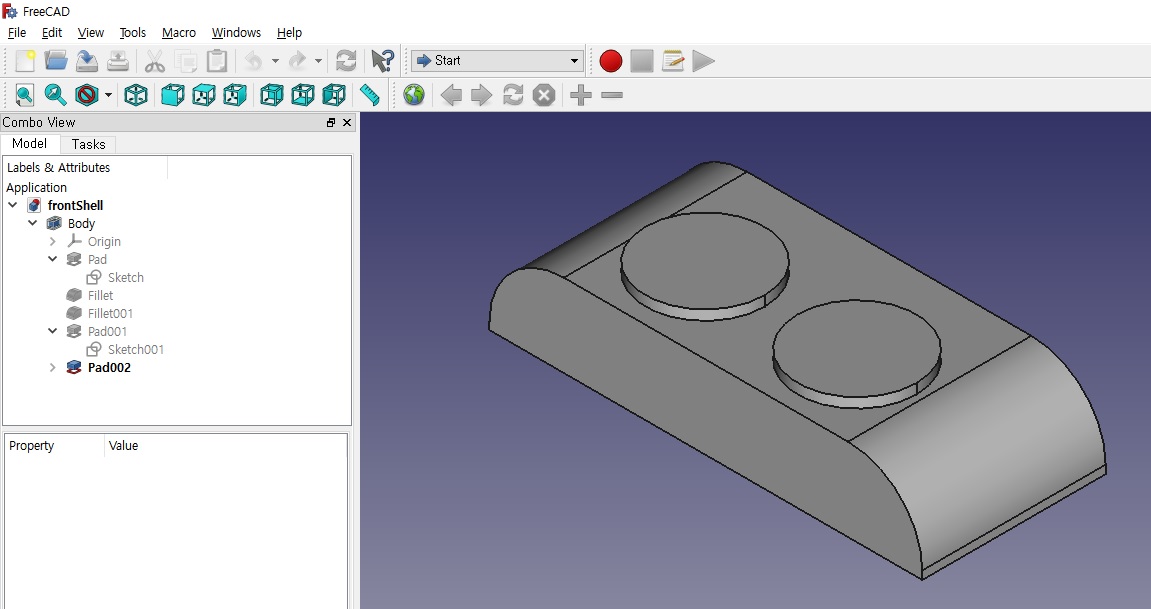
4-1. Modeling
I focused on vintege style audio speaker cover and take a shape fit to two of 3 inch
diameter. Here is a model.
4-2. Milling data
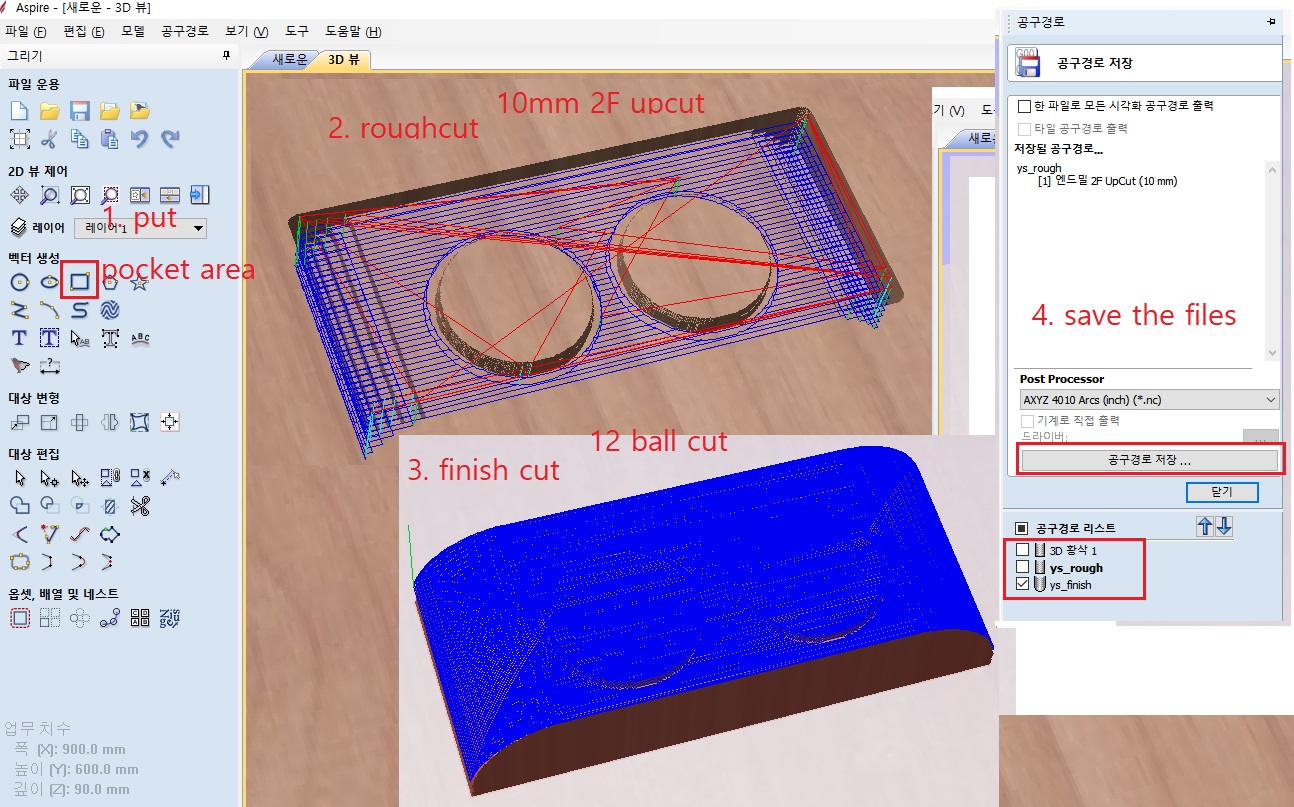
To prepare tool paths datas for Shopbot CNC, I used to with Aspire software with 3D modeling file save as stl format.
making steps
-1. to reduce time to mill, put the pocket area first before made roughcut generate.
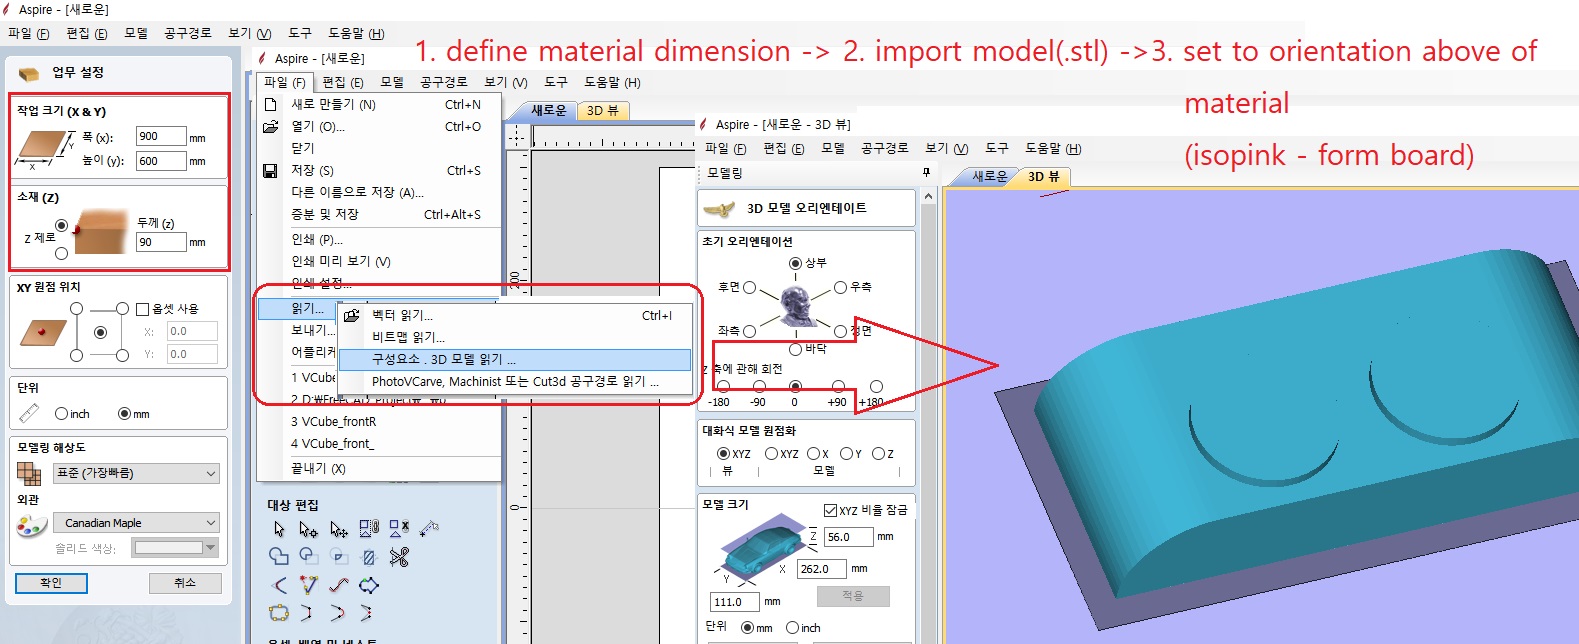
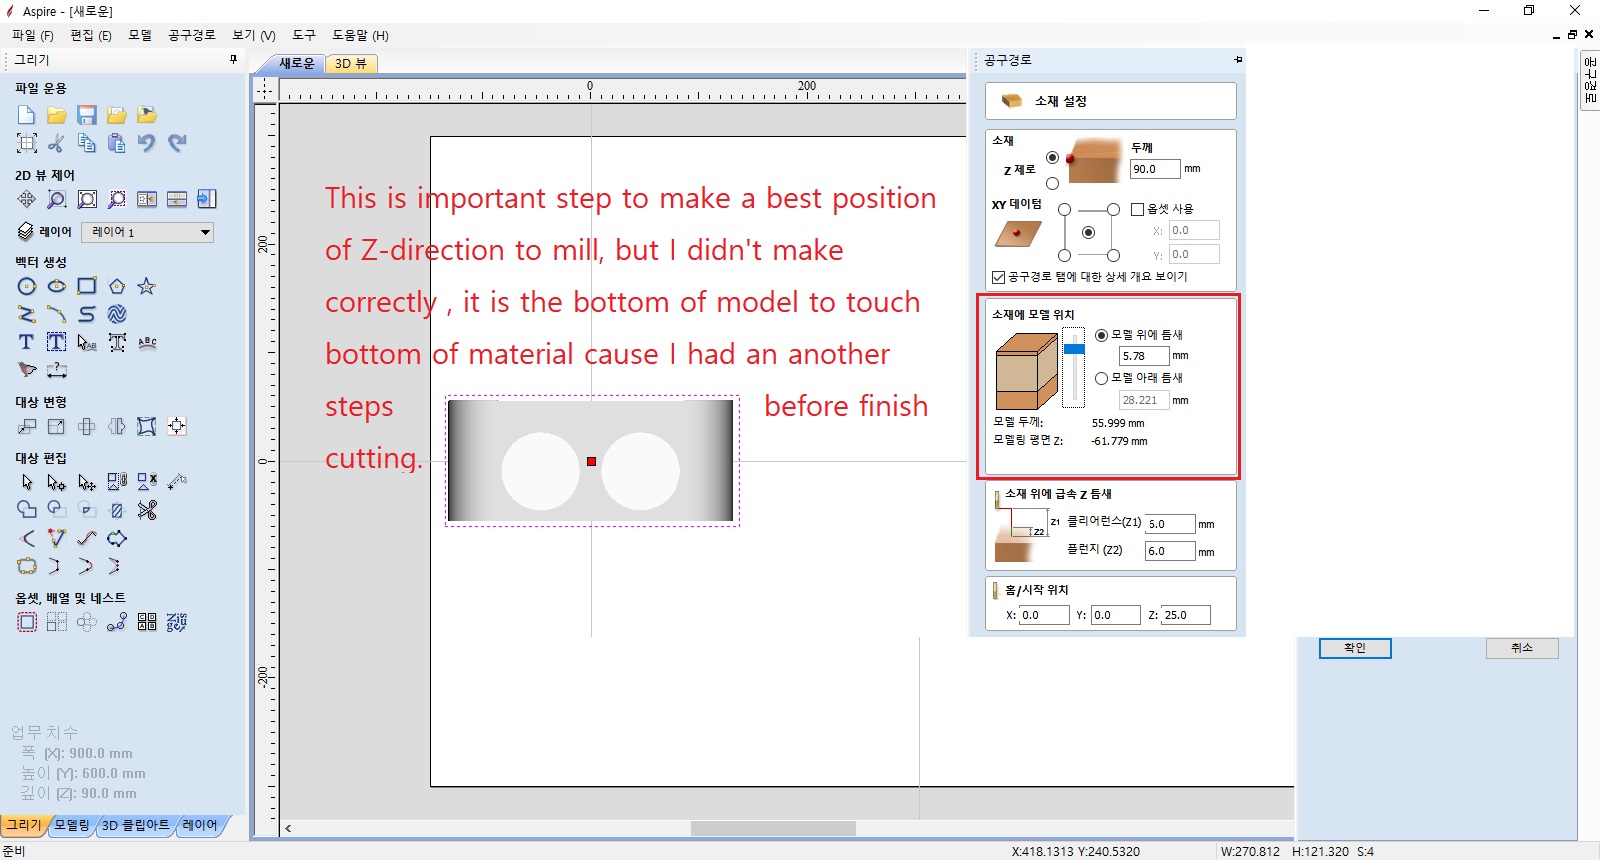
-2. for stable milling, put the model top face to fit slitely dipper position in z-axis.
(some trouble issues on goto section 4-3. it shows about how I missed position.)
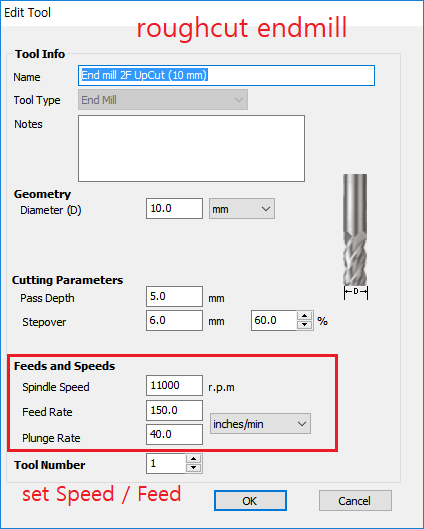
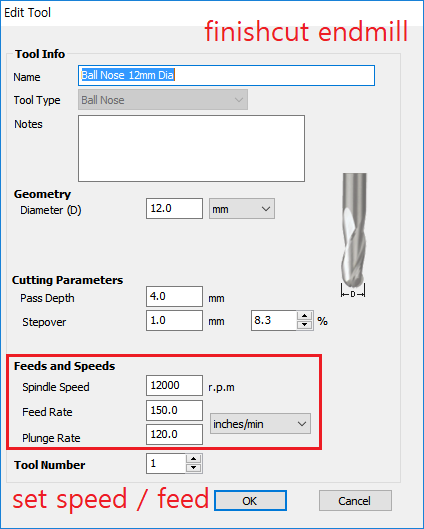
-3. generate roughcut with 10mm diameter 2 flite upcut endmill and use 12mm diameter ball endmill for finish cut
Endmill settings
-4. chech about simulation for tool paths
-5. save all path datas.
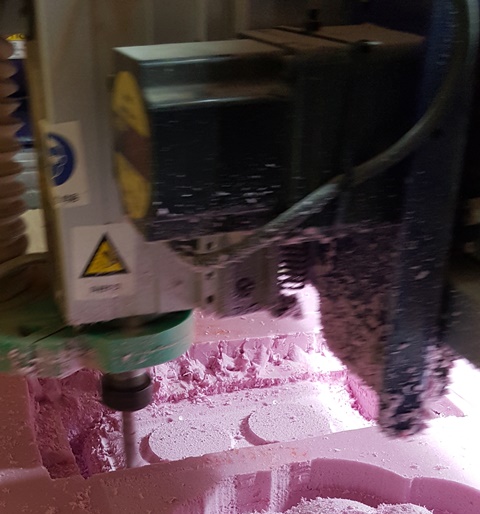
4-3. Milling and Casting
I found some errors during roughcut that is the collect outer parts to touch on top of isopink.
I found already in aspire job, but I coudn't fix about it cause not find menu for select material
after other files job. I didn't know how I fix it at that moment so I pass the step.
(I think it is right don't do that!!!). In roughcut process, I was thinking and thinking about to take a best result
over holeprocess. I decide to take off about some of top plate touched areas after roughcut process.
Then, try to make a finish cut process.
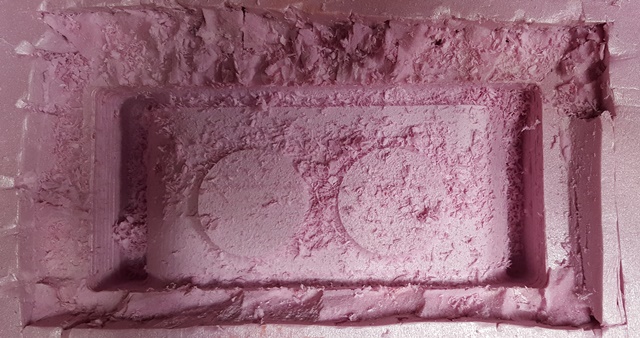
After mill process, I got the result as below it needs some sending.

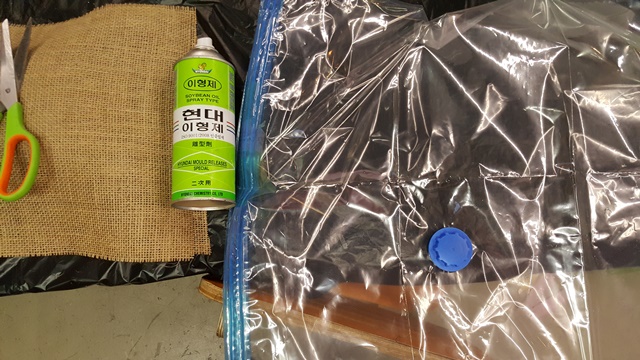
Epoxy mold process
- Step 1. - prepare :
a. vinyl cover over the work bench.* Epoxy : brief contents for uses
b. about 250mL, 100mL measuring cups for epoxy mix.
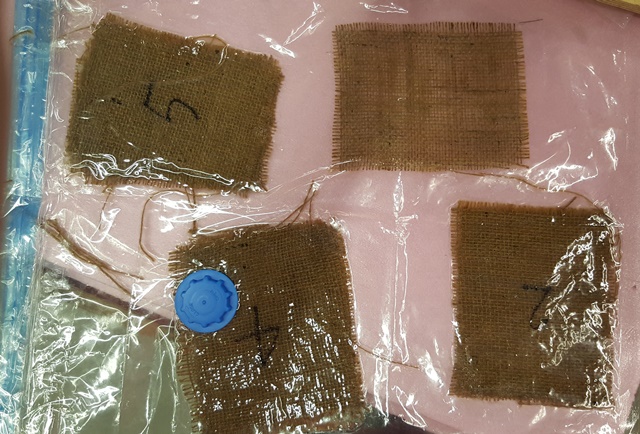
c. test sheets 100 mm x 100 mm size for one through five layers
d. brush for epoxy coating.
e. electronic scale for measuring epoxy.
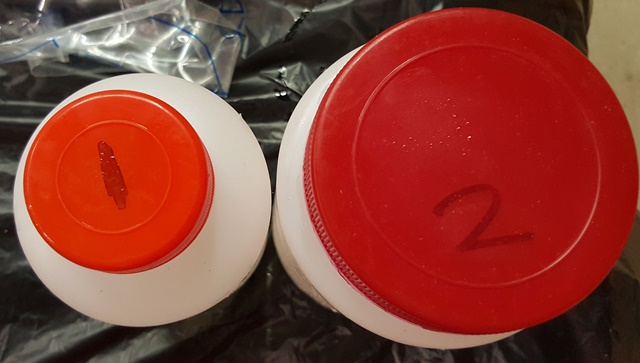
- Step 2. - choice a good sample for suitable hardness.
[MSDS]
a. properties - Use at room-temperature.
b. protection for human body - Wear goggle, mask, protective gloves/clothing/ face protection
c. safety - Store in cool, dry, well ventilated place away from heat, direct sunlight.
Keep containers securely sealed when not in use.
d. handle with care - Wash throughrly after handling.
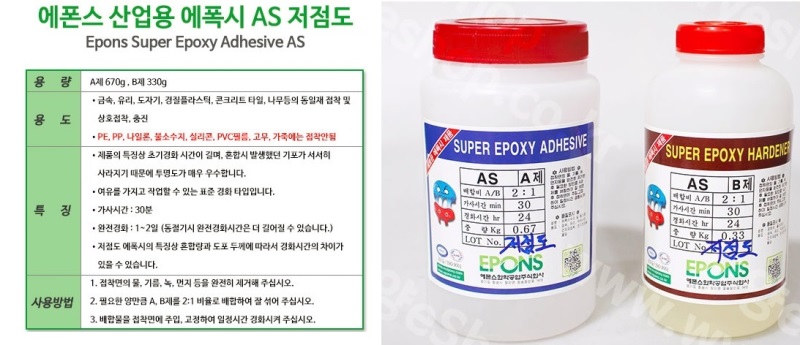
[manual]
a. Use at ambient temperature above 5 'C.
b. Clean the surface such as water or oil.
c. The ratio of adhesive vs hardnener is 2 : 1 by weight of each.
Wear gloves, in 2~3 minute combine A(adhesive) with B(hardnener)
d. Paint the mixed epoxy on sheet, spread out with brush.
The hardness time is about 24 hours at room temperature.
e. Wash throughly after handling with soap.
The unused A and B, close the cap and store in cool place.
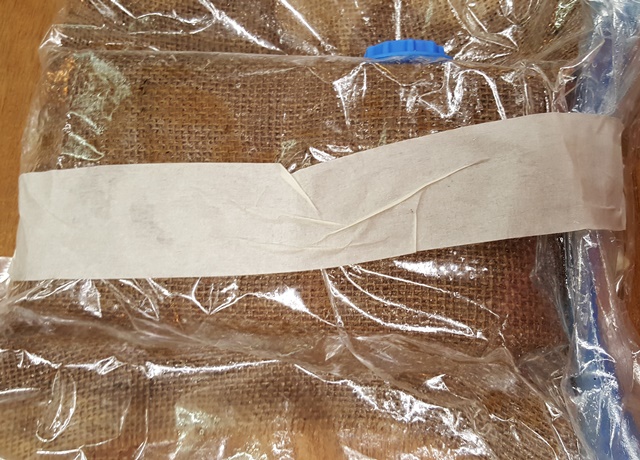
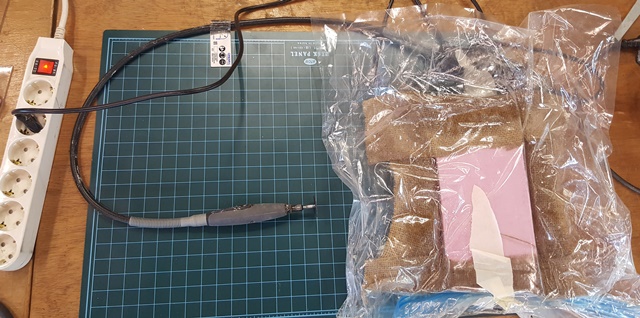
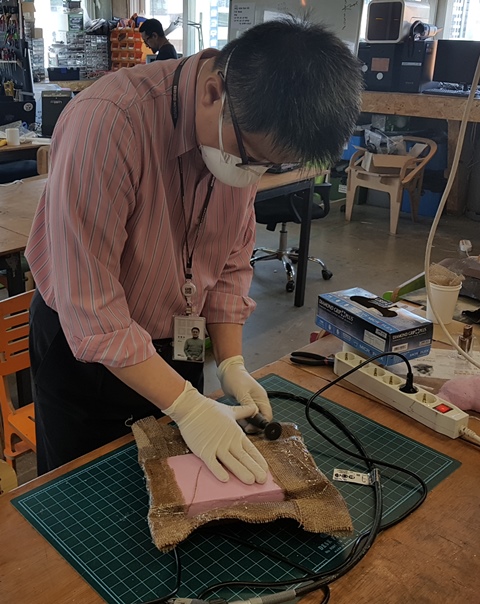
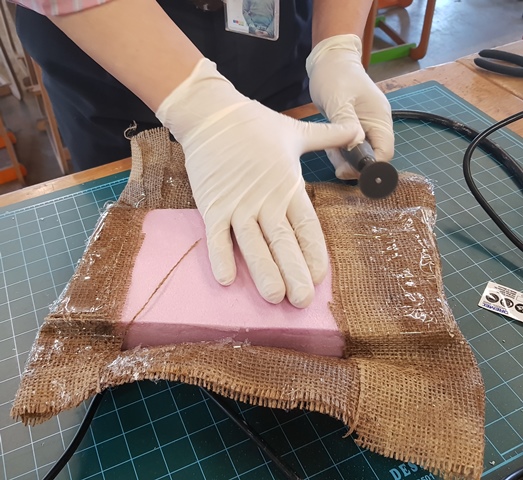
- Step 3. - Epoxy coat and vacuum out the air of sealed vinyl envelop.
For my application, the final output shell need a slitely softness so I made a bending test for test sheets.
After each test, I choose the 2-layers sample. It's thickness about to 2.5mm and suitable thickness for covering of speakers
front.
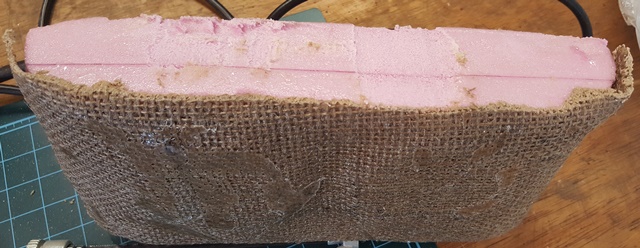
4-4. finishing
After about 1 day, prepare a grinding tool for cut out extra parts from shell.
Then, first check about hardness process complete using several knocking with hand tool.
If it feels like a good state, take a tool grind out side of shell edge lines.
More and more cutting outsides to fit edges.
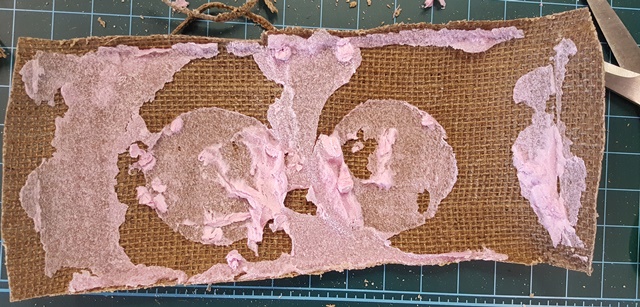
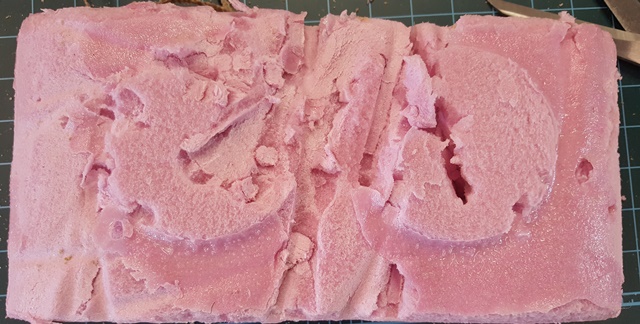
By the way, In this step, I just recognize about some missing before epoxy coatings.
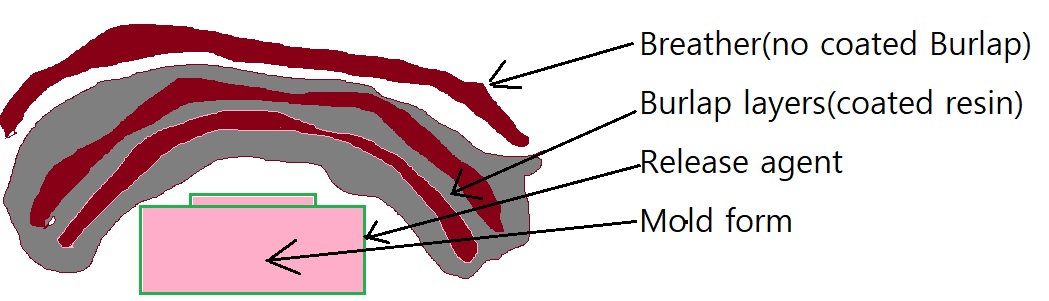
One is that oil sprey(release agent) over all about isopink body before natural coaton sheets wrap around.
It was cause about some part to bond isopink and sheet so it makes the isopink body can't be reusable.
Here is the body after take off sheet. The other is some more resin on top layers cause didn't cover the
breather sheet can be breath when vacuum out of air , its enhanced about the final shape.
5. Consideration for avoid errors
[1] For Modeling
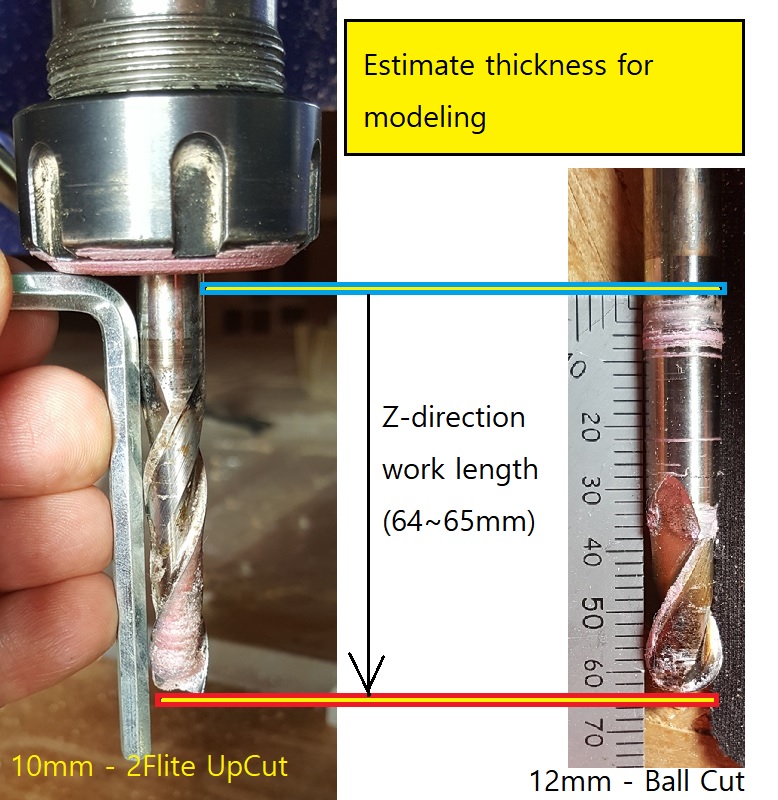
- Must be check first about height to possible mill(Z-axis work length) for 3D model.
(If model height more then maximum Z-axis, it can't be finish the cutting.)
-As a result, if needs more then z - direction work length(for my case, its (~65mm)) then
divide several units by this length.
[2] For 3D Toolpaths
-If use a wide material more then need space, then put first suitable a pocket area on the possible area.
-Make sure the start position of z-direction(It can be makes in Material setting in tool path menu).
[3] CNC work
- If use multi layers of isopink materials, use the adhesive to glue each face of plates,
also Double Coated Tape to stick to CNC machine base bed.
[4] Epoxy Coating
- At first, sprey release agent to cutting model and vacuum hold vinyl envelop.
- For the epoxy combine, follow the MSDS and manual directions.