Wildcard
Things to do:
Possibilities include (but are not limited to) composites, textiles, biotechnology, robotics, and cooking.
The goals for the week are referred to the textile assignment and it is related to the final project.
Have I achieved this week's goals?
It's time to have a creative flair! :)
After two hard weeks surrounded by the gears and the mechanical design I made for my group project, I can finally focus my attention on my final project! In fact, this week I'd like to start managing my time and make a schedule for it. After having googled many information about the textile's world and the wearable technologies' field, I'm going to take the LilyPad main board as a sample. I will use a similar PCB as a master board and I'll sew it on my child seat cover. The idea is to link it with an accelerometer (used as a motion sensor) and a Bluetooth module (that will work as a master sender). In addition, I also decided which kind of shape I'm going to use. Considering the fact I'm going to work on a project made for children, I would like to recreate something that would be appropriate and funny. Anyway, during the wildcard week, I would like to recreate a personal PCB and try the basic steps in order to learn sewing.
LilyPad for wearable technologies
The LilyPad is a microcontroller board designed for wearables and e-textiles. It can be sewn to fabric and similarly mounted power supplies, sensors and actuators with conductive thread so as to create interactive garments and accessories. This LilyPad main board consists of an ATmega328 with the Arduino bootloader and a minimum number of external components to keep it as small (and as simple) as possible. The board can run from 2V to 5V. The latest version of the LilyPad supports automatic reset for even easier programming. The back side of the LilyPad is now completely flat! A surface mount programming connector is employed to keep the header from poking through. (website reference here)
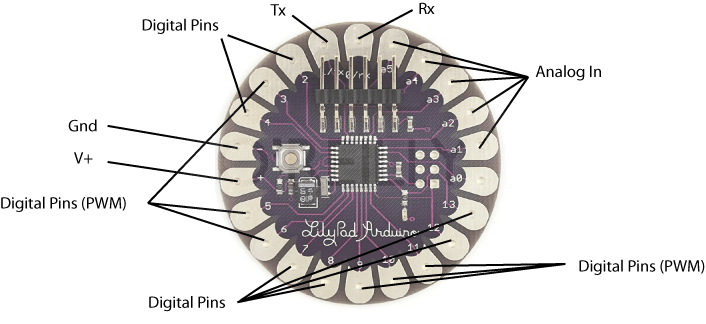
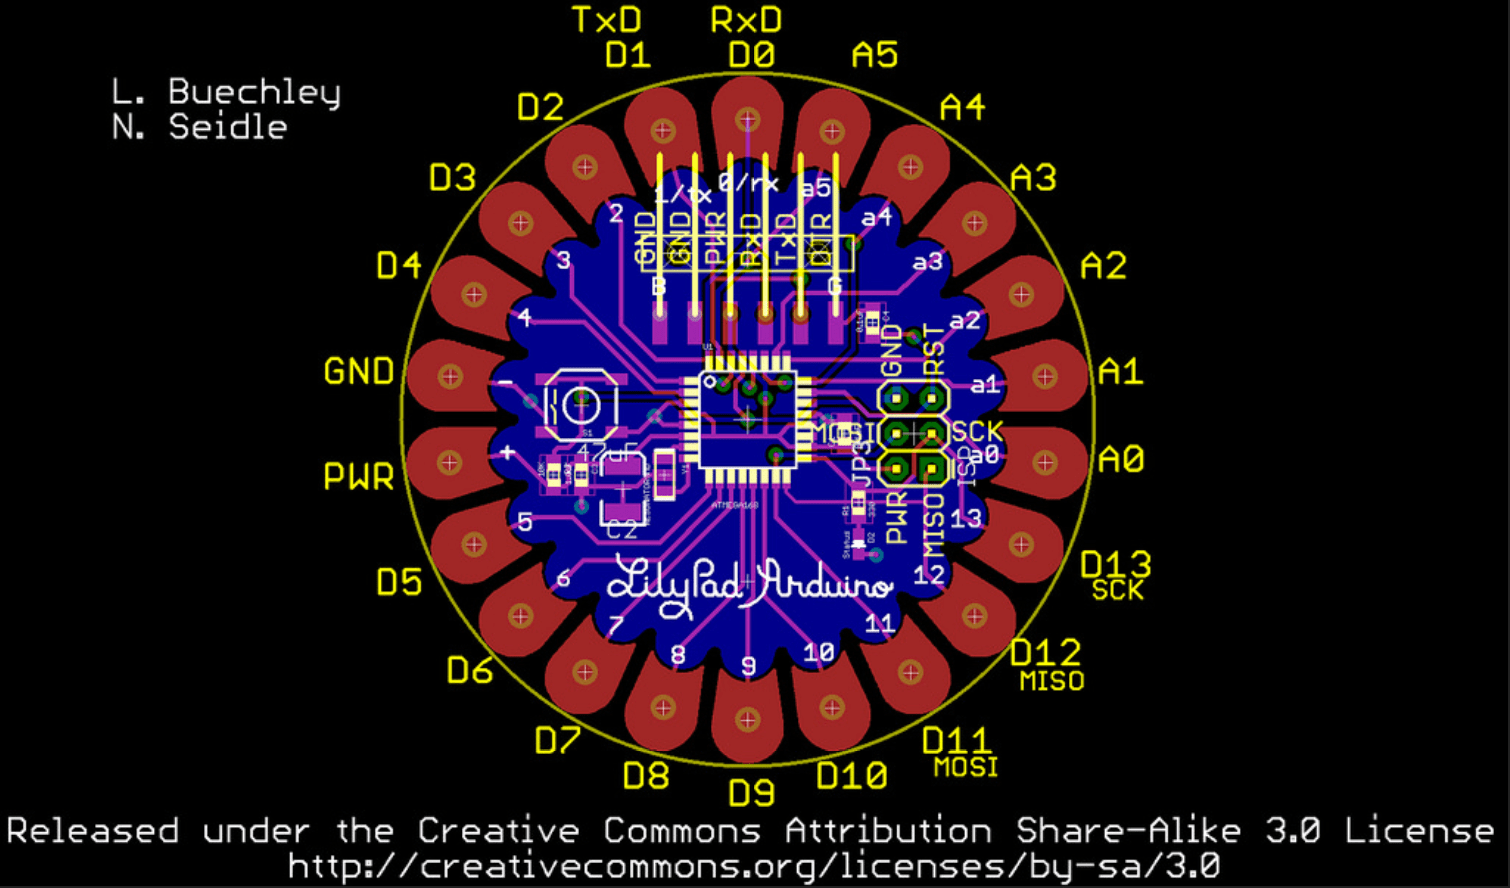
Before starting on my own creation, I paid attention to the LilyPad main board's features. I wanted know which were the digital/analog pins. The following picture has been extremely useful and after having looked for it, I also opened the pins configuration. To sum up, both pictures represented the kernel for my weekly assignment: they helped me to understand which were my needed components.
Textile assignment
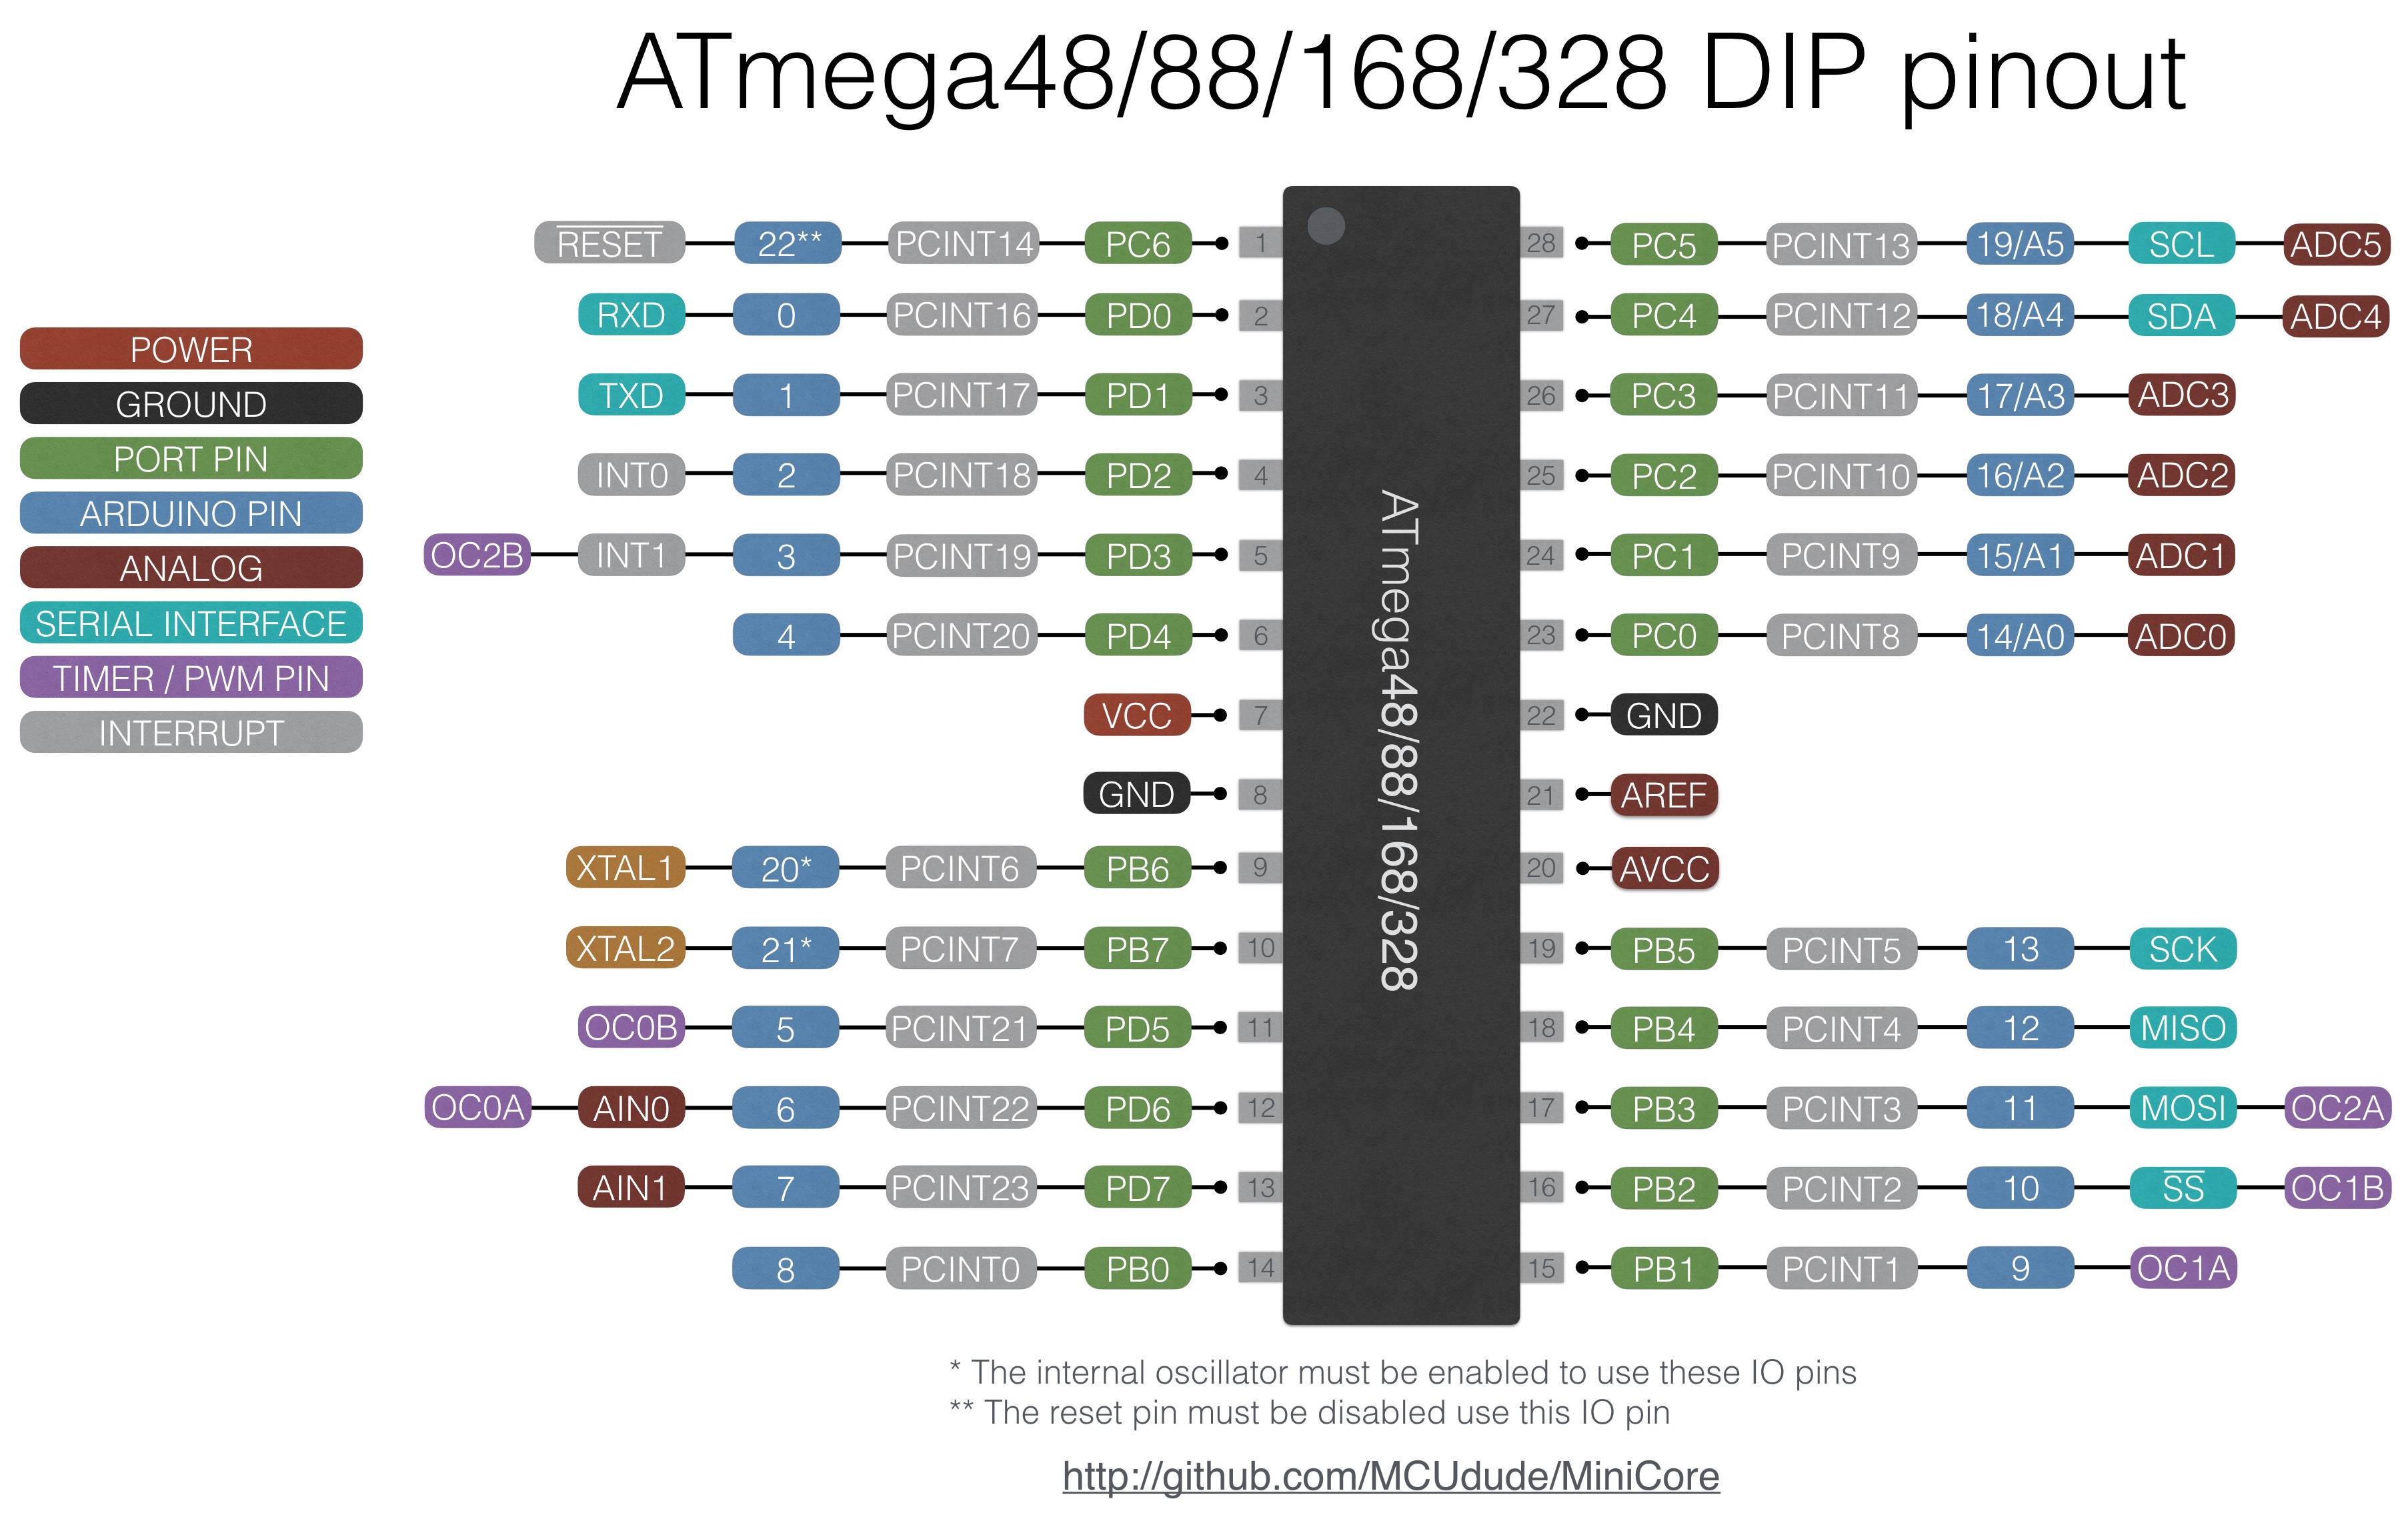
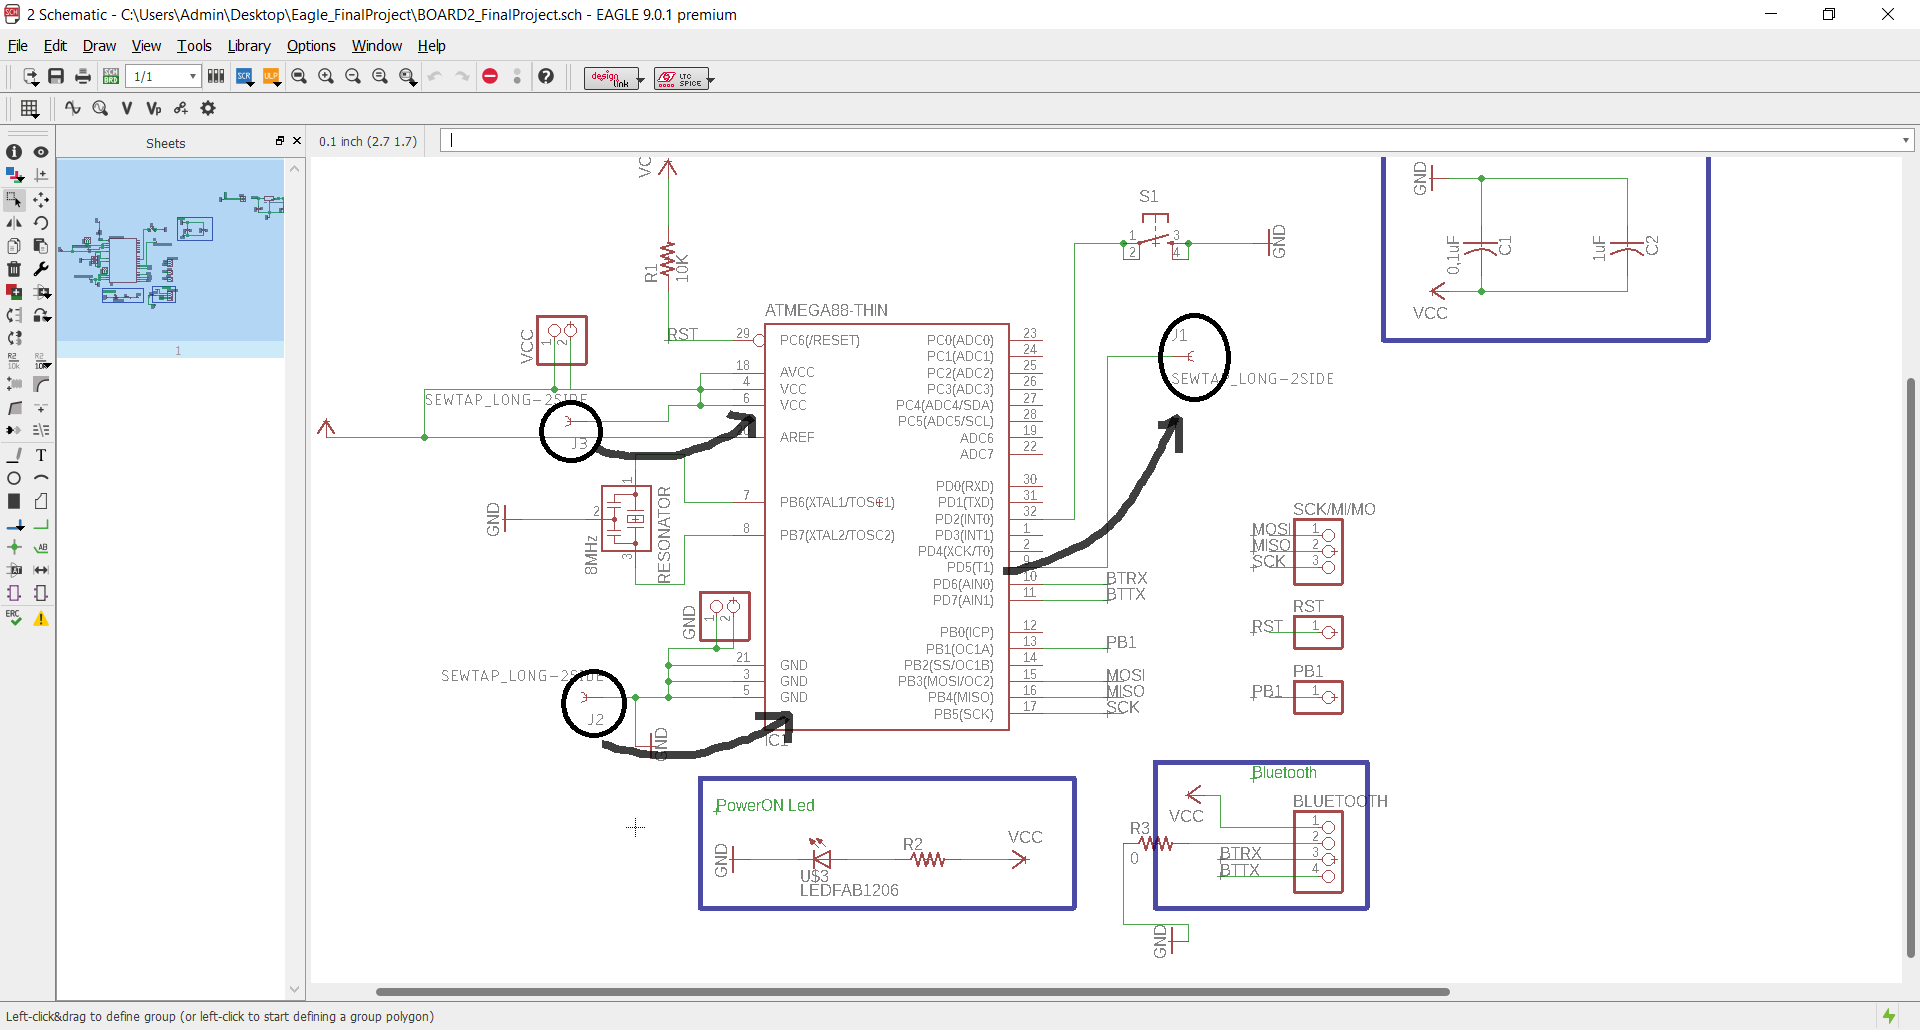
The aim is to re-create a responive wearable technology! So, getting to the point, this week I used the Eagle to design my board and I also did some practice with the sewing needle and the pieces of fabric related to it. Obviously, I also looked for the Atmel 328P microcontroller pins: I've never used it until now. So, I went on the datasheet and I paid attention to the next picture:
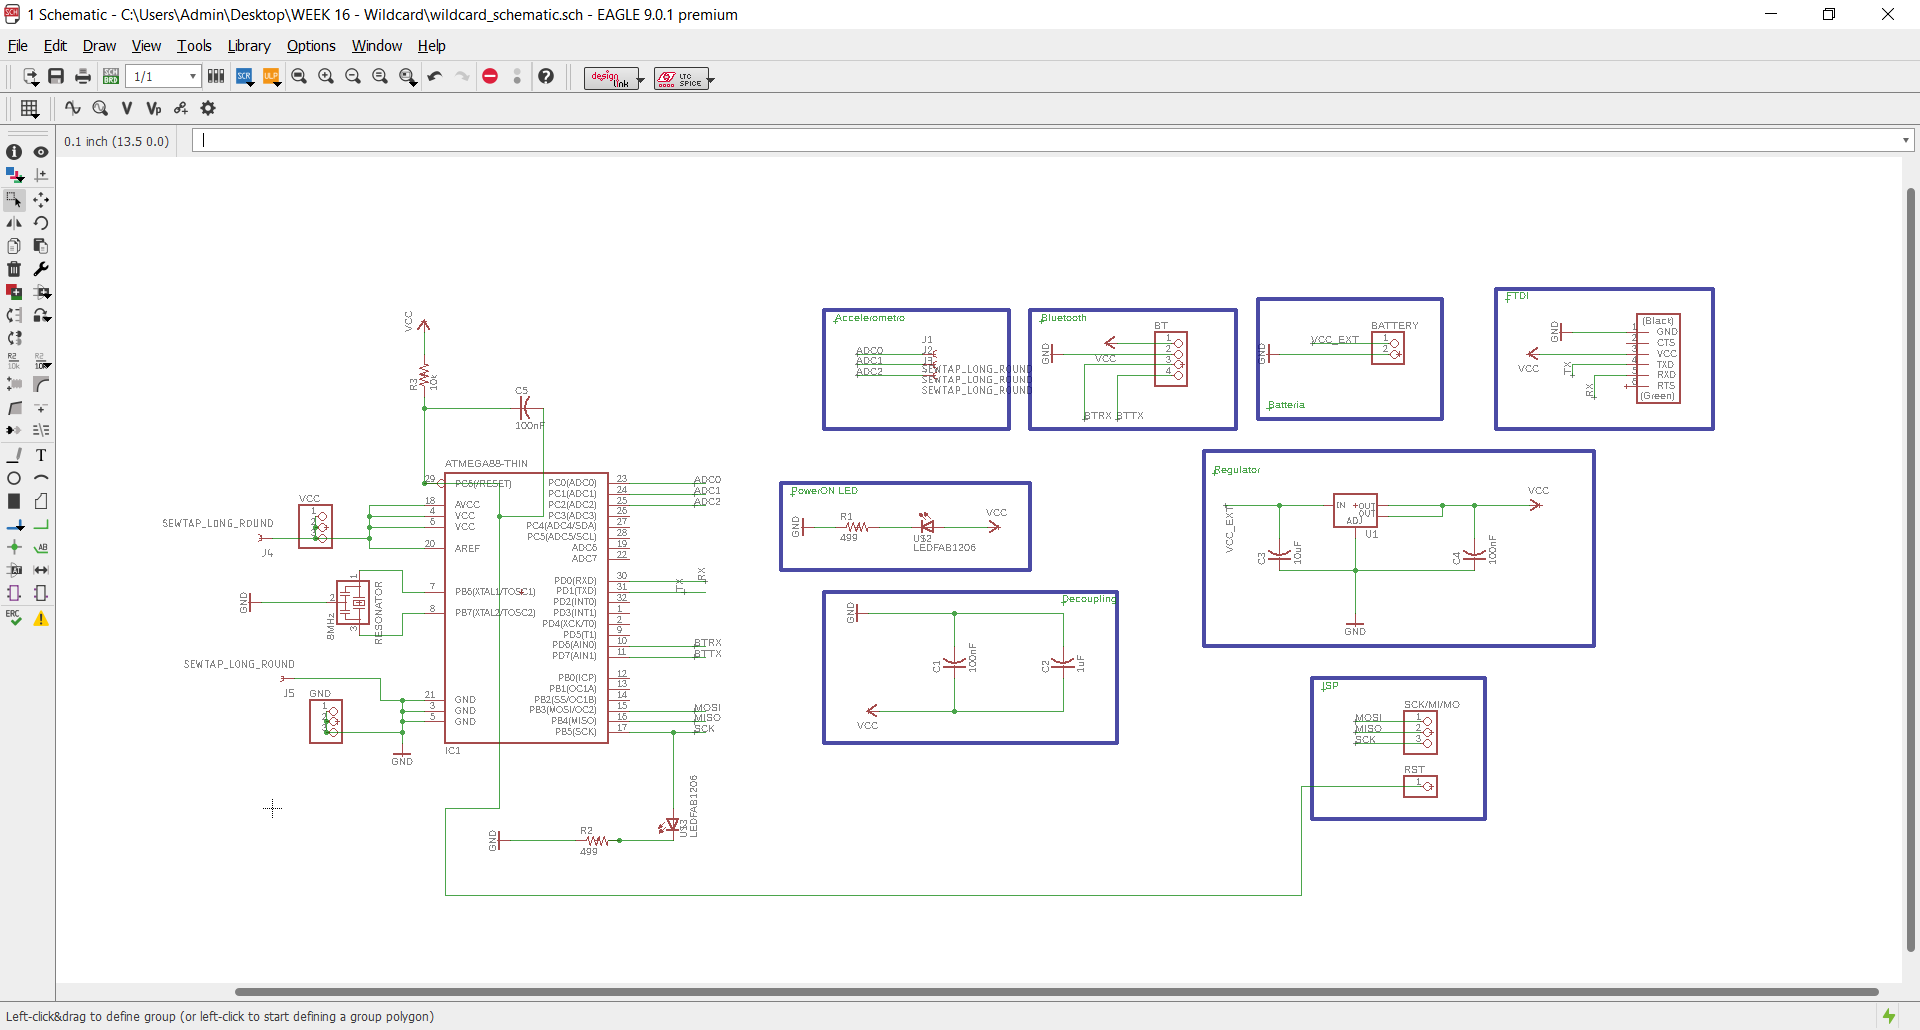
Then, I did the schematic on Eagle and I switched it to the board's version. Even if I used the Fab.lbr components, I also added the LilyPad.lbr because I had to put the right drills on my board. At the moment, I put five drills on it (3 of them will be linked with the accelerometer and the others represent the GND and the VCC).
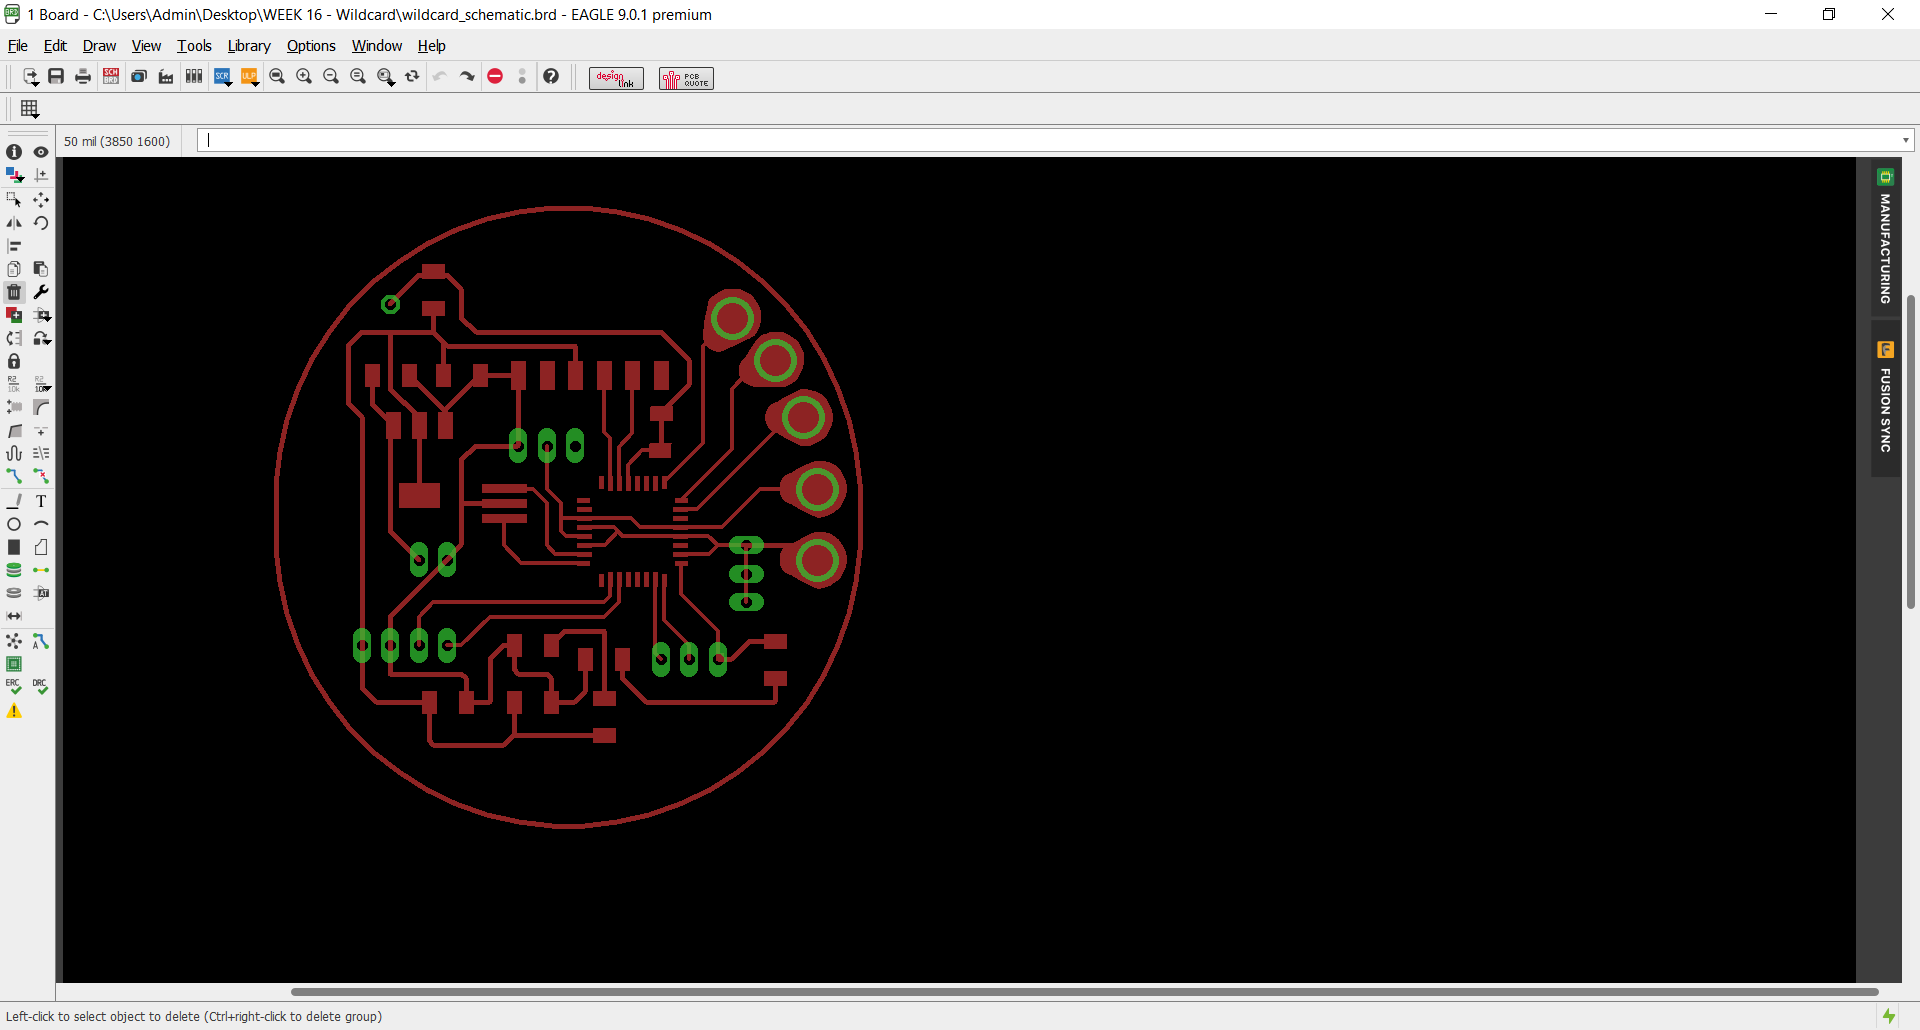
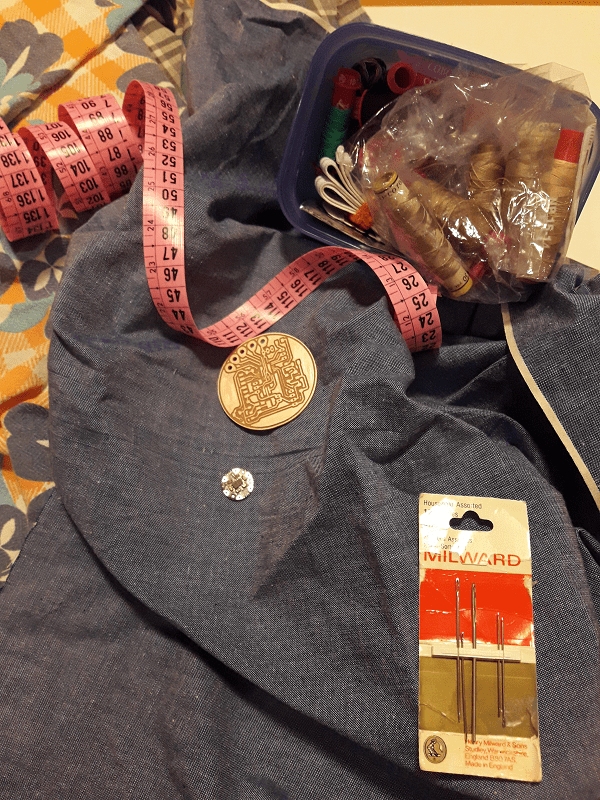
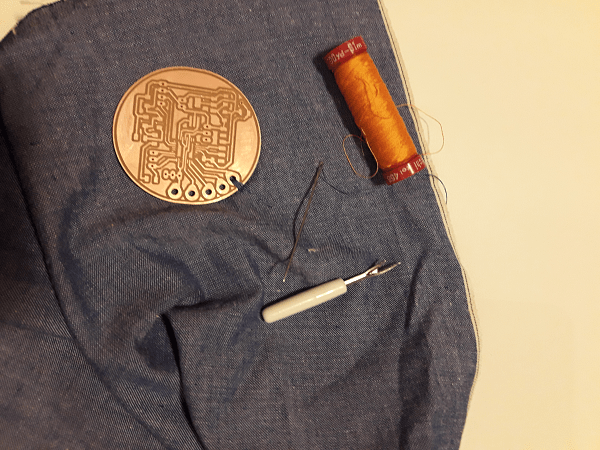
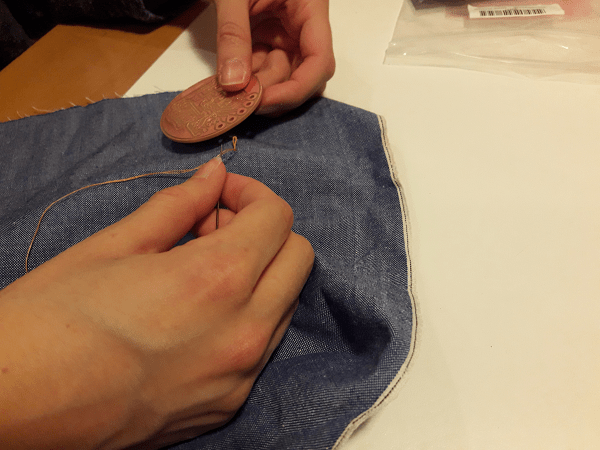
When I finished working on Eagle, I exported the file as an image (setting the same values: 1000dpi, monochrome, window area). I worked on it in order to obtain three files (traces, outline and drills). I After that, I went on the Fab Modules and I saved my .rml files! The previous steps weren't new...so, only now comes the funniest part! I asked my mother to give me some tips to sew! She wasn't happy at all because she hates doing it but I needed some suggestions and guidelines. After a couple of hours on the bus, I was ready (or not?!) to learn a new thing. I took some fabric pieces to the kitchen's table and I also put the essential tools on it too. As you can see, the board isn't soldered yet, but that's why I wanted to do a test before considering it as the final version of my project. In other words, I was curious to see it sewed on a fabric piece and learning how to fixed it and the textile. In addition, you have to consider the fact I used thin strand only because I needed to become more practical. In the next days, I will complete the board and I'd like to sew it with a conductive thread. Now, let me show you the quick test I did and then I'll revise this section properly with the related updates! :)

Update
I decided to realize my PCB small in terms of dimension. I thought it has been wereable and sewed on the child seat cover, so I'm really convinced that it's essential to create something in a smallest shape as possible. I proceed drawing an other board (that I will use as a master) and sew my pad holes to the fabric. Honeslty, during my first drawing on the CAM software I was inspired by the LilyPad rounded shape. In a second moment, I realized it wasn't important and I needen't too many pads. In addition, even if I'm referring to wereable technology, their main aim is to be hide (except for leds or something like that). Here, I'm going to show you the second board I did, and my sewed part on the keychain I did with fabric. In the latter one, I didn't drew the led but I respected and watched as they were place on fabric. So, here are the files related to the to boards I drew on Eagle's CAM and you can also see the conductive thread I used to fix the pads on the main fabric.
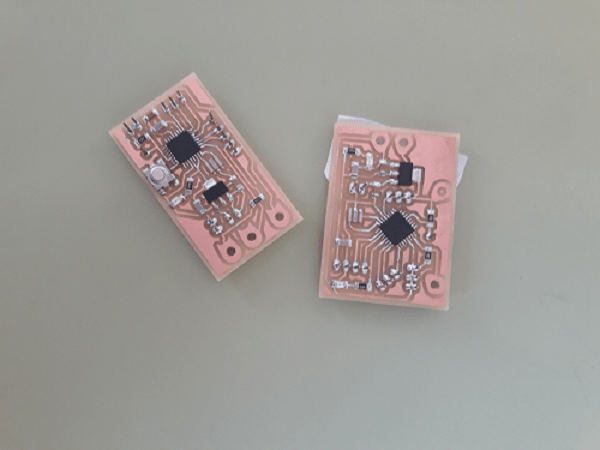
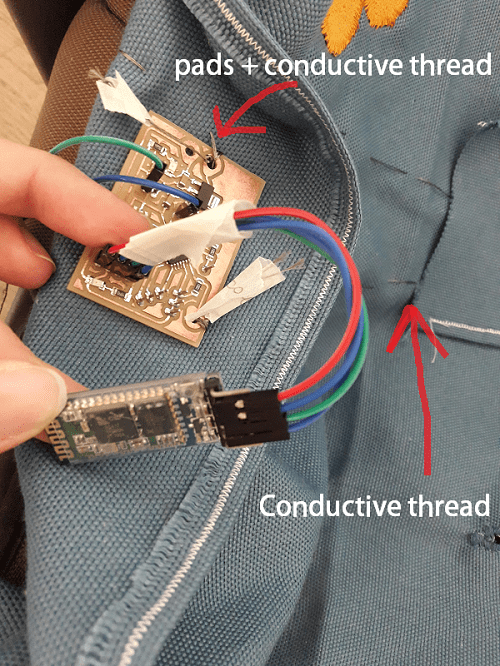
The sewed board is small in its dimension but it would have been better designed in terms of its shape. Even it is out of sight, LilyPad shapes liked me very much. Anyway, the main purpose its PCB's funcionalities and I moticed the pads play a key role on my assigment. Without them it would have been impossible sewing the board on a piece of fabric. I really enjoyed this week and I watched many tutorials just for my own curiosity. Adafruitworked thought different projects and I found them very exciting. Thanks to the researches I did in thies field, I found interesting the use of Flora Neopixel v2 and I decided to use them on the fabric keychain I'm going to create. So, I used three leds and I linked them with the conductive thread. Obviously, I considered this kind of choice when I did the schematic file on the CAM. Each led needs to be connected to a GND and VCC pads. Moreover, it needs a PWM pin. Considering the fact, I used an ATmega 328p MCU, I looked at its pinout configuration and here, you can quick see the needed leds' pads connections.
Useful links:
LilyPad Wearable.lbrLilyPad Main Board
LilyPad.pdf
Atmel 328P microcontroller datasheet
Wearable Technoloies (Italian webpage)
Conductive threads
Basic E-Sewing
