Week 9 : Embedded Programming
- Read a microcontroller data sheet.
- Program your board to do something, with as many different programming languages and programming environments as possible.
- Optionally, experiment with other architectures
Fab Academy 2018 - Thierry Dassé
Before programming my hello board, I read the Atmel ATTiny 25/45/85 datasheet.
The datasheet contains a lot of information useful to conceive your board like :
You can program your board using Fab ISP and typing :
make -f hello.ftdi.44.echo.c.make
sudo make -f hello.ftdi.44.echo.c.make program-usbtiny-fuses
You also can use an Arduino board as programmer. This way, you can use some Arduino librairies wich is quite interesting.
But I have to verify each time if the library I want to uses is compatible with ATTiny or other microcontroller.

To use Arduino as a programmer, you first need to include AtTiny in known microcontrollers.
In File/Preferences of arduino Ide add https://raw.githubusercontent.com/damellis/attiny/ide-1.6.x-boards-manager/package_damellis_attiny_index.json
in Additional Boards Manager URLs.
Now, in Tools/Board, you should have Attiny at the end. If not, restart your Ide.
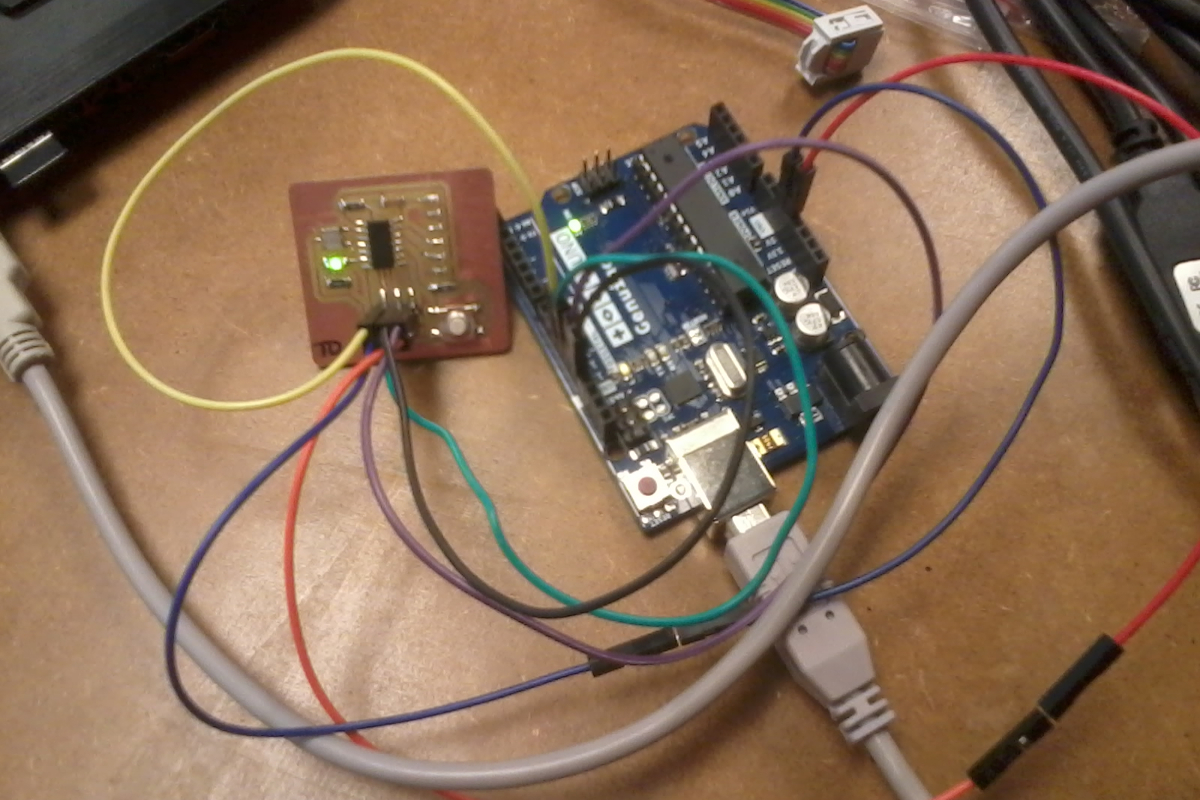
After, connect your Arduino board to the computer, load Examples/ArduinoIsp/ArduinoIsp and upload the program on your Arduino uno.
Now, your board is ready to be a programmer.
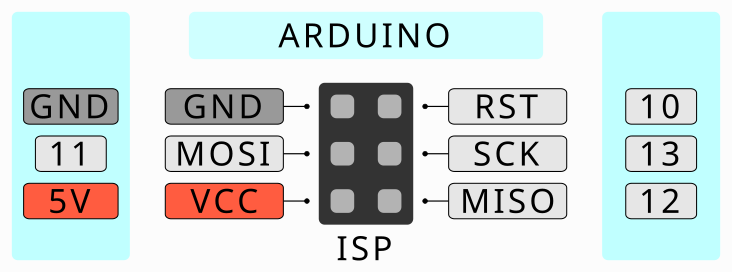
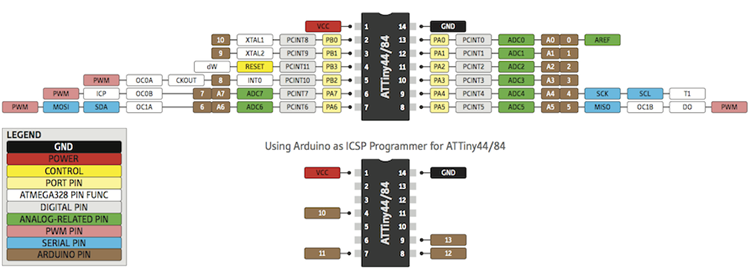
Connect your hello board ISP to arduino pins like below.
In Tools, choose Board:ATTiny 24/44/84, Processor: ATTiny 44, Clock: External 20MHz, and Programmer: Arduino as ISP.
Then, load Examples/Basics/Blink. Replace LED_BUILTIN by 7 and upload.
Your board should blink.
/*
* Hello board
* Blink
*/
const int ledPin = 7;
void setup() {
}
void loop() {
}
Make the led on pin 7 blink.
/*
* Hello board
* Switch
*/
const int ledPin = 7;
const int switchPin = 3;
int switchState = 0;
void setup() {
}
void loop() {
}
Turn the led on if switch button is pressed.
/*
* Hello board
* Onoff
*/
const int ledPin = 7;
const int switchPin = 3;
int switchPrevious = 1;
int switchState = 0;
int isOn = 0;
void setup() {
}
void loop() {
}
Turn the led on at first pressed and off at the second etc.
/*
* Hello board
* OnOffCom
*/
#include<SoftwareSerial.h>
#define rxPin 0
#define txPin 1
const int ledPin = 7;
const int switchPin = 3;
int switchPrevious = 1;
int switchState = 0;
int isOn = 0;
SoftwareSerial serial(rxPin,txPin);
void setup() {
}
void loop() {
}
Turn the led on and off when pressing the switch button and send O if on or X if off. You can also turn led on or off by sending O or X from the computer via the serial communication.