Week 06
3D Scanning and Printing
The group and individual assignment for this week is to respectively test the design rules for our Labs 3D printer(s) and design and 3D print an object that could not be made subtractively and then 3D scan an object (and optionally print it)
Characterizing Printer Design Rules
Our lab have two different 3D printers, the Ultimaker and the MakerBot, So I started the weeks assignment by first testing the design ruls of our 3D printers. For the design rule test file, I decided to download a calibration file from thinkgivere. File can be located (here) and see photo of test file below. After downloading the file, I imported it into both the Ultimaker softwere (Cura) and the MakerBot software (Makerware desktop) and printed to both machines using the same print parameters. Afetr printing, I noticed the output of the two 3D printer were very different. It appeared the output of the Makerbot was mauch better than that of the Ultimaker. Find photos below.
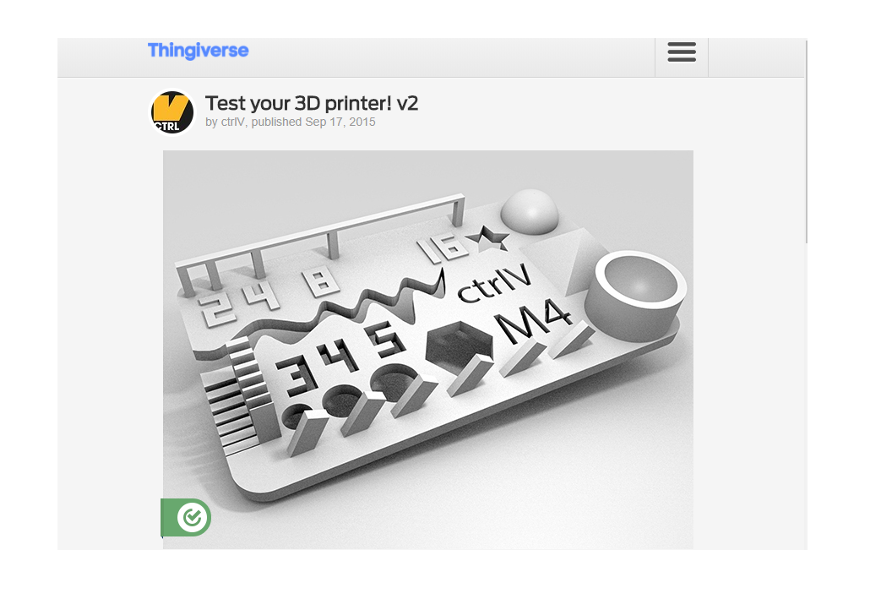
Downloaded Calibration file
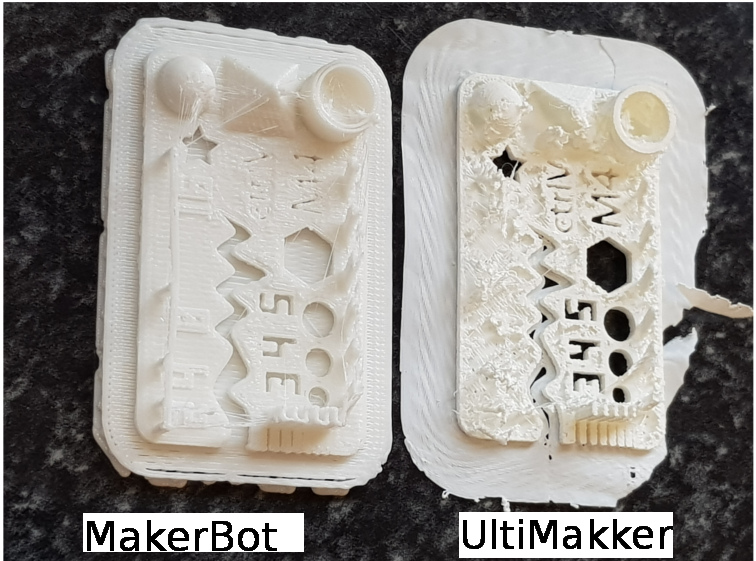
3D Printer Outputs
3D Scanning
Our Lab have a 3D sense scanner which I have never used. This being the first time using the scanner, I had to first get the software installed and ready for scanning, so I went to the 3D sense website and downloaded the sense 3d software and then installed it. After installing it I connected the 3D sense scanner ready for scanning.
Scanning
After installing the Sense 3D software and connecting the 3D sense scanner, I tried printing several objects of different shapes and sizes. I noticed variable difficulty in getting a good scan based on the size and uniformity of the object's shape. I also noticed that the scanner is able to scan the human head shape and organic shapes better than uniform and smooth shapes. I also noticed the difficulty in getting the scanner around the object.
After trying several objects and shapes, I decided to settle on scanning something organic and random. But before doing that I decided to create a turntable for turning the object with the scanner in a fixd possition. I then scanned a piece of rock by placing it on the turntable as shown in the photos below.
Putting the turntable together after cutting parts
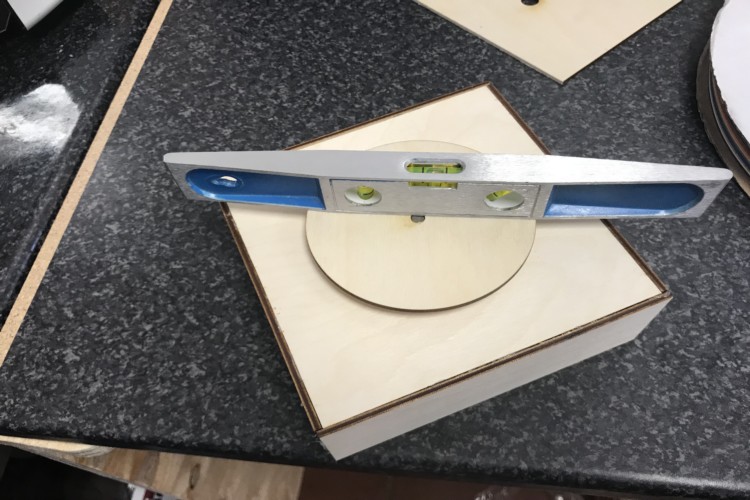
Checking the level of the turntable
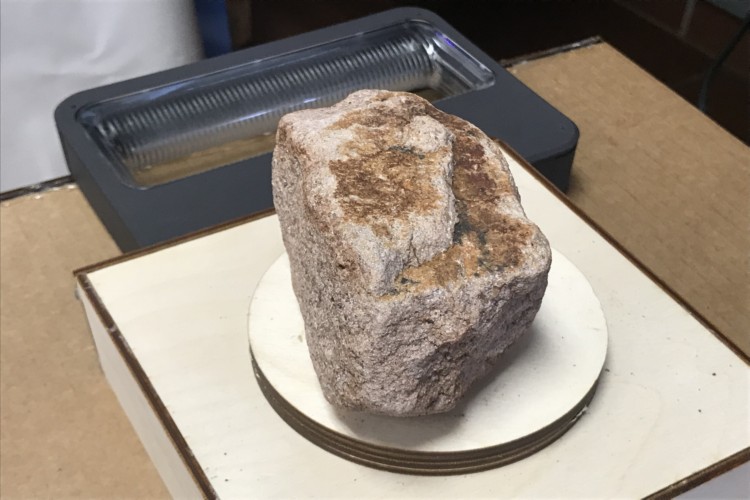
Rock on turntable
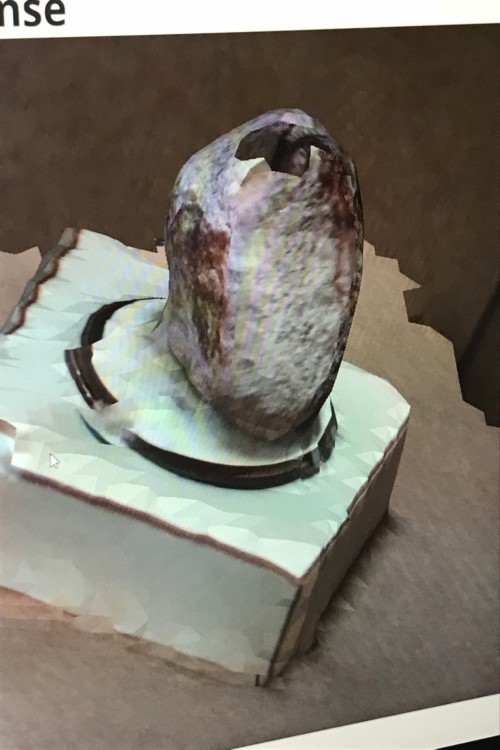
Scanned Rock on turntable

Scanned Rock on turntable
3D Printing
For the 3D printing part of the assignment, I decided to design my own iphone case instead of donloading. Having used SolidWorks for most of my previous assignments, I decided to use AutoCAD for modeling my iphone case giving the correct dimensions. Below are the steps taking in doing the my design and printing it.
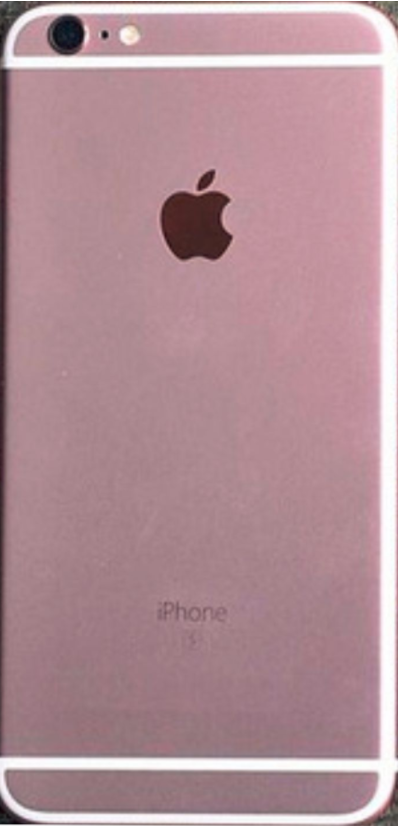
Image of my iphone
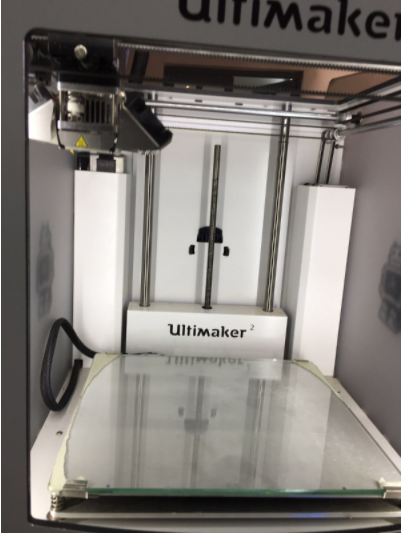
3D printer used for printing my part
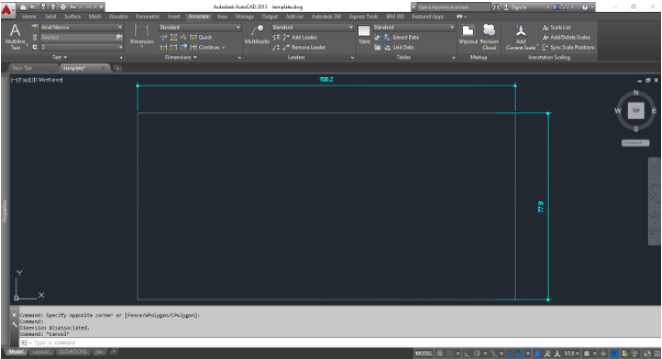
Starting my design sketch in AutoCAD
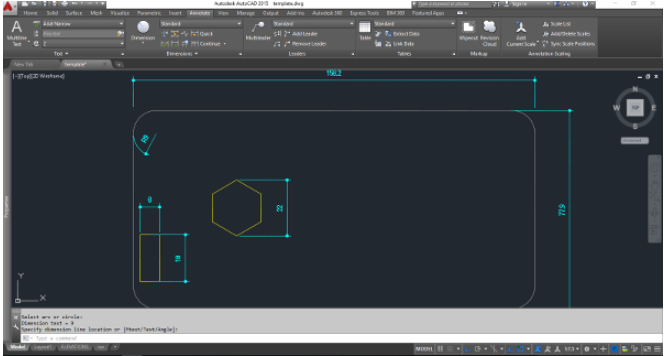
Adding details to my sketch in AutoCAD
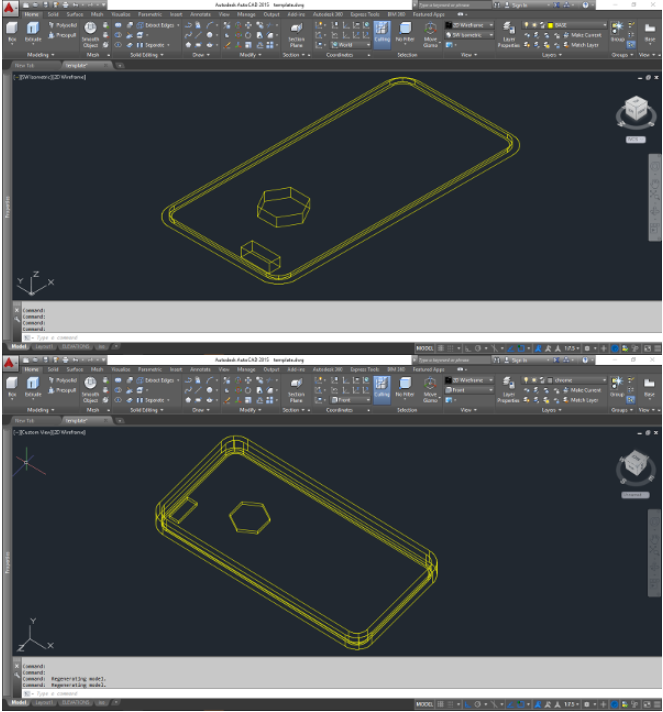
Adding extrude features to my design
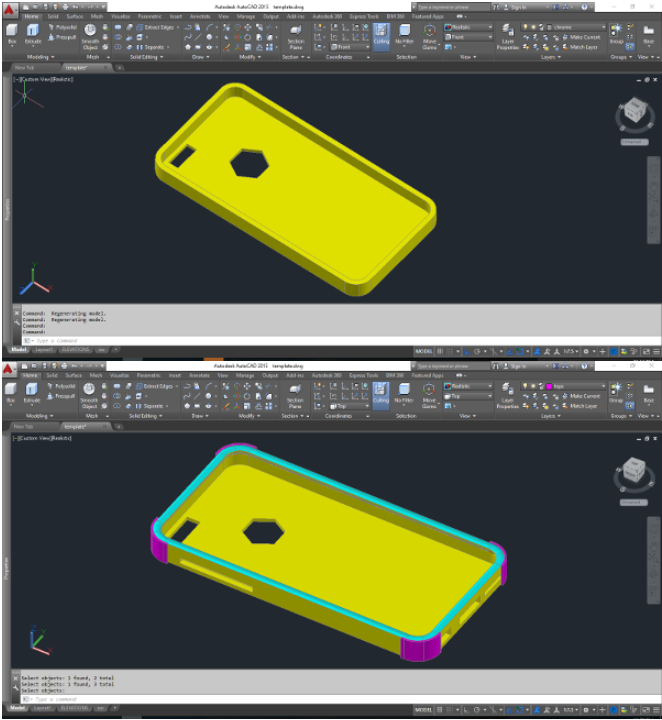
Rendring my design

Rendered design
After doing my design, I Created an STL file and opened it with the CURA software for the Ultimaker 3d printer. I had to make sure the object is correctly orriented to maximize my print time. I then set all the necessary print parameters and then saved the file for printing.
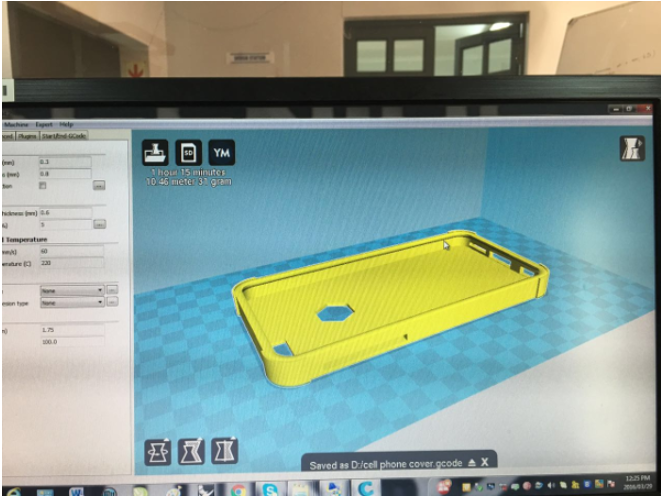
Opening stl with Cura
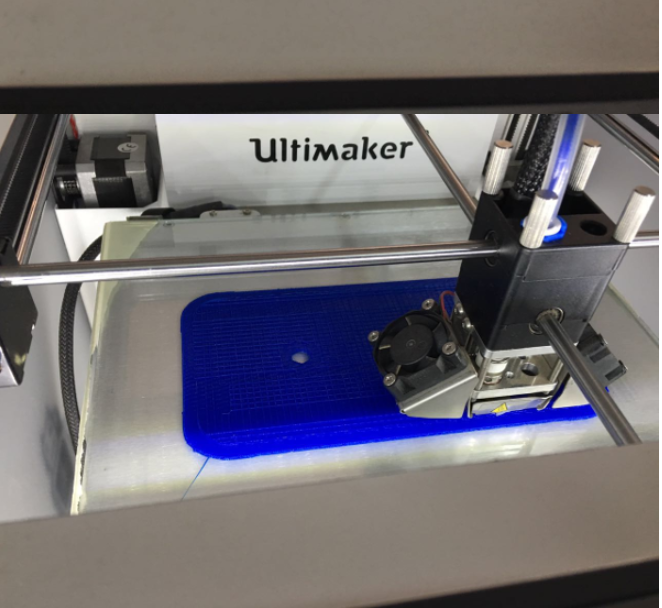
Printing with Cura
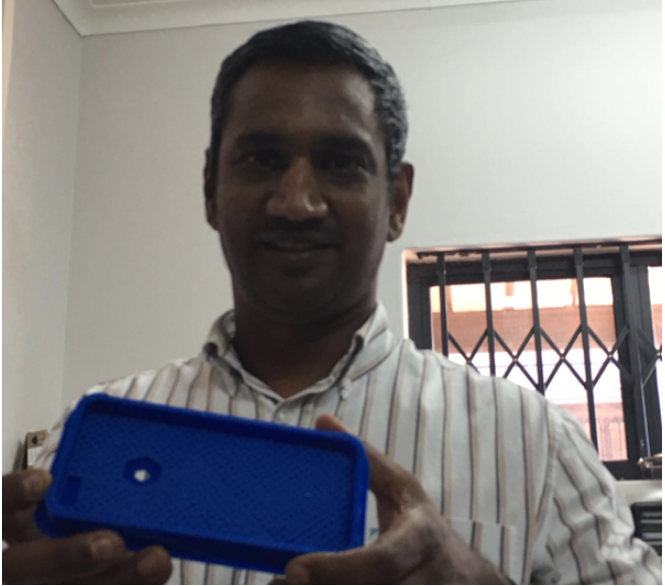
Finnshed product after printing
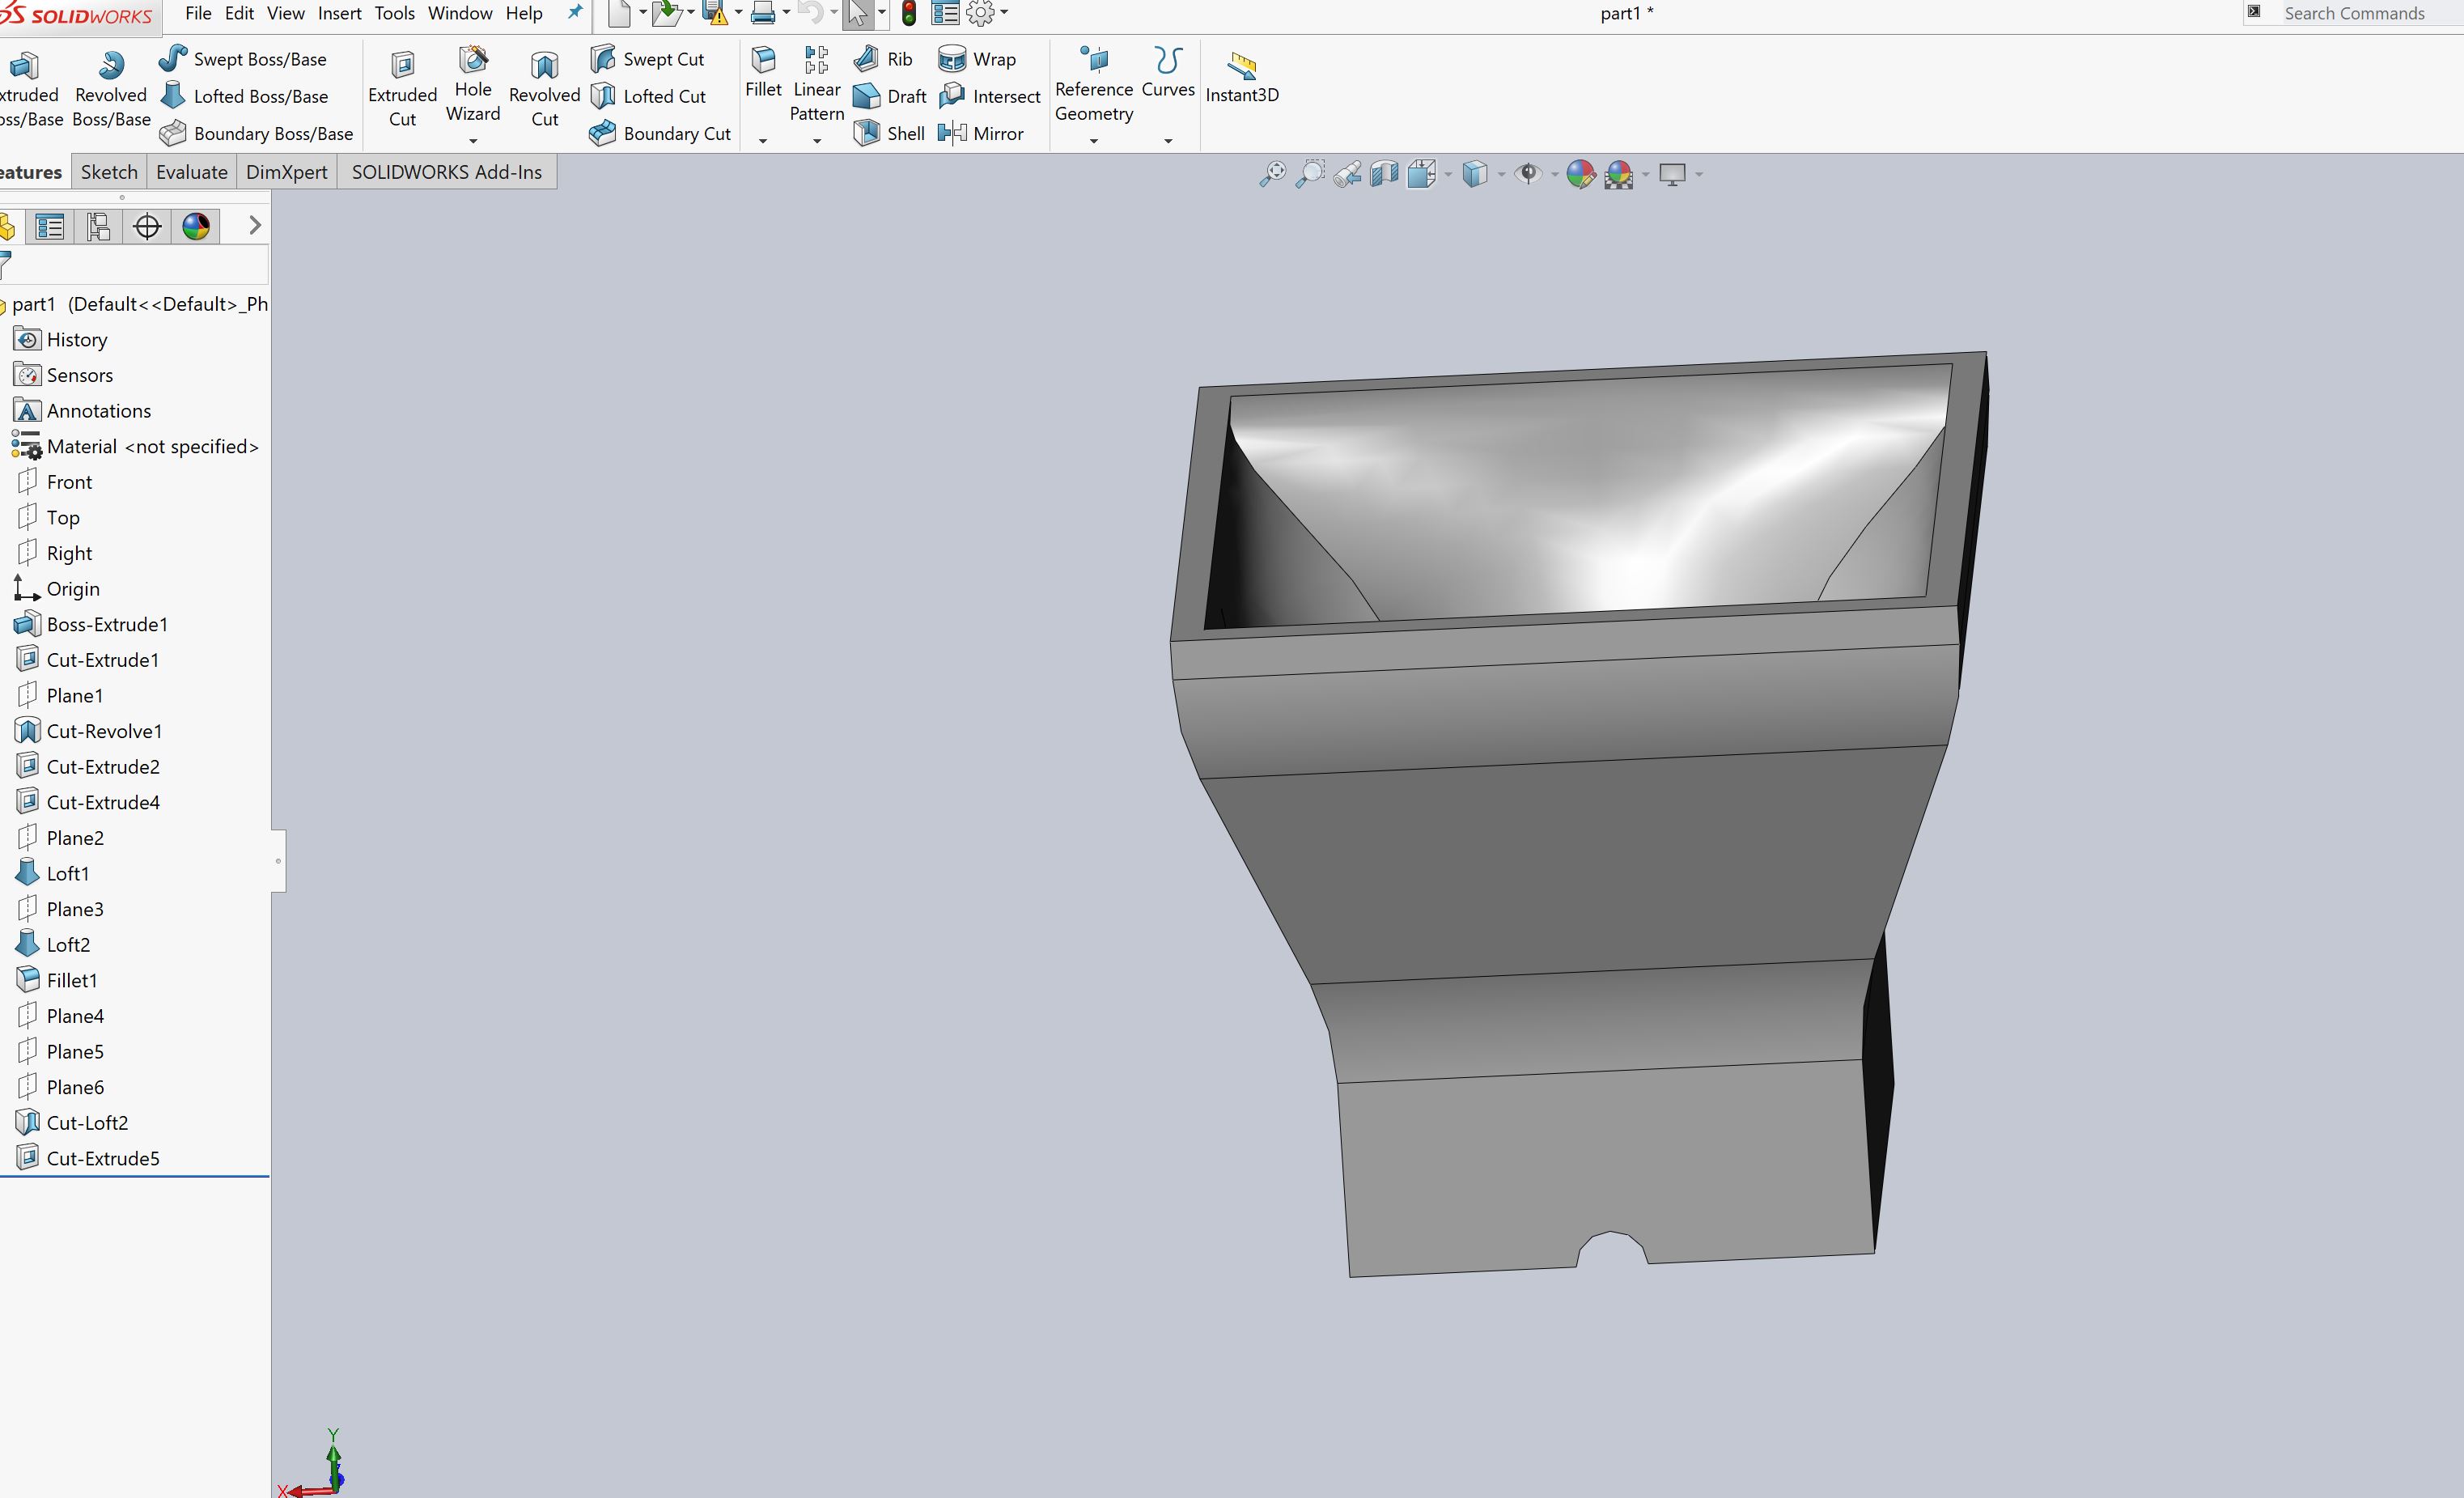
The computer I used for the design of the cell phone cover crashed and I lost the files for the first 3D design. But I decided to use the 3D printing part of my Final Project as a substitute for this weeks project. Below are the photos showing the steps.
the cell phone cover was the previous design i just included it, i used a sindoh 3D printer for this years project , that was included in my final project. the filament used was 1,75mm thick , the wall thickness that i used was 4mm, the infill pattern i used was grid and infill density 20% because , i needed the model to be printed quickly and also if i used 100% it would have taken forever to print.I used a speed of 30mm /second
i had to use support materail to hold up certain parts otherwise it would have collapsed and the printing would have messed up. the support can easily be broken off once it was printed.
because of the detail in the design and like the hole in the ball, it was not possible to do such detail subtractively. also the molding and casting material was not readily available as well, there are parts that could have been done subtractively but i looked at the time factor and also availability of materials
what did i learn from 3d scanning and printing. it is not very easy to scan, and the one thing when printing , the bed must be well leveled otherwise the print messes up and wastes alot of time as you have to re print everytime.
The files for the design can also be found here
Food chamber
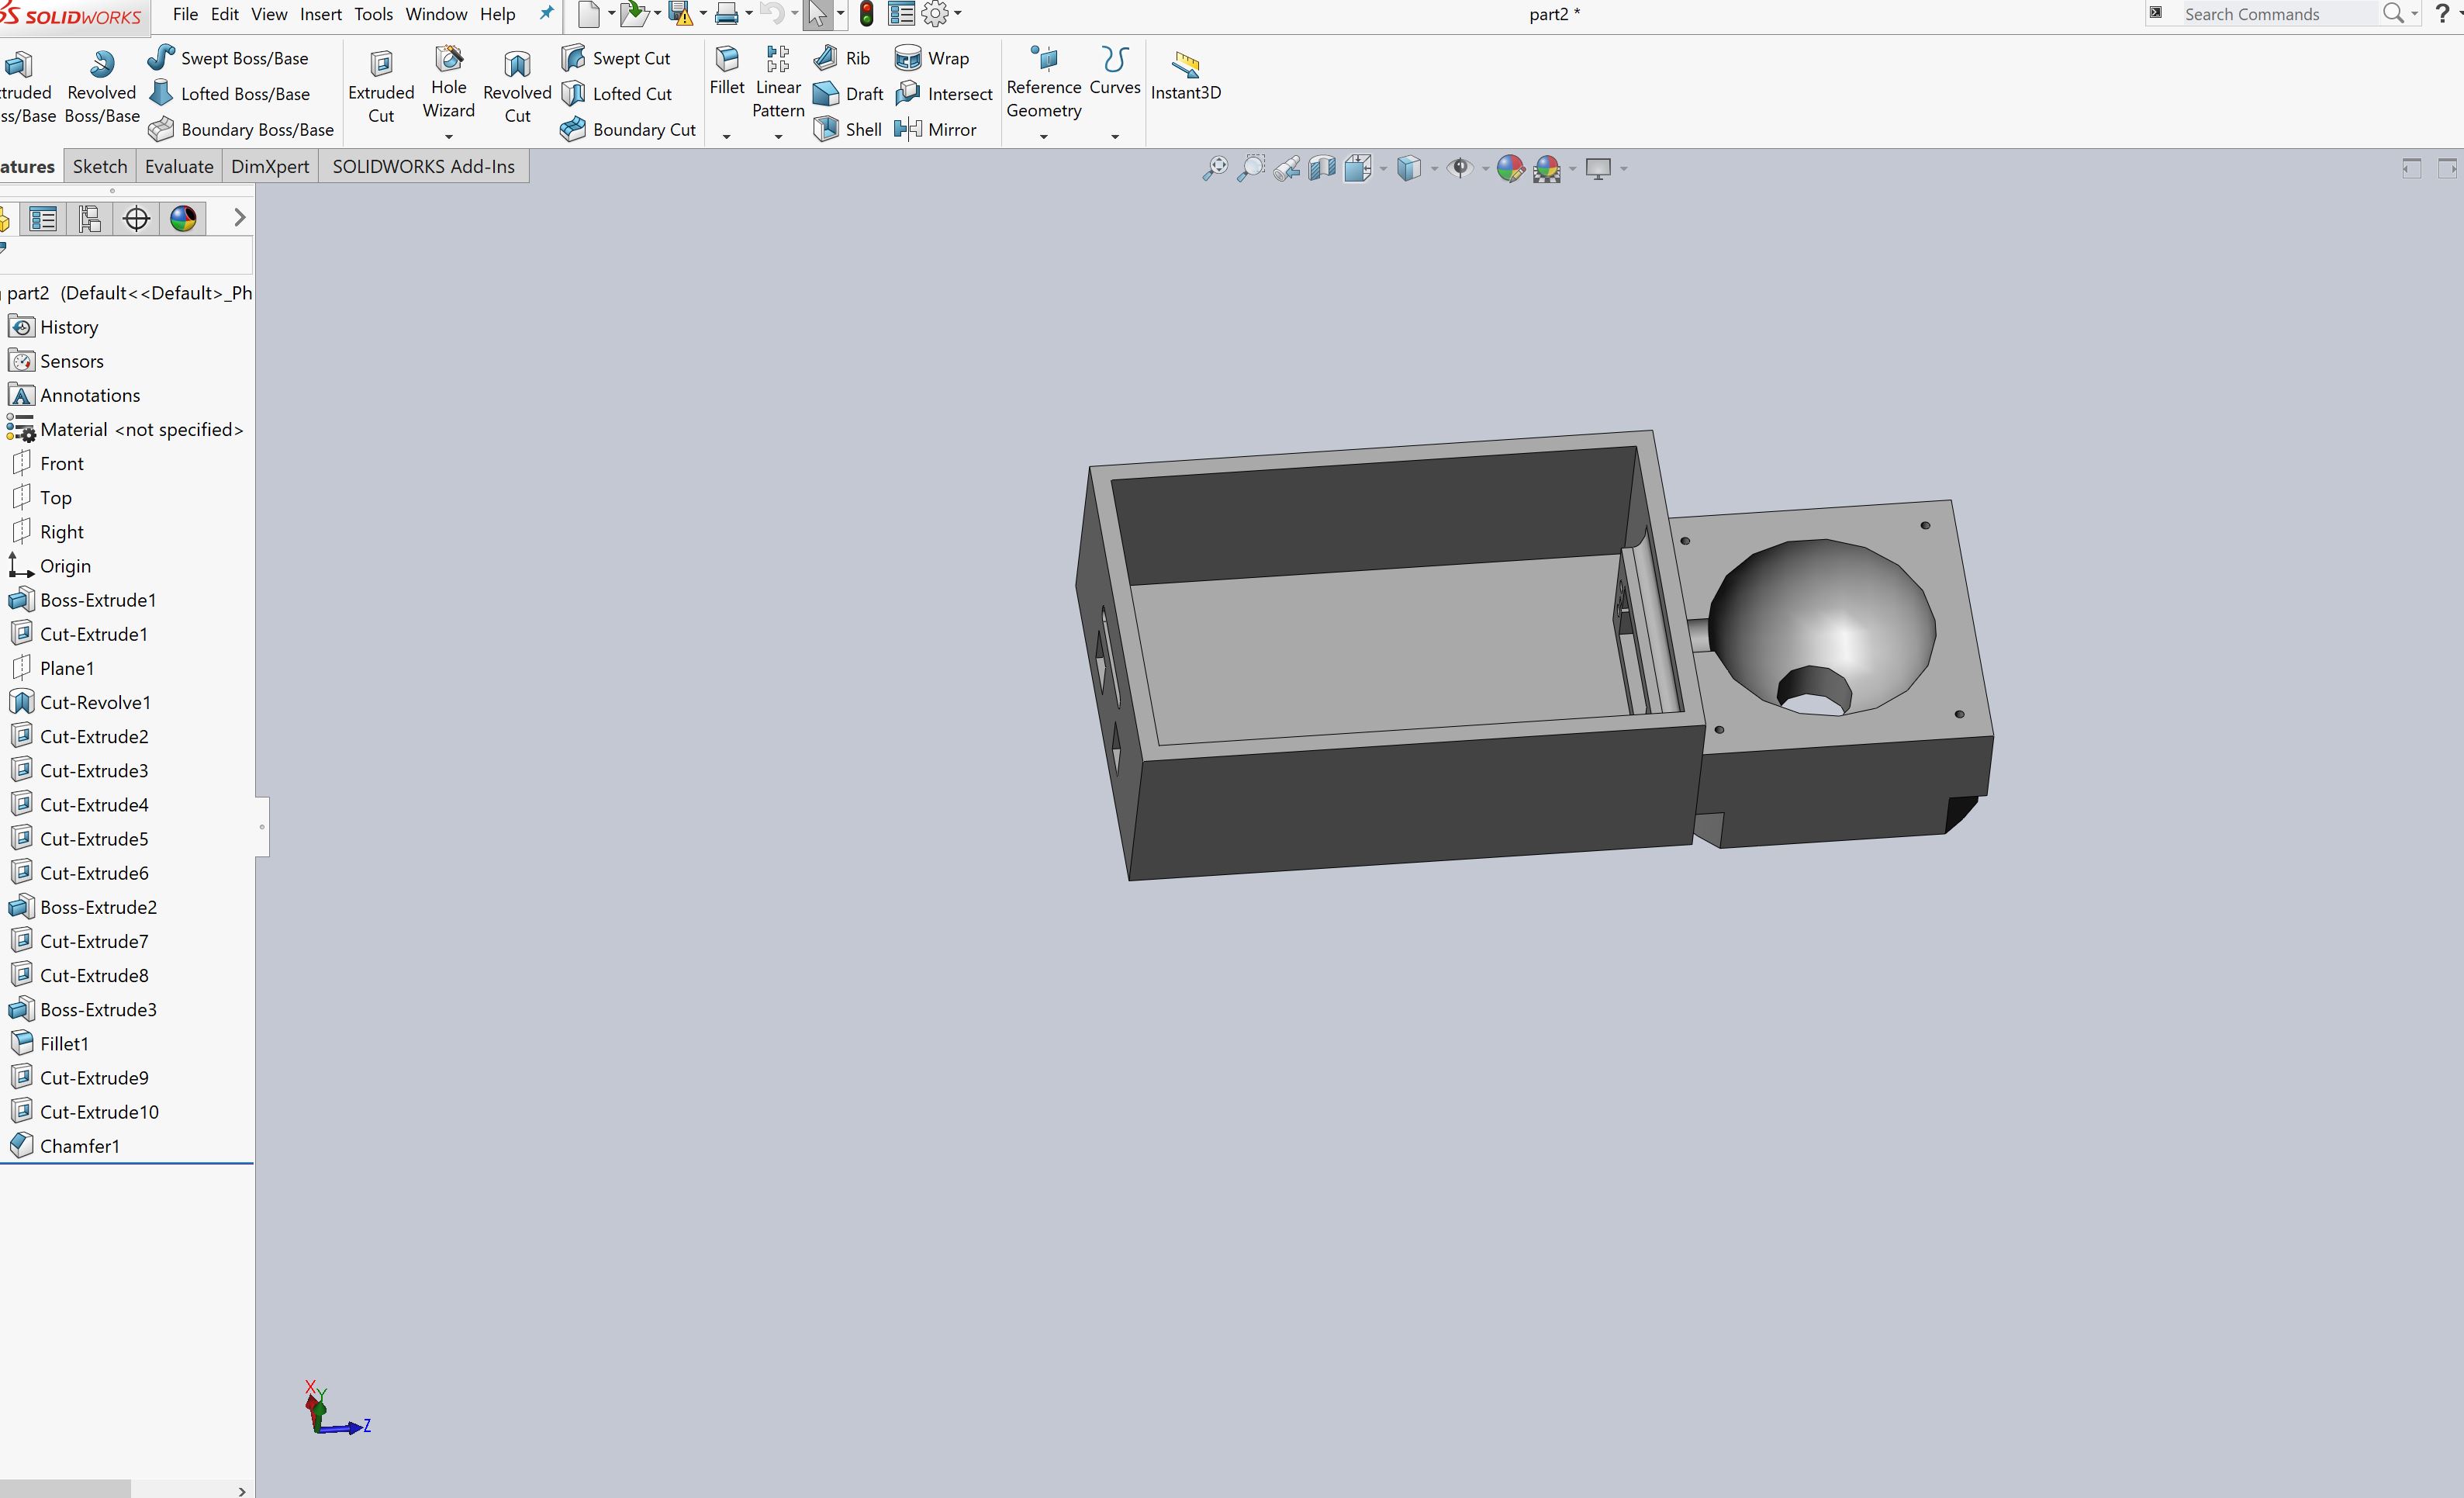
Control unit housing with part of the dispensor housing
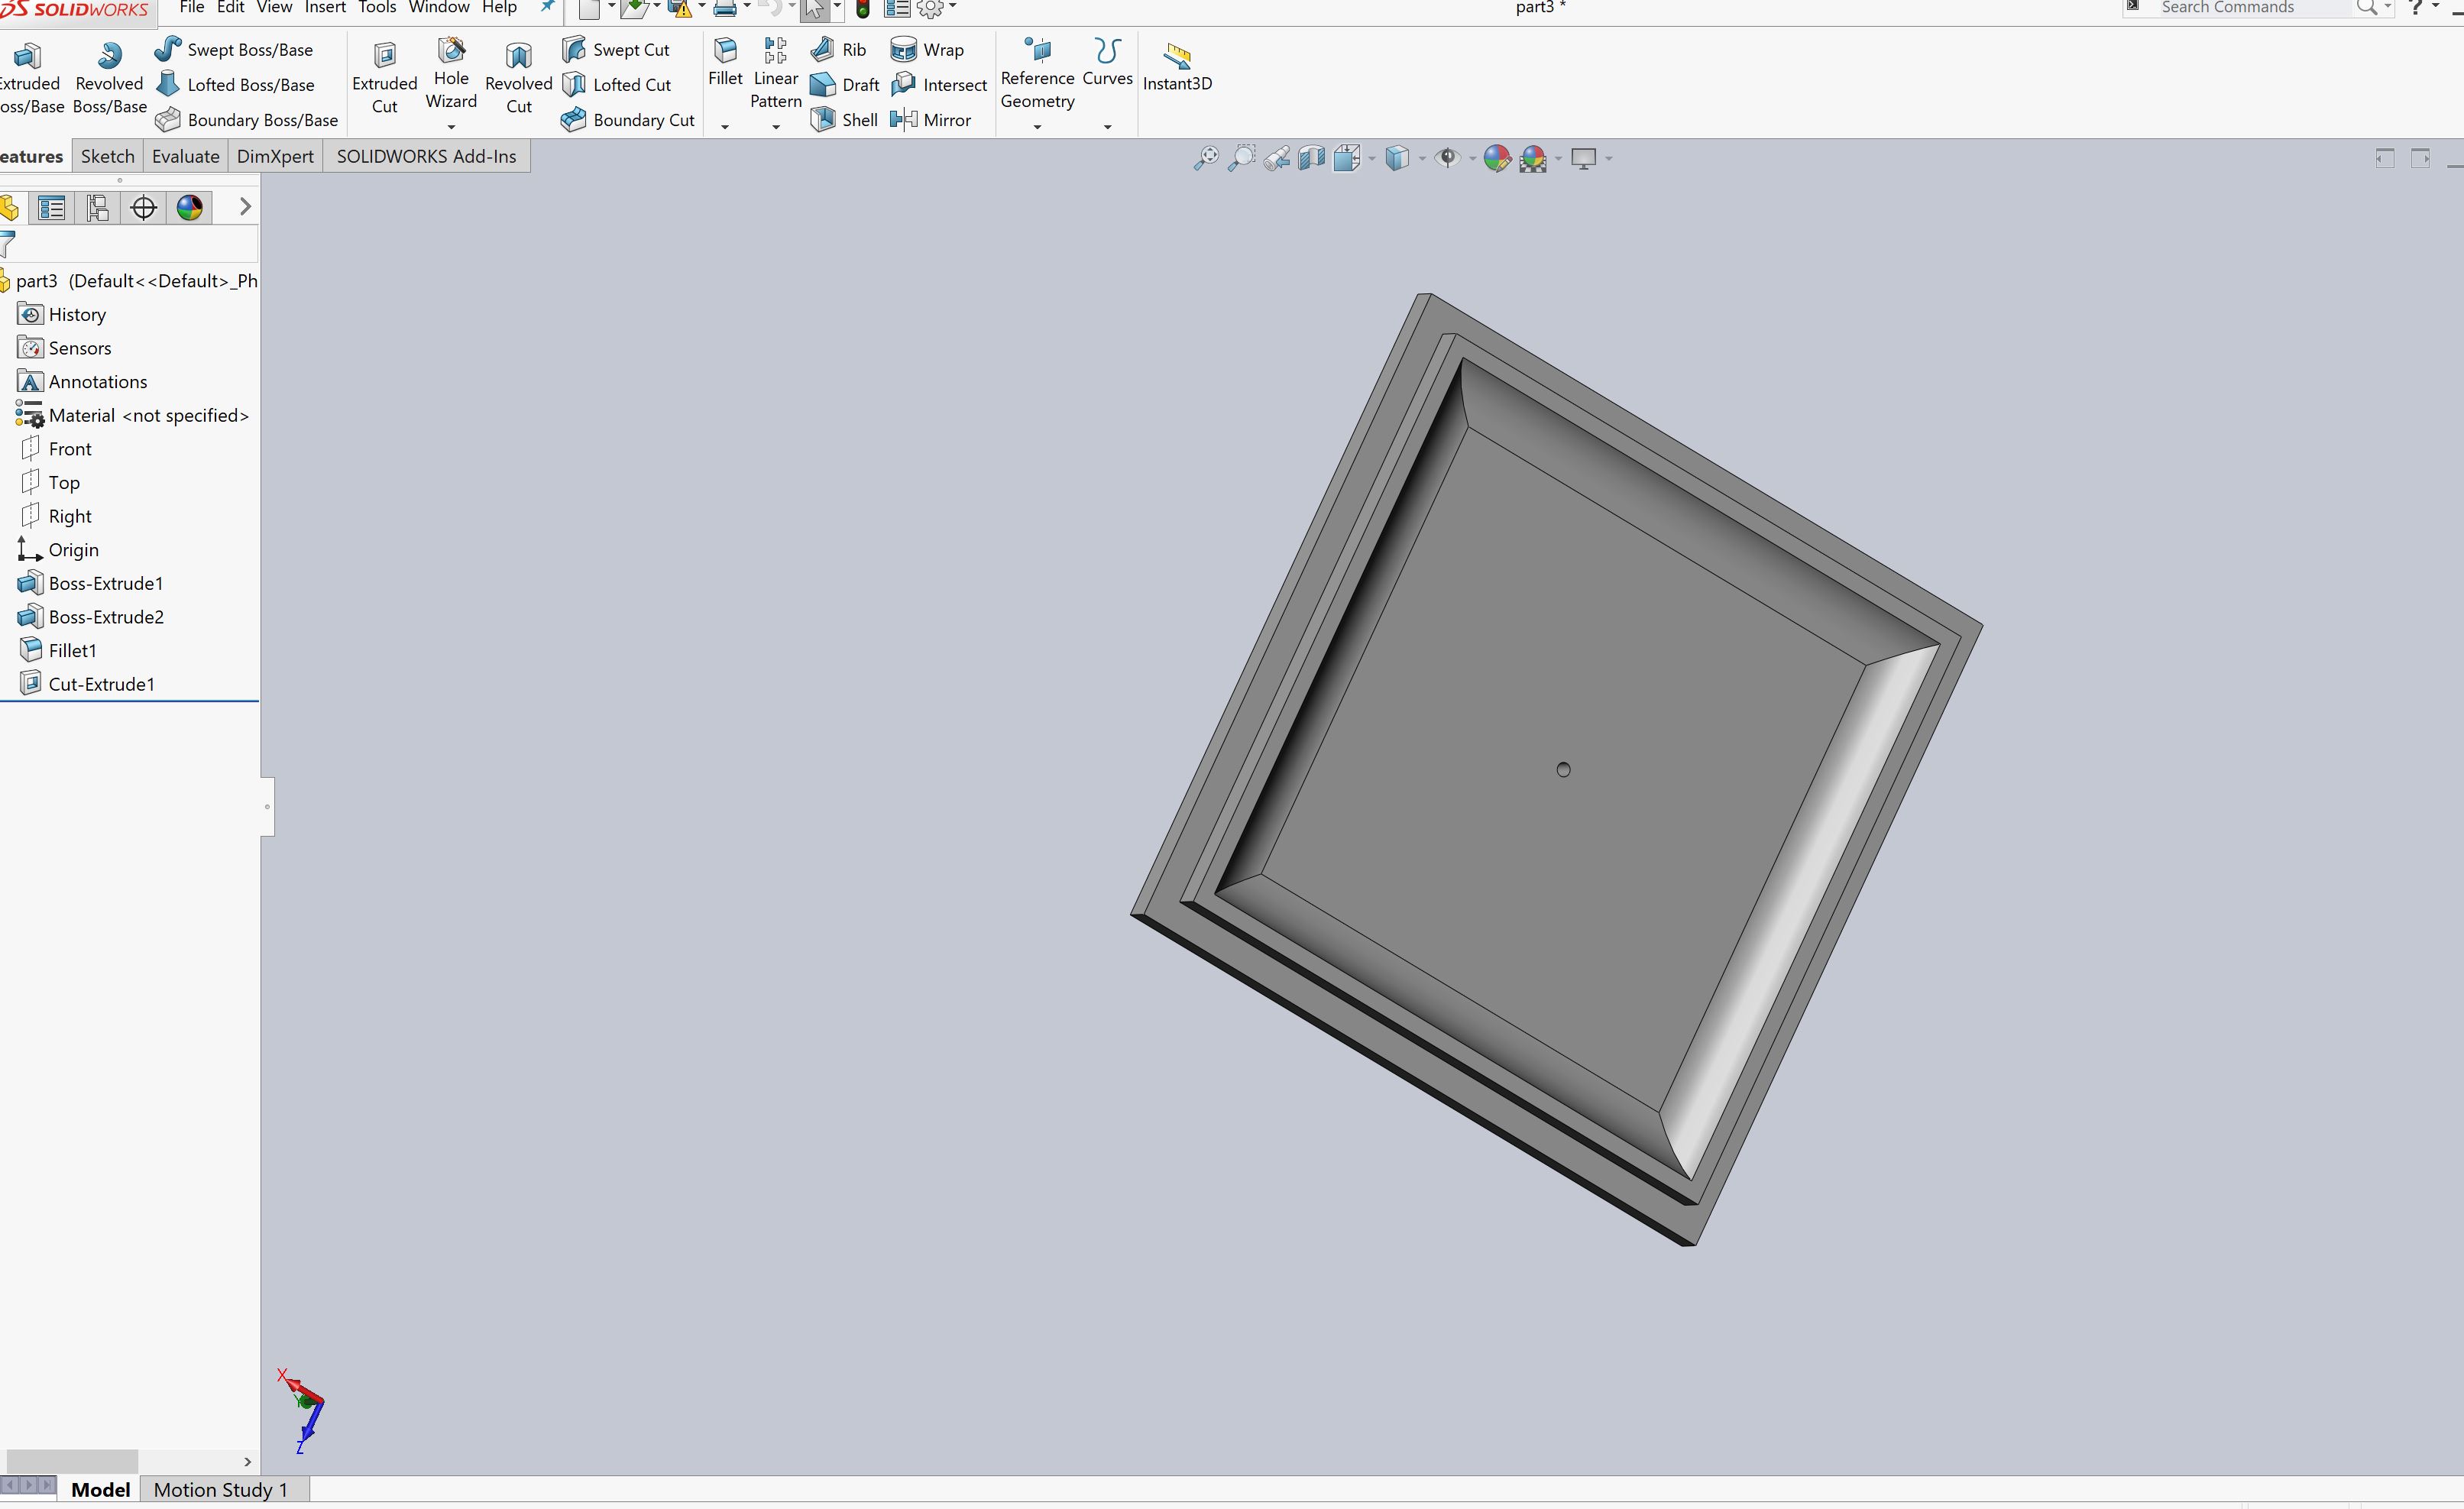
Food chamber cover
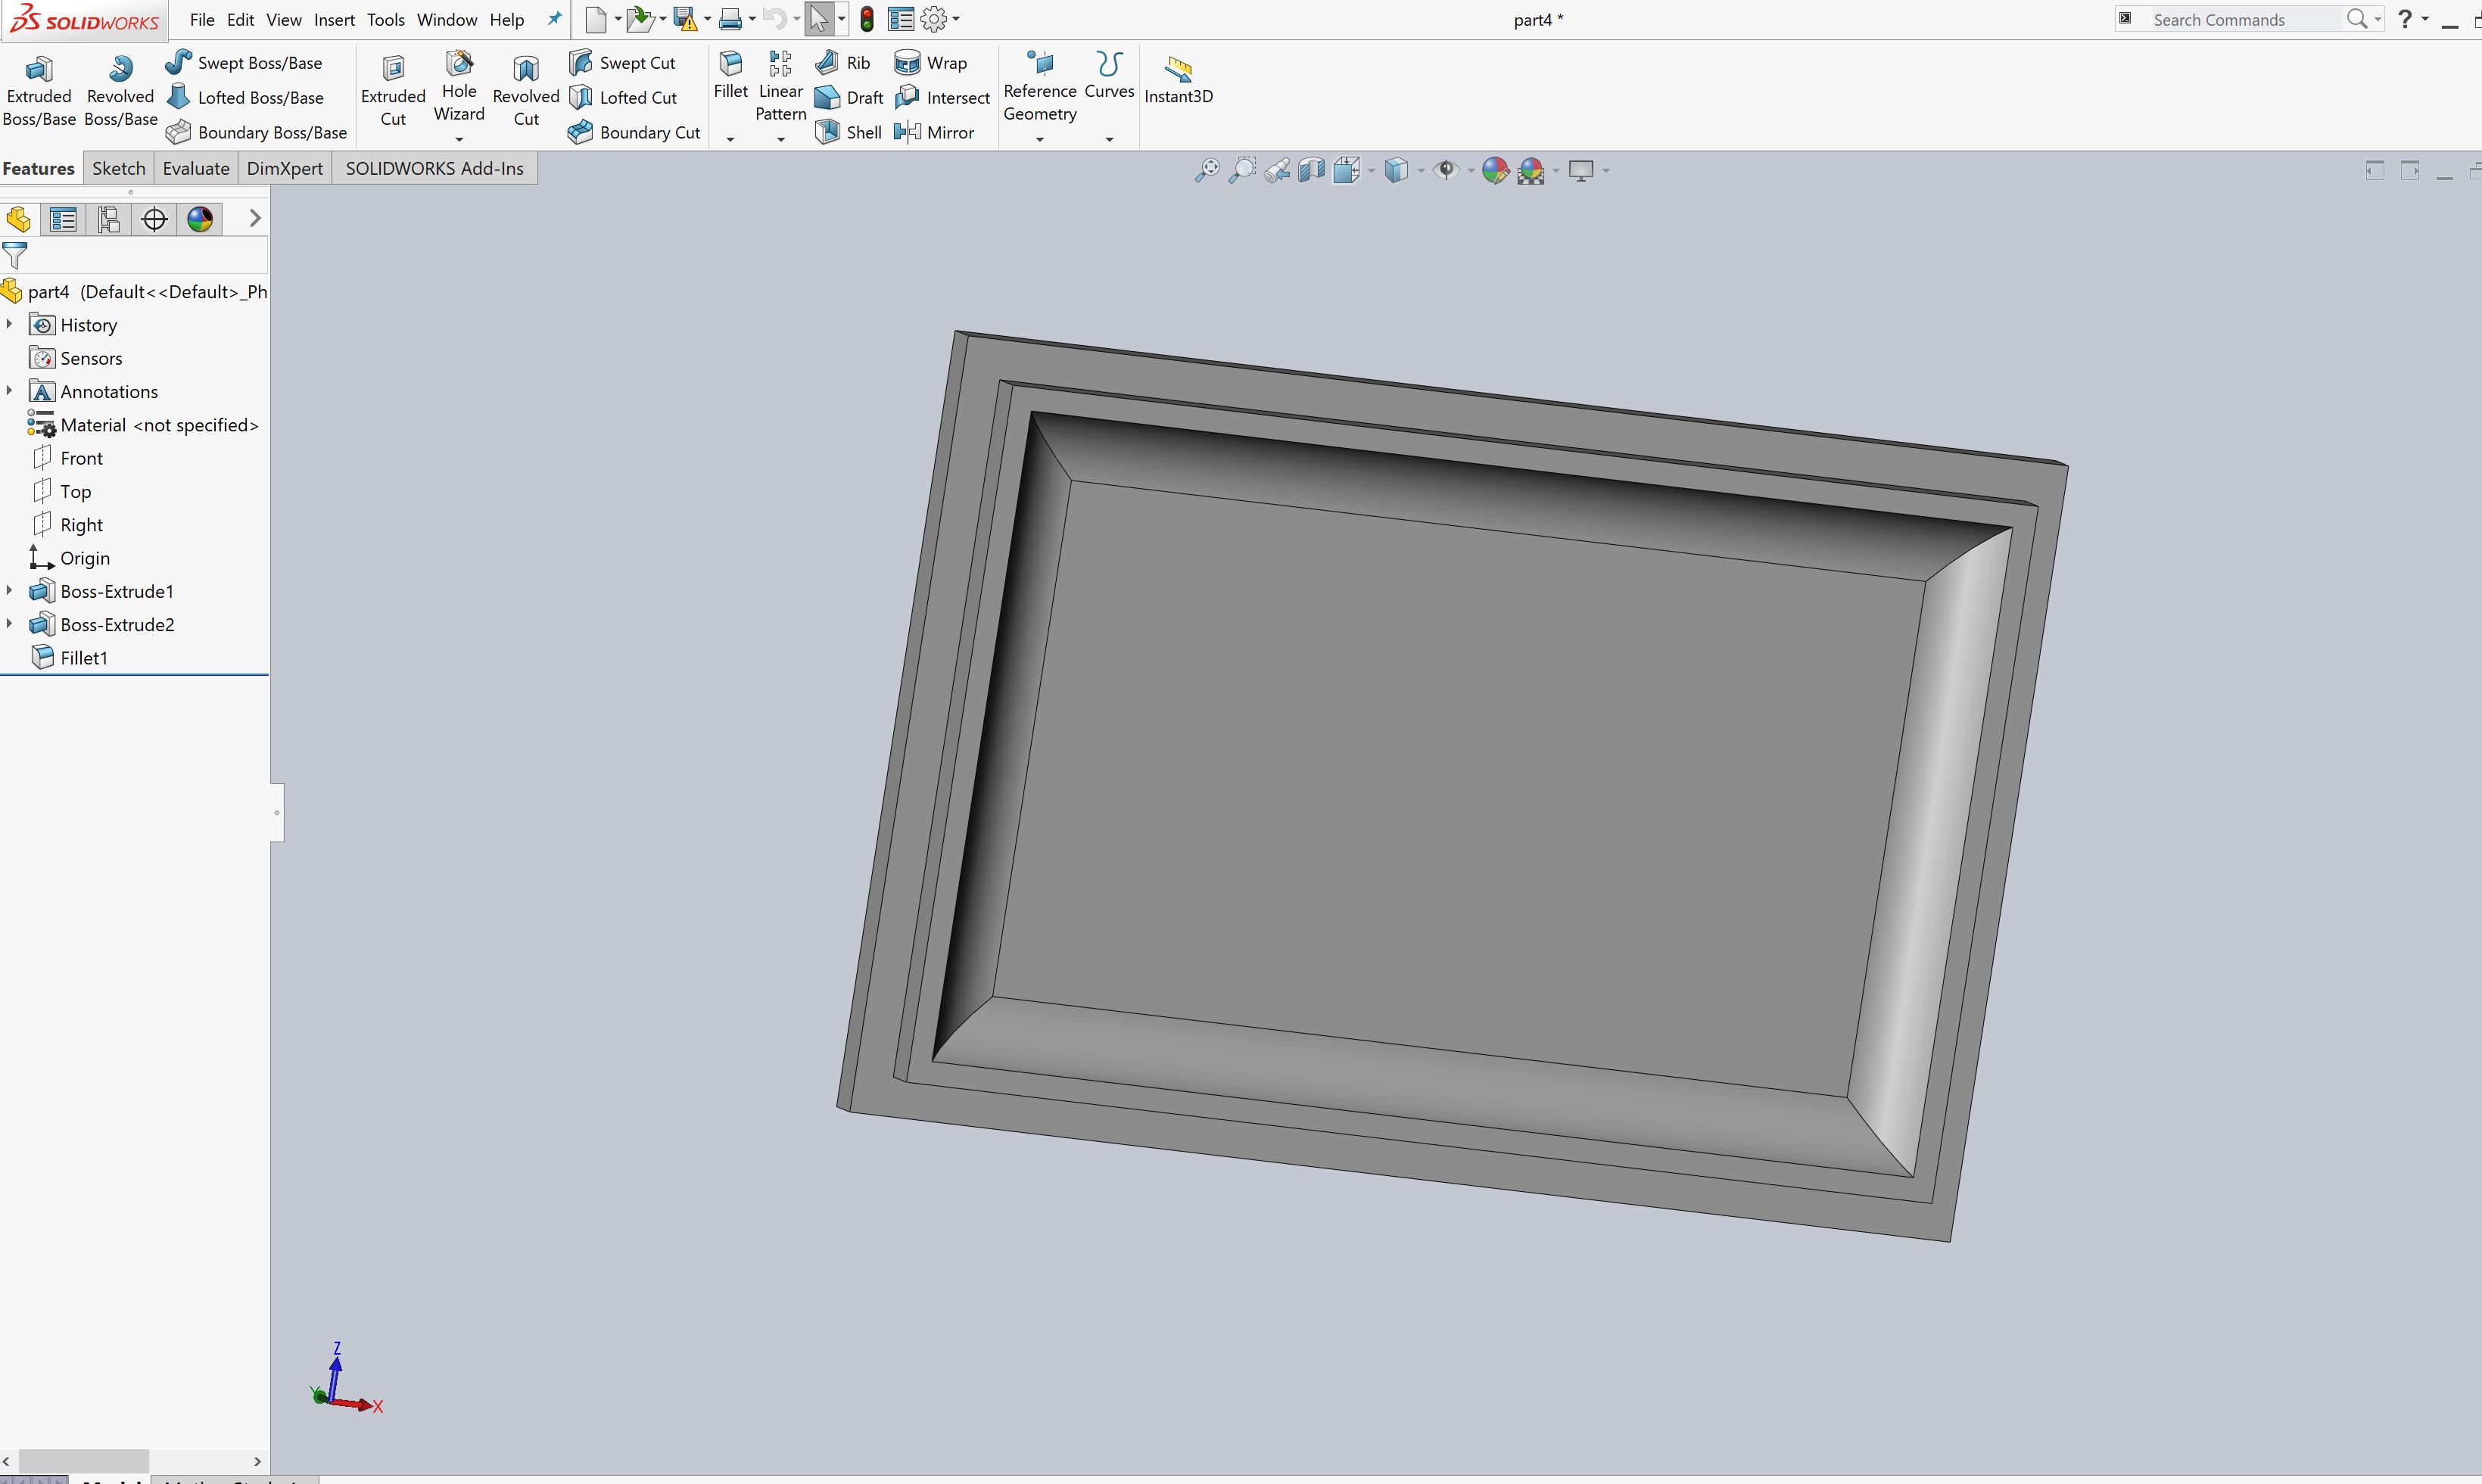
Control unit housing cover
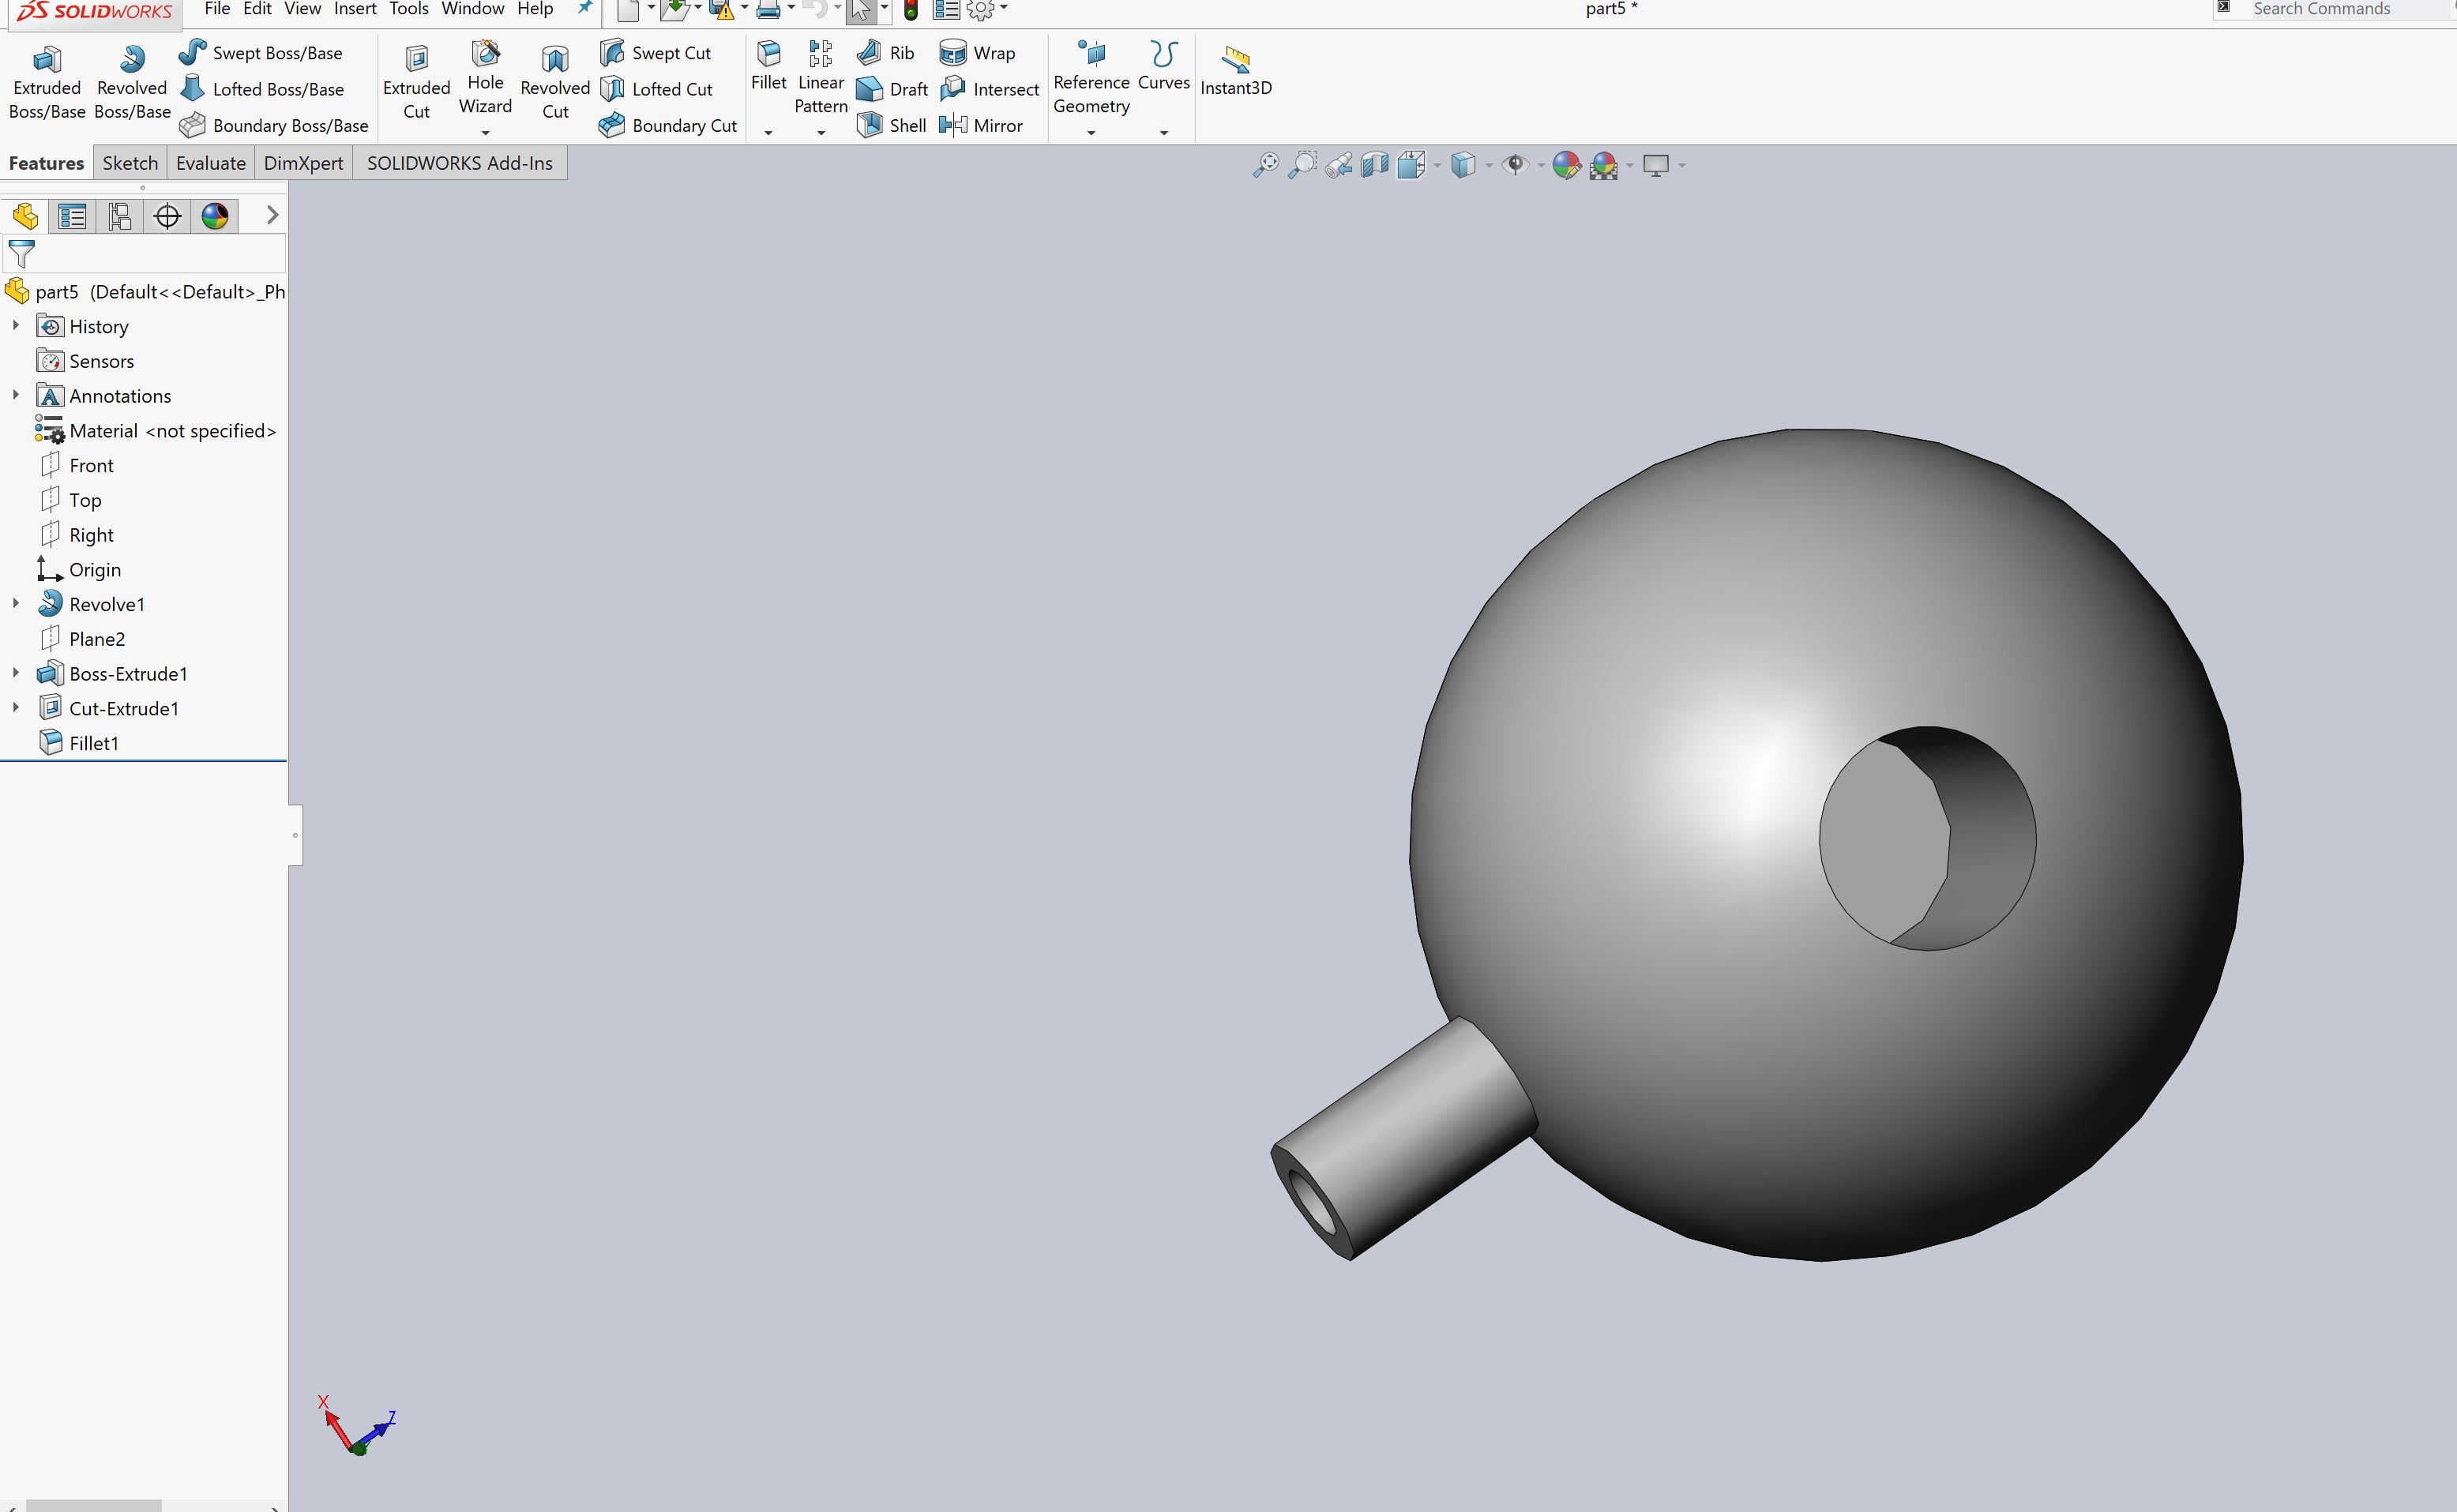
Dispensor Unit
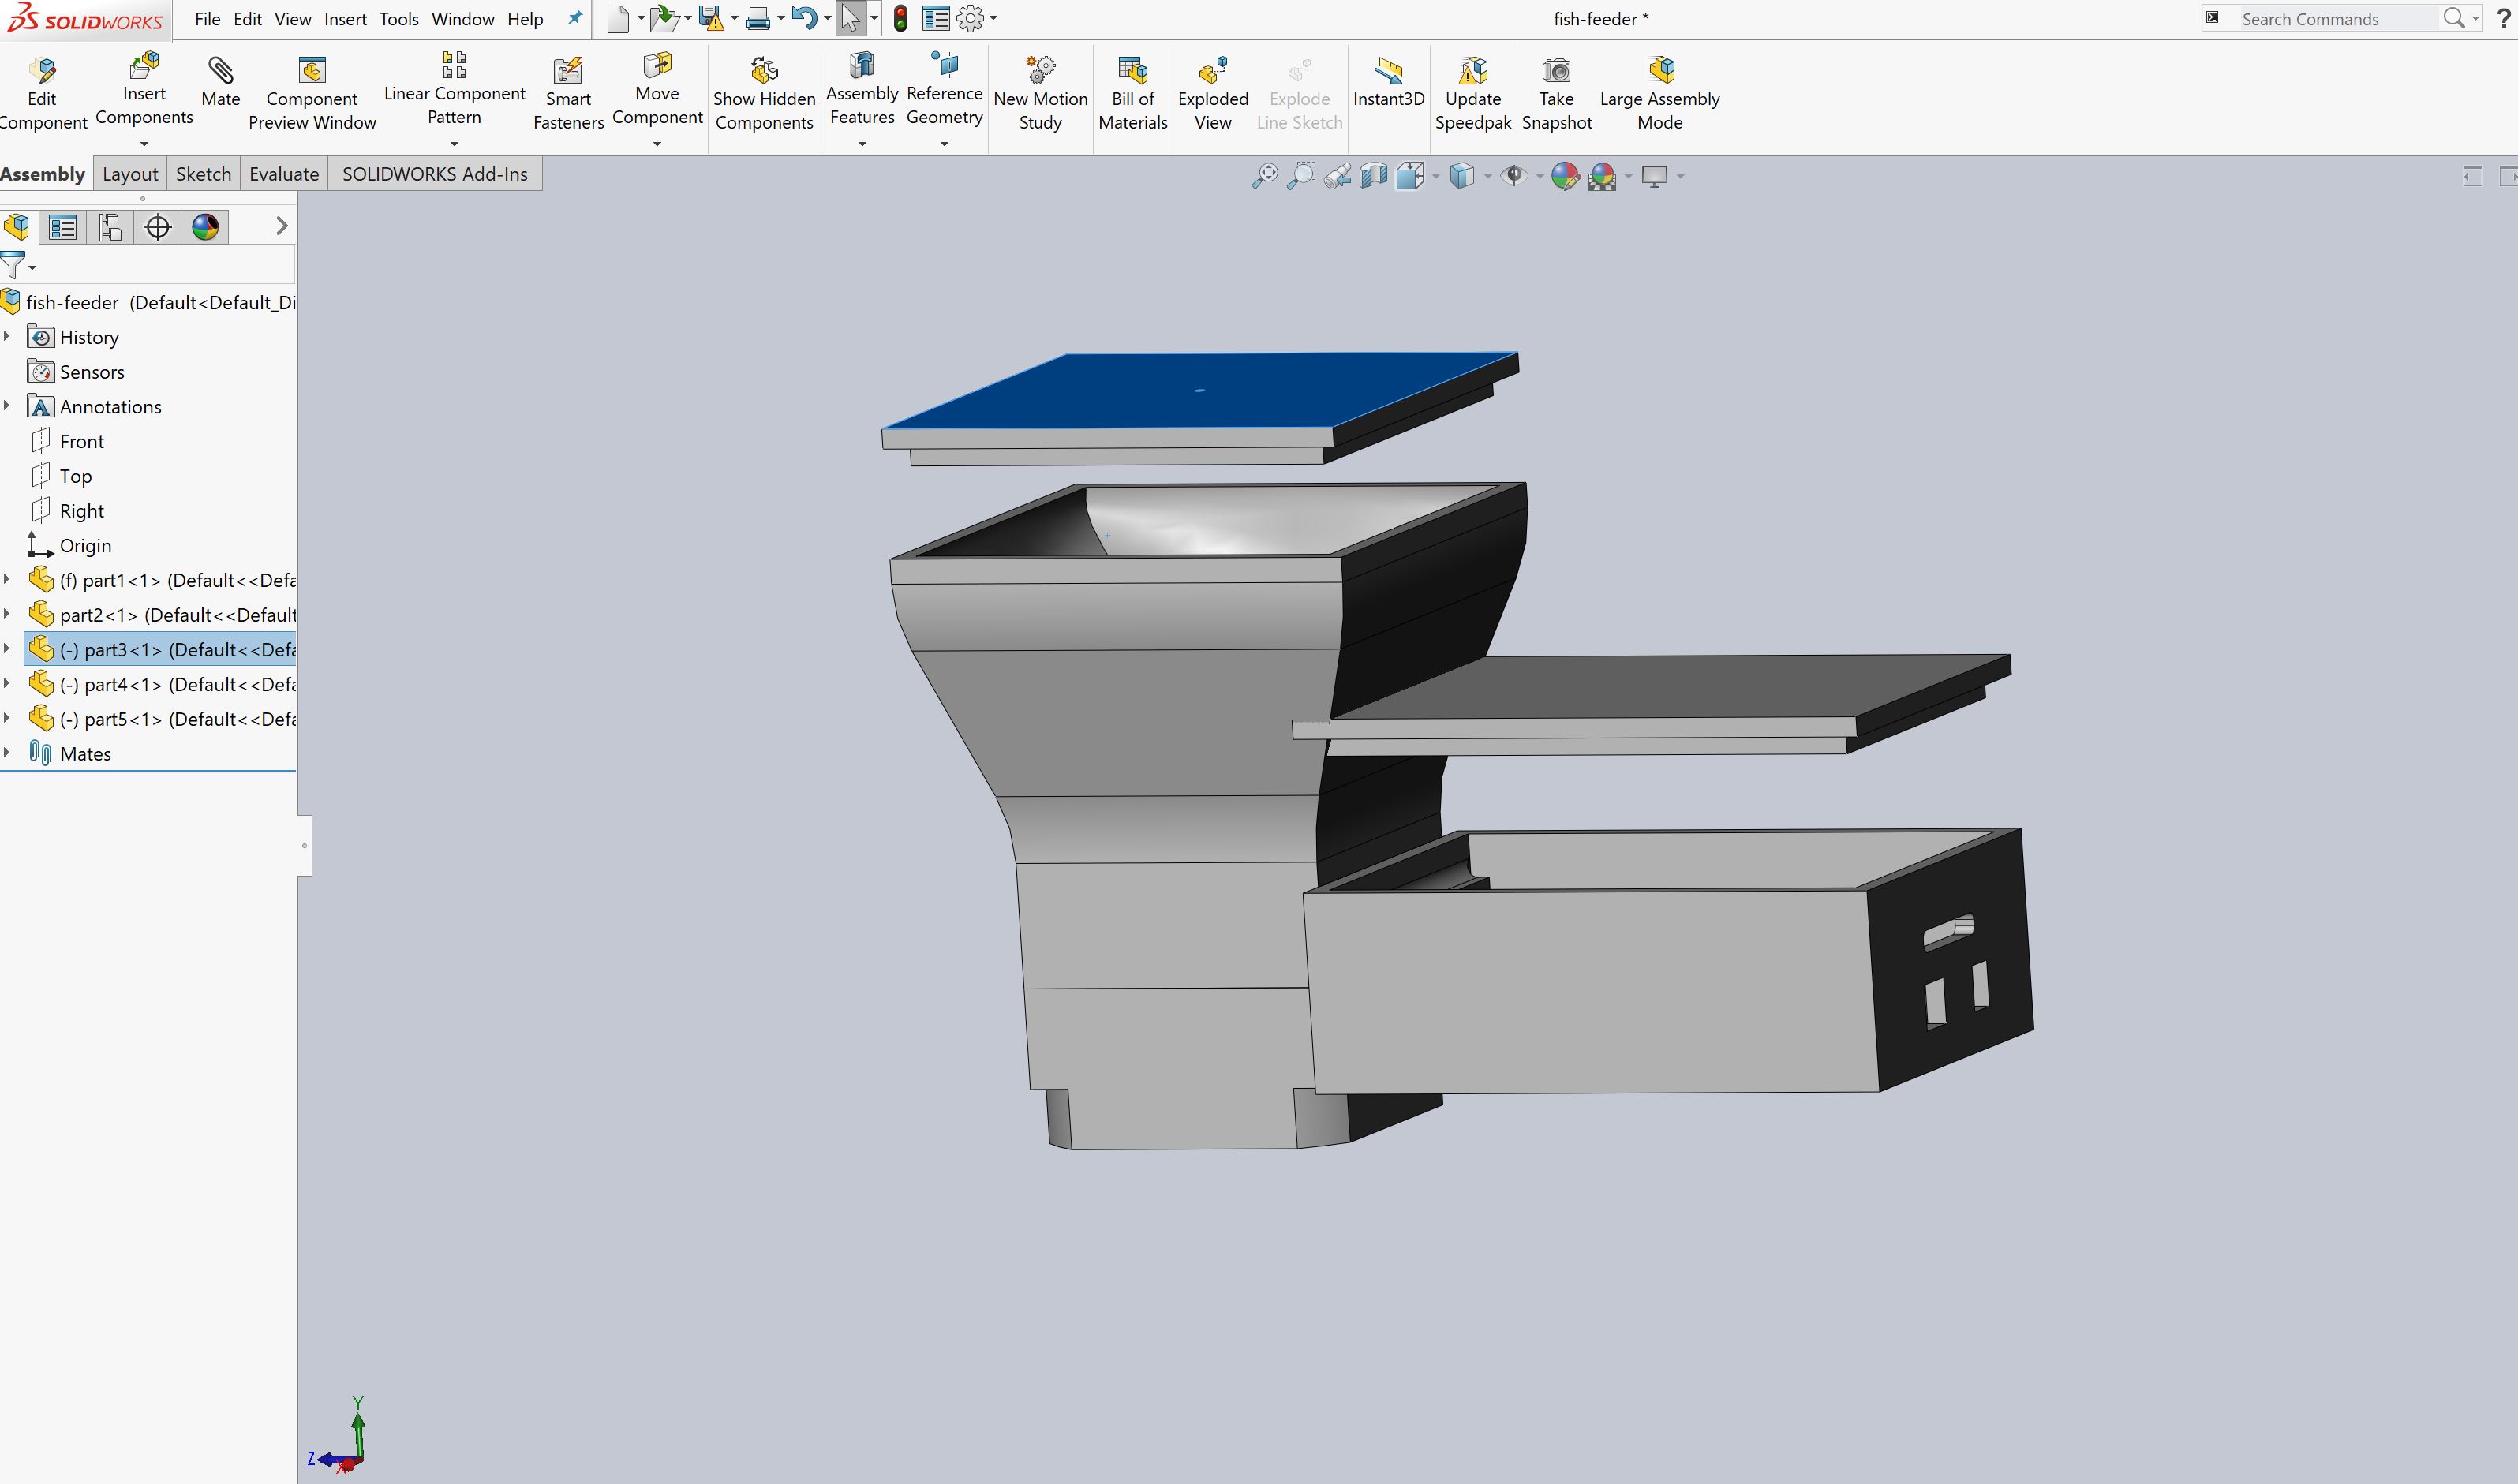
final assembly

final Final Render
click here to download solidwork files
3D printing
Using the sindoh 3D printer this time round, the sindoh 3D printer is much better as its boxed and it mentains the atmosphere temperature while printing.I started to print the parts

3D printing

3D printing

3D printing


assembly of parts

assembly of parts
