Week 3 assignments:
Computer-Controlled Cutting:
From Fab Academy 2018 assignments
Lasser Cutting:
1. Characterize your lasercutter, making lasercutter test part(s), making test part(s) that vary cutting settings and dimensions(group project).
2. Design, make, and document a parametric press-fit construction kit, accounting for the lasercutter kerf, which can be assembled in multiple ways.
Have:
Designs explanation
Includes files of the designs and photos of the completed projects/h6>
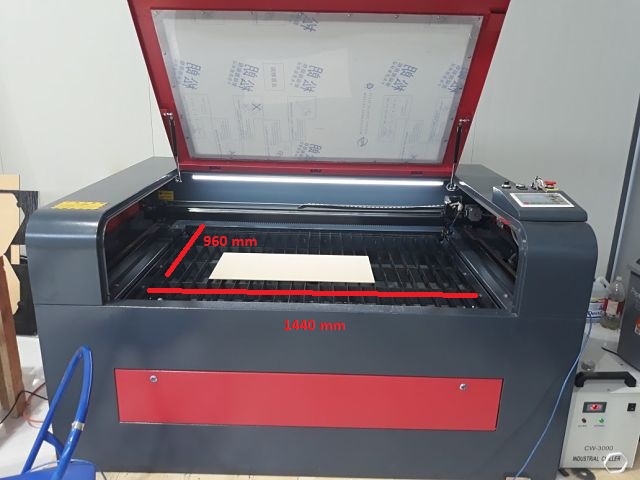
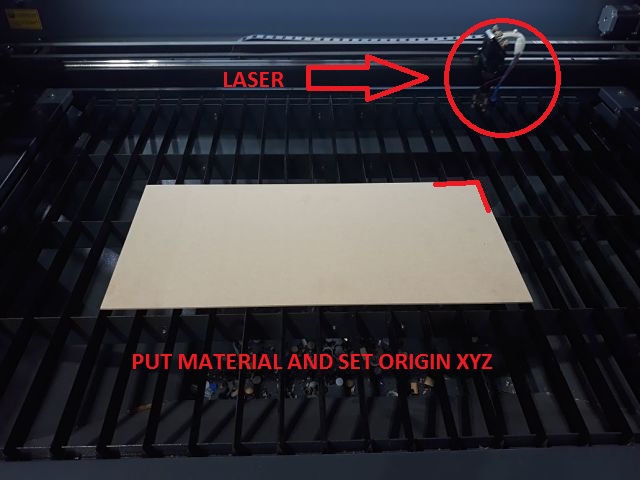
The laser cutter can be used in various applications, such as acrylic cutting, cutting of architectural models, plastics, signs and signage, paper, toys, wood, jewelry and much more. It also allows engravings on any type of material. In this case I used a laser cutter with the following characteristics:
CO2 laser cutting machine
- Engraving and cutting area: 1400 x 960 mm.
- Cutting material allowed: Plastic, cardboard, MDF, Acrylic, textile fibers, triplex.
- Maximum material thickness: Maximum 10mm (Depends on the density of the material) .
- Power: 100 Watts
Parameters and Settings
Laser cutting and engraving is based on a series of parameters that must be set, in order to achieve the effect we want to obtain in each material with which we want to work. The parameters vary according to the type of material (plastic, wood ...), its origin (organic or inorganic), its thickness ...
Only perfect results can be achieved in engraving and laser cutting if it is correct when choosing the parameters. The laser parameters are a combination of the following settings:
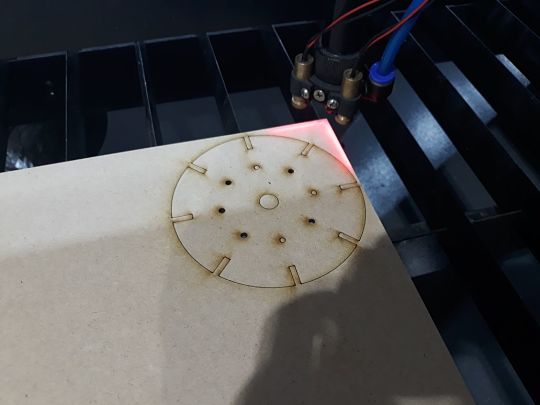
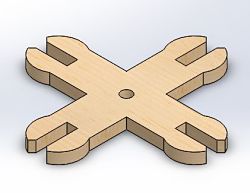
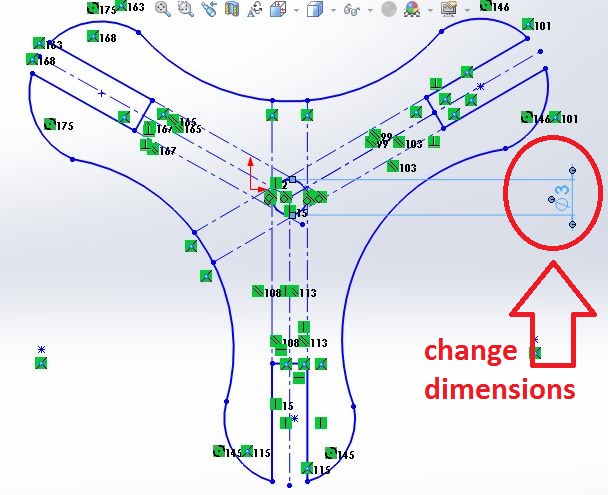
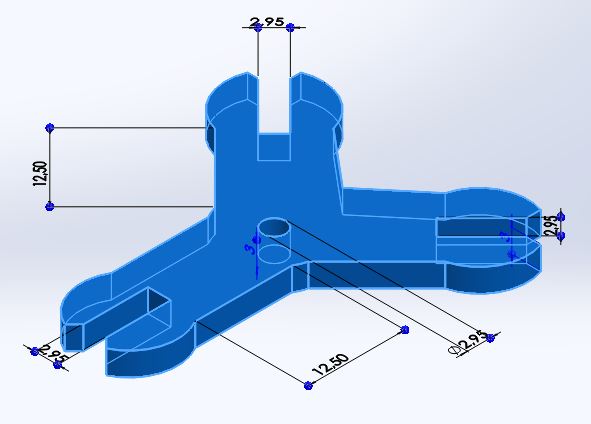
To execute the assignment this week we first designed a device that allows us to verify the correct dimensions for the press fit. The dimensions used in our device were: 3mm, 2.95mm, 2.90mm 2.85mm, 2.80mm, 3.05mm, 3.10mm, 3.15mm. But first I would like to mention some recommendations about laser cutting and engraving.
Tips and Recommendations
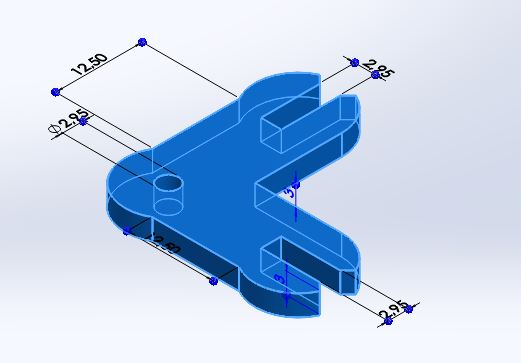
Device for Press Fit test
The device for press fit tes was designed in the solidworks software
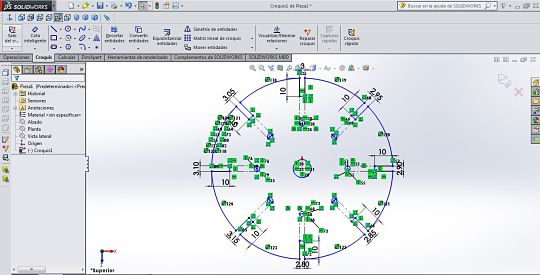
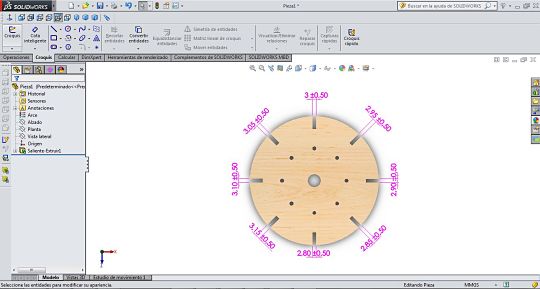
Is important export the file in dxf extension and set the correct parameters of speed and power
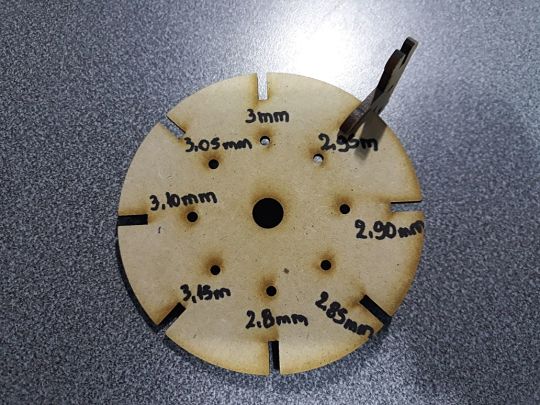
The measure that best fits the material used is 2.95 millimeters, so I used this measure for the design of the parametric construction kit
Also with my colleagues we have made some devices to test the laser engraving and cutting, For this we have used the Epilog Zing laser machine.

Epilog Zing laser 40W machine
- Engraving and cutting area: 600 x 300 mm.
- Cutting material allowed: Plastic, cardboard, MDF, Acrylic, textile fibers, triplex.
- Maximum material thickness: Maximum 10mm (Depends on the density of the material) .
- Power: 40 Watts
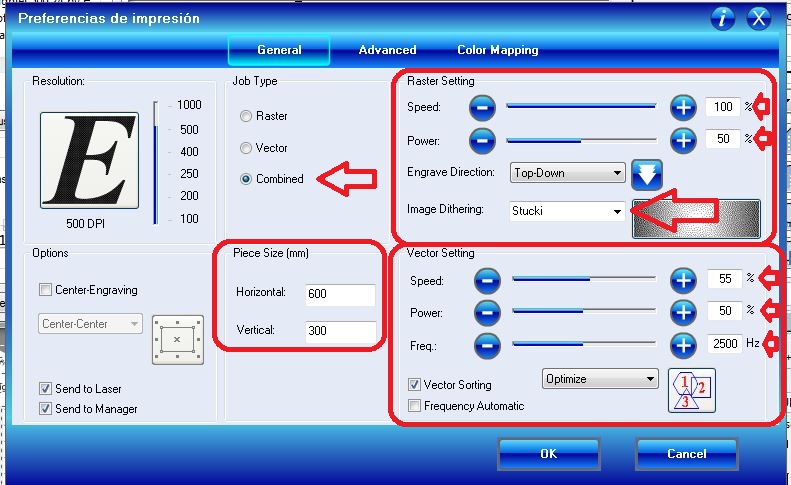
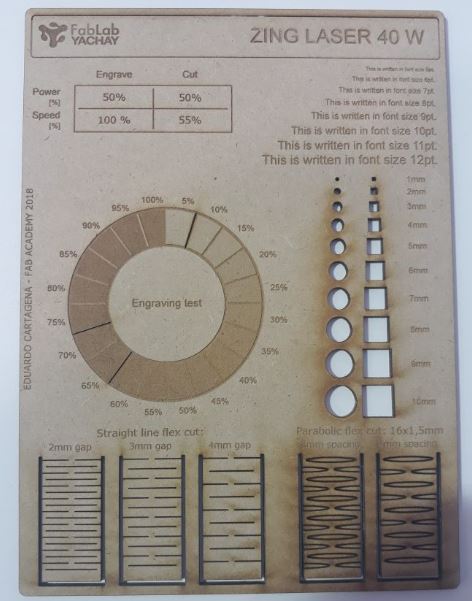

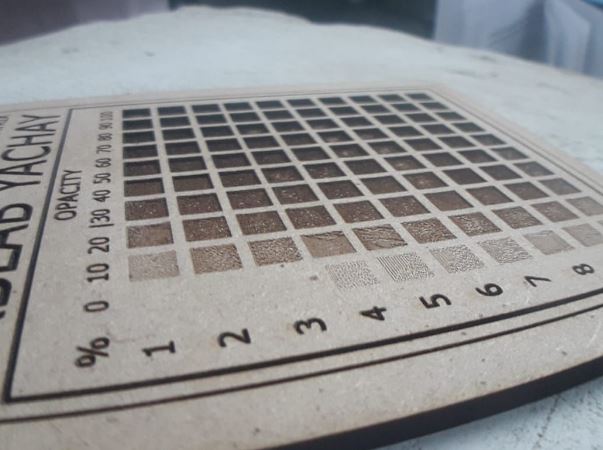
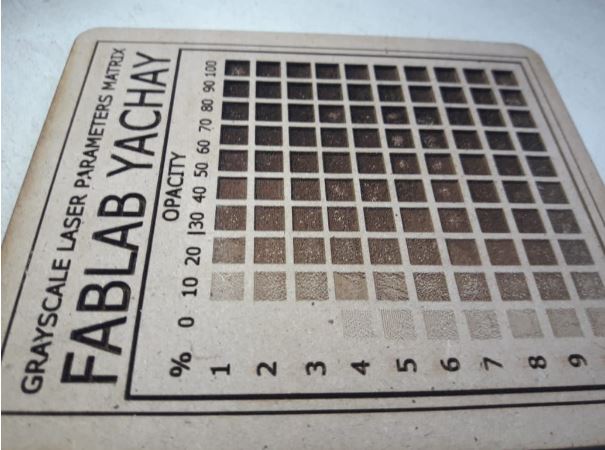
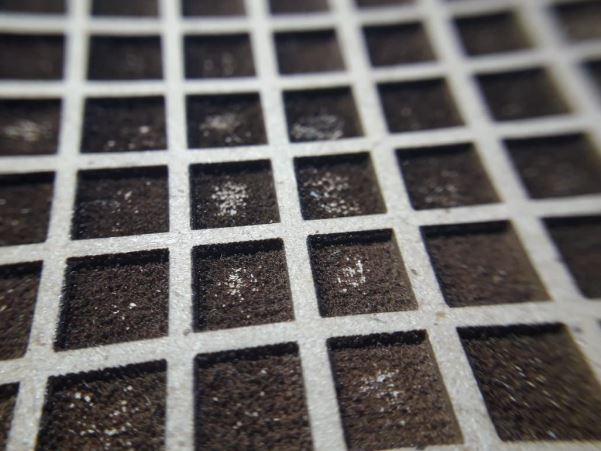
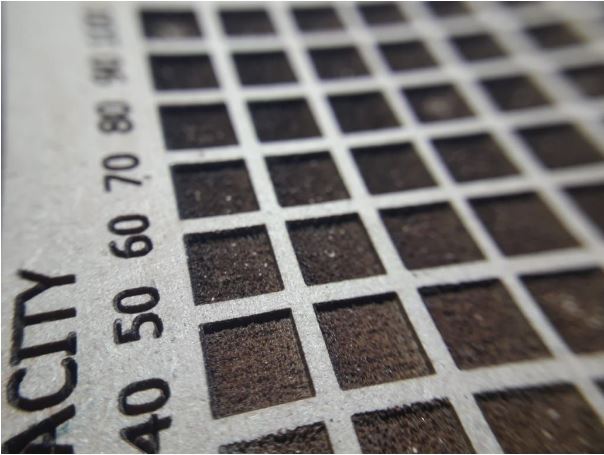
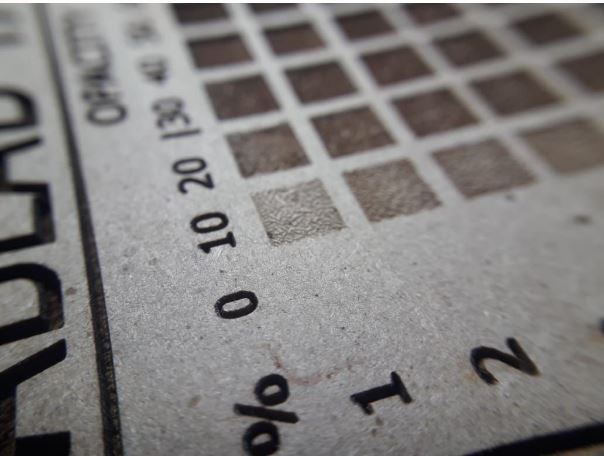
With the laser engraving tests we could demonstrate that we can also change the intensity of the engraving by modifying the range of colors in the design, that is, the darker shades are recorded with greater intensity of power.
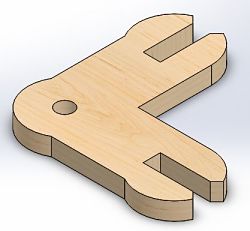
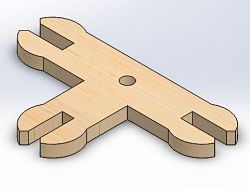
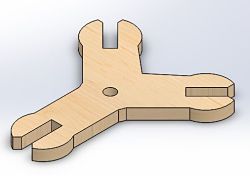
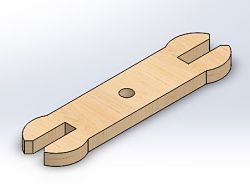
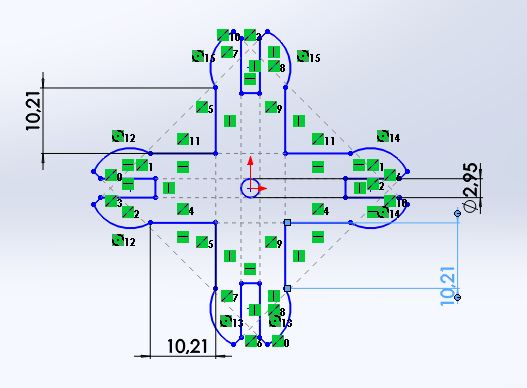
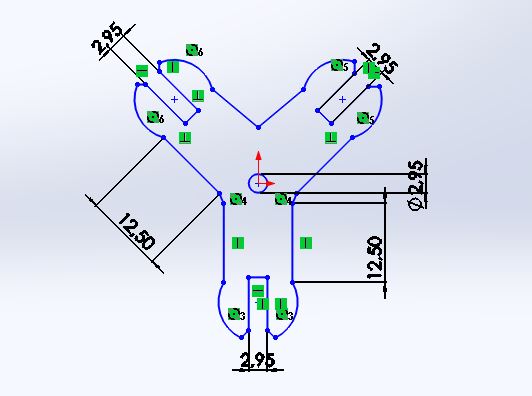
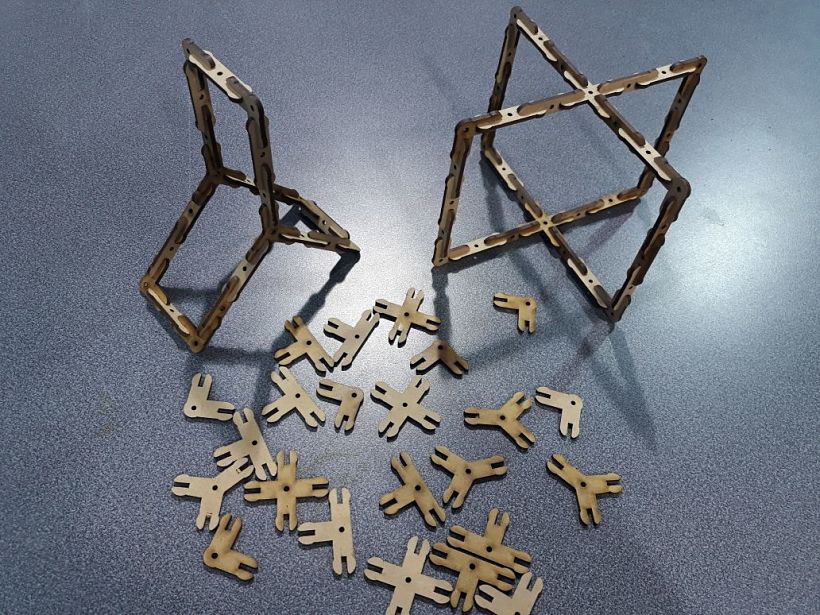
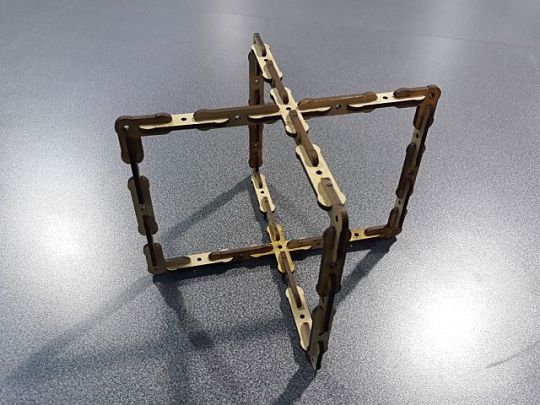
Parametric press-fit construction kit
For this assignment a parametric construction kit composed of 5 elements was designed:
Design process
For the parametric design of the press fit construction kit, I used the Solidworks software. I'm not an expert in 3D design, so I always use solidworks tutorials if I need help
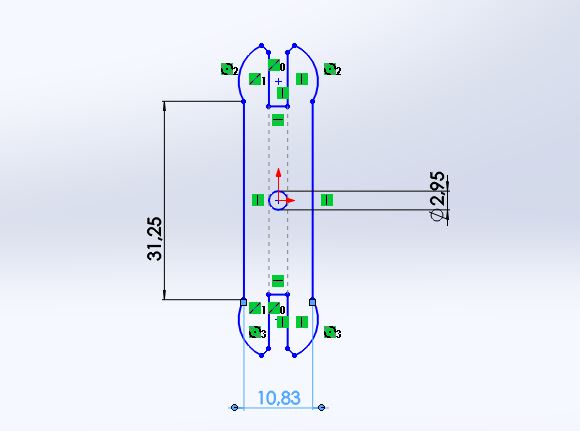
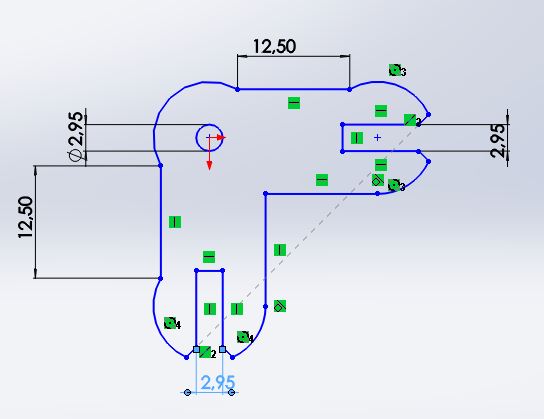
To parameterize the designs I use a central circle with intelligent dimensions that allows me to change the dimensions of all the slots to adapt to different types of material.
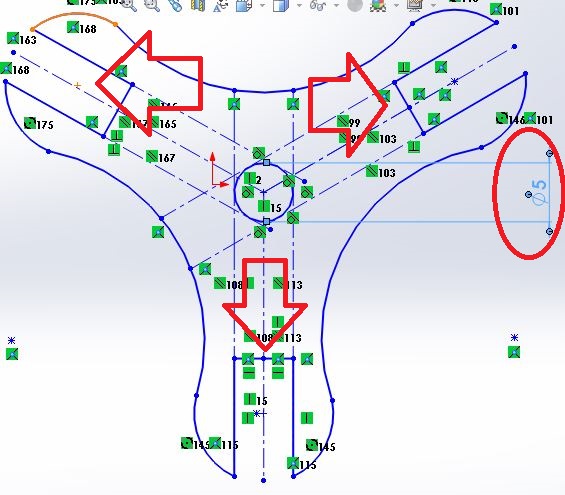
I use the same method with the intelligent dimensions and the central circumference to parameterize the other pieces of press fit kit, in this way it is easier to change the dimensions.

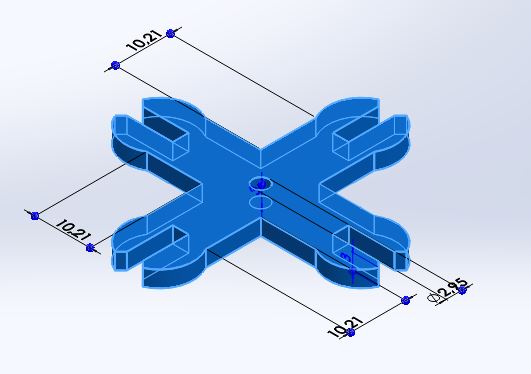


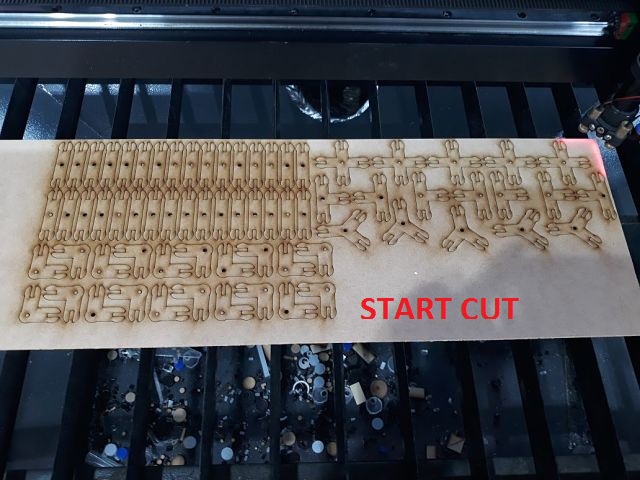
Fabrication process
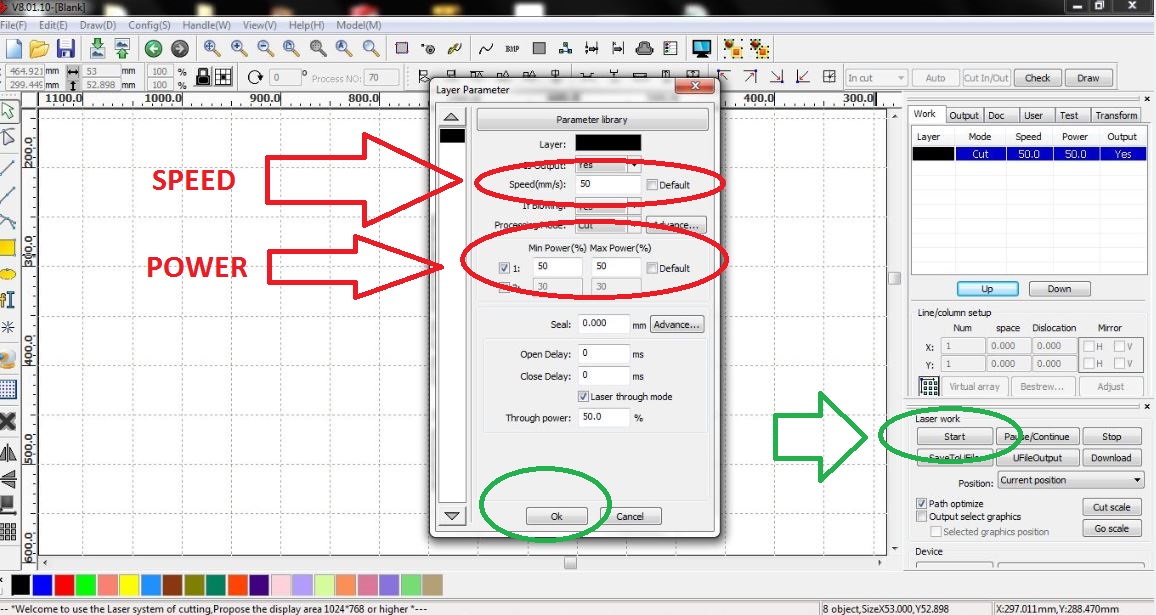
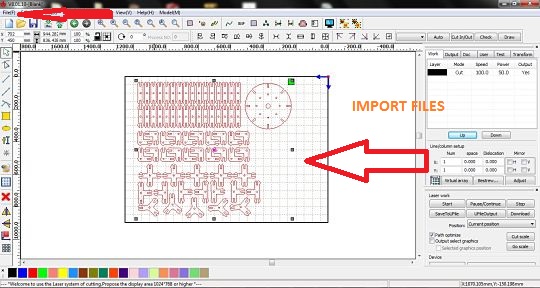
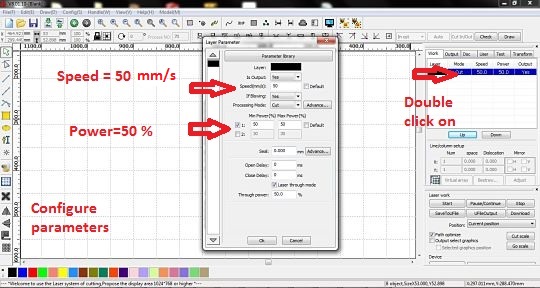
For manufacturing, I used MDF material 3 millimeters thick, import the design file in DXF format from the software of the laser cutter and configure the parameters as follows:
_opt.jpg)
Vinyl Cutting:
1. Processes involved in using this machine.
2. Design, make, and document a parametric press-fit construction kit, accounting for the lasercutter kerf, which can be assembled in multiple ways.
Have:
Designs explanation
Includes files of the designs and photos of the completed projects/h6>
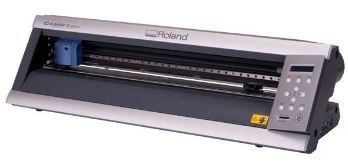
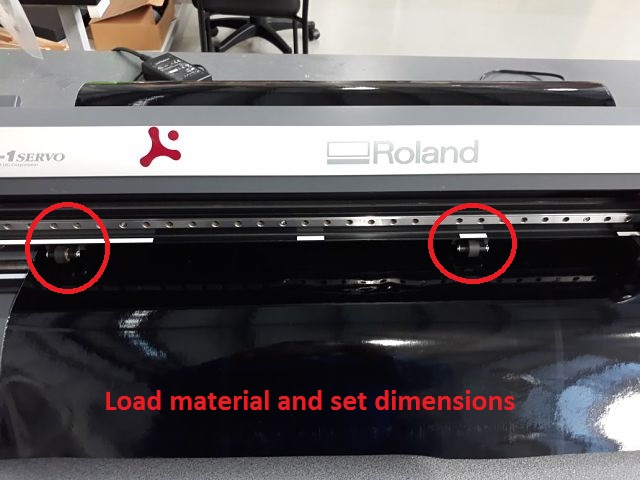
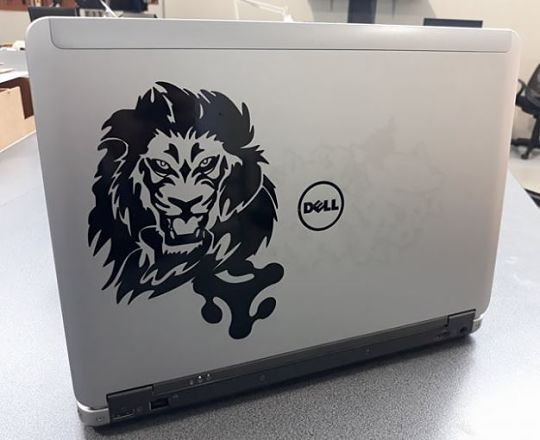
A cutting plotter was designed specifically for graphic impressions with great precision. They have a blade about half the size of a sewing needle. It is used for posters, vehicle decoration, stained glass and others. The material used for this type of work is adhesive vinyl. In this case I used the roland camm-1 servo cutting plotter, this machine has the following characteristics:
- The width of the CAMM-1 Servo GX-24 reflective cutting plotter is 61 cm.
- Automatically register for contour cutting.
- Speed from 10 to 500 mm / sec.
- Connection via USB 2.0 port.
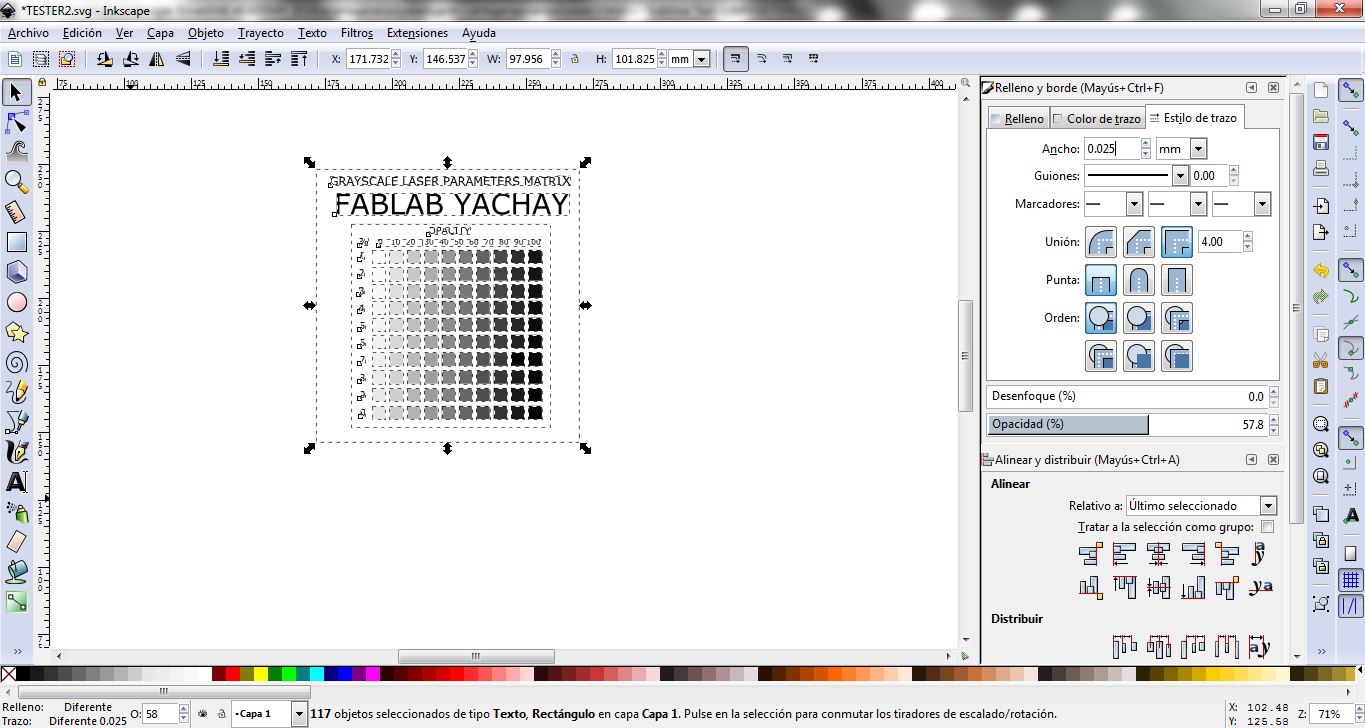
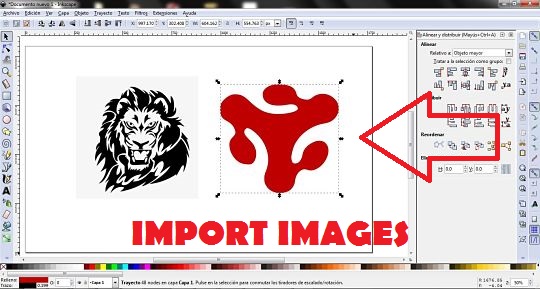
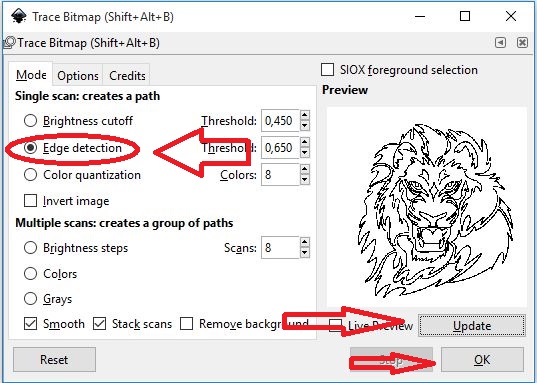
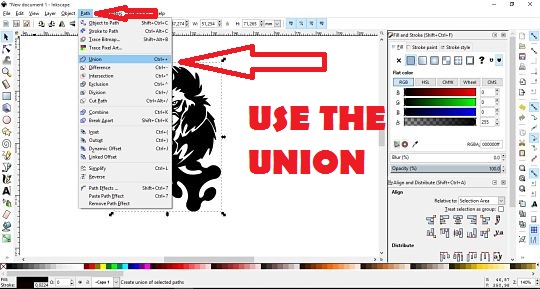
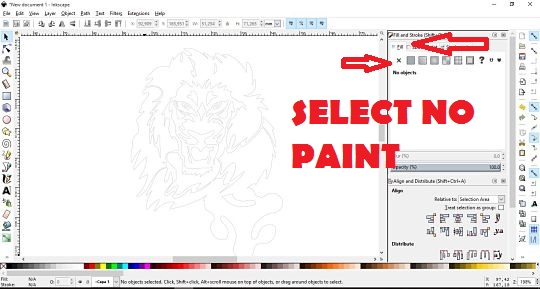
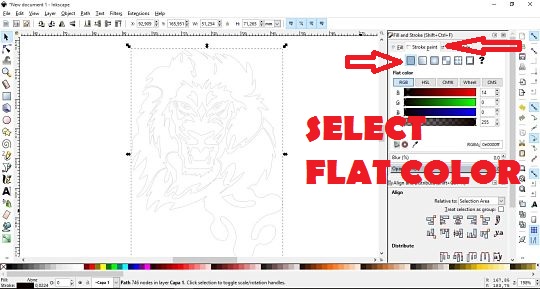
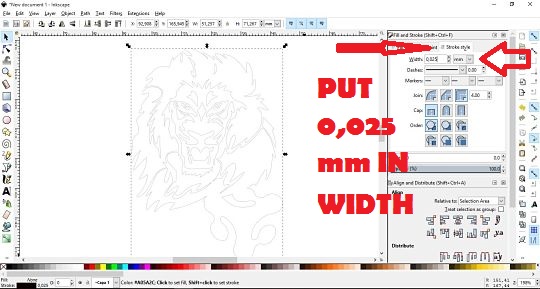
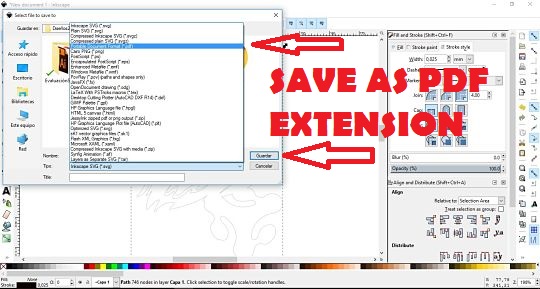
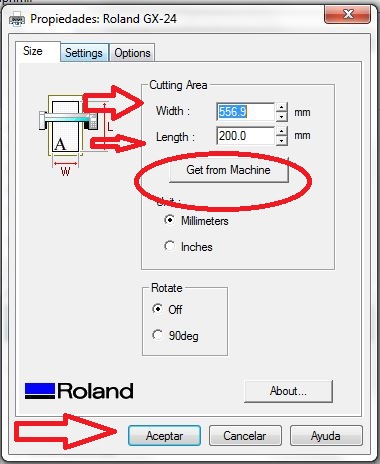
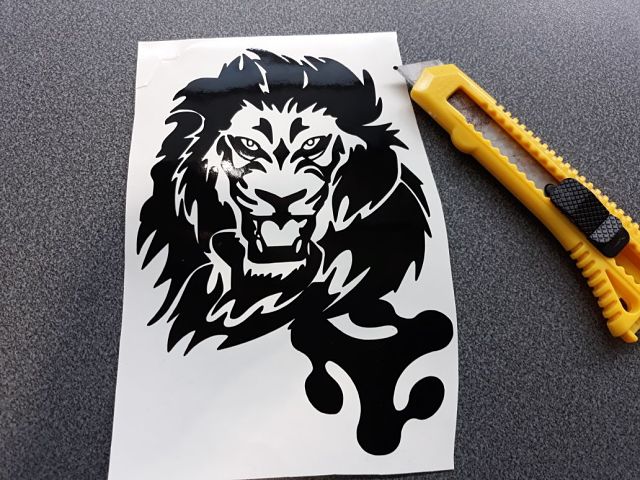
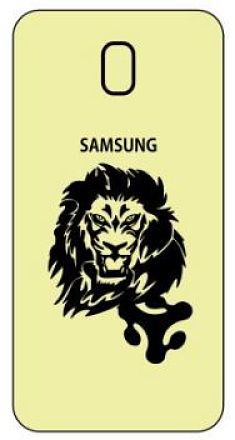
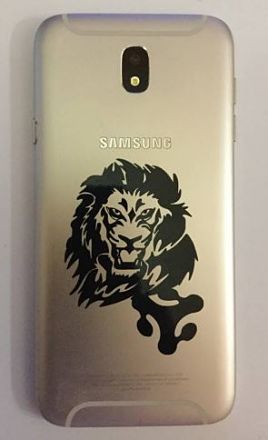
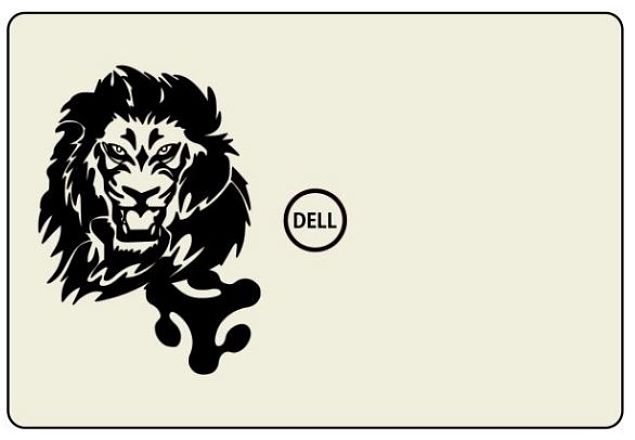
To test the operation of the vinyl cutting plotter, a design was made using the Inkscape software.
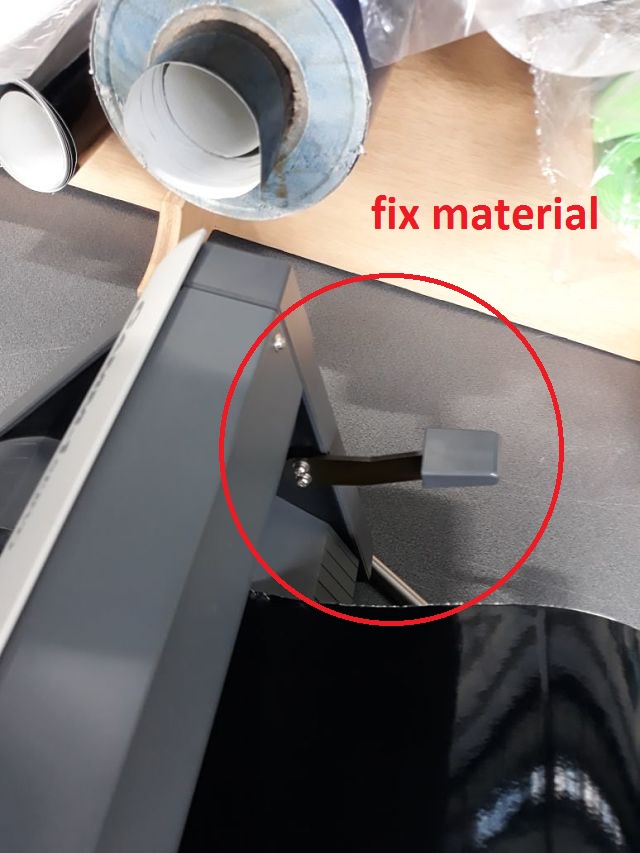
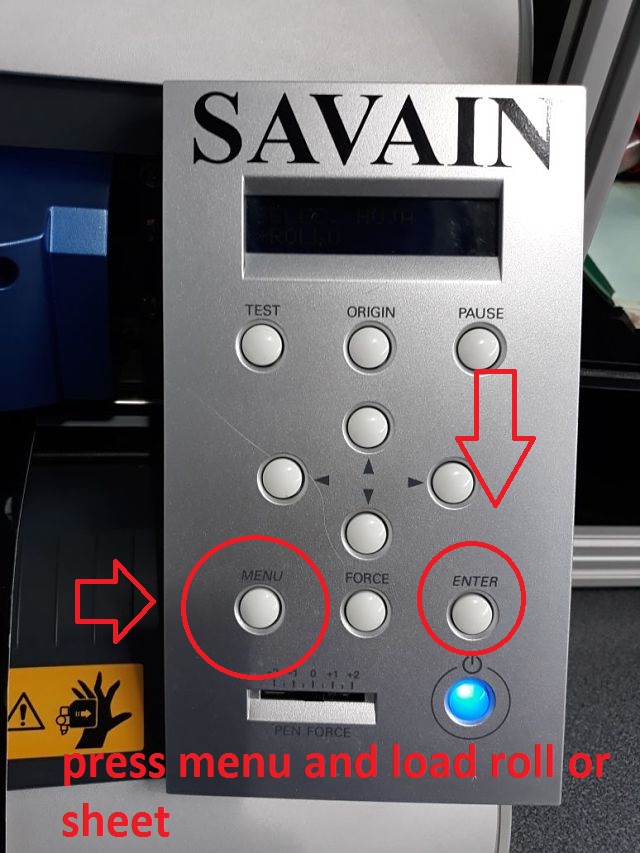
Design process
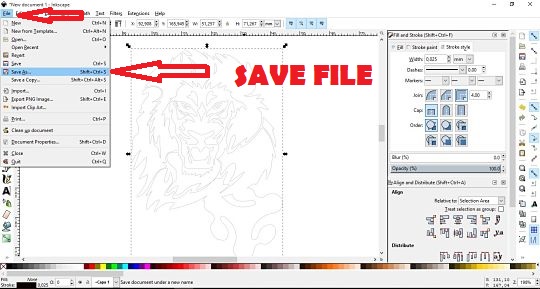
Fabrication process

DOWNLOADS
- File 1: Kit Press Fit
- File 1: Cutting vinil design
- File 2: Engraving and cutting tester
- File 3: Engraving and cutting tester2