
Lucio Pentagna
3D SCANNING & PRINTING WEEK
Learn moreDivided works - design basic models - Print Testers - Documentation about practices - Develope Group Page
For this week, we must to make some tester with the 3D printers present in our lab. As continuos students, Lucio and me have some practices made during the last year and others news made for the new cycle.
If we must to talk about with our experience with the 3D printers machine you can read more in our personal pages or research something at internet. By my opinion, lucio have an lot years of experience with this kind of machines. He research and build fantastic machines which can to print during a trip in a boat .... I think he is an expertise that love to build machines :).
Both teach with them, we made workshops and course in the past and actually so we love 3D printers!!!
So Lucio described in his week page all processes followed during the week so you can visit his page following the link below but basically he made some attempts with the last machine we assembled together using a thingiverse model downloable.
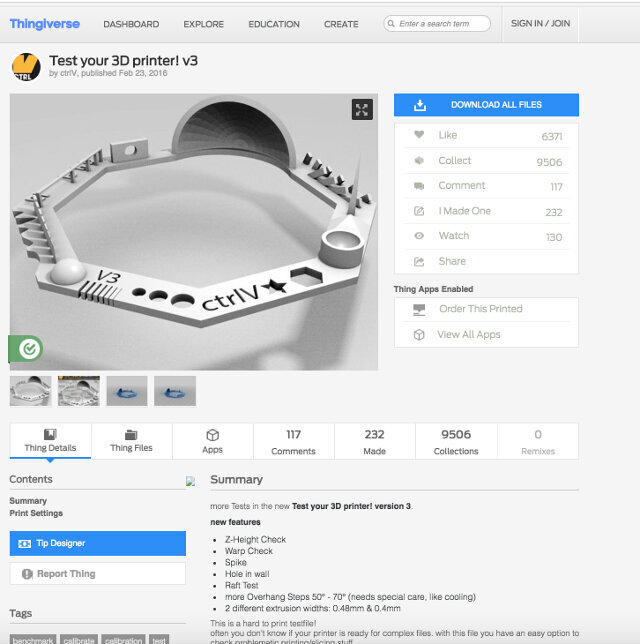
For the task to generate the Gcode that the Delta Printer needs , he used Repetier Software tooking the Gcode saving on the SD card and placed it on the 3D printer and started the print after he charged the PLA filament.
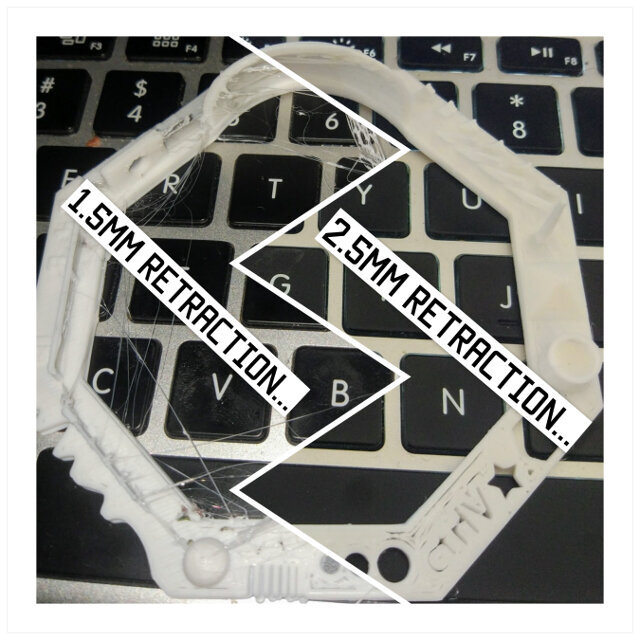
The prints were not bad but there was a lot of oozing (spider web). So I increased the retraction by .5 mm and then by 1 mm the improvements were very noticeable in both printers.He made a further documented wrapper with the results that you can check at his page.
here is the link ti his page : "Lucio´s Week Assignment"
Pilu made the last year this task group and work a lot for the group developing a web, printing things, making testers with differents filaments with the MakerBots presents there.
I described how was my experience with this machines and how i contributed to the group in my personal page and what things i had testing with the idea to learn more about not substractively design technniques, so you can visit this page too for check how i was working with ThermoChromics Filaments.
During 2017 i explained how the week should to be used to make a workshop, after the Diploma some Universities contacted to me offering the opportunity to teach about Digital Technologies in Fashion Design Degree.
so Actually, i ´m teaching about the subject at Spanish Universtity so i made some exercises with the idea to demostrate to my students some new digital design and fabrication techniques.
For that reason i designed basic samples and downloaded others from thingiverse with the idea to teach them about the improtance of tolerances in any 3D printer, the importance to make tester before print any model and learn trought the the fidelity and reality or which things are important to consider if you download anything open and free.
Here are some pics about the processes we followed :
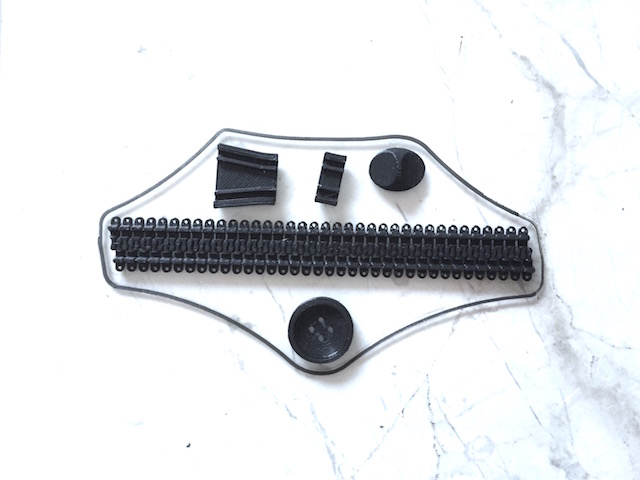
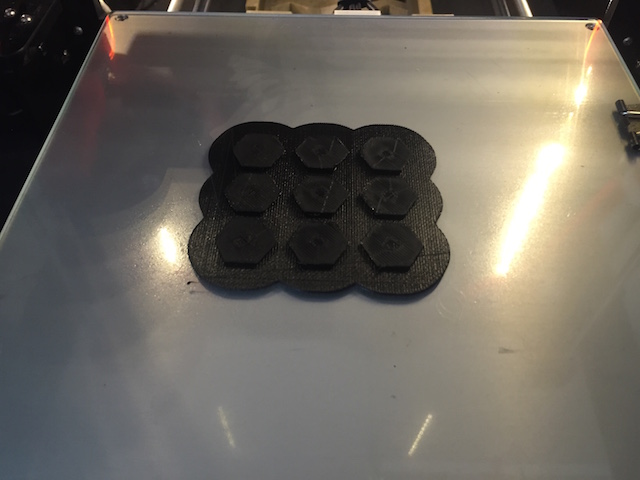
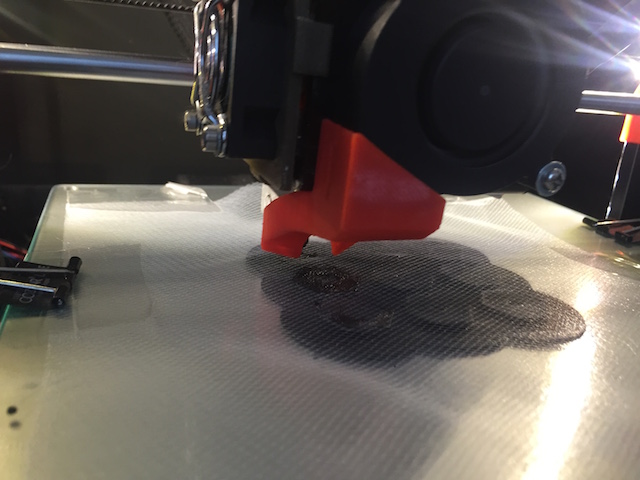
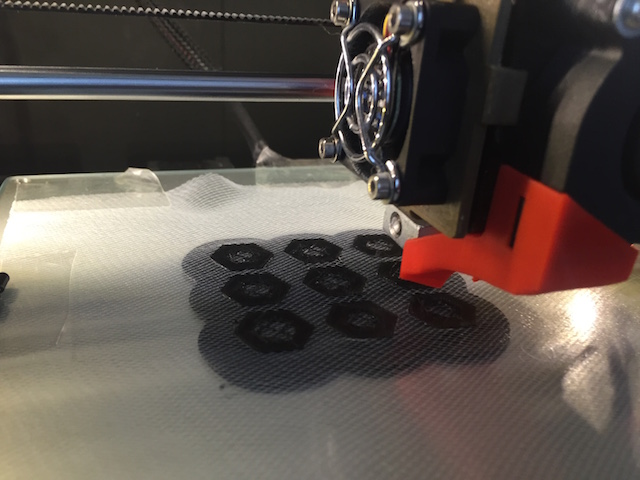
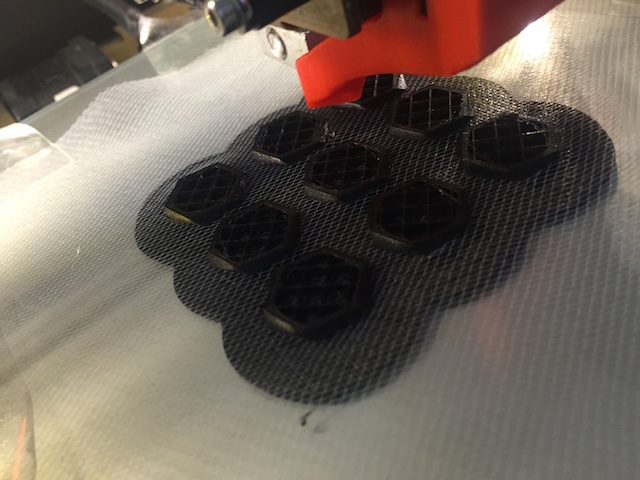
1. Designing and Printing Parametric buttons with OpenScad Software i wont to demostrate how easy is design something with code using basic functions:
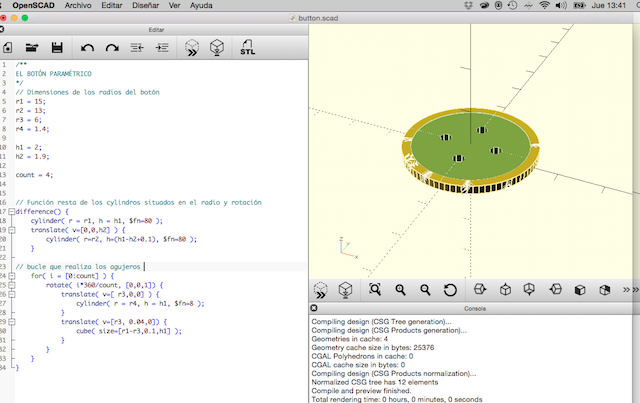

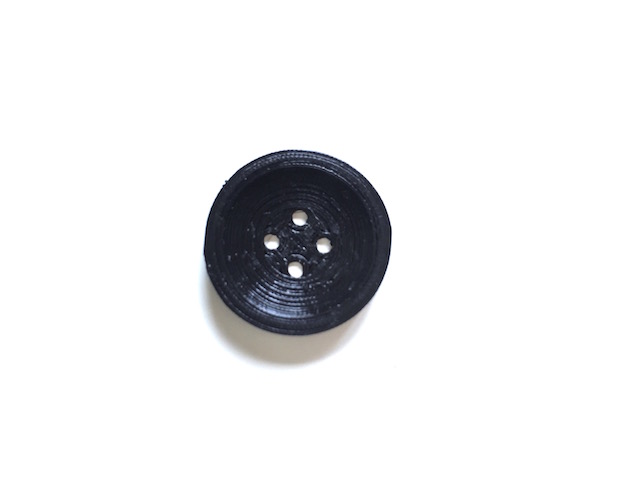
Parametric concepts help a lot the design task if you want to use a lot the same model. So this was the result :
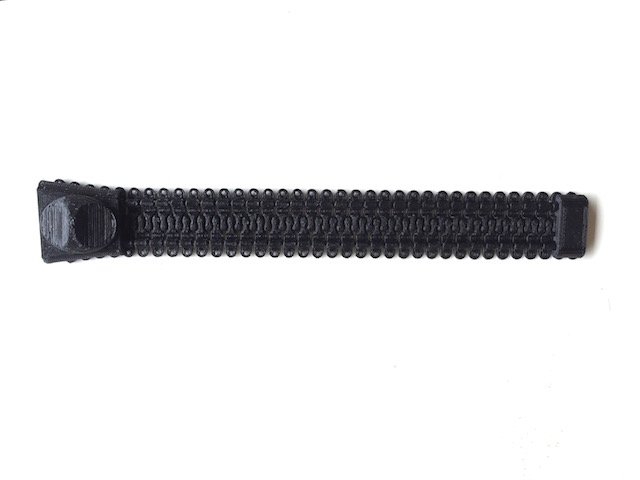
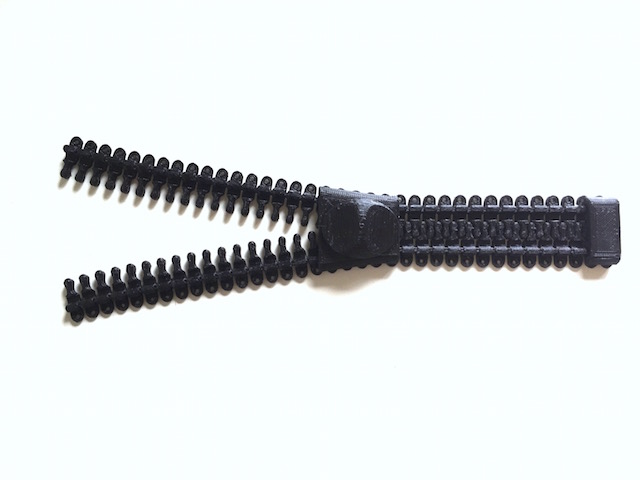
2. Printing ZIPPERS for demostrate how they can design one. By PARTS :
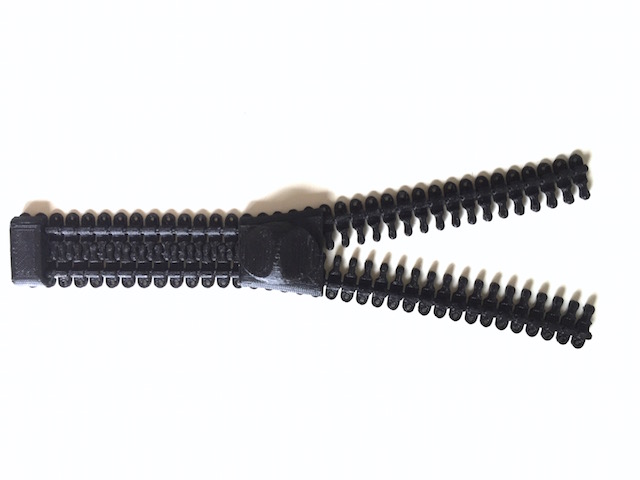
or following substractively techniques :
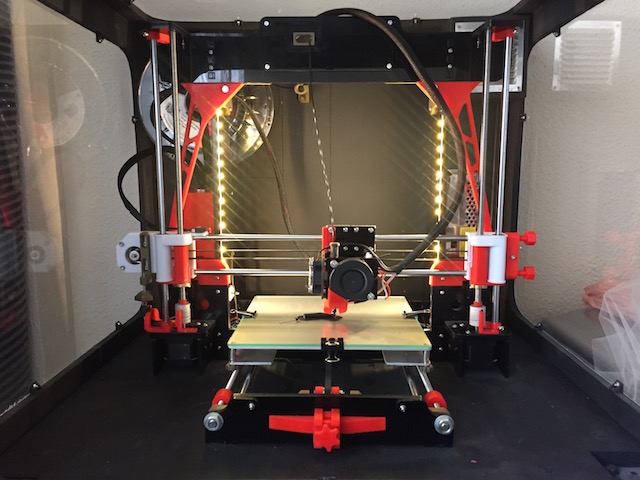
In my case, for generate the G-Code, i used Cura Ultimaker Software, where in settings i choose Prusa I3 making my custom settings for print the first basic samples :
| Material | Profile | Temperature | Speed | Support | Raft |
|---|---|---|---|---|---|
| PLA Filament : Brand - BQ Filament | 210º | 60 | No | No |
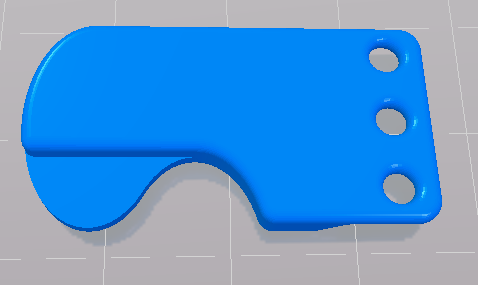
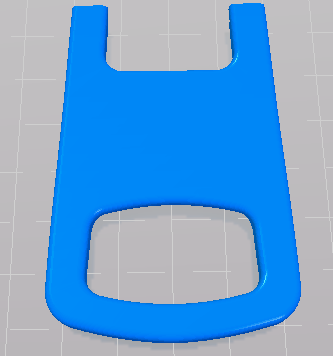
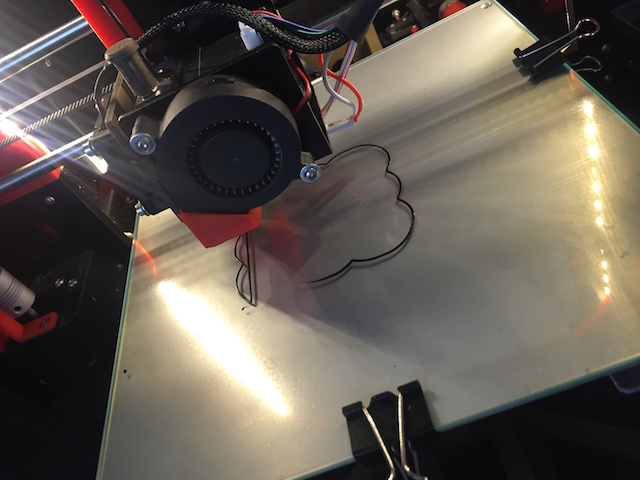
Later and with the idea to teach them about how to integrate the fabrics intro the prints, i decided design a basic model with TinkerCAD (they are not good 3D designers) and explain the process for made something like that :
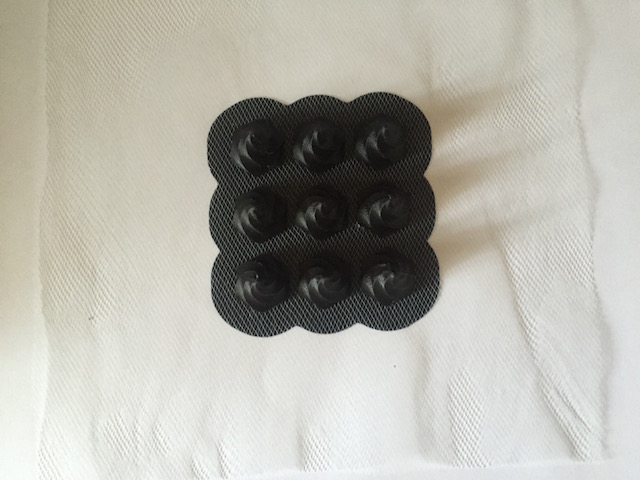
With the aim to manipulate better the piece later, we decided to put a Raft at the base:
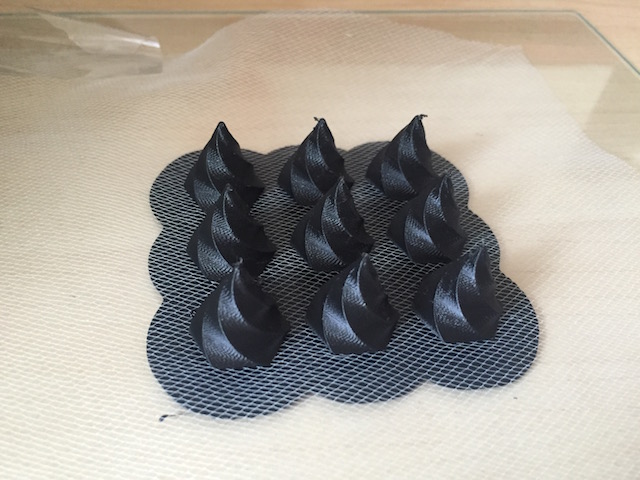
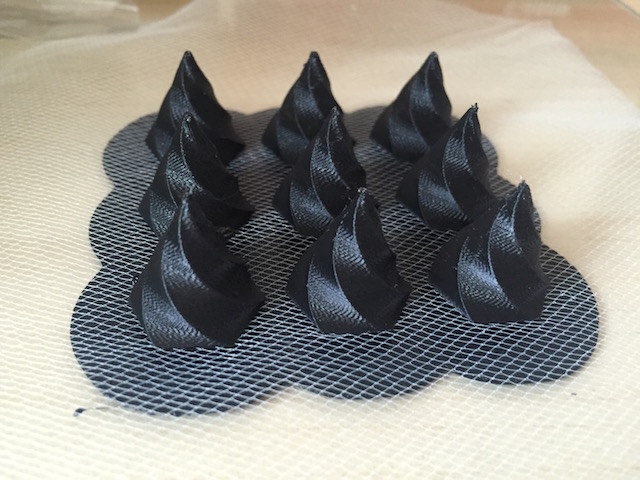
When the machine made the 10% of the work, i stoped the print with the ide to introduce the fabric, the kind i used was "tul" (cheap and easy to found in any fabric shop):

When i was sure about the fabrics was fix to the based with the adhesive, i started the printer again and observed how everything works fine :
Printing in Fabrics from Pilu Caballero on Vimeo.
Printing in Fabrics II from Pilu Caballero on Vimeo.

Printing Fabrics III from Pilu Caballero on Vimeo.
The results was fantastic , everything was printed without problems for fix :

3D SCANNING & PRINTING WEEK
Learn more
3D SCANNING & PRINTING WEEK
GROUP PROJECTS PAGE INDIVIDUAL WEEK PAGE