2. Project management
Assessment:
- ~~Build a personal site describing you and your final project.~~
- ~~Upload it to the class archive.~~
- ~~Work through a git tutorial.~~
Learning outcomes:
- ~~Explore and use website development tools~~
- ~~Identify and utilize version control protocols~~
Have you? 1. ~~Made a website and described how you did it~~ 2. ~~Introduced yourself~~ See my About Me page 3. ~~Documented steps for uploading files to archive~~ 4. ~~Pushed to the class archive~~ 5. ~~Signed and uploaded Student Agreement~~
Project Management week
This week I worked on learning how to use GitLab to keep track of my projects and progress. I understand the importance of keeping track of versions because I am an author. I also appreciate using a repository to work collectively on a project because I work with a team of editors in India and working on the same document together cuts down on the amount of time it takes to complete a new edition of my works. Being able to access prior versions is helpful. Sometimes I take something out for one edition but put it back in for the next. Accessing prior versions means I don’t have to rewrite the whole thing. Tracking changes on one document helps us see when I make a change that my editors don’t approve of (when they change my American idioms to proper grammar, for example). When I was a lawyer, many of us worked on one document together but we did not have a repository. We just wrote our section and hoped it made sense with everyone elses.
Research
The Important SSH Key
You cannot start using your FabAcademy website without the SSH Key. I used a git tutorial to generate and upload the SSH Key by following these instructions:
To install Git:
1. open terminal on a Mac (Git is usually preinstalled on Macs. Xcode is required so older Macbooks might have to install that first.)
2. type your Git username email for the config like this: git config –-global user.name “deborah.orlik”
3. Configured you email address for uploading: git config -–global user.email “dorlik@milkenschool.org”
4. Generate an SSH key by typing ssh-keygen -t rsa -C “$dorlik@milkenschool.org”
5. Ask to see th key by typing cat ~/.ssh/id_rsa.pub
6. Copy the key by typing xclip -sel clip < ~/.ssh/id_rsa.pub
7. Then add the copied key to GIT on your web version of GitLab
To add the copied key to GitLab
- sign in to GitLab
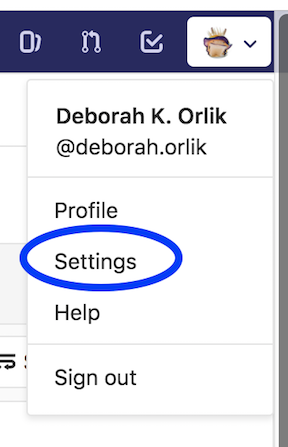
- click on the upper right corner user icon
- from the pulldown menu, click on settings
- in the settings menu on the left side, click on SSH
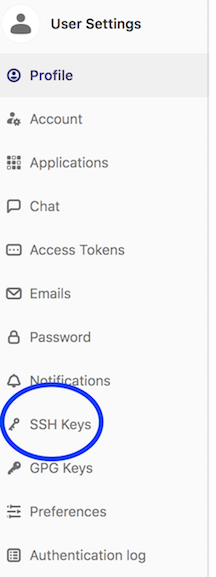
- Use the “add key” button
Try out some software for creating a GitLab website
Atom
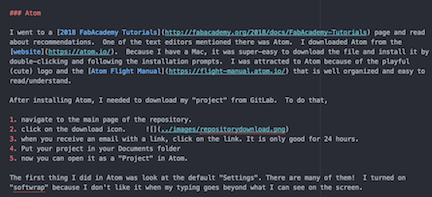
I went to a 2018 FabAcademy Tutorials page and read about recommendations. One of the text editors mentioned there was Atom. Atom was built by GitHub so it must work really well with GitHub. I downloaded Atom from the website. Because I have a Mac, it was super-easy to download the file and install it by double-clicking and following the installation prompts. I was attracted to Atom because of the playful (cute) logo and the Atom Flight Manual that is well organized and easy to read/understand.
After installing Atom, I needed to download my “project” from GitLab. To do that,
- navigate to the main page of the repository.
- click on the download icon.

- when you receive an email with a link, click on the link. It is only good for 24 hours.
- Put your project in your Documents folder
- now you can open it as a “Project” in Atom.
Alternatively, you can just copy one page and open it in Atom.
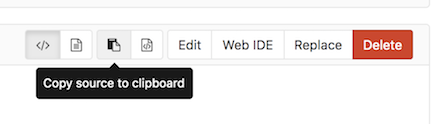
- In the upper left of your GitLab page, click on the symbol to display the source (to look at the page in source code style)
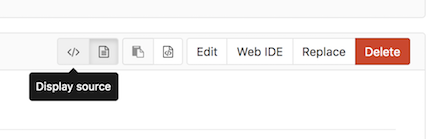
- Then click on the copy symbol to copy the source to your computer’s clipboard
- Go into Atom and File –> New File
- Paste the source code there (Command V)
The first thing I did in Atom was look at the default “Settings”. There are many of them! I turned on “softwrap” because I don’t like it when my typing goes beyond what I can see on the screen.
Atom is much like every other text editor. Two things I liked about it: (1) the brackets manager keeps you straight on closing brackets you’ve opened. That saves time and close proof-reading; and (2) if you have cloned your repository to Atom, the files change color when you have made changes to them. For someone like me who works on many files at a time and doesn’t necessarily remember which ones have changes, the color change will also save time. To see what files should be uploaded to your repository, slide your cursor all the way to the right of Atom’s screen and a little arrow appears and tells you which files need to be uploaded. It’s pretty cool.
Macdown
Macdown is an alternative to Atom that I tried. It was actually created in 2004 specifically for MacOS. Cleverly branded as a Mac lightweight markup language (thus mac----down), the idea is to simplify code that we can then use in html. Make it easy to type…like English…and add just a few characters to make it act like html. Here are some examples:
Emphasis with single asterisks or single underscores.
Strong emphasis, aka bold, with double asterisks or underscores.
Combined emphasis with asterisks and underscores.
Strikethrough uses two tildes. ~~Scratch this.~~
So, it’s not wysiwyg (like Frontpage), but it’s also not Greek. I used to write html. Anything that brings that language closer to ordinary typing is a good idea.
To explore Macdown, I read about it from 20,000 feet (wikipedia) and then I read the Macdown Guide all the way through. I spent most of my time on the cheat sheet that gave me all of the syntax I needed.
The Macdown Guide referred me to Dillinger where you can practice typing in the left side of the screen and it shows you what the code looks like in the right hand side. So…they made it look as wysiwyg as they could. Dillinger “hides the stuff that’s happening behind the scenes”.
Macdown gave me some information for my website such as header hashtags
# Large Title
Large Title
## Slightly smaller title
Slightly smaller title
### Slightly smaller title
Slightly smaller title
#### slightly smaller
slightly smaller
##### even smaller
even smaller
We need things like bolding or crossing things out and, as described above, add files, pictures, links to videos.
To download my entire repository to use Macdown, I used Terminal on my MacBook using the “git clone” command and my gitlab.fabcloud address.
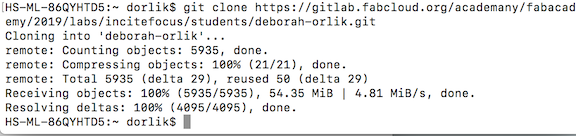
It gave me a 38 MB file called deborah-orlik-master.
Once the file folder has been downloaded with all of the files, I can use Macdown software to make any edits.
When go to my deborah-orlik-master file, I initialize the folder as a git repository with “git init”
I open the assignments folder in Terminal
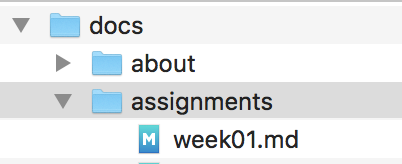
And give the “commit” command for the file I have changed in Macdown.
Now my changes to the file have been changed in the GitLab repository.
The Macdown book referred me to this article about how to publish an e-book using Macdown, something that has been on my mind for awhile now.
The final word on Macdown? It was easy to use and free (two important facts). I did not see some of the things I liked about Atom such as bracket control.
What Text Editor Have I Been Using?
I have three different computers from which I do work for school and for FabAcademy. I have a school laptop at work. It’s a big MacBook Pro. I have a smaller version of the same computer at home and I have a desktop at home, as well. Because I am using 3 different computers, it’s important for me to have one local place where I can work on this GitLab website. The best answer is to work on line. I use the GitLab on line editor for all of my work. I’m not using a local texteditor for this website. Using the GitLab online editor is very much like using GoogleDocs. Everything is there no matter what computer I’m using.
This turned out to be a terrific thing when my school MacBook Pro’s logic board went out. My computer was dead. I did not get it back (with a new harddrive and no files) for a month.
My dead school computer actually ended up as a good thing because when the laptop was fixed, the head of our Tech Department worked with it to install Parallels (something that otherwise would not have been done during the school year). He got me up and running to flash the electronic boards I have built throughout this course. He had it for a full week.
If I had been using Atom or Macdown or another text editor, I would not have been able to seamlessly keep my website up-to-date for that month. I did lose some files, but all of the crucial files (like lesson plans) were backed-up to the Cloud.
To use the online text editor is very easy. I just log in, click on a week’s assignment page and type.
GitLab: My FabAcademy Website and Tracking Changes
GitLab is a Git repository manager with a wiki. It provides issue tracking and continuous integration of new material. This is what we will be using to host our websites, files and documentation throughout the course. It is also available to other students after we complete the course.
Making and tracking changes all about “workflow”. As a former attorney, I learned alot about workflow in the Dark Ages when there was no way to collaborate effectively. We had to work together but we each had our own secretaries typing our separate documents that would eventually have to be one document (such as a pleading). Then we would get together with red pens and try to make our section of a document go together with everyone else’s sections of the document. GoogleDocs would have been a God-send then!
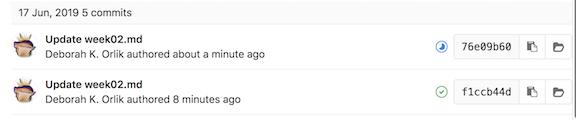
Sometimes it’s important to know who wrote what (so you can go ask them what they were thinking when they wrote that ridiculous argument.) At that time it would have been nice to check the Commits of each person working on the document so that we can see each change, who made it, and when, and then go ask that person “why?” Because I am working alone on my projects, I don’t have to worry about that, but I might have the occasion to revert to an earlier version of my page if, for example, I have made a mistake on a page. Rather than retype or fix the mistakes, I can access my earlier commits, click on one, and go back to a clean copy of an earlier version.
Preparing, uploading and linking to a picture:
Uploading a picture to GitLab is easy. Just go to your “images” file and click on the upload button.
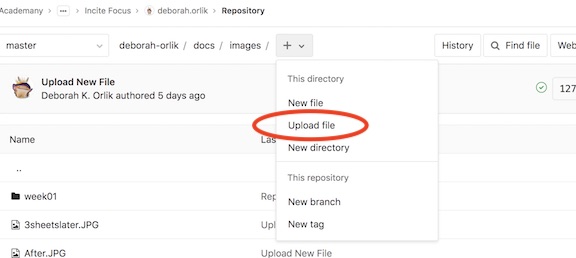
The interface allows you to drag and drop your images (although only one by one). It prefers jpeg files.

Pictures should be small so I resize all of my screenshots in Preview to 4” or 5” wide. (I later changed this to 2” or 3” wide.) Then I export them as JPG. I name them something I will remember (as parts of my story) so that the pictures are easily inserted along with my narrative. For example, the following picture is named resize.jpg

I was initially confused by the idea of “relative” link addresses for the images so I used the trial-and-error method to figure out how to post my pictures on the pages. For example,

The code itself doesn’t make any sense to me. Exclamation point bracket bracket is not a language I speak. However, I’m happy to just copy the code and paste it where it belongs and trace the path back to the folder where I put my image. I taught myself how to handle large databases by coding in dbase back in the 1980s using this copy-and-try method. (Is this guess-and-check?)
Linking to files
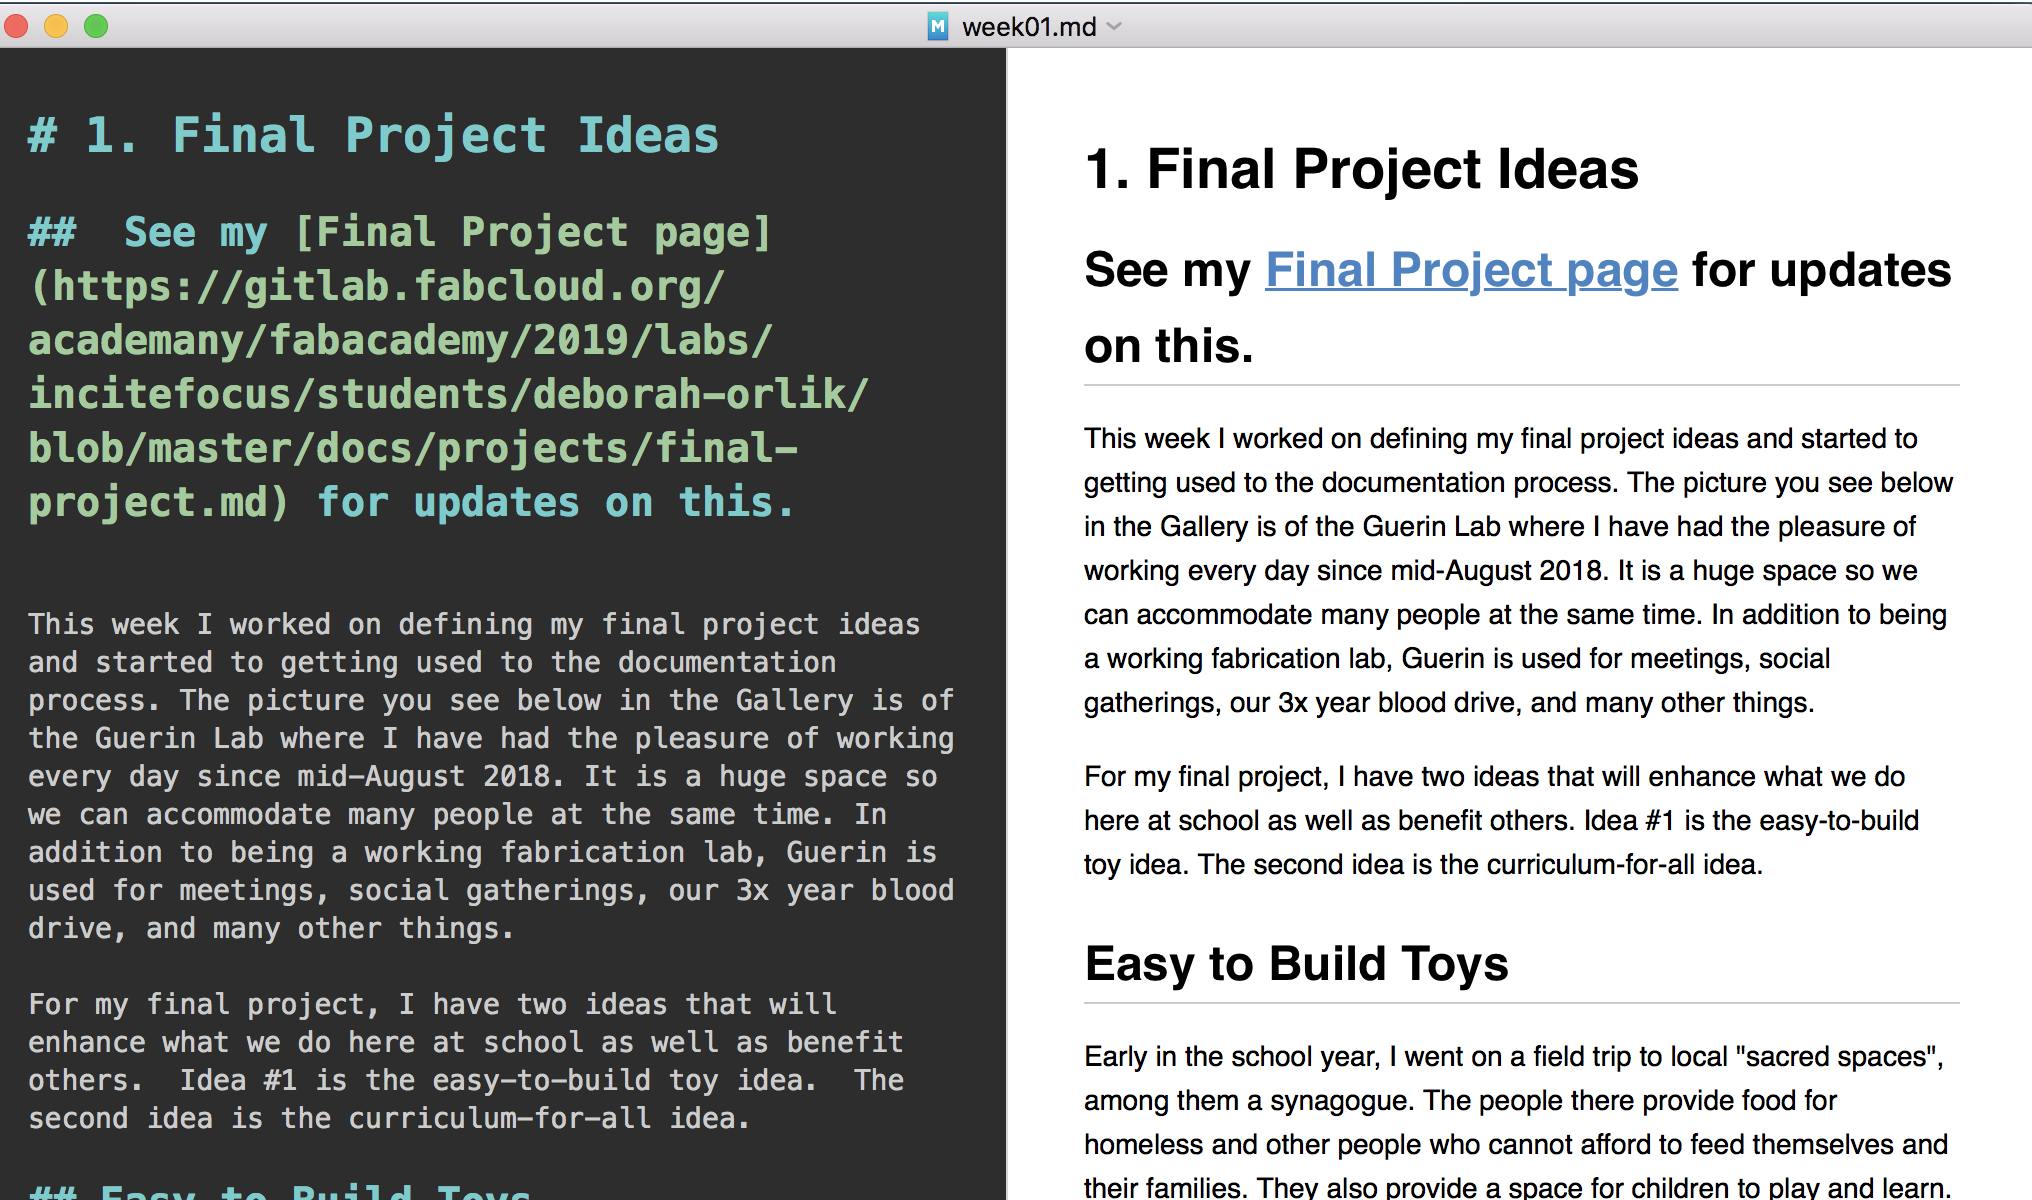
To link to a file, put your file name (or other words for the link) in brackets [ ] and then put your full http:// etc link url address in parentheses directly after the bracketed words.
…[FileName]…(https://gitlab.fabcloud.org/academany/fabacademy/2019/labs/incitefocus/students/deborah-orlik/blob/master/docs/projects/final-project.md)
If I took the … out, the link would attach itself to the FileName.
From Youtube
I watched several GitLab videos. Each of them gave me a bit of information that I was able to use later.
I watched this one Why Git? where I learned the reasons people should learn Git. Actually, their explanation is more complex than it needs to be. When we use GoogleDocs (something that many, many people do every day) we can do all of the things that Git offers: 1. We are in charge of versions and can revert to any version in the history of the document (practially character by character). 2. We can tell what day what changes were made and by what person (so we have evolutionary records), and 3. We can work collaboratively on the same document. We are not halted in our work because someone else has the document.
I watched this one about Gitlab workflow to understand the steps for going from typing what you want to say to getting it on your wiki. This one helped me understand what I did not initially understand about security (SSH handing).
After I watched a few videos, I figured out that GitLab has a [channel]{https://www.youtube.com/channel/UCnMGQ8QHMAnVIsI3xJrihhg).
Don’t forget to Commit Changes
If you don’t click the green Commit Changes button, you will lose all of your work. I learned this the hard way, of course.
Local Archive and Remote Archive on Gitlab
A repository is what we use to store your documents in GitLab and change them with version control. A repository is part of a project (our entire website/wiki), which has a lot of other features. When you create a repository in Git, it exists as a “remote” repository. It’s on the web. You can clone your repository to create a “local repository” on your computer and sync between the two locations.
We host our files in GitLab repositories by pushing your those files to GitLab. We can either use the user interface (UI), or connect our local computer with GitLab through the command line.
To configure GitLab CI/CD to build, test, and deploy our wikipages, we need file called .gitlab-ci.yml to our repository’s root. We didn’t have to create the yml (pronounced ya-mel) file because it was there for us.
We can store our different page files locally on our own computer and push them to the online GitLab when we are ready to publish. I can’t imagine how that gives us an advantage but perhaps someone is on a remote island where their internet is spotty while they are drafting their FabAcademy work. They would keep all of their work on their laptop, I suppose, and then clone that work into GitLab when they have good internet connection.
All git commands start with the word “git”, then have a git command, and then one or two arguments. If I want to clone my git repository to my laptop, I can do that through terminal:
type: git clone and then the url of the repository (which you can get by going to the repository, scroll down to the HTTPS copy button and click on the “copy” button).
Your entire repository will be copied to your desktop (or where you openned Terminal. Now you can work on your files on your computer without worrying about internet connection. Later you can upload them to your Gitlab on line.
Use git push to push commits made on your computer to your remote repository.
The git push command takes two arguments:
A remote name, for example, first
A branch name, for example, master
So you would run git push first master to push your local changes to your online repository.
Then you must “commit” just like pushing the “commit changes” button. git commit
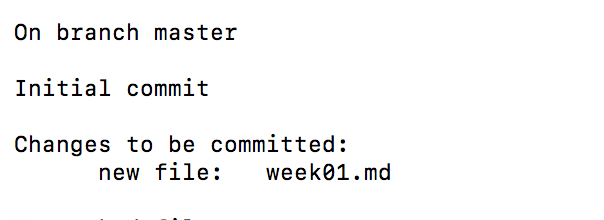
To check the changes in your local repository use this command in Terminal: git status
To add these changes or new files to the git lab repository use this command: git add -A
To record changes in your local repository to the remote repository use the following command and describe the commit, so you can read what has been changed or added. The commit is not visible in gitlab yet… git commit -m ‘description’
To upload local repository content to a remote repository you use this command, the changes or new files will be visible in gitlab. git push
When you archive your repository, you make it in-editable.
Learning More GIT commands
The best place to go to learn some GIT is Fiore’s tutorial He literally wrote the book on using Git for FabAcademy. This is a list of the important commands I reviewed from his book. I will not remember them so it’s a good idea to have them here for future reference.
- $ git
- $ git config –global user.name “deborah.orlik”
- $ git config –global user.email “dorlik@milkenschool.org”
- $ git init
- $ cd .git
- $ vi TextFile.txt
- $ git status
- $ git add; $ git add –all
- $ git commit -m “commit message”
- $ git add .gitignore
- $ git commit -m ‘added ignore list’
- $ git diff
- $ git checkout –TextFile.txt
- $ git rm
- $ git mv
- $ git log
- $ git push
- $ git pull
I read all of the git tutorials on the fabacademy tutorial page. I especially liked the cheatsheet tutorial because I learn well by doing the task with a little help. Cheatsheet
Signed student agreement
signed and uploaded
Useful links
Gallery