


For this week, we got introduced to Python language. Using it, I created a graphical interface to control a micro chip.
First of all, I downloaded and installed Pycharm, which is a special sofware to program using Python language.

Pycharm's interface looks like this.
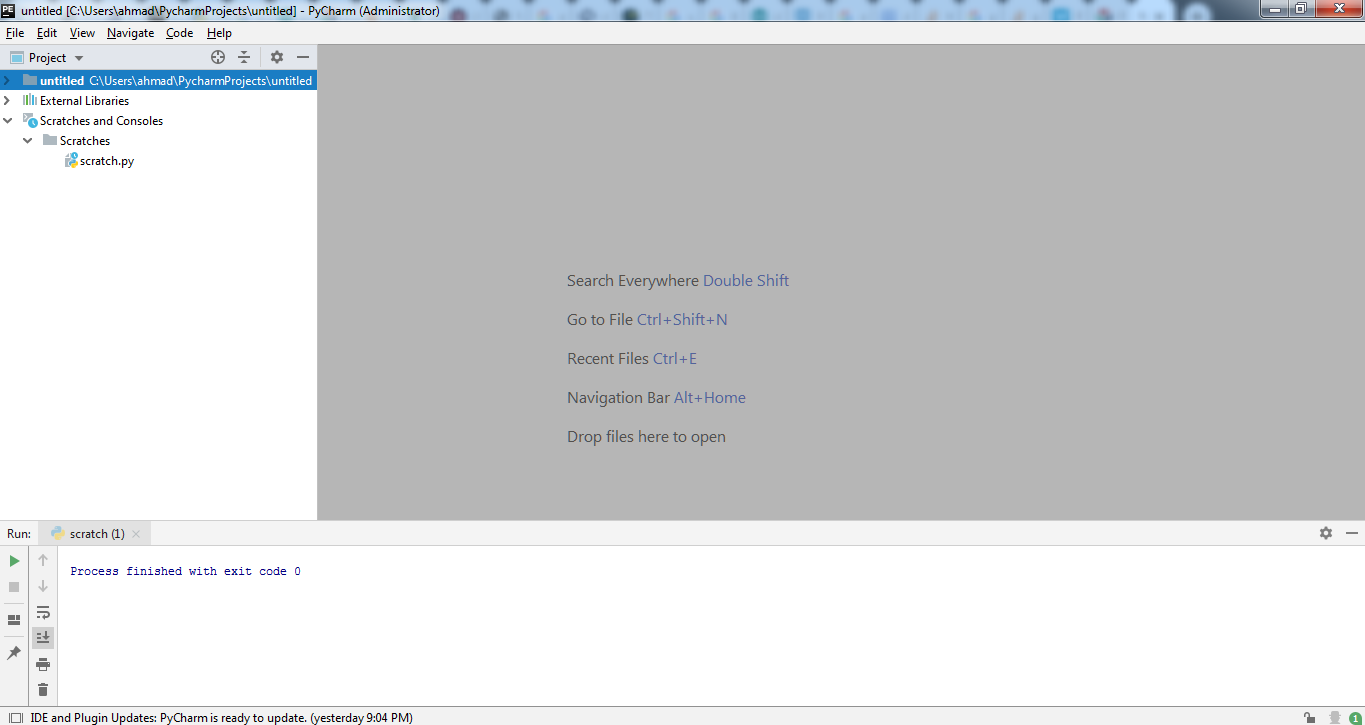
From file, click on New Scratch File. A list will appear, choose Python from this list then start writing your code.
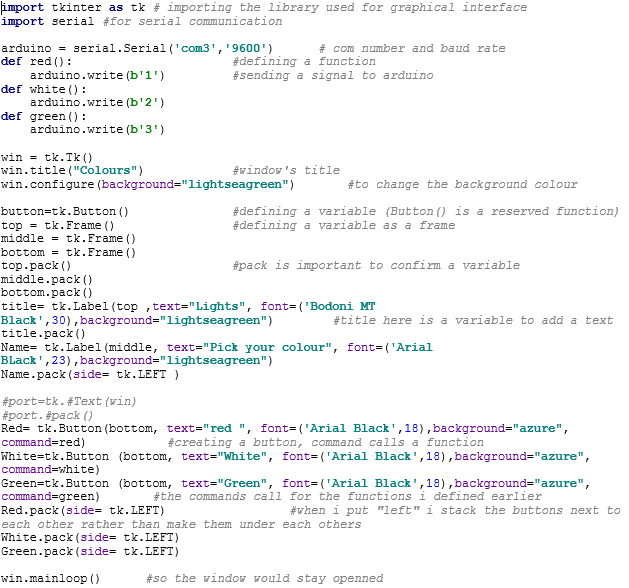
The first thing you need to write so you can make a graphical interface, is to include the graphical interface library using this command: import tkinter as tk
In Python, the symbol # is used for commenting on the code. And we don't use the symbol ; to end a line or a command.
After that we have to import the serial library: import serial
Then we define the Arduino for serial communication. arduino = serial.Serial('com3','9600'). When doing so, the port number and baud rate must match those of the transmitter we're running and on the same PC.
To define a window, we use this code: win = tk.Tk() to state that we're creating a window, and with Tk it's a grapgical window. The lower case tk is a variable that could be changed, but it is easier to use tk to follow up. This variable is going to be used next to each function related to the graphical interface.
Following my code in the picture below, all the terms on the left side are variables. And their right side term is a reserved function. So I am here making variables to later on "pack" to the graphical window. Packing any function, means that I am ordering it to appear on the window.
When defining a button, we name the button then use the reserved word, tk.Button() and inside the brackets, we deifne the appearance of the button and the text it contains. And finally, we connect the but on to a previously created function. And the functions in my case are about sending a signal to the Atmega board.
Last thing, I used this statement win.mainloop() so that when I click run the code, I will be able to see it because like this, it won't pop up then dissappear immidietly.
As you saw in the picture, I defined three functions to send three different signals. Then on the Arduino code, which is very similar to the Networking code, I created three conditions with the three signals. Each lighting an LED colour.
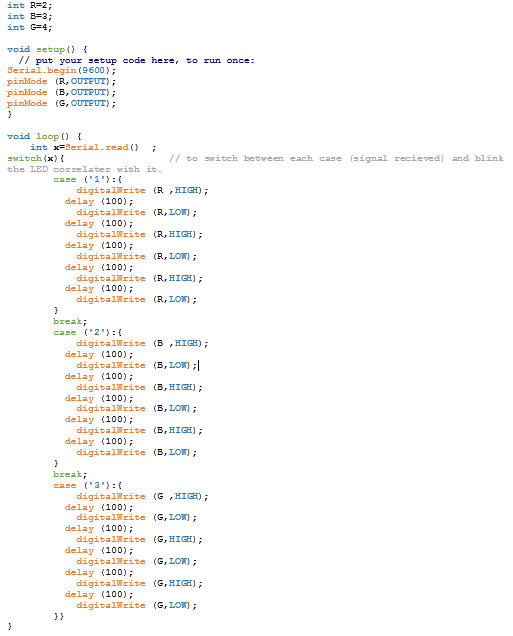
I used the same board I have used in the Networking assignment. And with the same LEDs attached to it. I connected my board to the computer with FTDI cable to enable serial communication. (notice that in Python code, the port number mentioned must match the port number of which the FTDI cable is connected to).
Finally, when the Arduino code is uploaded to the chip and it's now connected to the computer through FTDI, head to the Python code and click RUN (the small green triangle) and if everything is right, the window should pop up.
Files:
