Embeded Programming
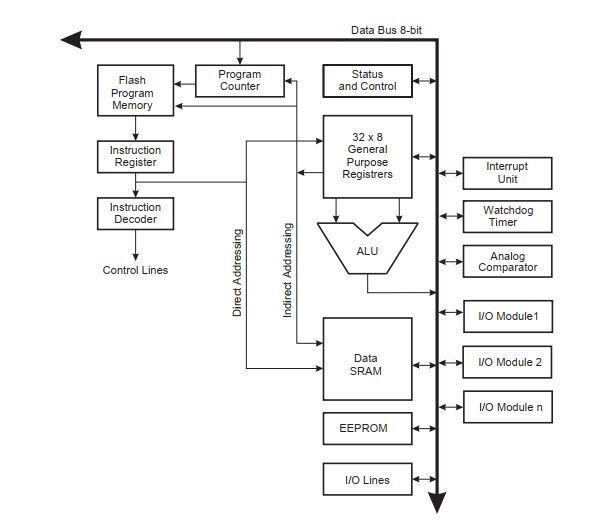
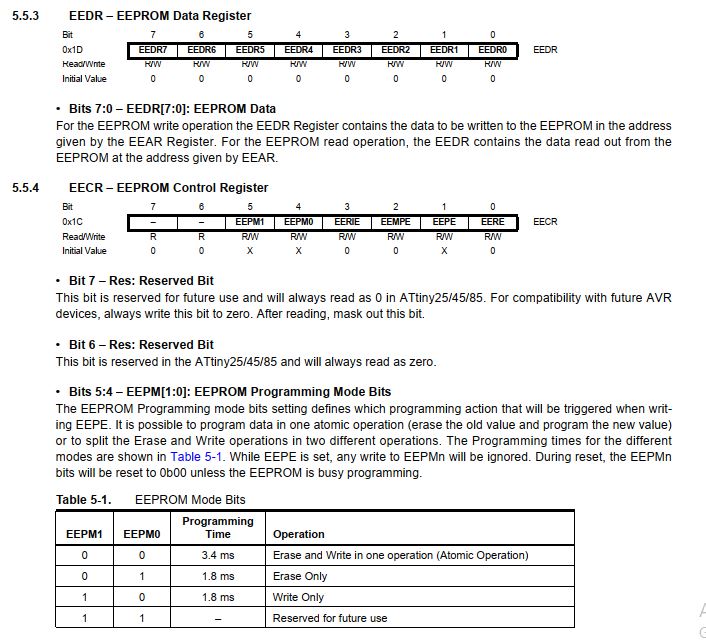
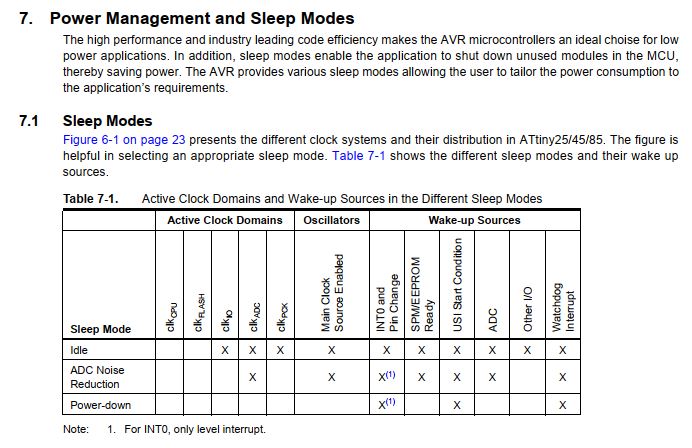
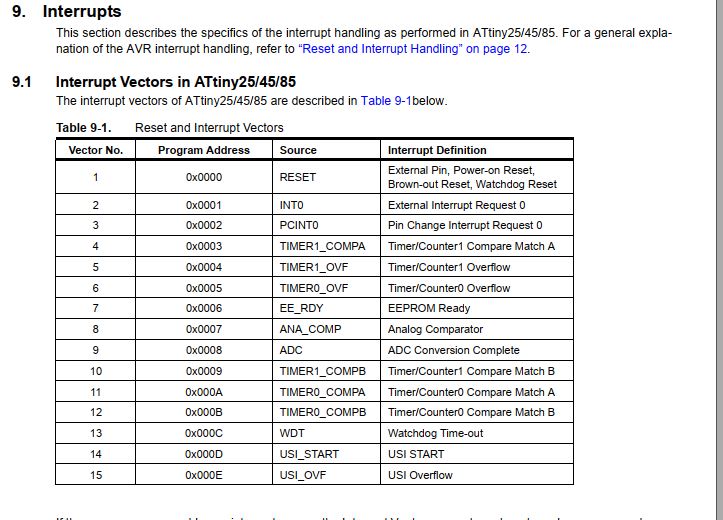
Before programming my hello board, I read the Atmel ATTiny 25/45/85 datasheet. The datasheet contains a lot of information useful to conceive your board like :
Following are a few different microcontroller architectures available in the market.
They are differentiated on the basis of their operation at the lower level. While 8051, AVR and PIC come in 8-bit, 16-bit and 32-bit, the ARMs generally come in 32-bit and even 64-bit. The 8051, AVR and PIC work closer with the I/O peripherals and can be lower power and faster as a result.
RISC (Reduced Instruction Set Computer) performs more instructions with lower cycles as compared to CISC architectures. CISC processors include the Intel x86 and 8051, Motorola 68000 and Zilog Z80 families.One of the key advantages to RISC is the load/store architecture which separates memory access and ALU operations (arithmetic logic unit). This improves cost, power consumption and heat dissipation, making them desirable for light, battery operated devices. RISC processors can be found in the ARM, AVR and PIC microcontrollers.
AVR is a family of microcontrollers developed by Atmel that use the RISC processors. AVR are most commonly used in the Arduino line of open source board designs. These are available in 8-bit tinyAVR, megaAVR and XMEGA. AVR32 is the 32-bit offering, which was intended to compete with ARM processors. These are not compatible with the original ARM and include additional SIMD and DSP instructions as well as audio and video processing features. One of the nice features of most AVR models is that they can reserve a bootloader region to store re-programming code. The code can then re-program through any interface available.
PIC stands for Peripheral Interface Controller. It is a family of microcontrollers developed by Microchip with a wide variety of options available. They are not strictly RISC processors as they differ very slightly in their operation. The product range includes the 8-bit PIC10, PIC12, PIC 16 and PIC18, the 16-bit PIC24 and dsPIC and the 32-bit PIC32MX, PIC32MZ, PIC32MM and PIC32MK. The 8-bit range focuses on lower cost, the dsPIC focuses on digital signal processing. The PIC32 series of microcontrollers uses the MIPS32-M4K core technology, which is a 32-bit RISC architecture. MIPS is a direct competitor to the ARM processors covering all types of applications in home entertainment, embedded and networking products, mobile, wearable and IoT devices.
The Intel MCS-51 (also known as 8051) is a CISC architecture. These are available in 8-bit, 16-bit and 32-bit microcontrollers. 8051 silicon IP cores are typically smaller size, lower power compared to ARM Cortex-M and MIPS processors. They are used in everything from USB flash drives to washing machines and complex wireless communications systems-on-chip
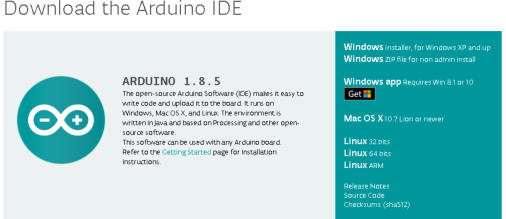
From the Arduino site I download the software and after installation, at the start of the program the interface is very simple and practical. First thing that i did is install arduino IDE.You can download arduino IDE from Here

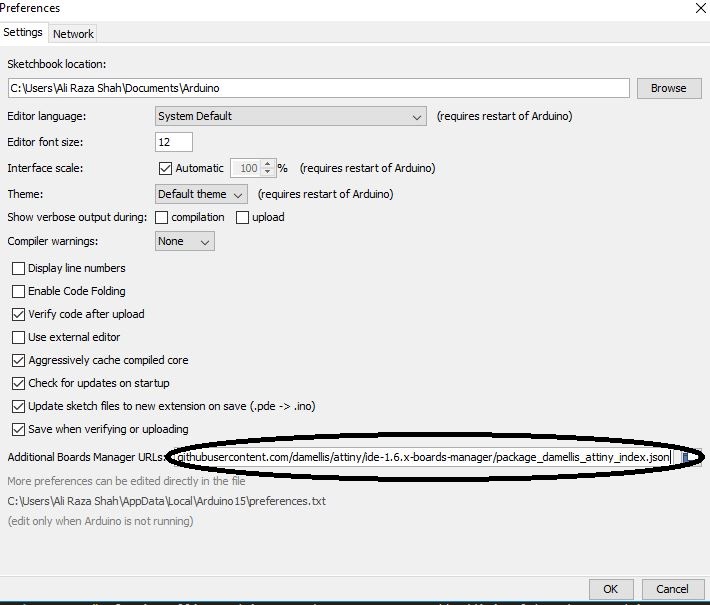
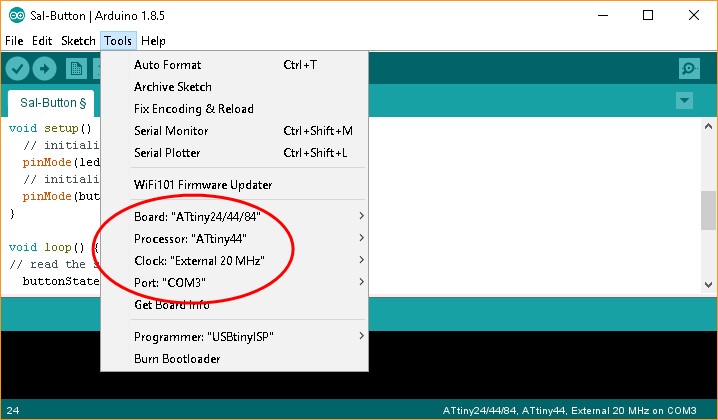
Afte installing Arduino IDE the next step to add additional boards to Arduino IDE. For that we need to Files than References and put this address (https://raw.githubusercontent.com/damellis/attiny/ide-1.6.x-boards-manager/package_damellis_attiny_index.json) to the Additional Board Managar. NOTE: you must have Arduino IDE 1.81 for this step.
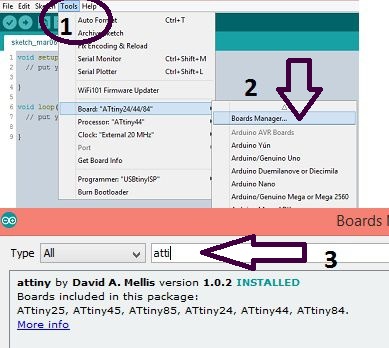
The next step is to add Attiny library. For that we need to go tools -> board -> board manager. Here we need to install the library shown in image given below.
Arduino Board setting
Atmel Studio
After installation of Atmel we seleect the installed templates from the tempaltes that we had. I selected Gcc C Exectuble Project Compiler C/C++
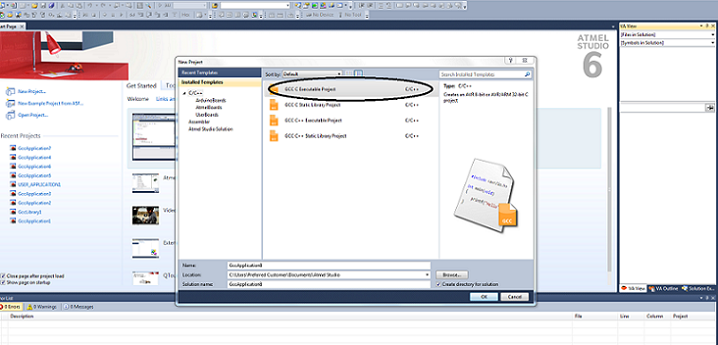
Gcc C Project C/C++
After Selecting Gcc C Exectuble Project Compiler C/C++ , i opened the project , after that the initial interface looks like below
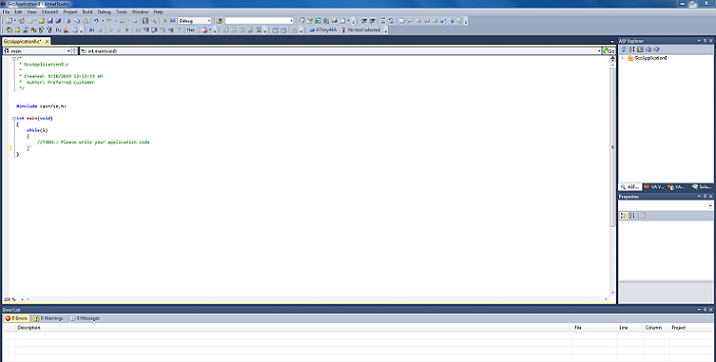
Interface
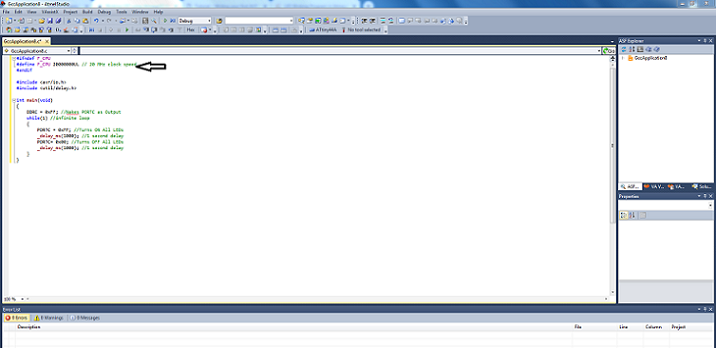
After that i make sure the clock pulse that is according to my board or not , but the clock is not set according to my board
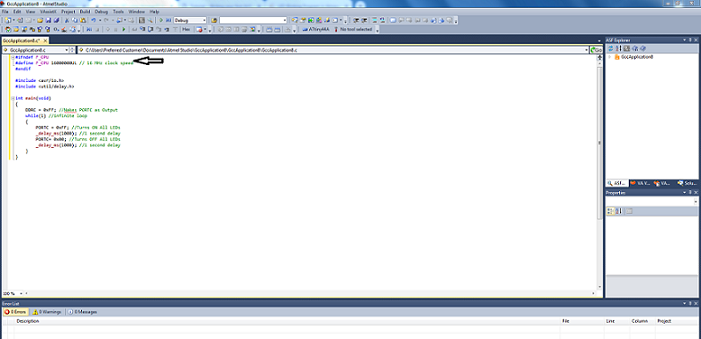
Clock
I changed 16 MHZ to 20 MHZ
20 MHZ
Chnaging PortC To Port A before that it give erorr

Before changing
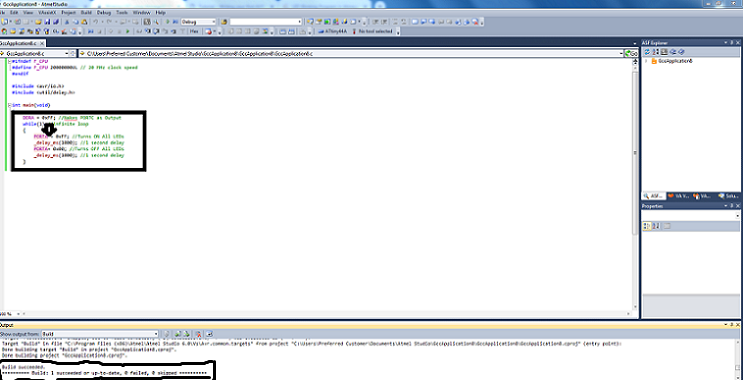
After changing
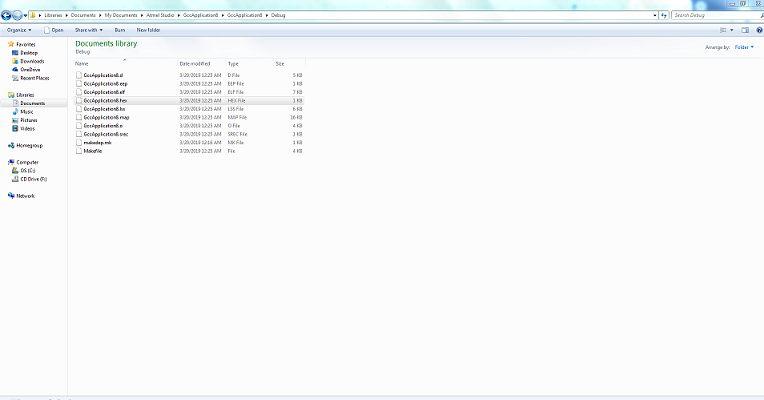
Hex File
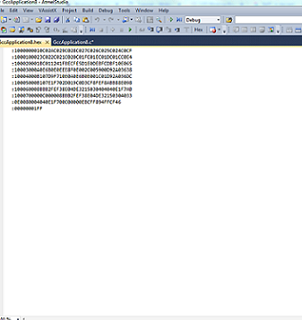
Hex File
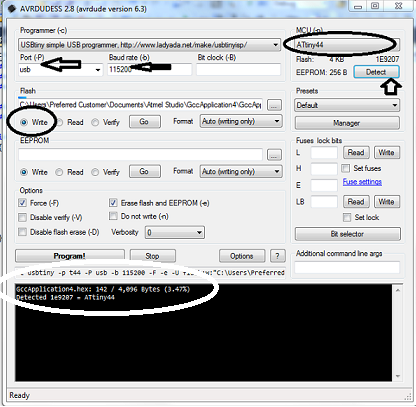
After generating hex file the next step is to give hex file to avrdude and check whether the board is detected by avrdude or not. and also did some changes following are the changes that i made
Hex File
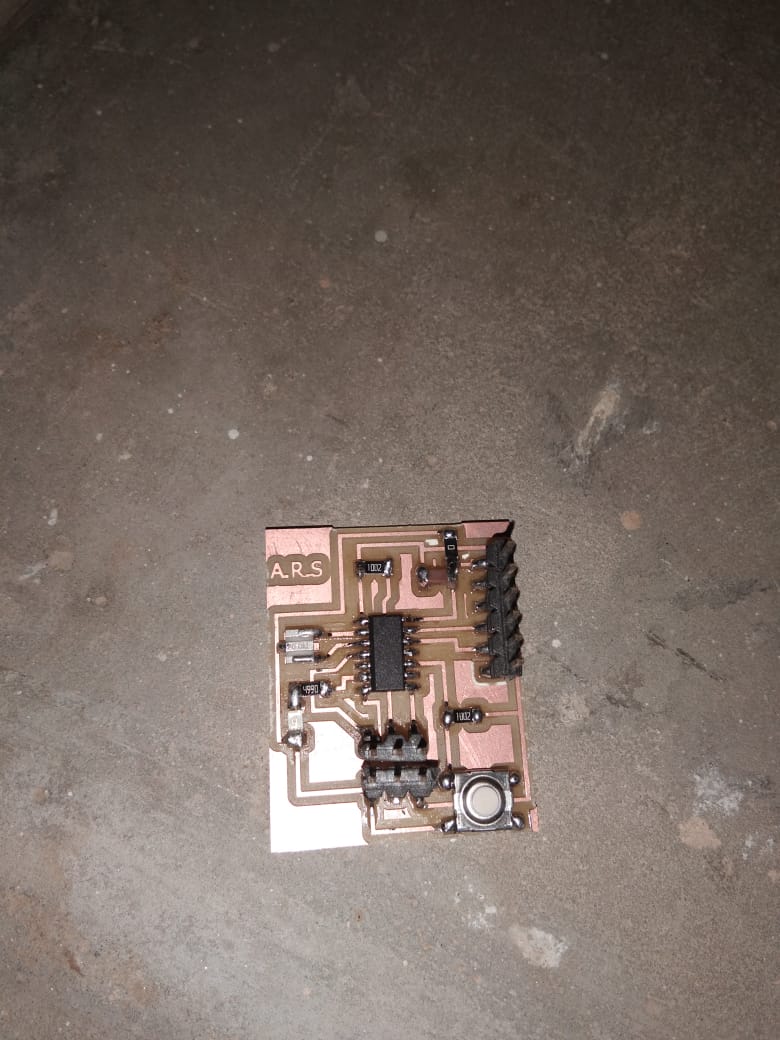
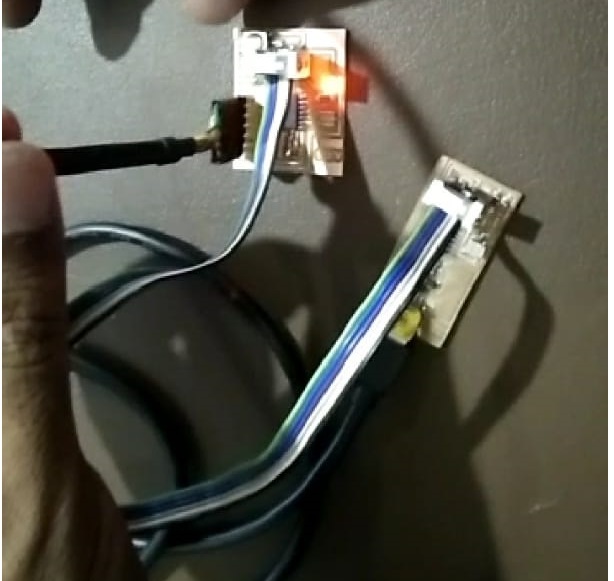
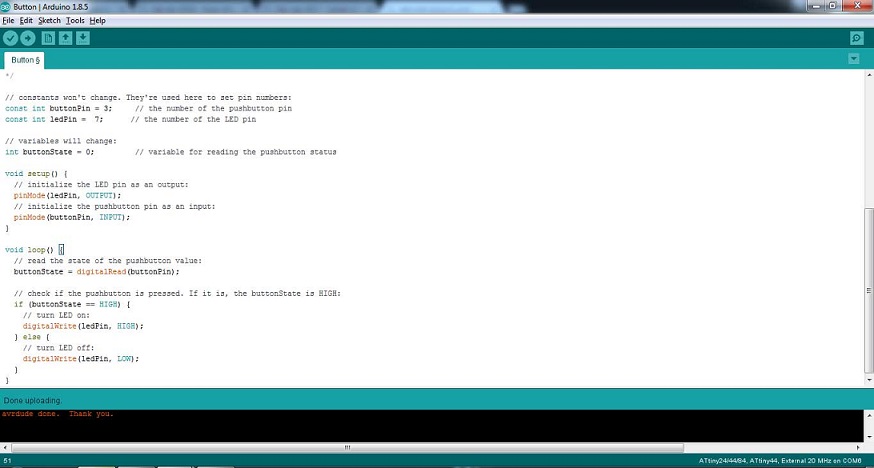
After all making changes the next step is program the board .
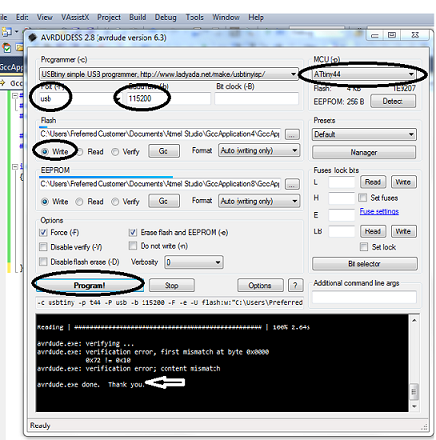
Done
You may Download all files from here
.png)

