2. Project management
The assignment of this week is to work through a git tutorial and to build a personal site in the class archive describing me and my final project. This weeks lecture was about project management. We learned about version control and the use of git. I never worked with Git or the terminal before therefore I first need to figure out how these work. Otherwise I won’t to be able to build my own personal site in the class archive. This however will be a challenge as well because it is ages ago that I learned HTML and I never really used it.
Files, planning and tools
Files
Planning
- learn how to use the terminal
- learn how git works
- learn how git lab works
- learn how to change the mkdocs template provided on git lab with own content
- changing the theme and colors on the git lab template to make it more my own
- learn how markdown works
- customize my own site with a theme
- learn how to install ruby and Jekyll
- learn how to install a theme with Jekyll
- figuring out how the Jekyll theme works
- implement the provided documents on git lab in my own website and change them
- learn how to publish this theme online with git
- write down everything in my own documentation
- understand how version control works
Tools
- MAC OS (version 10.13.6)
- Terminal
- Sublime text
- Google chrome
- Adobe Photoshop (for images)
Link with final project
This weeks assignments is linked with my final project because I will document my weekly assignments and my final project on this Fab Academy page. Each week I will try to use the same order of topics to keep my documentation consistent. That way it will be easier for me to look back.
Research and inspiration
This week I mainly used tutorials and explanations of my fellow Fab Academy students and Henk to get a better understanding of how to use the terminal, how to use git, how markdown works, and how to install Ruby and Jekyll.
links I used for editing documents
links I used to setup Jekyll and a Jekyll theme
- Jekyll installation Mac OS
- Jekyll quick start
- Jekyll themes
- Jekyll voyager theme
- Jekyll voyager theme by redVi
links I used to set up Git and GitLab
- git cheat sheet - fabacademy
- git
- git tutorial
- git lab tutorial: start using git on the command line
- GitLab tutorial setting up SSH](https://docs.gitlab.com/ee/ssh/)
- git lab tutorial: Creating and Tweaking GitLab CI/CD for GitLab Pages
What I did – step-by-step
As I mentioned in the introduction, I never worked with git, markdown or the terminal. I did have some courses on HTML ages ago but in the end I never made use of it. This week was therefore a big challenge. For to be able to track my learning curve I will explain step-by-step what I did in this documentation.
Step 1: how to use the terminal
On Thursday Henk gave us a workshop about the basics of the terminal. The main focus was on common commands to get around like: “ls -al, cd , pwd”. After the basics we used the terminal to instal git, make a connection to gitlab, setup the ssh-key. These commands brought me back memory lane and makes made me think of playing Frogger on the computer in DOS when I was a kid.
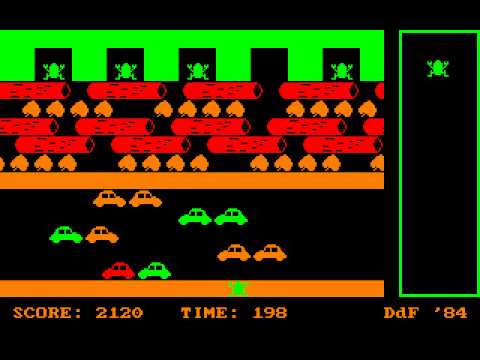 using the command line made me think of playing Frogger
Basic cheat sheet of common used terminal commands:
pwd 	--> this is where you are in the folder structure

ls 		--> this command shows an overview of all the files in the folder you are at

ls - al --> this shows all the files including the "hidden" files in the folder (lists attributes)

ls - l 	--> this provides a list with all the attributes

man -ls --> manual comment

q 		--> gets you out of manual mode

cd 		--> change directory, this way you can move around in folders and paths

cd - 	--> you go back one folder in the path

cd ../../ 	--> go back 2 directories

touch [name] --> create a file, name the file between the brackets

mk 		--> command to make something like a folder or file

mkdir 	--> this makes a folder (directory therefore the dir)

rm 		--> command to remove something like a folder or file

rm -rf 	--> this removes a directory with all files in it, be careful with this command!

ctrl c 	--> force quit - this way you get out whatever is happening
Step 2: how to connect to Git and work with GitLab
The Fab Academy uses GitLab for the student archive. All students have their own place setup at the gitlab.fabcloud server. This is the link to my git lab fabcloud. The first step is to install git, I used the fabacademy tutorial for this. To check if Git is already installed on your computer just type in git in the command line. It turned out I already have git installed on my computer. If not you can use these commands:
git config –global user.name “Joe Smith”

git config –global user.email “jSmith@mail.com”
2.1 Setting up SSH key and .pub folder
In class Henk helped us to setup the SSH-key and I used the GitLab tutorial for further details this is used to communicate between servers in a safe way. This way I don’t need to supply my username or password each time. It’s, as far as I understand, a remote program with an encryption key. We generated an public and an encryption key.
2.2 Cloning the git repository locally
To create a local repository on my own laptop I used the Git Basics tutorial to make it work.
git clone git@gitlab.fabcloud.org:academany/fabacademy/2019/labs/waag/students/mick-vanzeijl.git
2.3 Add, commit and push
The local clone of my git repository is connected with my GitLab. Now I can locally change my documents and I can push them when I want to my git repository online. With commands in the terminal I can communicate with GitLab. The basic idea is that you have version control, so when ever I change something
git status 	--> this shows me the status of git, so which files changed, if there's something waiting to be push or pulled etc.

git add .  	--> this adds all the files that were changed to the list, it's like making a grocery list

git add [filename] --> this only adds this specific file to the grocery list

git commit 	--> this moves the files I added from my workspace to my local repository

git commit -m 'message' --> you always need to add a message to your commit. Easiest is to use -m 'message' otherwise vim opens.

git commit -a --> this adds and commits in one go

git push 	--> this pushes the files to the remote repository on GitLab

git pull 	--> works the other way around from push, so it updates my local workspace with the latest version

git fetch 	--> this is almost the same as git pull, but git fetch updates the local repository
Step 3: changing the mkdocs and md files
With these main commands for git and my local repository, I can start making changes in the given mkdocs template. I know some basic HTML and CSS so within the mkdocs and md-files I looked for the theme tag. I noticed that for the Fab Academy mkdocs setup we could only use three different basic themes. The theme used from the start is material. I found this theme bit too basic, so as first assignment I wanted to change the color and the font. In the mkdocs.yml file I found the basic setup for the theme so in this file I change the font to “Open Sans” and the colors to “blue grey” and “teal”
theme:
  name: material
  # see https://squidfunk.github.io/mkdocs-material/getting-started/#color-palette
  palette:
    primary: "blue grey"
    accent: "teal"
  font:
    false
    text: "Open sans"
    code: "Ubuntu Mono"
3.1 How to work with Markdown
My colleagues often talk about markdown but I never used it myself. To be able to edit content on the md-files I needed more understanding of how this works. Luckily it’s quite easy to learn. I use this markdown guide whenever I get lost.
H1 --> #
H2 --> ##
H3 --> ###
H4 --> ####
H5 --> #####
H6 --> ######
Italics -->*asterisks* or _underscores_.
Bold --> **asterisks** or __underscores__.
Bold and italics --> **asterisks and _underscores_**.
Link --> [I'm an inline-style link](http://fabacademy.org/2019/labs/waag/students/mick-vanzeijl/posts/2019/01/23/week02.html)
Image --> 
code --> ```code```
esc active code in markdown --> \{\% code \%\}
Step 4: how to install Ruby and Jekyll to use a Jekyll theme
Because I found the mkdocs themes too basic I wanted a nicer theme, Henk suggested for to use Jekyll because the have nice themes and because, as far as I understand, Jekyll works well with GitLab because you can build it on Git Repository. The themes looked really nice so I decided to go ahead and use a Jekyll theme for my site. To be able to get these themes working I needed to install Ruby and Jekyll I never did anything like this before. My fellow Fab Academy student Joey helped me with these steps in the terminal. I know from talking to my students at my university that sometimes with these kind of plug and play options it’s better not to think too much about what you’re doing. So with that in mind I installed Ruby and Jekyll by following all the steps ofthis tutorial: Jekyll installation Mac OS. It’s a good tutorial because I got everything installed with no problems.
4.1 Installing a Jekyll theme
Theme-wise it I really liked the voyager theme by redVi on the Jekyll themes site. I downloaded the zip-file of this theme. After my download I wanted to see how it looks locally but I could get it to work. Somehow it didn’t work because when I clicked on the index.html (what I was used to) it showed a very weird version ofthe theme. My fellow Fab Academy student Heidi helped me and explaided that for Jekyll to work you first have to set up a server and build the site because it needs to convert the markdown docs into html. She gave me two commands, which I followed and it worked.
jekyll serve ---> this one sets up the server for Jekyll

jekyll build ---> this one build the site and transfers md docs into html
4.2 Changing the theme
The next step was to change the theme into my own style and add my own content. In the beginning I was really confused because I was editing in the HTML files and every time I would locally build my site it would switch back to older versions or somethings would change and others wouldn’t.
The problem: my site would go back to the old version
Everytime I locally build the site it looked different than I thought it would. The problem was that I was editing the HTML instead of md-files
How I solved it: The place to change the content is at the md-files, so not the HTML-files. It took me a while to totally grasp the idea that Jekyll transfers these md-files into HTML. Therefore every time I would build my site it would overwrite the changes I made in HTML.
The problem: I was editing in the site-folder
This problem is related to the one above. I was editing HTML in the site-folder but when I give the command Jekyll build it builds the site in the ‘site-folder’.
how I solved it: This means that I can edit everywhere else except for the ‘site-folder’ as this is create by Jekyll with the build command. So I can change some HTML but not the ones that are in the ‘site-folder’. The main lesson learned is not to work in the ‘site-folder’.
4.3 Adding the weekly assignments to my theme
My first step was to copy and paste the weekly assignment folder md-files from my local repository GitLab in the post folder of my theme. However when I did Jekyll build nothing changed. So I needed to add the top part, as I saw in the posts from the theme, to my Weekly Assignments and change the details. The posts are placed in order by date.
bg: "wk2_notes.jpg"
layout: post
title:  "2. Project management"
crawlertitle: "project management"
summary: "Project management"
date:   2019-01-23 22:00:47 +0700
categories: posts
tags: ['Week 2']
author: micky
The problem: I didn’t know how to set the order of posts the way I wanted.
To get an idea of how the Jekyll theme works I just went around and changed stuff. To get the posts of my weekly assignments in the right order of weeks I used the date tag to order them. So I wrote down fake dates to make sure the weeks were placed in the right order. However, these dates are also published on the page of each post. This made it really confusing because all the weekly assignments would go back in time. So, I wanted to use the real dates for each weeks and still have them in the right order.
How I solved it: With a little bit of help from Klaas-jan I found out that I could reverse the order in the markdown document. So I added reversed to the code below. Now I have the right dates and the right order.
\{\% for post in site.posts reversed \%\}
4.4 Adding menu items
To add an item to the menu on top I noticed that I could just add an md-file to the main folder. However for it to really show up I need to add an “active” tag on the top, like ‘active: about’
---
bg: "MICKY.gif"
layout: page
title: "About me"
crawlertitle: "about me"
permalink: /about/
summary: "Hello, I'm Micky"
active: about
The problem: Title bug: the title of my site changed back to its previous name(s).
I changed the title of my project a couple of times, first of all because I couldn’t choose and secondly because in the beginning I used the title as Weekly Assignments but navigational wise this was confusing. As a result I changed the main title three to four times. Every time I would change two different documents it would jump back to the last used title.
How I solved it: This was a weird bug in my theme and it took a while to figure out how to solve it. And I’m not sure if I really solved it because in the end I did a work around. I just changed it to the final title. After that I did a couple of times some test changes in two different documents. Until it stayed with the the last and final title. After this ritual it didn’t change anymore.
Step 5: How to move my site to GitLab
After I customized my the locally, where everything worked and looked nice, the next step was to push my local repository to Git to get in online on my Fabacademy page. This didn’t work like a dream. So I upgraded my troubleshooting skills.
5.1 How to build, add, commit and push my theme to GitLab
As mentioned above to be able to push something to Git you first need to add and commit the files. However what I didn’t realize with my theme I first had to build my site before I could commit and push it. So my steps to update my file repositories and have a working website are:
Jekyll serve && Jekyll build

Git Status

Git add .

Git commit -m 'write a meaningful commit message here'

git push
5.2 Change the .gitlab-ci.yml
Before I can get my theme working on GitLab I need to change something in the .gitlab-ci.yml file. Because the setup of Fab Academy uses mkdocs and I use Jekyll. Henk provided us with the yml-file to replace at GitLab. As far as I understand it creates a public folder so it can show my theme on the Fab Academy URL.
pages:
  stage: deploy
  script:
  - mkdir .public
  - cp -r * .public
  - mv .public public
  artifacts:
    paths:
    - public
  only:
  - master
What I did wrong – and how I solved it
My site didn’t look as nice online as locally.
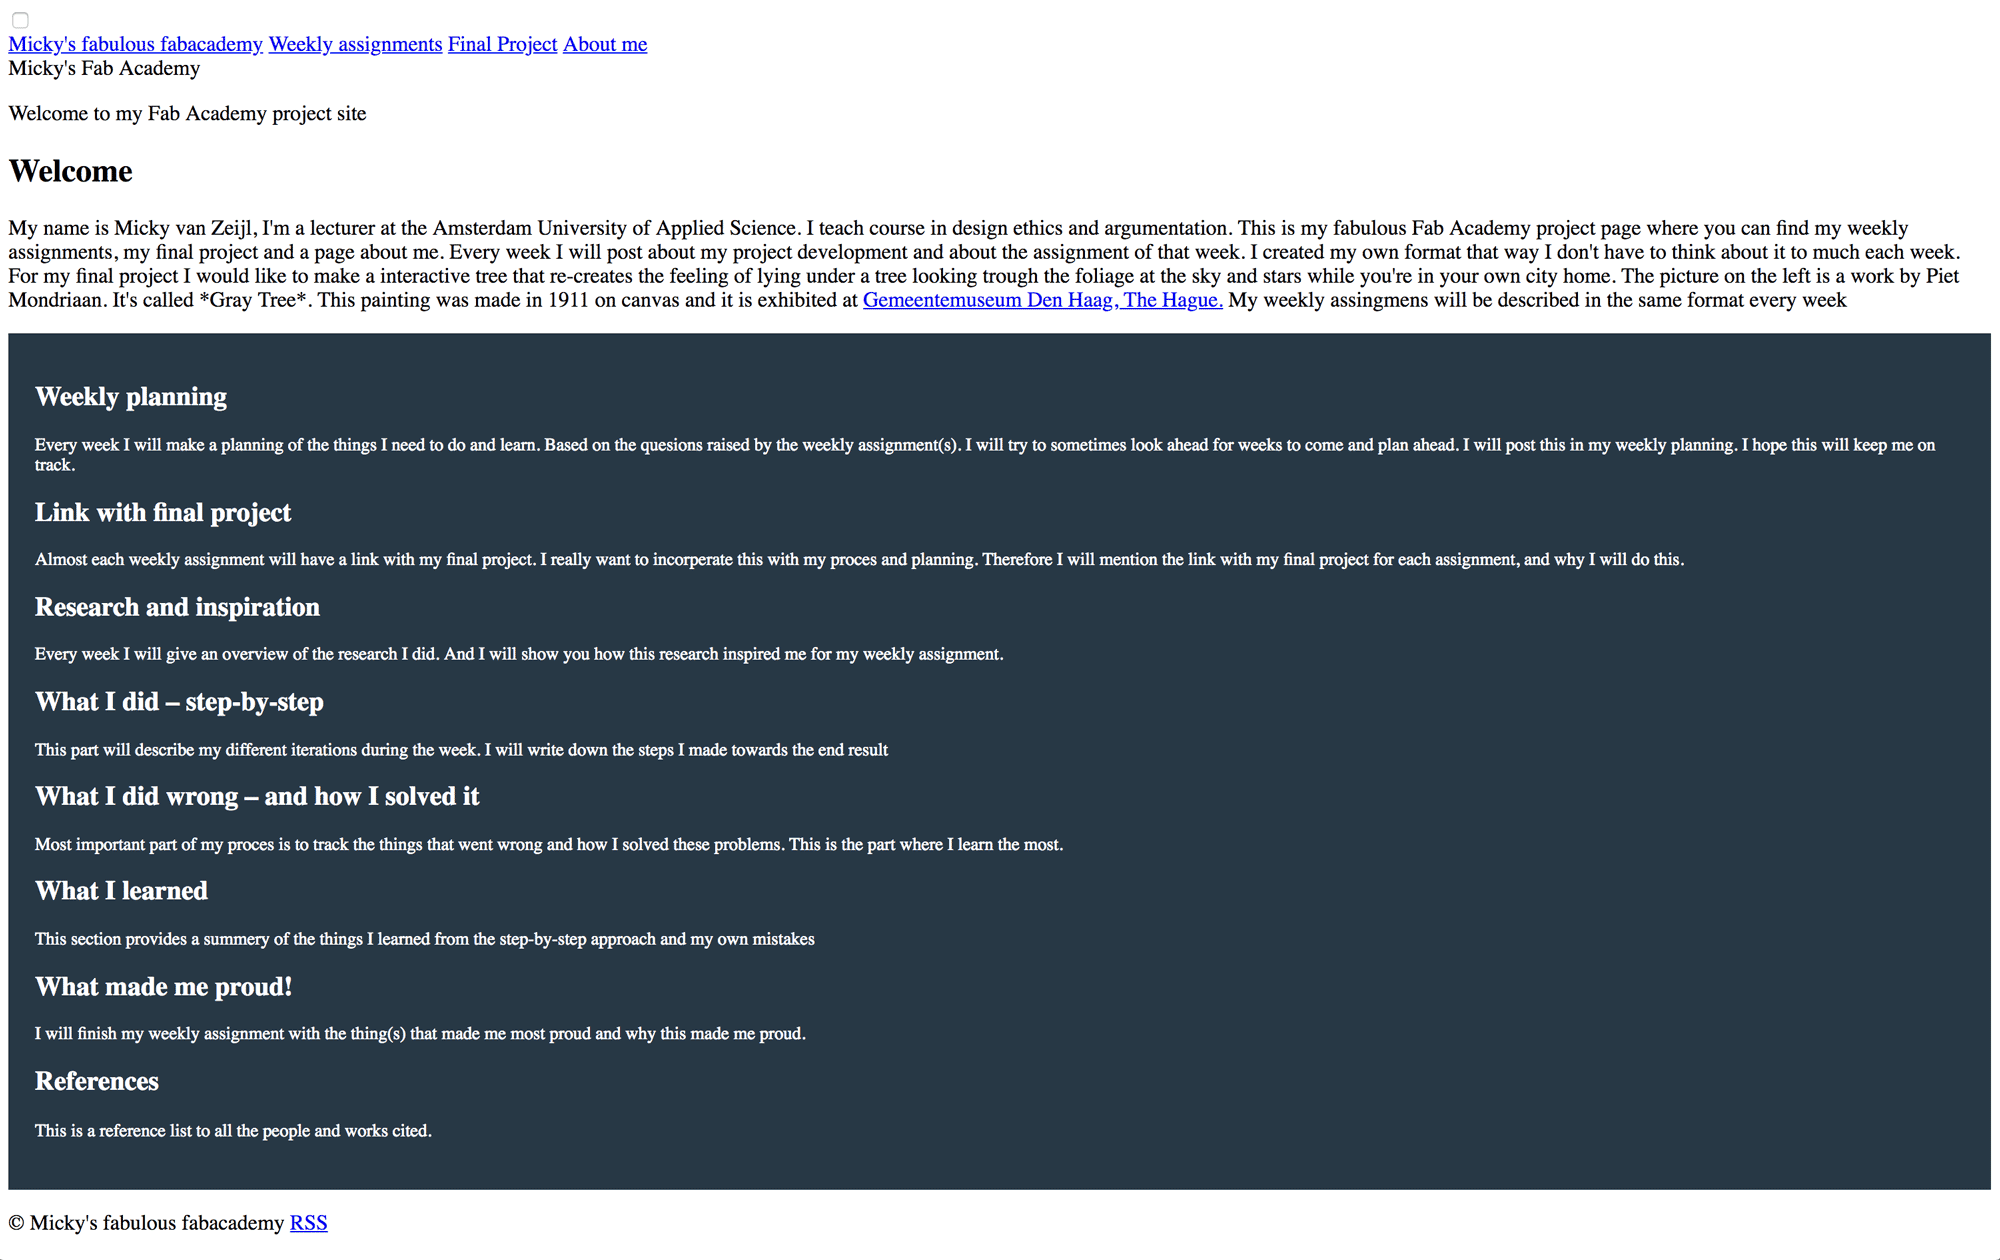 screen shot of my first Fab Academy project page, something went wrong
With my first push to GitLab my site didn’t look the same at all. I only saw my home page without any theme of links.
How I solved it: I could only solve this with help from Klaas-jan. He saw that I had to add the location of my site-folder to the gitlab-ci.yml file. Because Jekyll builds my site in the site-folder and not the root of my repository at GitLab. So I edited the gitlab-ci.yml file. When I did this I saw my home page with the design of my theme.
- cp -r _site/* .public
The problem: The links in the menu didn’t work
After I managed to get my home page in the right theme online I was able to click the menu items but when ever I click these I got a 403 FORBIDDEN message for each menu item. I saw that each menu item linked to the wrong address.
How I solve it Again I could only solve this with help from Klaas-jan. He saw as well that the URL wasn’t correct. It was easy to fix as I had to change something the baseurl and the url in the ‘config-file’. So that’s what I did, I edited the ‘config-file’ with the following details.
baseurl: "/2019/labs/waag/students/mick-vanzeijl"

url: "http://fabacademy.org"
The problem: There was no content on each main page
After I managed to get my links working on the pages. There was no content. First I thought this was a permalink problem or maybe a deploy/build problem. Anyway it showed nothing while the links were right.
How I solve it: While I was troubleshooting this at my work my colleague Sonja said; ‘is there content in your site-folder on Gitlab?’. I assumed there was because I pushed my local repository to Git. However there was nothing. It turns out that the ‘gitignore-file’ ignores the ‘site-file’ in my local repository. So I had to force add my ‘site-folder’ to the commit.
git add -f _site
This command added the ‘site-folder’ and after I pushed it to GitLab my site worked. It’s a bit weird because I still have this problem although sometimes it does work and other times I have to force add changes from the ‘site-folder’.
What I learned
This week I learned a lot. I started from scratch and I managed to build a working personal site with Jekyll. These were a lot of steps in my learning process.
Don’t overthink too much - just follow the tutorial
I learned to choose your “learning battles”. My goal in this case was to have a nice theme for my Fab Academy site, it wasn’t my goal to learn how Ruby or Jekyll works. Therefore I just followed the tutorial without thinking about what I was doing. So when I was installing Ruby, Gems, HomeBrew, Jekyll etc. I just followed the Jekyll installation manual on the Jekyll site and it worked. What I learned is that it’s not necessary to know exactly what you did and how something works, sometimes you just need to follow a good tutorial.
How to debug
I learned how to debug when you come across a problem. And I also learned that the system of debugging really goes against my own character as I’m naturally all over the place. However my boyfriend learned me some basic useful steps:
- don’t assume.
- when you debug you need to me precise, know what you’re doing and where you are.
- change something small in one place (so don’t change stuff all over the place not following any structure).
- test these small changes before you change something else.
- change something small again and test, follow this lead but don’t assume you’re on the right track.
- patience: don’t give up, keep going till you find the bug
What made me proud!
I’m very proud that I’m able to use the terminal and Git and that I sort of understand how it works. In addition, I’m proud that I managed to build my own site for the Fab Academy and that I was able to customize it with a Jekyll theme.
Credits and references
Credits
I got help from Henk and my fellow Fab Academy students (extra help from Joey and Heidi, thanks!) with the setup of GitLab, installing Ruby and Jekyll, and setting up a Jekyll theme. My colleagues Justus and Sonja helped me with troubleshooting GitLab and my boyfrined Klaas-jan, he helped me a lot with the setup of my site in GitLab. He taught me how to debug and how to troubleshoot.
References
- Image on the left: My own notes of lesson 01: Project management (2019).
- Image of Frogger: Old Classic Retro Gaming. (n.d.). DOS Game: Frogger Jr. (1984). Retrieved from https://www.youtube.com/watch?v=YfJjYqVZPJU
- Theme used for this Jekyll site: Jekyll voyager theme by redVI](https://github.com/redVi/voyager)