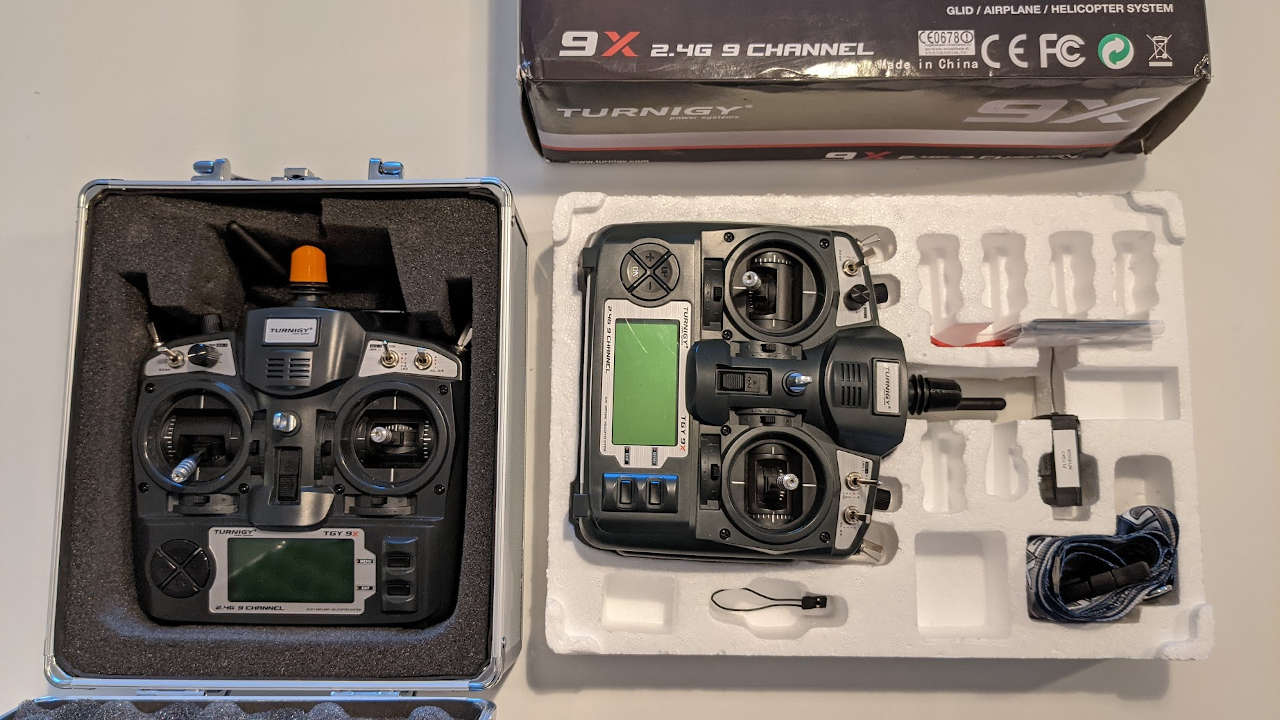
Turnigy 9x Radio Controls
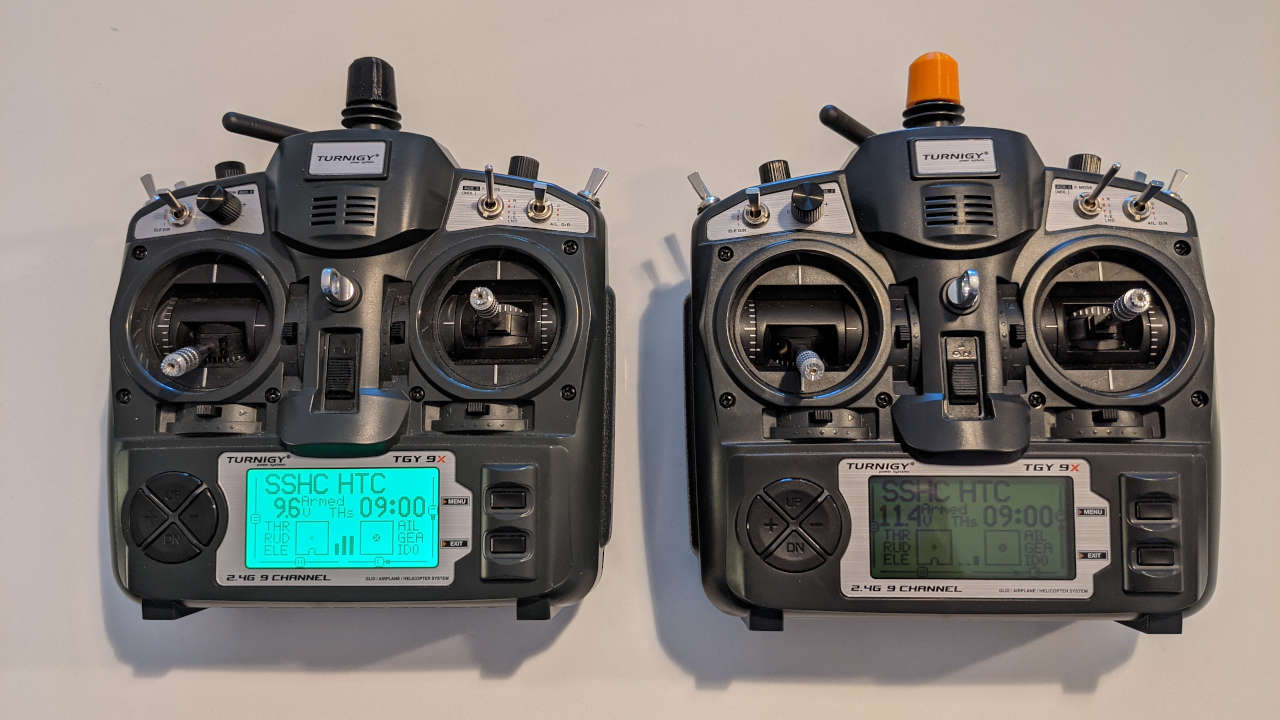
We have two Turnigy 9x Radio Controls. They were hacked by the MiG (Multi-rotor interest Group) adding USB programmer boards to burn and run open source firmware. Custom 3D printed parts were also added. These hacks allow the radios to be programmed and backed up via desktop computer software and to use removable TX modules that plug into the back of the radio.
These radios are very versatile and with their DIY-Multiprotocol-TX-Modules installed can control almost any radio controlled craft.
Note: as of 2020 and onward, if you already have a Turnigy 9x radio, these hacks are worth doing. If you can get a Turnigy 9x radio for less than $10 these hacks are worth doing. It’s not recommend buying a new Turnigy 9x radio, there are much cheaper options now available for much less work and investment. Here is a list of better options for less investment:
- Radiomaster TX12 ~$80.00 pot gimbals, basic Multi-protocol, external module bay
- Radiomaster T8 Lite ~$40.00, pot gimbals
- Radiomaster T8 Pro ~$80.00, LCD screen and hall gimbals
- Radiomaster Zorro ~$100 Hall gimbals, 4in1 full Multi-protocol option, back lit monochrome LCD screen, external nano module bay (I suggest a ELRS module), small size game control format.
- Radiomaster TX16S Hall ~$200.00 Hall gimbals, full Multi-protocol, touch screen, external JR module bay, full size radio.
Features
- Compatible with OpenTX 2.1.9 branch and earlier releases see issue
- Compatible with er9x firmware (Supports serial communication with Multiprotocol-TX-Module)
- Also exists as FlySky 9X
- Atmega64
- 16 model memory
- 5 flight modes
- A lot of mods supported (audio, voice, telemetry, rotary encoder navigation, …)
References: OpenTX Radios
WARNING! Be aware that cell towers and high power 2.4ghz transmitters can severely impact control range of these radios, especially in a urban environment. Avoid flying in the beam path of cell transmitters and microwave dishes on buildings and towers. If you do lose a control link, hold the radio high above your head to regain control and note the position of the controlled model, and avoid entering that area again. Don’t ask me why I know about this issue.
Batteries
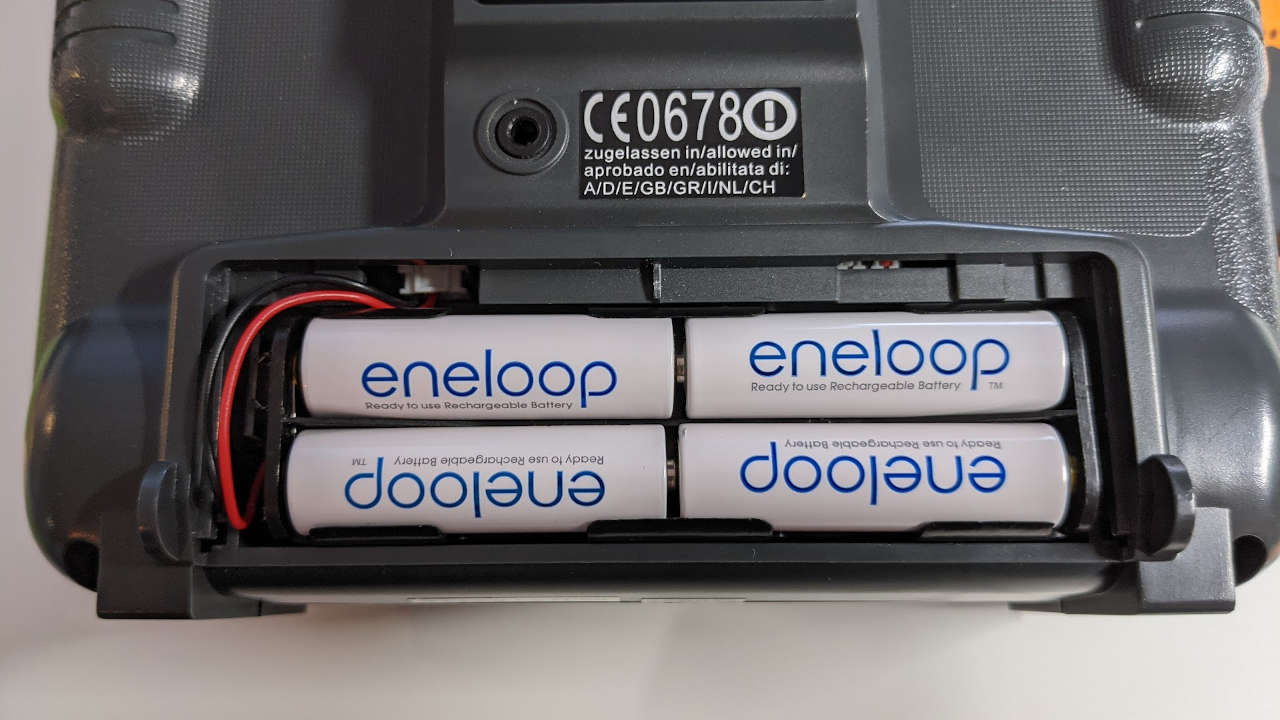
Currently both Turnigy 9x radios are powered by 8 AA NiMH Sanyo Eneloop rechargeable batteries. The low battery warning is set at 9.20V. Make sure to charge the batteries before you head out to fly.
If you use alkaline AA batteries you should increase the low battery warning to 9.7V
The low battery warning can be set on the radio by navigating to: Menu, Radio Setup, Alarms, Battery warning
Using other types of batteries to power the radio is possible, if doing so you need to research what battery setup is best and adjust the low battery warning. It is not recommended to use protected battery cells, they can cut off mid-flight and your aircraft will fly away and or crash. The Open RC forums has a few threads discussing alternate battery setups.
Trainer Setup
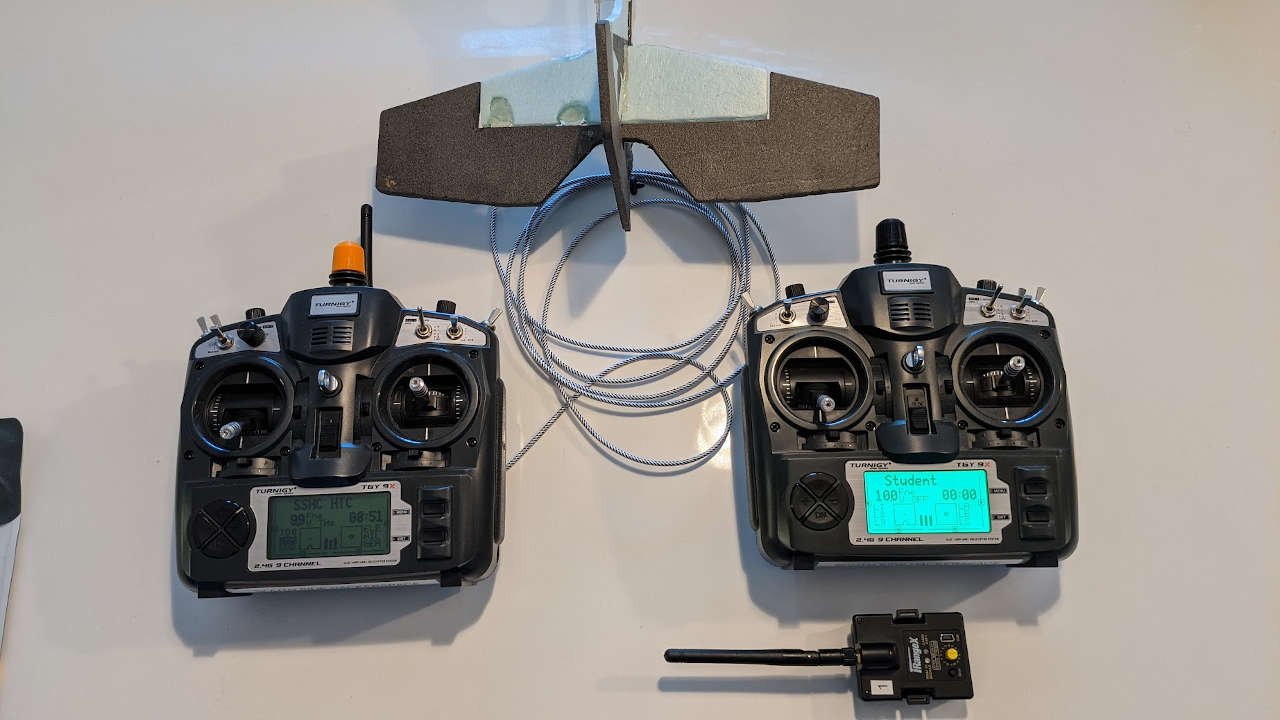
One of the best ways to learn to fly is to have a more experienced instructor RC pilot fly a model with instructor radio and connect a second student radio via a cable. This is sometimes called buddy boxing. The instructor radio is the one that is setup to fly the aircraft. The secondary radio is connected to the primary radio by a 3.5mm male to male jack mono or stereo audio cable. When the instructor holds up the momentary TRN switch on their radio the controls get passed over to the secondary student radio passing aircraft control to them. When the instructor releases the momentary TRN switch, controls are brought back to the instructor. The TRN switch serves similarly to a dead man’s switch, if for any reason the switch is released by the instructor the control returns back to the instructor.
Trainer Checklist
- Remove the TX module from the back of the student radio
- Power up the student radio and select the “Student” model from the model select menu.
- Power the student radio off
- Power up the primary instructor radio and select the model to be flown. Flight checks should be performed at this time, verifying all controls work properly on the instructor radio.
- Next the audio cable should be plugged into the powered off student radio, the student radio will power up when the plug is inserted.
- The other end of the audio cable should be plugged into the already power up instructor radio.
- Flight checks should be performed again, verifying all controls work properly on the instructor radio.
- Finally, the instructor should hold the TRN switch up and the student should use their student radio controls to do flight checks with their radio, verifying all controls work properly.
For more details on how to program and setup your own Turnigy 9x radios for buddy boxing, see the Trainer Chapter of the Er9x Manual.
Channel Order
The channel order on the shared Turnigy 9x Radios has been set to AETR. This is because most drones that we have been flying use this channel order by default. In addition our iRangeX IRX4 Plus STM32 DIY-Multiprotocol-TX-Module expects to see input in AETR channel order and will convert that order to be compatible with models of various channel orders we are connecting. For aircraft using servos this means that channel mapping and servo connections would be:
- A= Ailerons CH1
- E= Elevator CH2
- T= Throttle CH3
- R= Rudder CH3
This may or may not match the labels on your RC receiver in your aircraft. Changing the channel order to something other than AETR has caused a lot of confusion with buddy box connections and drone controls for us in the past. To avoid this confusion and be able to share equipment and help each other learn to fly it is suggested to use AETR channel order.
Firmware Hacking
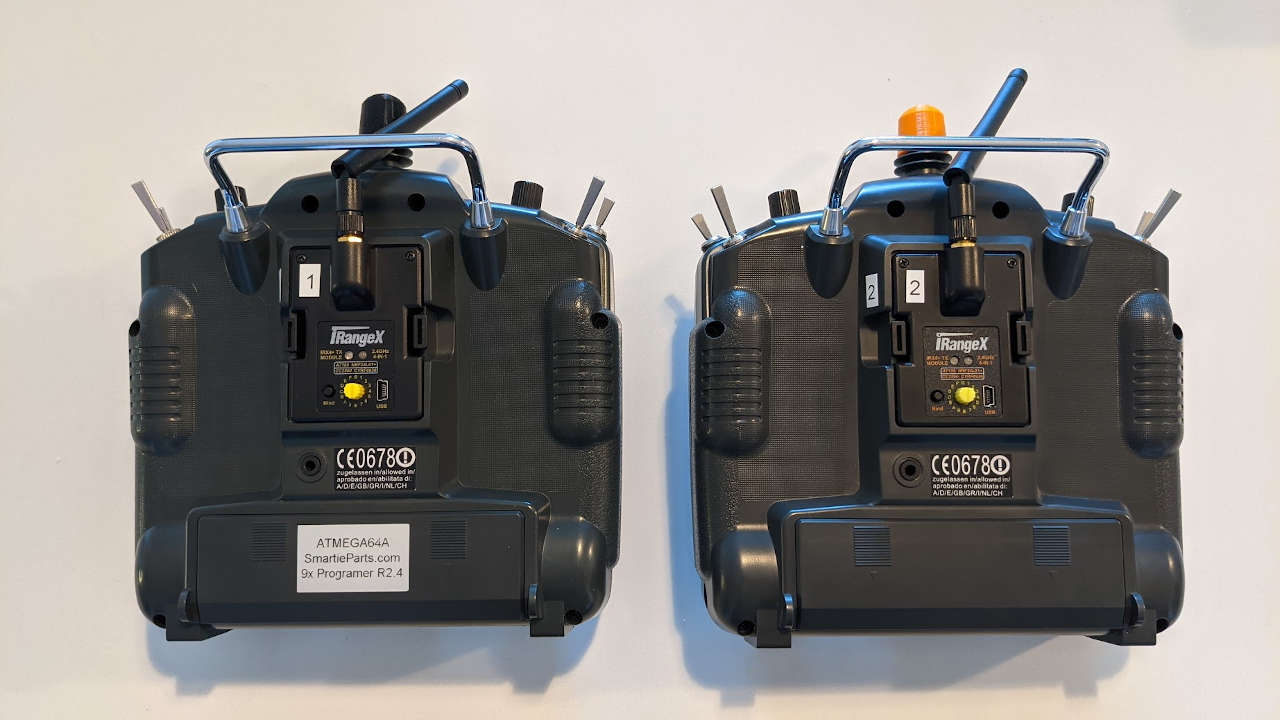
One of our radios has a SP Basic Rev 1.1 (9X Programmer. The other radio has a SmartieParts 9x Solderless Programmer Board Rev 2.4 with back light driver.
The correct USB ASP drivers are needed to use these programmers to burn firmware and communicate desktop software. Here is the driver needed. Note that the driver automatically installed by Windows 10 will not work. Zadig usb drivers also work well. Zadig settings that work are: Options, List all devices. Look for USBasp and replace with libusbK latest version. I am not sure but once libusbK installed it sticks to the USB port that you are plugged into and if you change to another port it will not work, this may also be related to the stupid increasing com# assignments windows assigns.
Windows 10 is the easiest OS to use to program and burn firmware from for the Turnigy 9x radios. I suggest using windows 10 instead of Linux to work with the Turnigy 9x radios. I spent weeks trying to get the older software needed to program the 9x radios and got nowhere.
You have two options of firmware hacks: OpenTX or Er9x
OpenTX
OpenTX 2.1.9 is the only version that runs on 9x radios.
Running newer versions of OpenTX will result in corrupted Eeprom
Here are some guides on installing OpenTX firmware on to a 9x radio: Turnigy TGY 9X Conversion to OpenTX Turnigy 9X Flashing with OpenTX
Er9x
Er9x is older but has awesome serial comm control for Multiprotocol modules. It seems to be a fork of OpenTX or a predecessor to it. This my preferred firmware for the Turnigy 9x radio.
I followed this guide to install Er9x on out Turnigy 9x radios Flysky TH9X family of transmitters
As suggested at the link above I used er9x Er9x test versions
I downloaded:
er9xProv822w.zip 03-Jan-2021 11:31
Basically select the newest eepe and er9x_.zip files from the er9x test page. The latest er9x_.zip file contains all the different versions of er9x for all possible mods. Our shared radios use ATmega64 processors, so we simply use the er9x hex file.
The other firmware with extended file names would be used if we de-soldered and replaced our microcontroller chips with more a powerful one, like an ATmega128 or ATmega2561. Note that newer Turnigy 9x radios come with ATmega128 microcontrollers, so if you are hacking your own Turnigy 9x radio control check the chip when you have it opened up.
Choosing between Er9x and OpenTX 2.1.9
If you have a Multiprotocol module, all the extra work of installing er9x is worth it for the serial control feature. OpenTX 2.1.9 is a lot more user friendly to install and runs great on both windows and Linux, but for some reason the serial control of Multiprotocol modules has not been added to OpenTX 2.1.9. It seems there is really only one active developer for er9x and eepe MikeB, who develops on windows only. I asked MikeB if there was a newer version of eepe that would work on modern Linux systems, he said no and I could build the dependencies myself. I tried to do this, but I could not get the updated dependencies. After several day of trying I gave up. However I developed a work around for Linux using ersky and eepe built for Linux by another user, see below.
eepe
Windows 10 eepe Install
On Windows 10, I then unzipped eepe.exe, ran it, and it threw a system error: QtNetwork4.dll not found. Searching the openrcforums I found that you have to have to install the official non-test version of eepe first from (http://www.er9x.com/)[http://www.er9x.com/]. That installs all the dependencies etc. Then I copied the test version of eepe over the file located in C:\Program Files (x86)\eePe. Launching eepe now worked.
Linux eepe Install
Installing eepe is a bit of a pain, but it can be done. Here’s how I did it on Linux Mint 20:
I found a post by a user on open rc forums. User rbecq posted a version of eepe that works on Debian Linux! Eepe for Linux Mint 64
After installing eepe I also needed to install avrdude for Linux as well. I used software manager to find avrdude and install it. I then searched my file system for avrdude and found it here:
/usr/bin/avrdude
In eePe I set the following:
- File, Preferences
- Default Channel Order AETR
- AVRDUDE Location /usr/bin/avrdude
- Click OK
- Burn, Flash Firmware to TX
- Select latest er9x.hx file downloaded from test version site. Or use the file below under Firmware and Model Files below
- Window pops up AVRDUDE finished correctly
- Radio says “alert bad EEprom Data Press any key” (this is normal, don’t freak out) go ahead and press any key.
- Radio displays “formatting EEprom”, Er9x splash screen displays!
To program models via eePe
- click load models/settings
- click an existing model to edit it. blank number to make a new model
- click help, users guide, read the Er9x Manual. It’s a lot to absorb, but you’ll be learning how to program a rc radio with the same format as all modern OpenTX radios, which now dominate the market.
- If you are using a Multiprotocol module, note that the Er9x Manual pre-dates it, so you wont find any mention of it.
Firmware and Model Files
Here is the Er9x Firmware burned on our radios. These files are a backup and will help others hack their own Turnigy 9x radios. Use eePe to burn these firmware and load model files onto a new Turnigy 9x radio.
Er9x firmware hex file
Hacker1 Model file
Hacker2 Model file
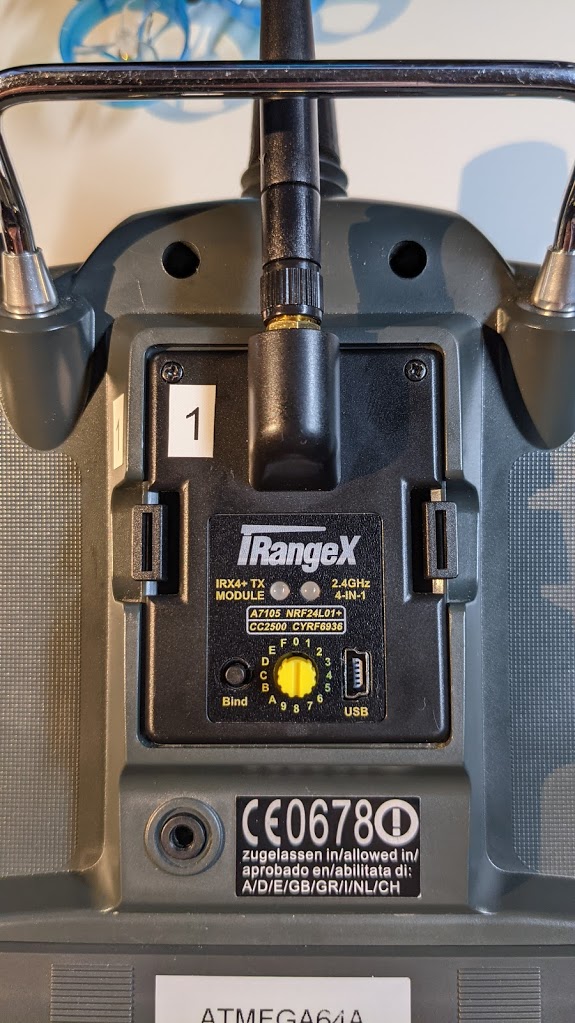
DIY-Multiprotocol-TX-Module
We have iRangeX IRX4 Plus STM32 DIY-Multiprotocol-TX-Modules that may be used in our Turnigy 9x Radios. The modules are removable, but keep in mind binding to controlled models will need to be re-done if the modules are moved to another radio.
Multiprotocol Module Setup
In this example we’ll use the FrSky D8 protocol to control a tiny whoop quad-copter, research your protocol if different.
- Copy, select, or program a new model
- Press and hold the Menu button, navigate down and select: Model Setup
- Navigate to: Protocol
- 1st Chan: 1
- RxNum: your choice 0 thru 15 (using a different number across models will prevent controlling wrong model)
- Set Proto: MULTI
- Protocol: FrskyD
- Type: None
- Power: high
- Freq.: This is a fine tuning for better range on FrSky protocol, see HOW TO “FINE TUNE” FREQUENCY T16 TX16S MULTI-PROTOCOL MODULE
- Bind: select to start binding process
- Autobind: N for bind once, Y if you want to autobind with many different drones with this same model
- Range: Select to perform a range test while reading telemetry RSSI. Usually you would also select Power: Low as well, unless doing a full range test out to 1km or more between the model and the control.
Multiprotocol Module Firmware
Firmware for all of our iRangeX IRX4 Plus STM32 DIY-Multiprotocol-TX-Modules were updated on 1/10/2021 with multi-stm-serial-aetr-v1.3.1.92.bin. The Flashing process is documented at (https://github.com/benlye/flash-multi) if a new protocol gets added that we need to control a RC model.
Old Model Multiprotocol Module Firmware Update
Older (2017?) iRangeX IRX4 Plus modules do not have a bootloader installed. To update these older modules see the official GitHub DIY-Multiprotocol-TX-Module instructions: Compiling and Flashing (STM32) After flashing the bootloader onto this old module, it now is up to date current 2021 shipping modules, and can be flashed and updated via the built in USB port.
Simulator Setup
A regular mono or stereo audio cable with 1/8” male jacks on either end works well for setting up your controller with a simulator. See Turnigy TGY 9X - Using as a controller for Liftoff Sim.
The FLYSKY SM100 USB adapter works well too.
Or you could use a wireless usb receiver dongle in conjunction with the DIY-Multiprotocol-TX-Module
Making Custom Splash Images
Format as 124x64 px 24bit bmp files. Basically black and white pixel art. Load onto radio using OpenTX 2.1 companion software. Name in this format #####.bmp do not exceed 5 characters in file name.
3D Printed mods
The stock antenna is routed through the radio and if de-soldered and removed the stock TX module can be pulled out of the back of the radio. This 3D printed cover allows the antenna to be moved to the removable module. Both shared 9x radios have this mod. Follow the instructions on the thingiverse page to complete the mod.
Turnigy 9X OEM TX Module Pluggable Module Modification
3D printed cap to cover the stock antenna hole: Turnigy 9x antenna cap
Serial Communication
With er9x firmware installed on the Turnigy 9X you can set the module switch to 0 (serial comm) and the protocol to be used can be programmed in the model settings. When you select a specific model the protocol you need will be set by serial communication to the module.
PPM (Yellow Knob)
If you want to use the iRangeX IRX4 Plus STM32 DIY-Multiprotocol-TX-Modules in a radio that does not support serial communication, and has a JR style module bay on the back with PPM output, you can turn the little yellow knob on the back of the radio to select different radio control protocols.
Default Protocols in PPM Mode:
| NO. | Dial | Green light | Protocol | Sub_protocol | Option | RF Chip |
| 0 | 0 | Off | Serial | - | - | ALL |
| 1 | 1 | Off | FLYSKY | FLYSKY | 0 | A7105 |
| 2 | 2 | Off | AFHDS2A | PWM_SBUS | 0 | A7105 |
| 3 | 3 | Off | HUBSAN | - | 0 | A7105 |
| 4 | 4 | Off | FRSKYD | - | 0 | CC2500 |
| 5 | 5 | Off | FRSKYX | CH_8 | 0 | CC2500 |
| 6 | 6 | Off | S-FHSS | - | 10 | CC2500 |
| 7 | 7 | Off | DSM2 | DSM2_22 | 7 | CYRF6936 |
| 8 | 8 | Off | DSMX | DSMX_22 | 7 | CYRF6936 |
| 9 | 9 | Off | DEVO | - | 0 | CYRF6936 |
| 10 | A | Off | J6PRO | - | 0 | CYRF6936 |
| 11 | B | Off | ESKY | - | 0 | NRF24L01+ |
| 12 | C | Off | HISKY | Hisky | 0 | NRF24L01+ |
| 13 | D | Off | KN | WLTOYS | 0 | NRF24L01+ |
| 14 | E | Off | V2X2 | V2X2 | 0 | NRF24L01+ |
| 15 | F | Off | ASSAN | - | 0 | NRF24L01+ |
| 16 | 0 | On | MJXQ | E010 | 0 | NRF24L01+ |
| 17 | 1 | On | FRSKYV | - | 0 | CC2500 |
| 18 | 2 | On | AFHDS2A | PPM_IBUS | 0 | A7105 |
| 19 | 3 | On | MJXQ | X800 | 0 | NRF24L01+ |
| 20 | 4 | On | YD717 | YD717 | 0 | NRF24L01+ |
| 21 | 5 | On | SYMAX | SYMAX | 0 | NRF24L01+ |
| 22 | 6 | On | SLT | - | 0 | NRF24L01+ |
| 23 | 7 | On | CX10 | CX10_BLUE | 0 | NRF24L01+ |
| 24 | 8 | On | CG023 | CX10 | 0 | NRF24L01+ |
| 25 | 9 | On | BAYANG | BAYANG | 0 | NRF24L01+ |
| 26 | A | On | MT99XX | MT99 | 0 | NRF24L01+ |
| 27 | B | On | SHENQI | - | 0 | NRF24L01+ |
| 28 | C | On | FY326 | FY326 | 0 | NRF24L01+ |
| 29 | D | On | FQ777 | - | 0 | NRF24L01+ |
| 30 | E | On | HONTAI | HONTAI | 0 | NRF24L01+ |
| 31 | F | On | Q2X2 | Q222 | 0 | NRF24L01+ |