


3D Scanning and Printing
3D Printing or additive manufacturing is a process of making three dimensional solid objects. Creating solid 3D objects based on additive manufacturing, and, it is the opposite of subtractive manufacturing process. Additive manufacturing is the process of making objects using the concept of adding layers of that material (E.g. PLA or ABS plastic) which combines to create the desired product. So, we can say that Additive manufacturing is "material joining process", and from 3D model it fabricates the product usually layer upon layer. This whole process requires a CAD software (E.g. SolidWorks, Rhino 3D, Fusion 360, InkScape, and many other CAD softwares) in which we design our own demand 3D object with different aspects. And, then give that CAD file to 3D printer (E.g. Ultimaker, Prusa i3. Available in our FabLab Khairpur ). While, subtractive manufacturing is a process to make, design, or construct 3D objects by cutting materials away from a block of solid object. It also done by cutting the material manually but, mostly it done with a CNC machine. (Examples of CNC machines: Epilog Laser Cutter Machine, Shopbot, and Roland SRM-20. Available in our FabLab Khairpur ). As "Additive Manufacturing" also known as 3D printing, in the same way "Subtractive Manufacturing" is known as CNC machining.
3D Scanning is a process of capturing shapes of an object using a 3D scanner, this technology allows us to create a 3 dimensional object. By using 3D scanning device we will be able to capture a digital copy of physical object, then the resulted file will be a 3D file on computer, which can be printed later, using 3D printer. For me, there are two relevant techniques of 3D scanning, "Photogrammetry" and "Light-based Scanning". Photogrammetry, This method is based on taking several 2D pictures around a particular object from different angles using a digital camera or camera of smartphone. Then combining these 2D images into a single 3 dimensional image using a specified software. Light-based Scanning also known as Laser Scanning, It is a device which measures the angle of the reflected lasers which translate into different coordinates of an object then into a 3D mesh, later on the resulted 3D mesh file feed to 3D printer.
Tasks of the week
-
Group Assignment:
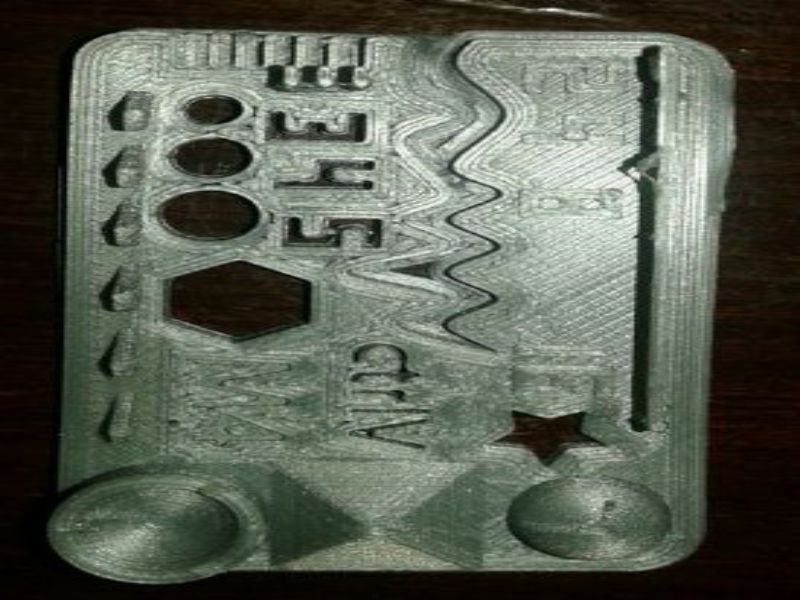
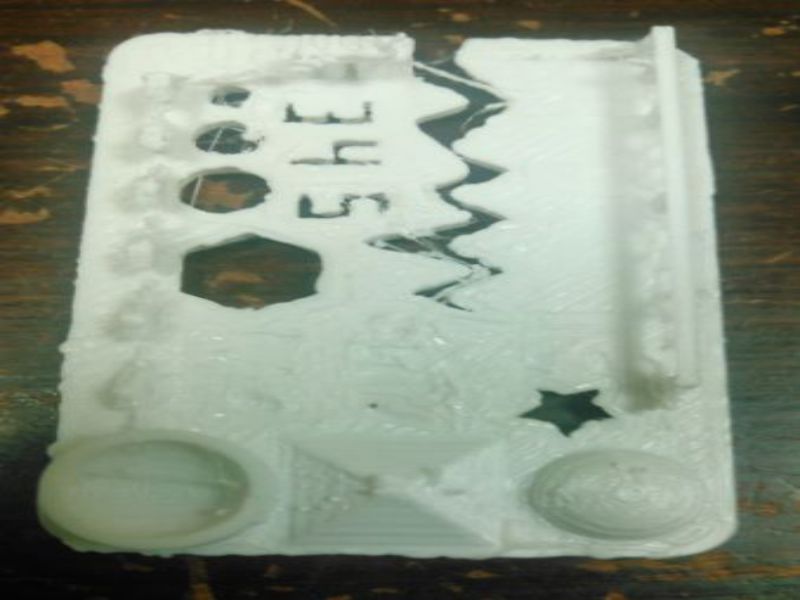
- Test the design rules for your 3D printer(s) Individual Assignment:
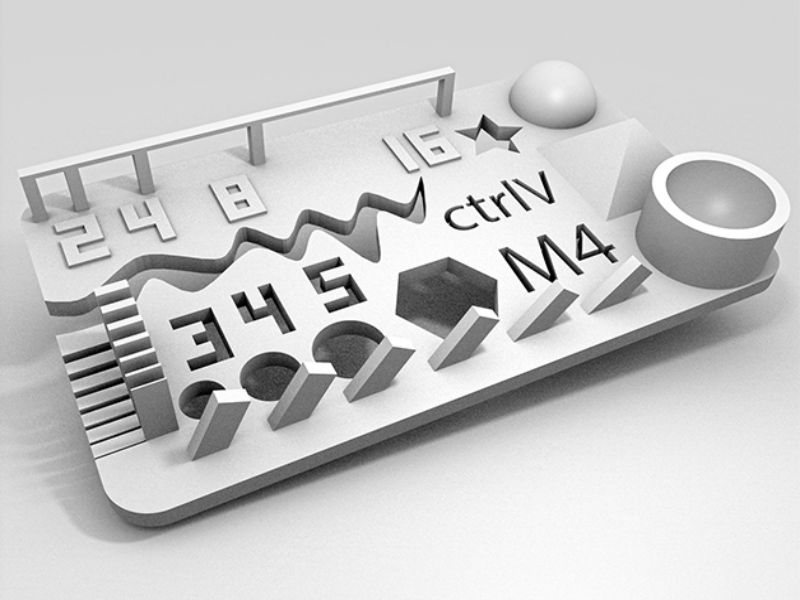
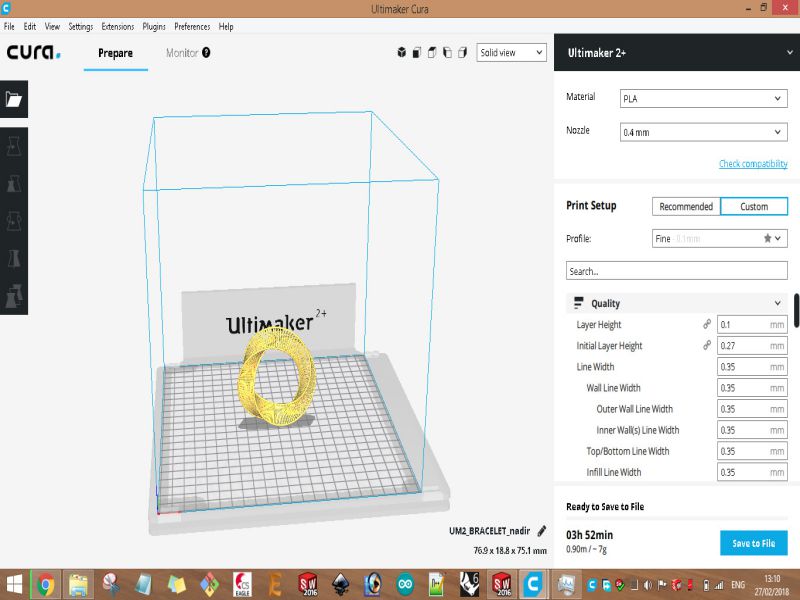
- Design and 3D print an object (small size, few centimeters) that could not be made subtractively
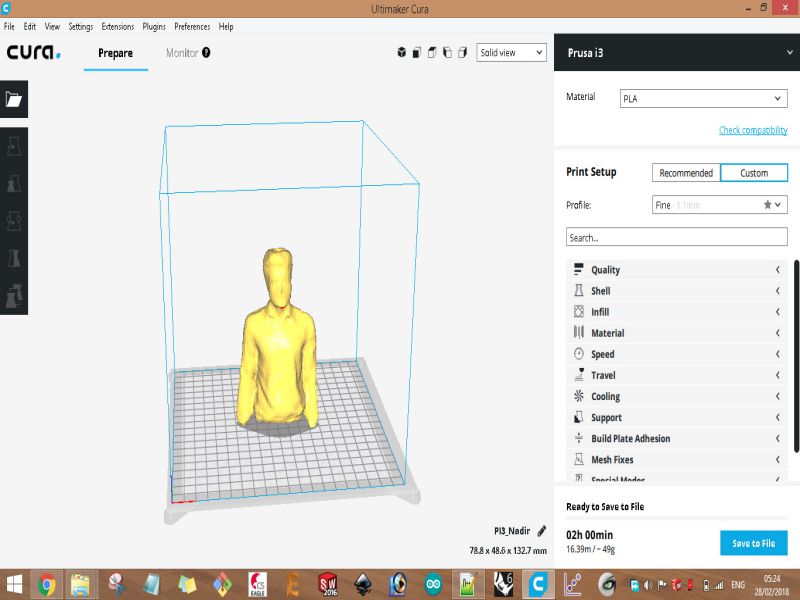
- 3D scan an object and print it (printing of the 3D scanned object is optional)
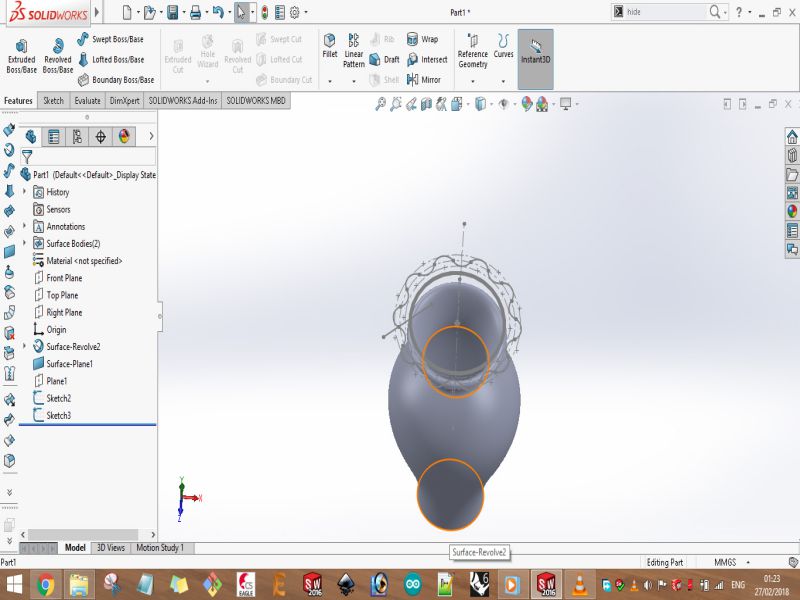
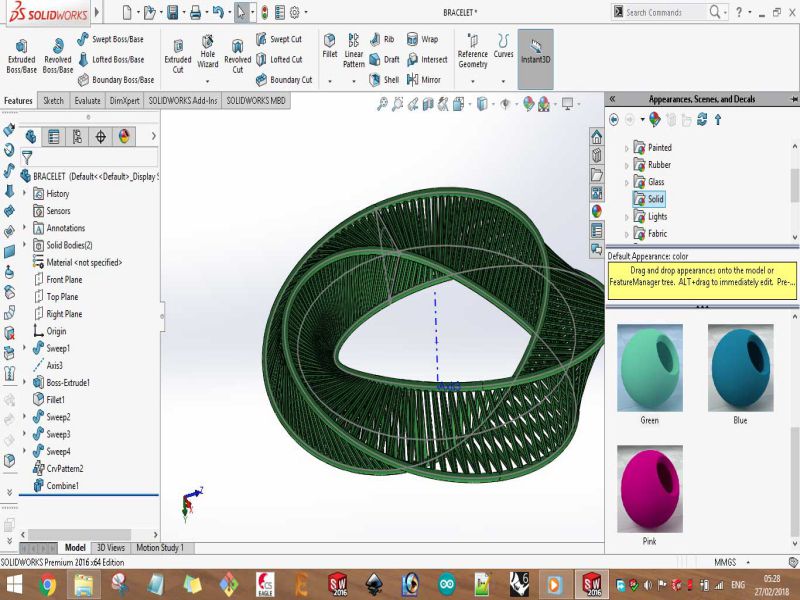
Here are snaps of uncompleted design on SolidWorks
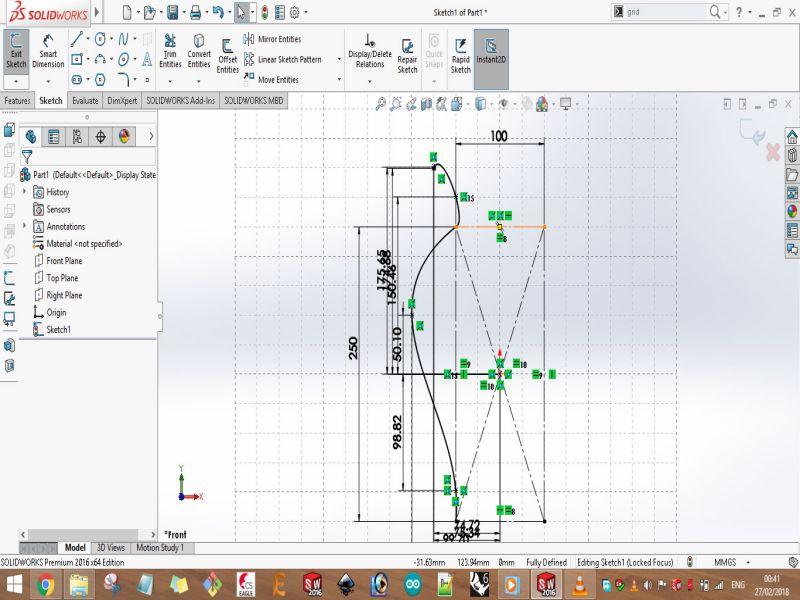
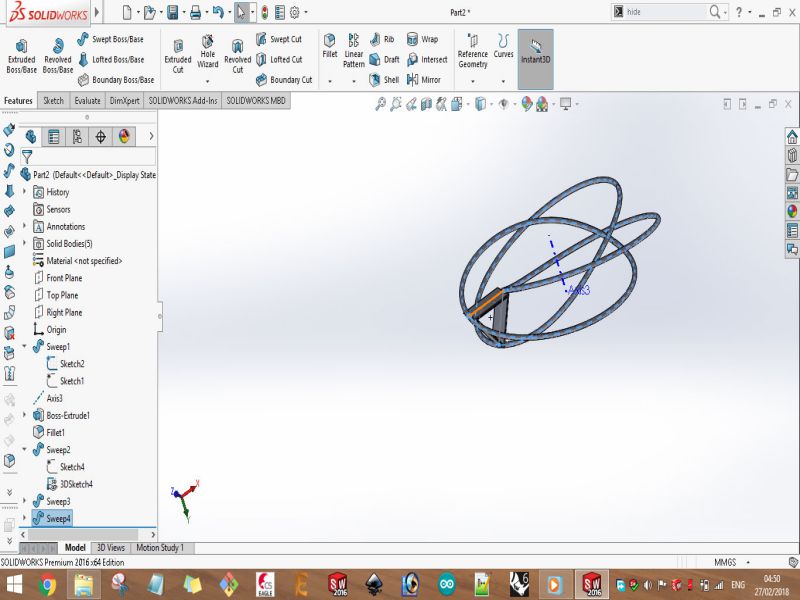
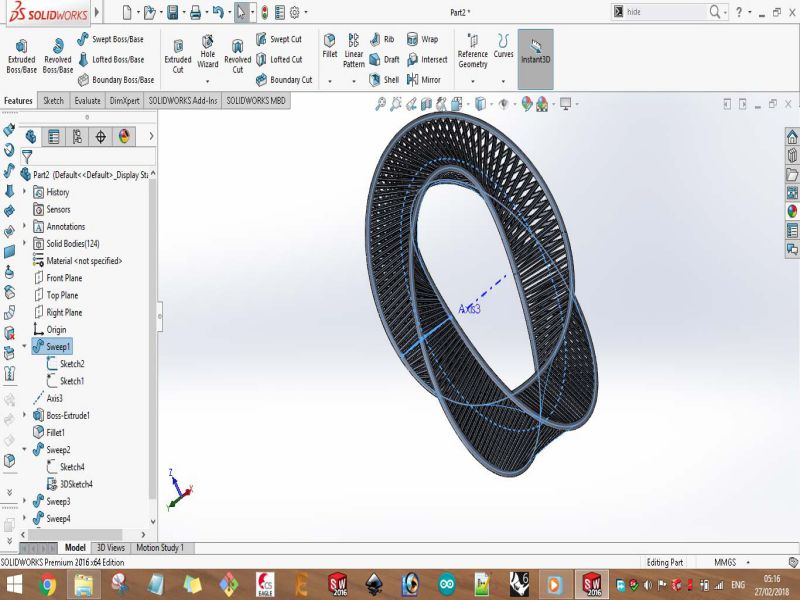
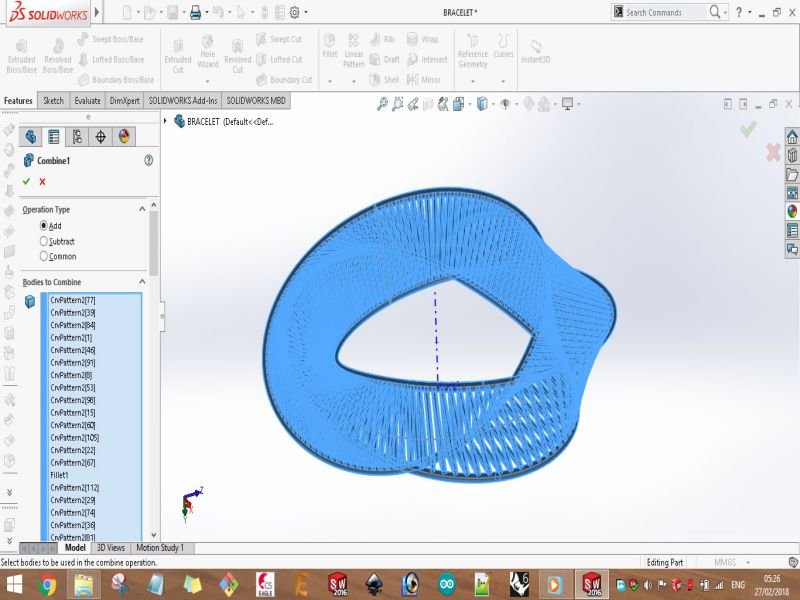
Print screens of the process of designing the bracelet are shown below:

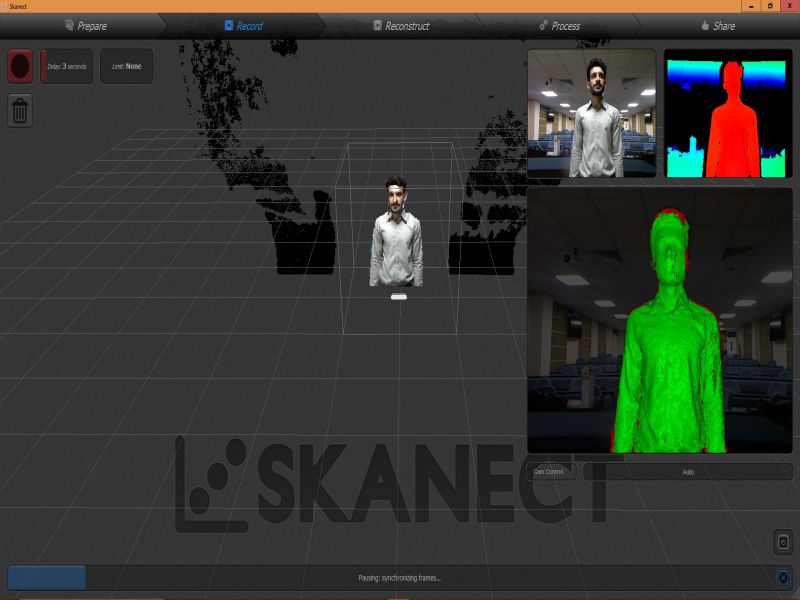
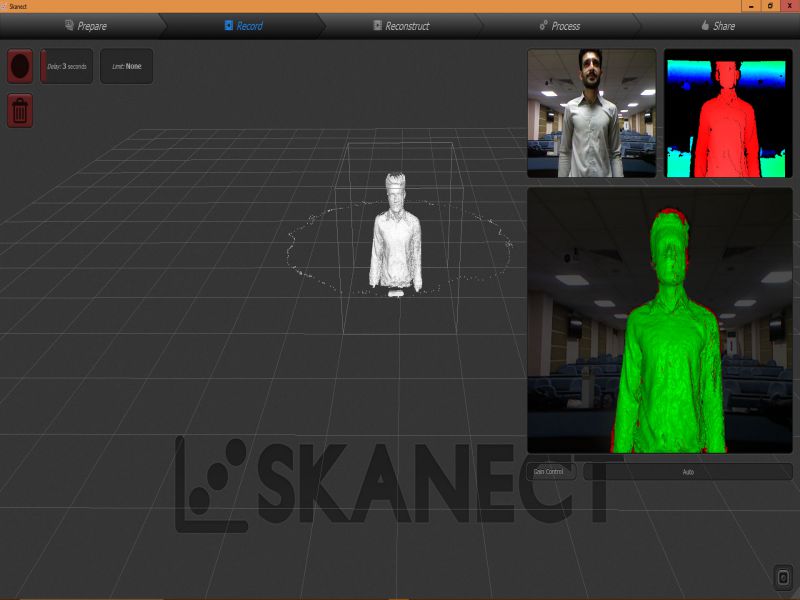
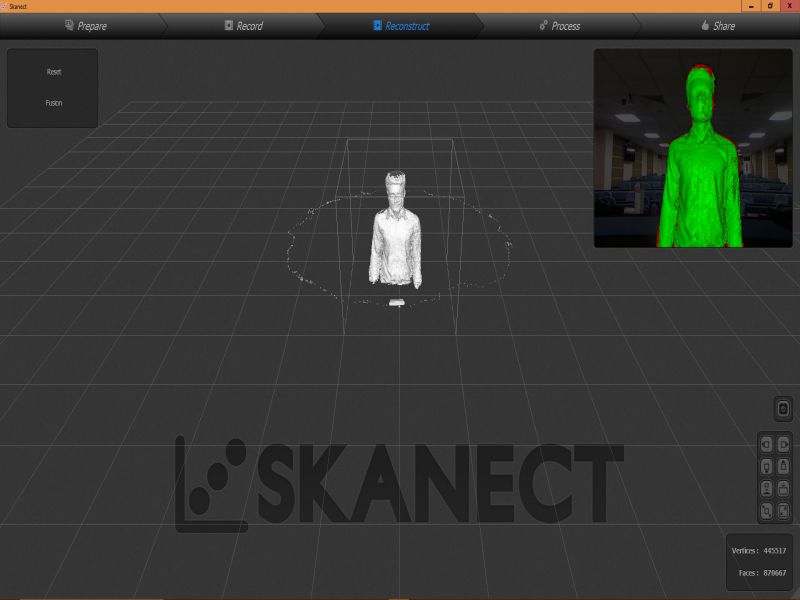
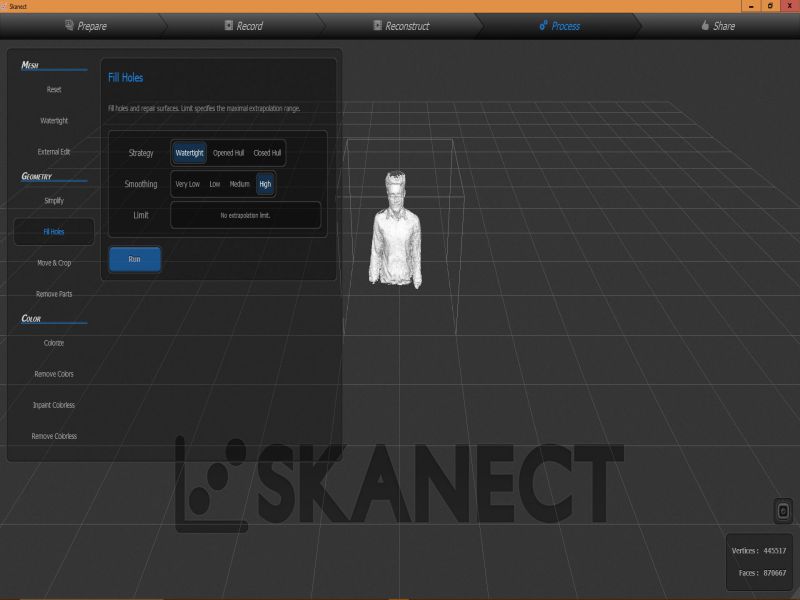
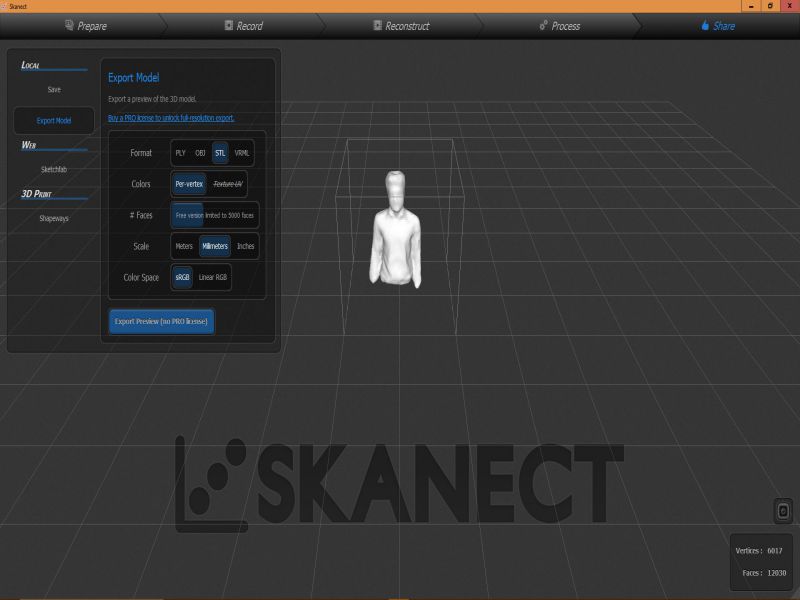
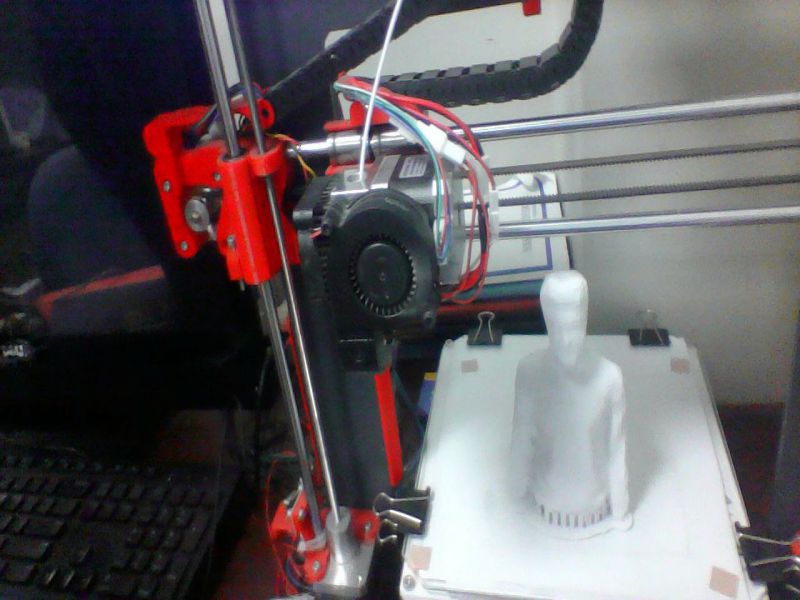
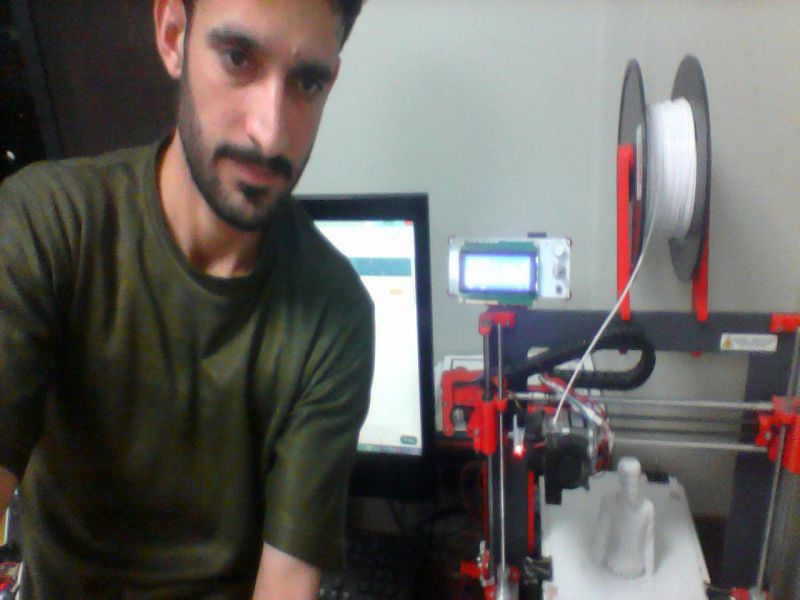
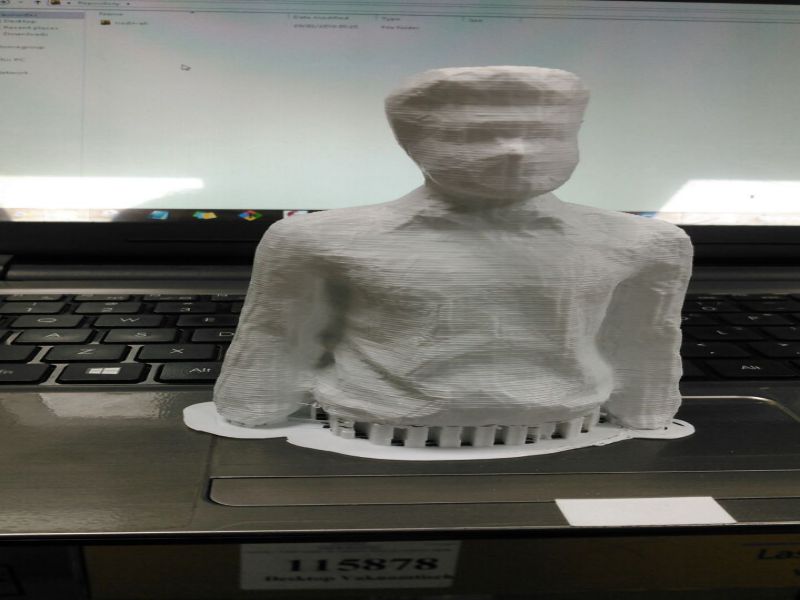
For this task, I scanned myself using an interesting device, "X box 360 Kinetic". I am completely new in this type of activities, this task was really interesting for me. X box 360 kinetic module is used to get 3D scan of any object, here, I got scanned copy of myself. It needs an specialized software "Skanect", so I downloaded its 1.9.0-win64 version first then installed it on my laptop. It also requires the installation of KinectSDK and KinectDeveloperToolKit to run on a windows PC. I managed to connect the above said device on my PC on Skanect software. Then, next step was to get a scanned copy of myself. For this, I got the help of my colleagues as the were guided me to move or stop, so I followed their instructions to successfully finish the first step. Here, there are two options for getting Scanned any object, first is to move the X box Skanect device around the object, second one is to move the object while putting the device in static condition. Here in my case I was the object and I moved slowly around 360 degree while the device was in rest condition.
Here are few glimpse of my whole process of Scanning object using Skanect.

This work is licensed under a Creative Commons Attribution-NonCommercial 4.0 International License.