Assignment 10
21.3.2018
Topic: Molding and casting
Goals of this week:
- Design a 3D mold around the stock and tooling that you'll be using (Individual)
- Machine 3D mold, and use it to cast parts (Individual)
- Review the safety data sheets for each of your molding and casting materials (Group) (LINK)
- Make and compare test casts with each of them (Group) (LINK)
Topic: Molding and casting
Learning about molding and deciding the project
I started my learning process by watching following tutotrial from youtube:

My final project is now clear so I decided to do something for it by using molds. My mask may need some
kind of controller to control mask´s functionalities. Therefore, I decided to create simple controler
surface with same design principles as Christian Reed.
First, I made draft of my controller surface:
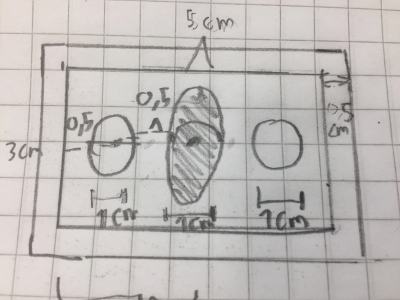
My controller surface mold should have:
- Two pieces: Plastic cover and silicon button plate
- Button plate should have 2x 1cm diameter buttons and 1x up-down 1cm diameter ellipse button
- Casting box around both parts
Next, it was time to make 3d model according to my draft. To do this, I used Fusion 360.
3D modelling controller surface
To cast my piece, I had to create mold around my piece (Later I fiqured out that this was
not enough!). To do this, I created the controller surface first as a normal 3d model.
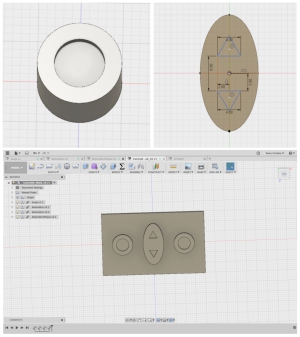
Hence, I created circle and ellipse buttons and plate for the buttons as individual bodies,
created compontents from those bodies, added them together to one design, and created one
component out from them to be used in future. I also created places for stickers to be placed
on top of the buttons:

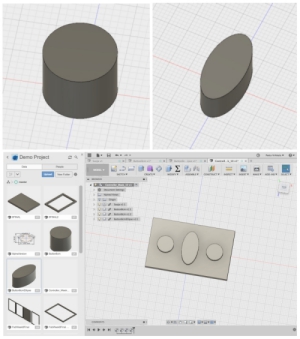
Fusion 360 links copied components to their mother components with links. I used this to my
advantage when I fiqured out that sticker places would complicate the drilling process. To
fix this, I edited orginal button component´s bodies and updated those changes via linkin
to my silicon board. By doing this, I didn´t have to design new buttons from the scratch.
Then, I created plastic cover for the buttons. Process was pretty straightforward:
Next, it was time to design mold around these pieces.
3D modelling mold for controller surface
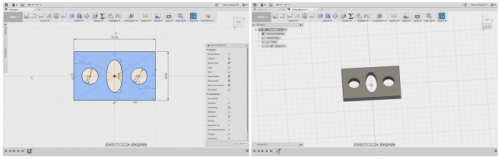
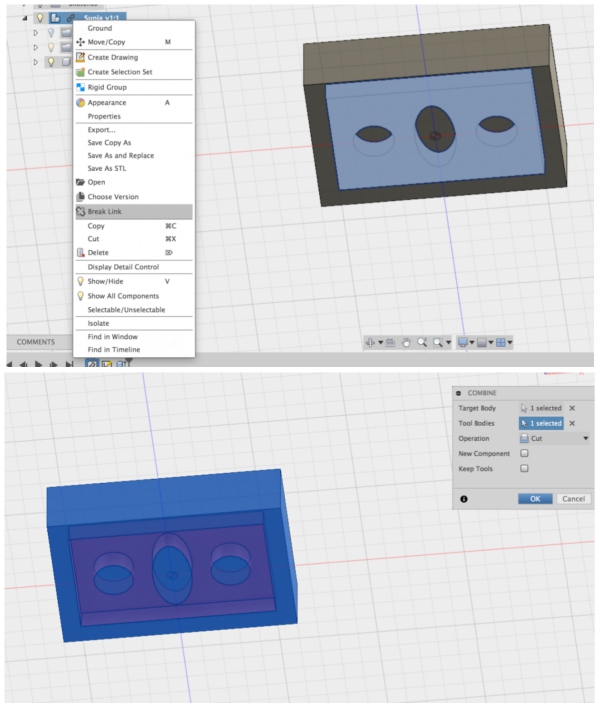
To create mold. I created two box bodies that are few cm wider and 1cm higher and lengther
than my models. Then I exported my designs to these boxes as components, broke their component
links to their mother files, and used Fusion 360 "combine" function under "modify" with
operation status "cut" to cut my models from the boxes. The end results were therefore molds
that can be used to create my 3D modeled models.
First I did this for the plastic cover:
Then I did the same for the silicon button plate:
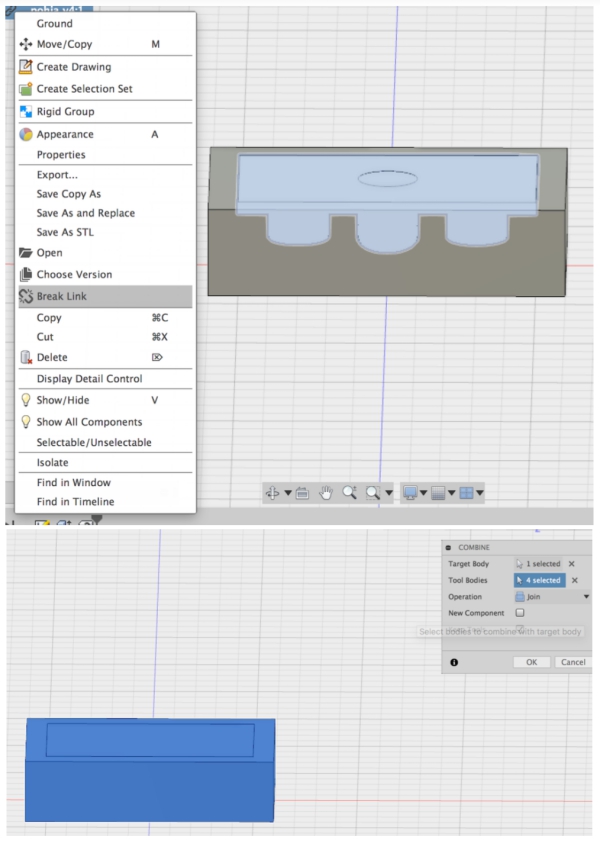
Finally, I combined both of these edited boxes to same design as bodies and combined them
together with "Join" operation under previously mentioned "combine" function:
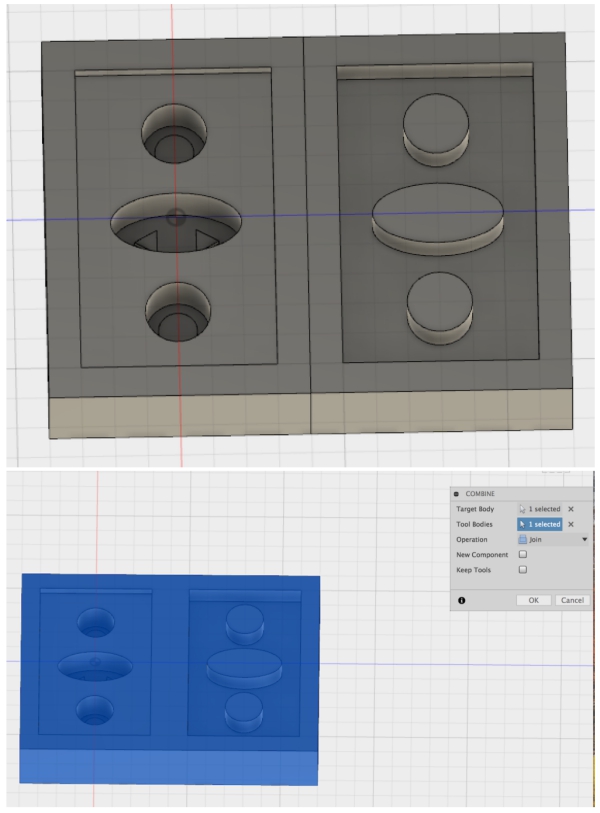
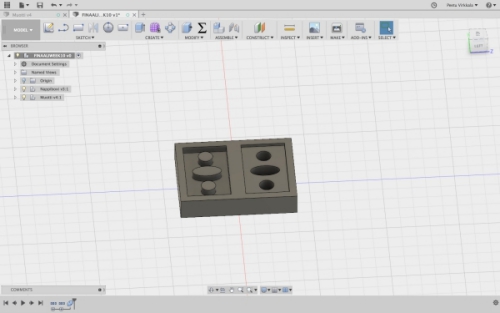
My mold was now ready. I exported it to my usb drive as .stl file and started to prepare for
the drilling operation.
Milling the mold
I used Roland SRM-20 as a milling device and Modela Player 4 as a preparation software
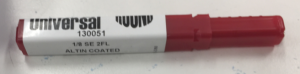
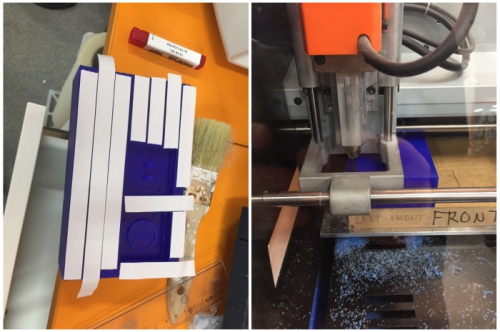
Preparing the SRM-20 went like during the week 5 but this time,
I used 3.18mm milling pit:
As a material I used a piece of molding was. I sticked it under the milling pit, and identified the starting x,y,z position:
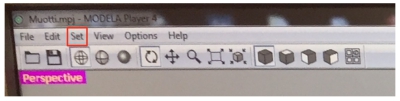
To prepare the .stl file for the SRM-20, I had to create milling settings for the model in Modela Player 4.
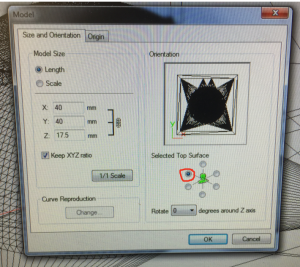
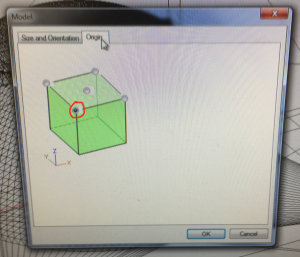
I began by importing my model to the Modela Player 4 and clicked Set > Model:
Here I changed the orientation so that the milling area was facing up and the starting point was lower-left corner
of the model:
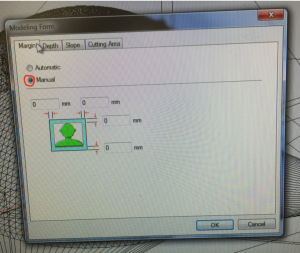
Then I went to Set > Modelling form and chosed Manual and offset of the model as 0.
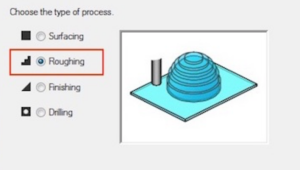
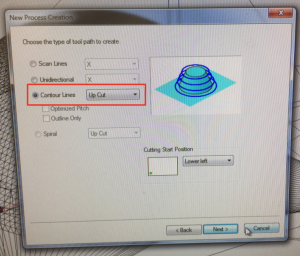
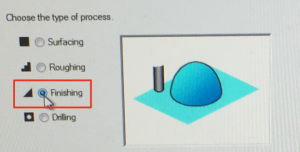
Then I went to Set > New process to create tool paths for milling. I began by selecting roughing:
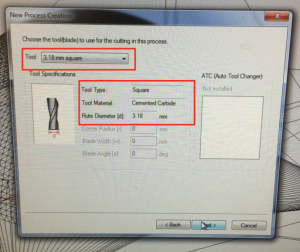
Then I selected 3.18 milling bit from "Tool" bar. Tool type, Tool material and Flute diameter were
set automatically.
Then I chosed Contour Lines as a too path type for roughing to remove material efficiently:
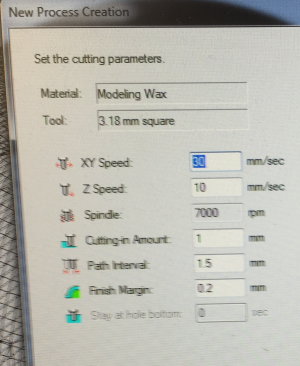
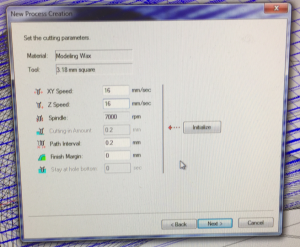
Then I set xy speed (the speed how fast the milling bit moves in x-y direction) as 30mm/sec, Z speed
(the speed how fast the milling bit moves in Z direction) as 10mm/sec, Cutting-in amount (how deep
milling bit goes in each path) as 1mm, and Path interval (The distance between a paths) as 1.5mm:
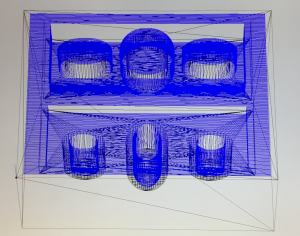
Finally, I clicked ok and the tool path for the roughing was generated:
Next I created finishing tool path by following the same process. By using the roughing toolpath, The milling pit
mills lot of the material but leaves bulky edges. Finishing tool path is used to fix this.
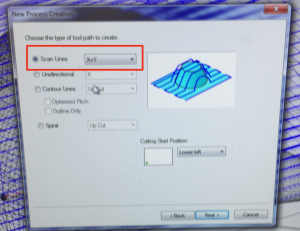
The process went forward otherwise same way as the roughing, but I chosed Finishing as process type, Scan Lines X+Y,
and set xy speed as 16,,/sec, z speed as 16mm/sec and Path interval as 0.2mm. Finally, I reduced the values of path interval
and speed to smooth the surface. The process can be seen below:
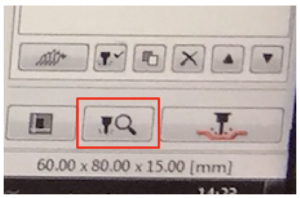
When I had generated both tool paths, I run the simulation for roughing and finishing by clicking the simulation icon
on the bottom right corner of the screen:
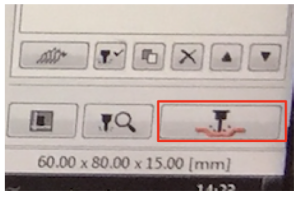
Simulations run through without errors and the end results were what I expected, so I clicked Cut icon and saved roughing
and finishing tool paths as a .srm files to my usb drive.
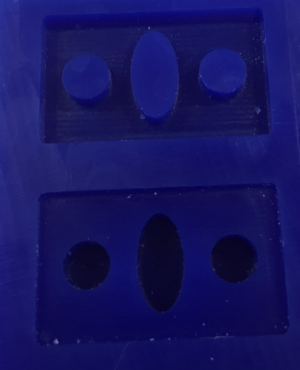
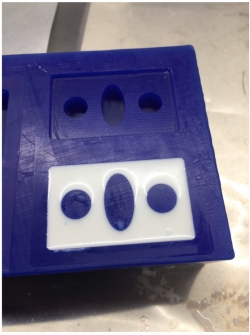
I milled first the roughing file and then the finishing file. The end result was success:
Making the molds
I went to appropriate working area to be able to do moldin To make silicon and
plastic Smooth-On molds, one needs following equipment:
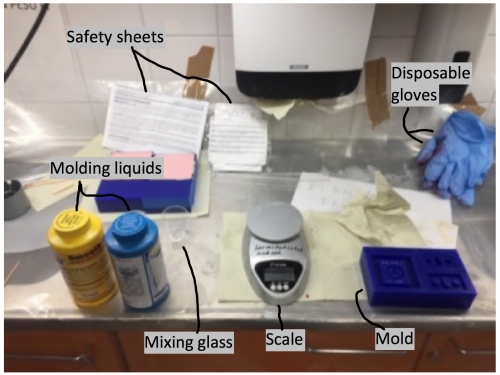
Plus:
- Safety glasses
- Mixing stick
- Some kind of timer
When I had gathered these equipments, I proceeded to molding activities.
Silicon mold (Button plate)
Luckily in my case, when I started to make the silicon mold, I managed to use Kati´s mixed silicon mold
liquid because she had made some extra liquid which would been otherwise thrown away.
I used this liquid by pouring it to the lowest point of my silicon button plate mold:
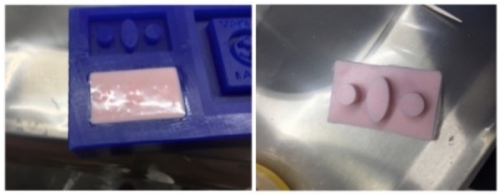
I continued until the mold was full and waited 24 hours. After 24 hours, I pulled
molded piece out from the mold. My Silicon mold was now ready!
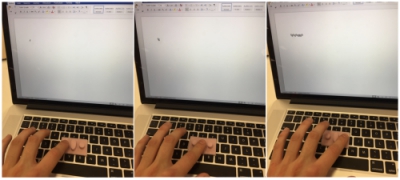
I tested my silicon button plate´s functionality by putting it top of my macbook pro
keyboard so that I could test to type with it.

The plate worked as I wanted: I was able push 4 different kind of letters with the plate
in planed order:
Plastic mold (Cover)
For the plastic, I had to do the mixing process from very start. To understand what I was
supposed to do, I read safety sheets.
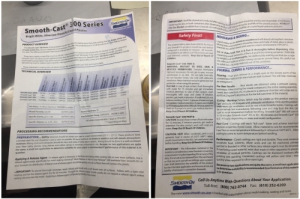
Most important information related to mixing the liquids can be found from the begin of the safety sheets:
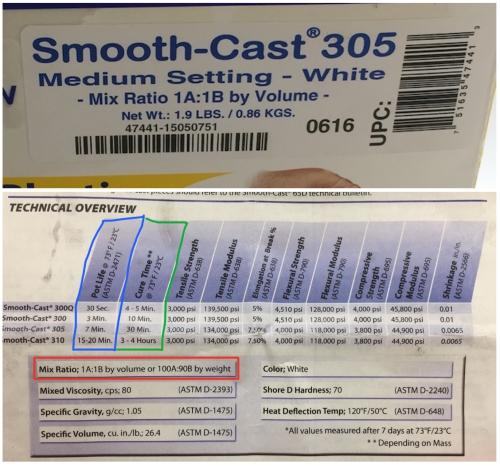
From the safety sheet I learned that:
- I have to mix liquid A and liquid B in 10:9 mix ration (Mix Ratio by weight, RED)
- When liquids are mixed, I have to create mold in 7min (Pot Life, BLUE)
- When mold is created, I have to wait 30min before the mold can be deattached (Cure time, GREEN
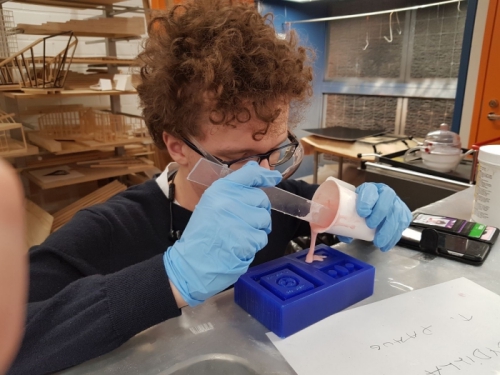
I started by measuring Liquid A (20g) and Liquid B (18g):
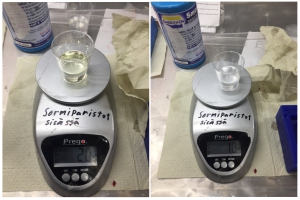
Then I mixed them together:
After mixing a while, I poured the liquid to the plastic cover mold:
After waiting 30min. I started to remove the plastic from the mold. However, because I
hadn´t used relase agent, getting the piece out from the vax was difficult. To be able to
remove plastic piece properly, I screwed few screws to the piece with screwdriver and pulled
the piece up by using the screws.

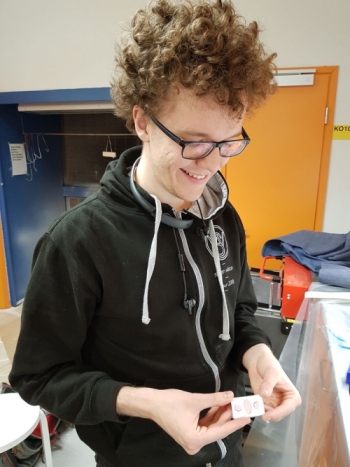
Luckily, this method worked and I managed to remove plastic cover from the mold. I tested
to fit silicon and plastic pieces together. They fit perfectly!
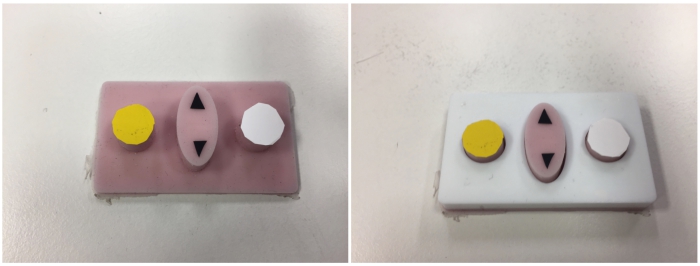
Finishing touches
Before finishing the design, I decided to add few stickers to my silicon buttons. I used
vinyl sticker sheets but decided to cut pieces by hand instead of designing them with computer
due to their small size. After this, I tested my controller surface once more with my macbook
pro keyboard.
Everything was working well. my controller surface was now finished.
Edit: my project was lacking. I had to do new model
When I got the controller ready, I noticed one big problem, according to assigment, I had to design a 3D mold
which can be then used to cast parts. However, my wax mold already created the controller whereas I should have
designed my wax mold so that it creates a mold which can be used to cast molds. After verifying from the instructor
that my project didn´t fullfill all the requirements of this week, I decided to create simple mold that fullfilled
assigment requirements.
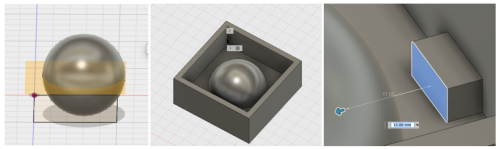
I decided to create a mold that can be used to create sphere. I began by creating the model in Fusion 360. First I
created sphere and rectangle box that was little wider than the sphere:
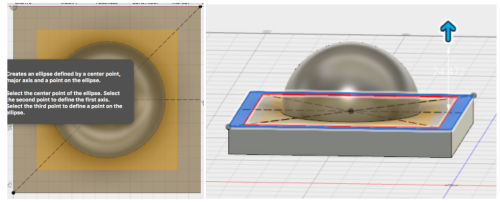
Then I created new sketching plane to cut the spehere and used top part of the sphere. Next I created walls around
the sphere and small box piece to create air hole to the mold:
When the model was ready, I prepared it for the milling as before:
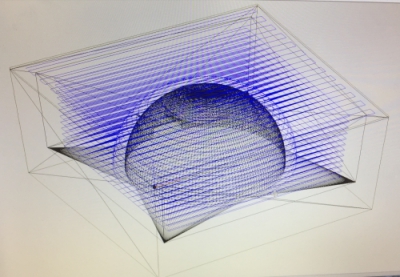
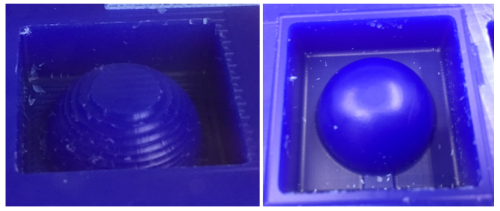
The milling process was success and the end result looked nice. Left picture is after roughing and the right picture is
after finishing process:
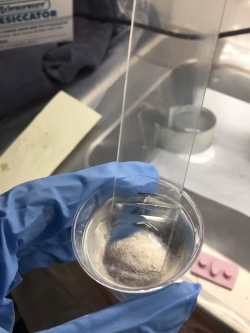
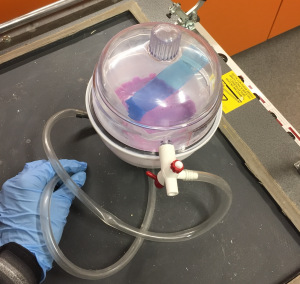
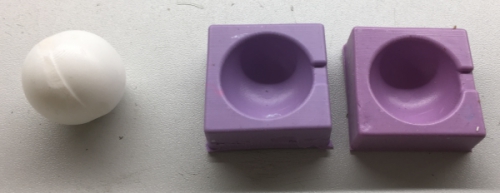
Next I mixed rubber liquids 50/50 and used desiccator to eliminate bubles:

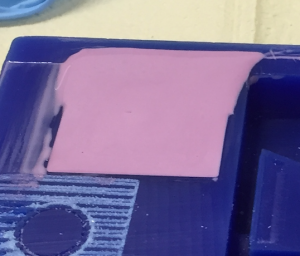
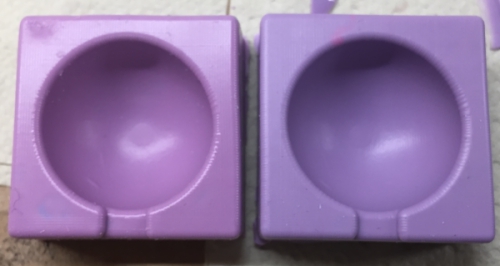
Then I poured the liquid to the mold, waited for 6 hours and repeated. Rubber molds had little different kind of color due:
to little different mixing ratios:
Next I used rubber molds to mold a plastic sphere. I taped the molds together, mixed mold liquids and poured the liquid
into the mold from the airhole:
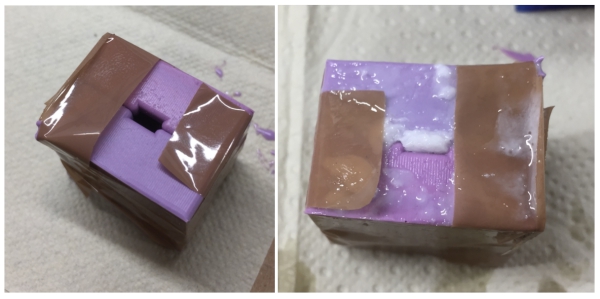
My first try was a failure. The liquid had filled only a part of the mold:
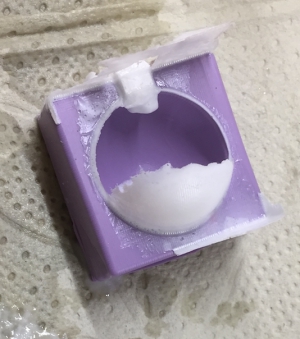
This problem was due to air inside the mold. To get it out from the mold during the pouring, I used a mixing stick to fix
this. With the stick, I kept the airhole open and hit time to time insides of the mold to make air bubles come out from
the mold. By using this techinque, I managed to mold the sphere succesfully:
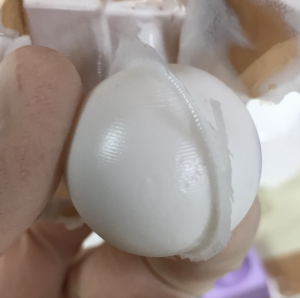
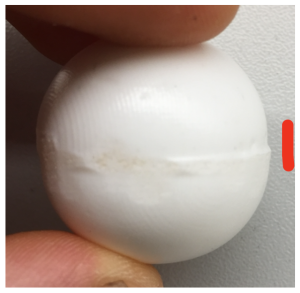
When the sphere was ready, I sandpapered it to make it smooth. I noticed that the pieces were aligned little incorrectly.
This was due to way how I attached silicon molds together: I didn´t have registors so I had attached the parts together
just by rule of thumb. To fix this in my future models, I should model registors in Fusinon 360 to attach the plastic
molds correctly together.
Finally, my molding and casting week was finished.
FILES made THIS WEEK

This work is licensed under a Creative Commons Attribution 4.0 International License.