 |
 |
 |
 |
Week6. 3D Scanning And Printing
assignment
group assignment:
- test the design rules for your 3D printer(s)
individual assignment:
- design and 3D print an object (small, few cm)
that could not be made subtractively
- 3D scan an object (and optionally print it)
1. Introduction of my 3D printer.
Equipments.
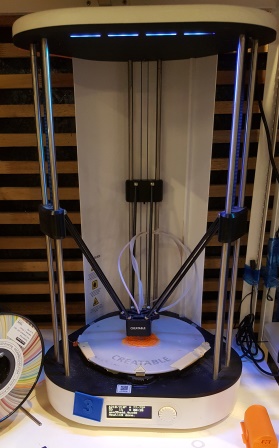
Hardware : Creatable D3 from Ateam Ventures(an Korean Company)
Software : Cura Slicer program
used material : PLA(PolyLactic Acid)
Creatable D3 Spec.
Printing methods : Fused Filament Fabriccation
Filament diameter/ Nozzle diameter : 1.75mm / 0.4mm
file format / interface : gcode / SD card or USB(generally uses SD card for some long time printing)
Creatable D3 uses.
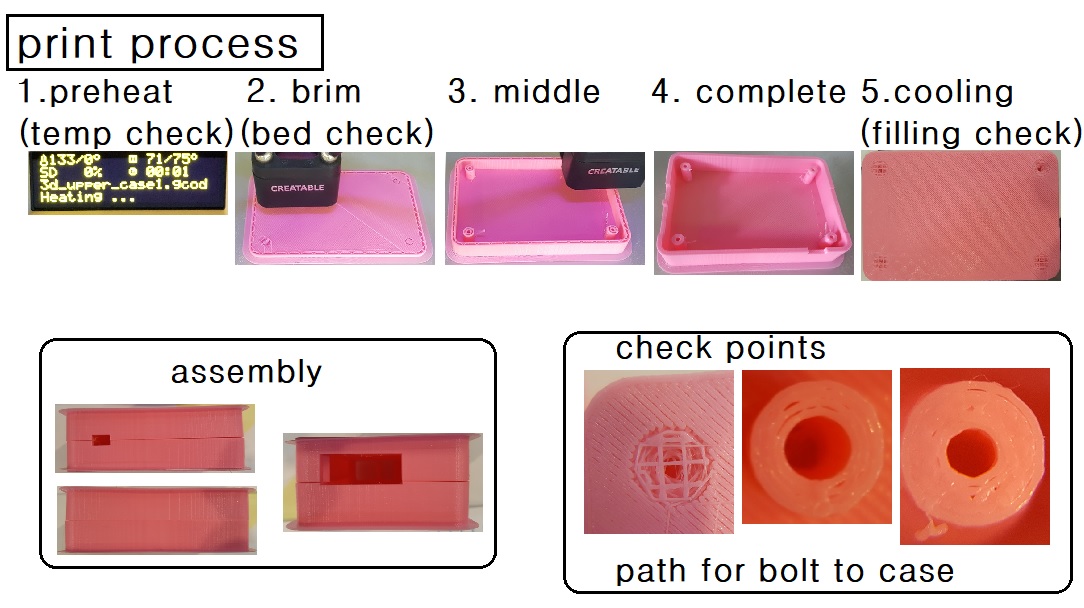
a. filiment extrude test of nozzle.b. if possible run the preheat process for the following job.
c. bed prepare : the surface clear and sticker sprey to make a holding filament and alignment check for the first print run.
d. if previous works fine then SD card put on the slot and print select file as saved.
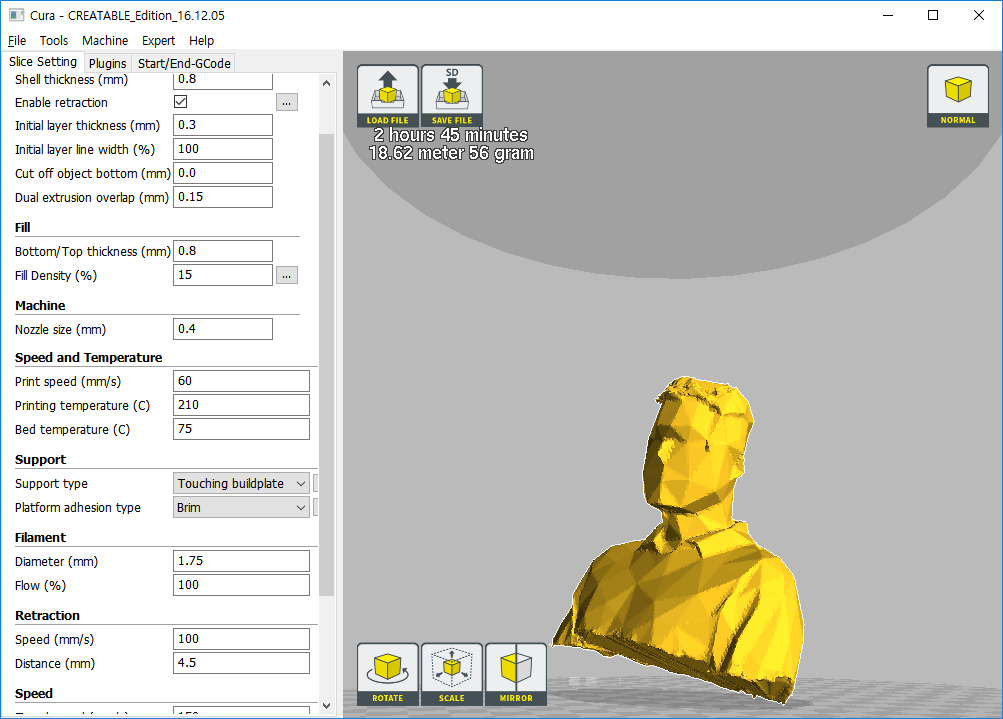
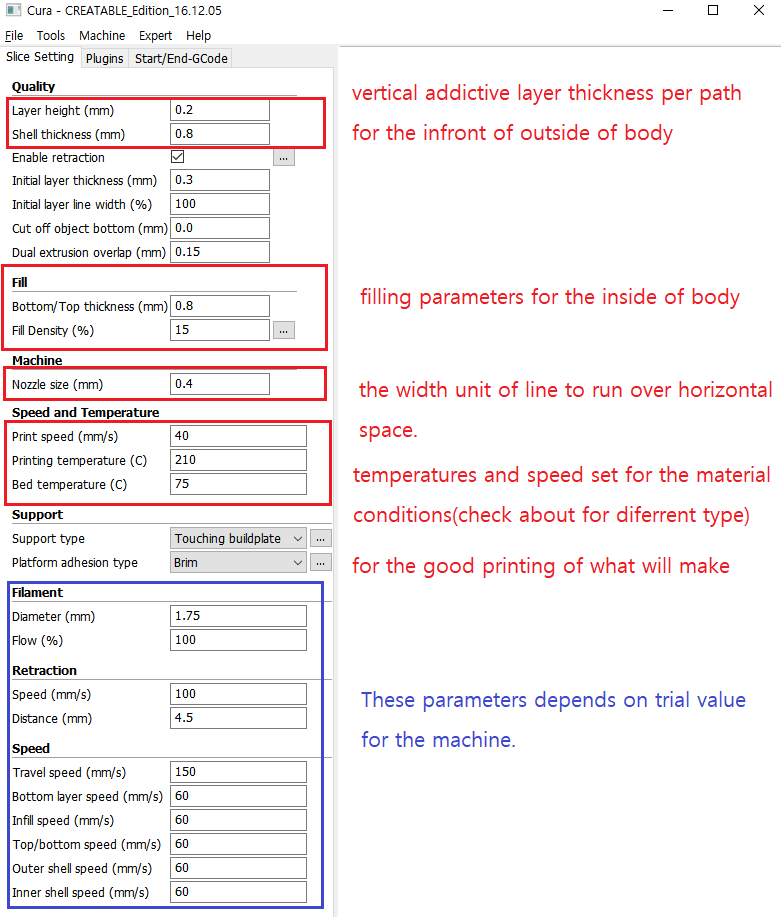
Slicer Software uses.
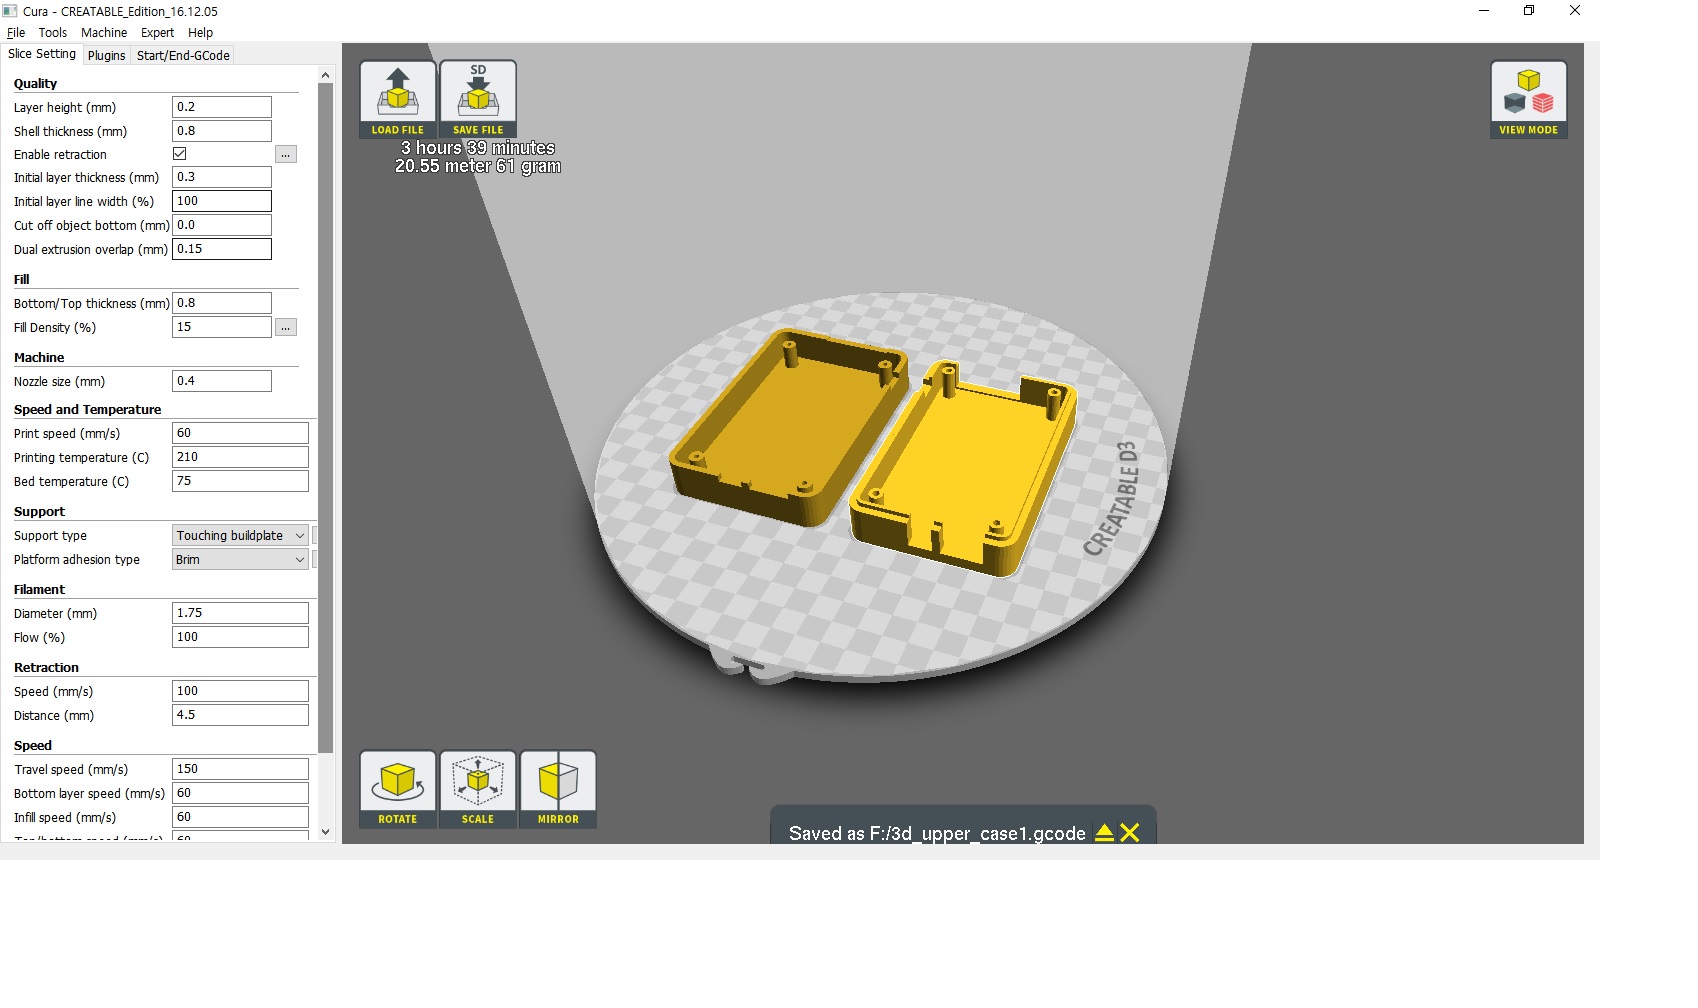
I just change file format to .stl type then simply load to Cura and set-up parameters as below.
Then check about simulation of gcode run. If its no errors, download the gcode to SD card and put in the print slot.
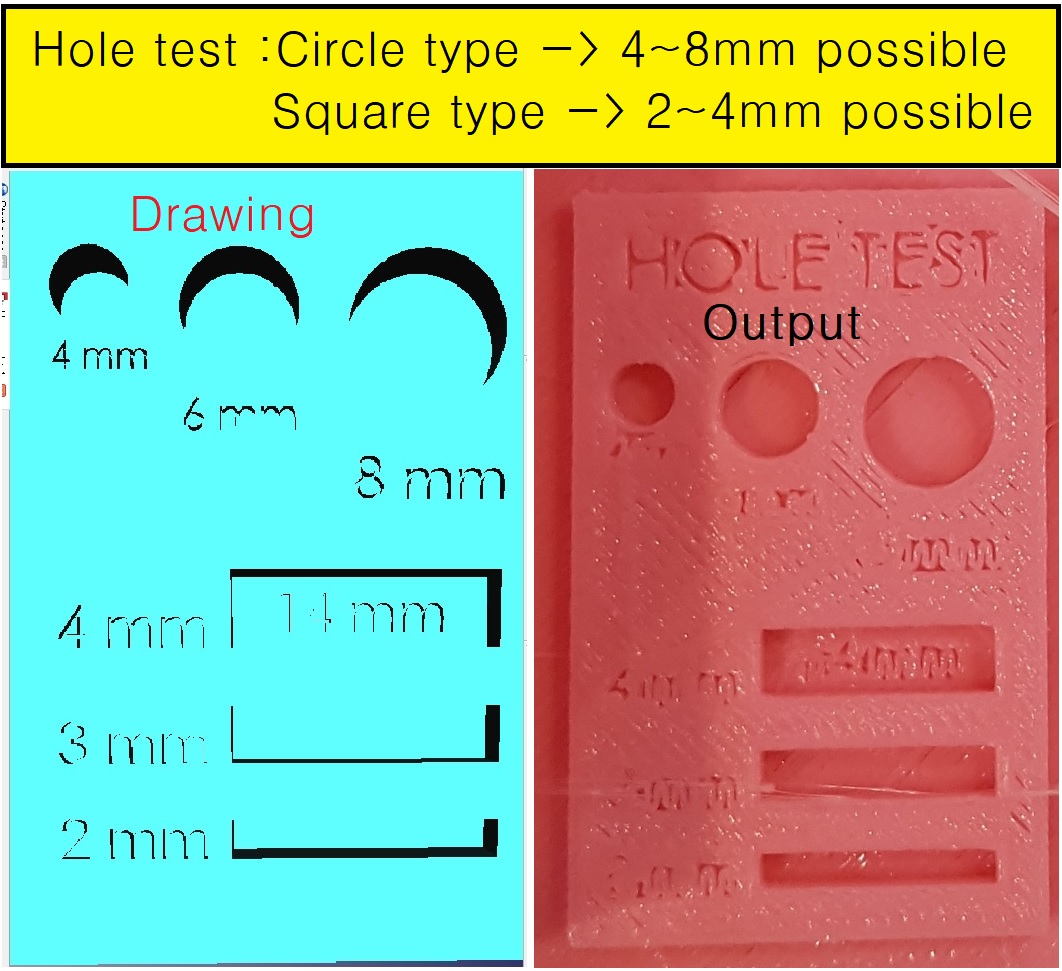
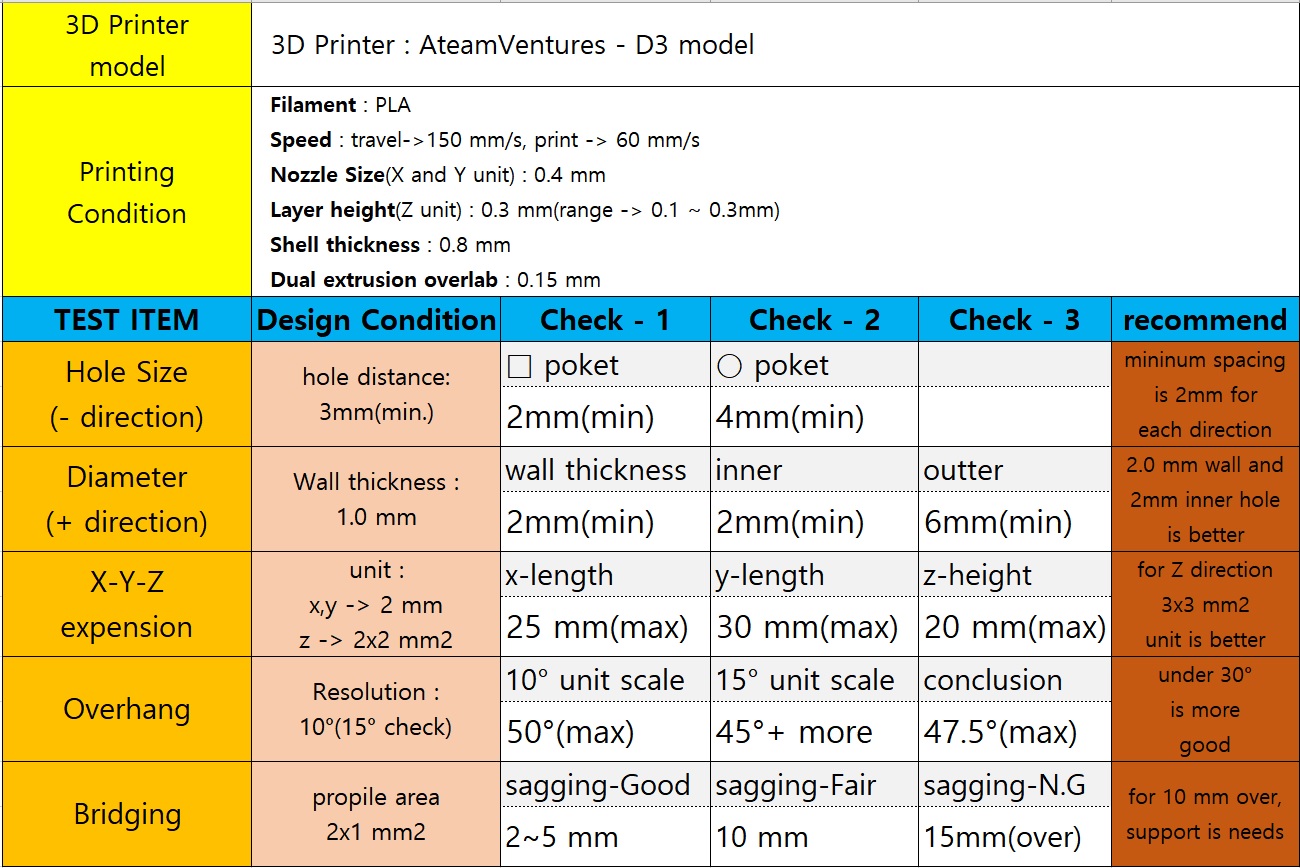
2. Test the design rules for your 3D printer.
a. Hole Test , b. Diameter test

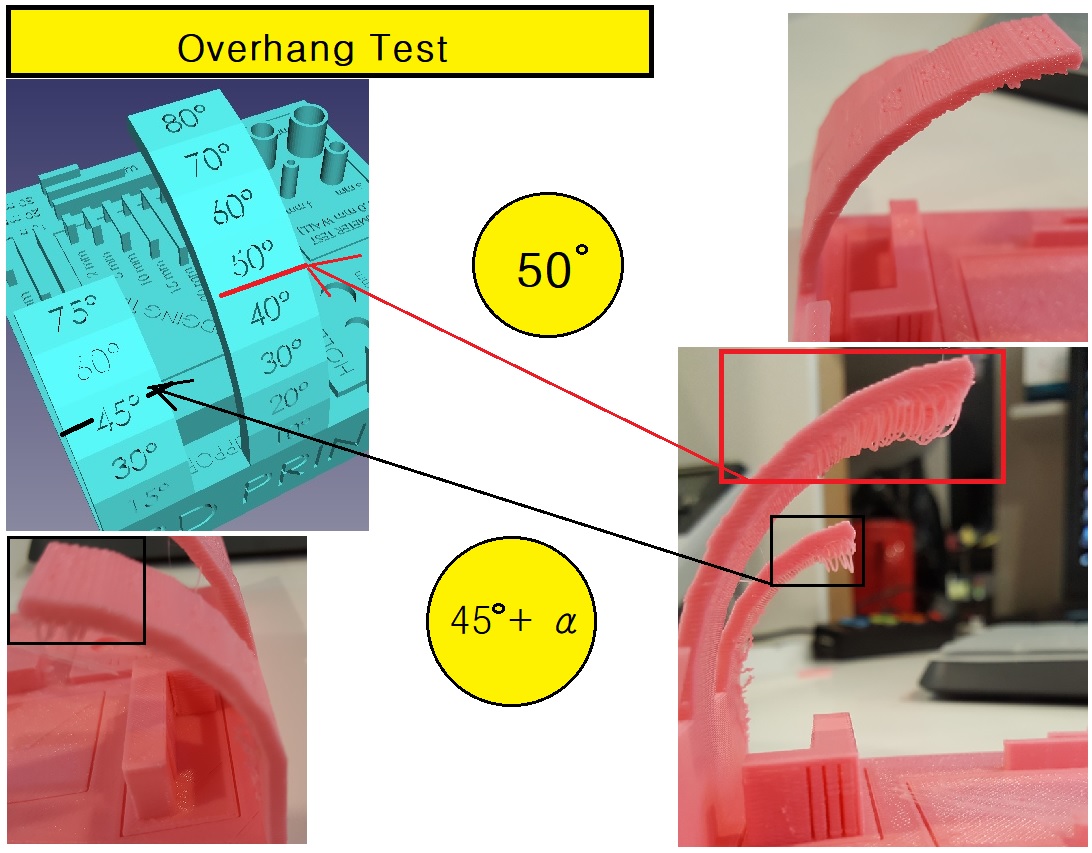
c. X-Y-Z Test , d. Overhang test

e. Bridging Test

3D Modeling Design Rule Estimation Chart for 3D Print
In this test, I learnt about capabilities as below
a. The resolution of printing is depends on several coditions which are nozzle,temperature,materials.
b. First of all, for the best result must needs prepare pre conditioning such as preheat, filament extrude, etc.
c. I has a mistake which is not check about state while printing.
d. Now, I understand that is import about the pre print test before printing especially which is related some important area.
Download files:
3D printer test file3d_print_test1.gcode
3. design and 3D print an object
design-I
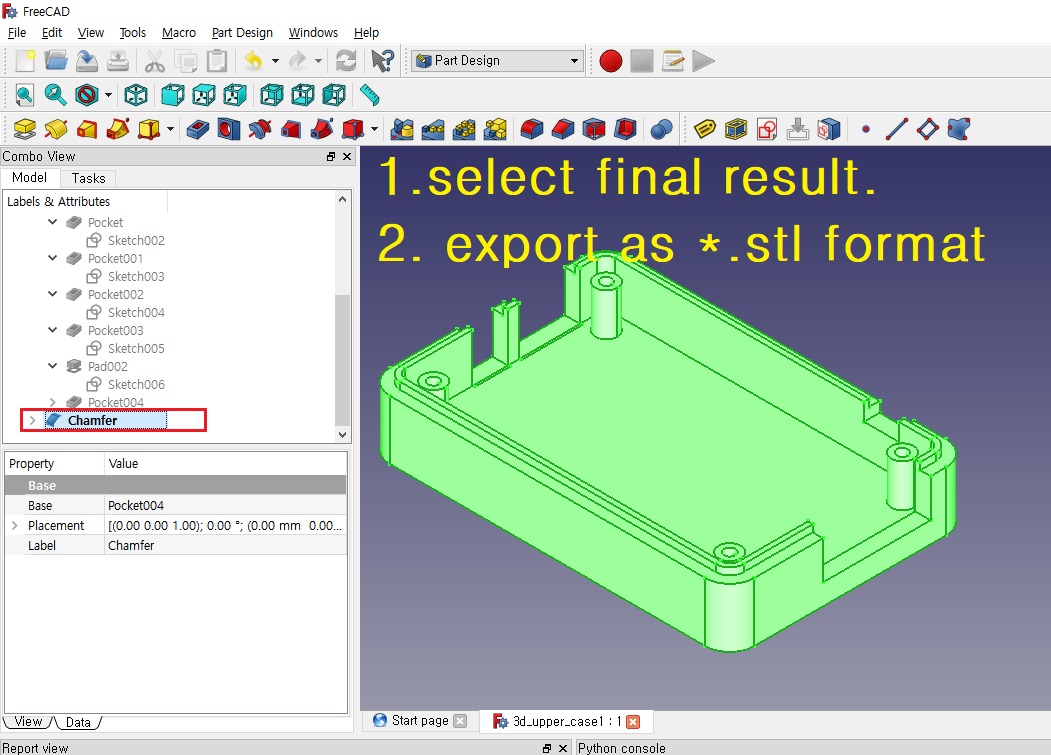
I use FreeCAD software to make a model to print. Hole design consist of two parts.
One is bottom cover to hold a PCB substrate, the other is a upper cover to combine to bottom cover
with 4 bolt screws.
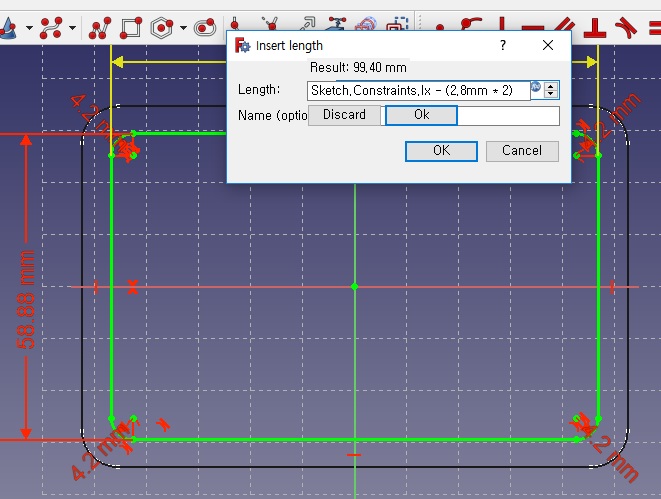
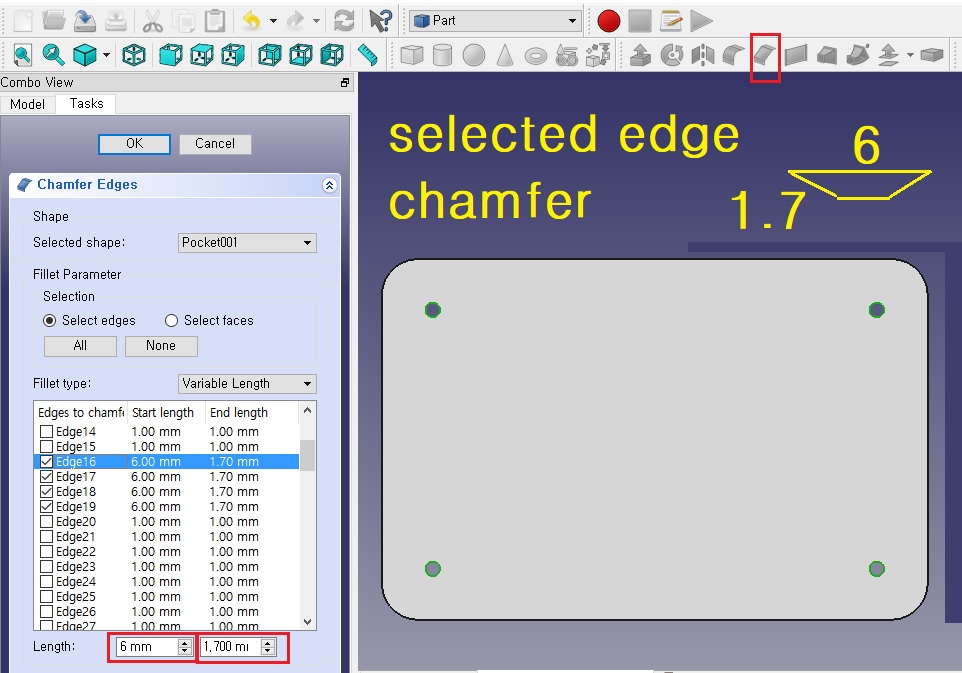
Drawing methods used parametric equeation, so when the outputs didn't mattach the other parts,
It can be manageable, so easy to modify the parameters.
Download files:
Lower case(stl)Upper case(stl)
design-II
Design
In this section, I made design for a gear box which is can't be made one parts from subtractive machining.
At first, show how I made design and explain what is different. And then printing.
Here is a process for modeling and assembly.
For modeling in freeCAD software, generally use the 'Parts Design' module. First sketch function to drawing.
In this step, numeric data can be use parametric design with several sketch sheets.
After each modeling complete, use another new file for assembly this file can be used to making gcode as stl format.
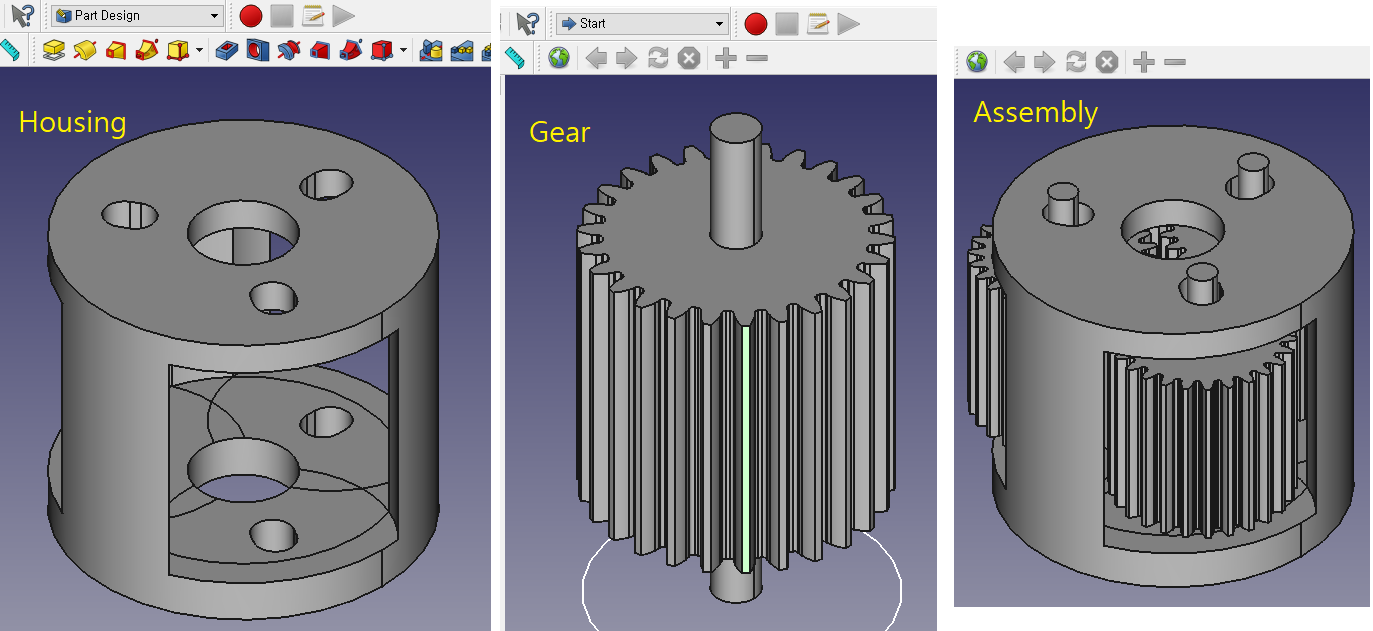
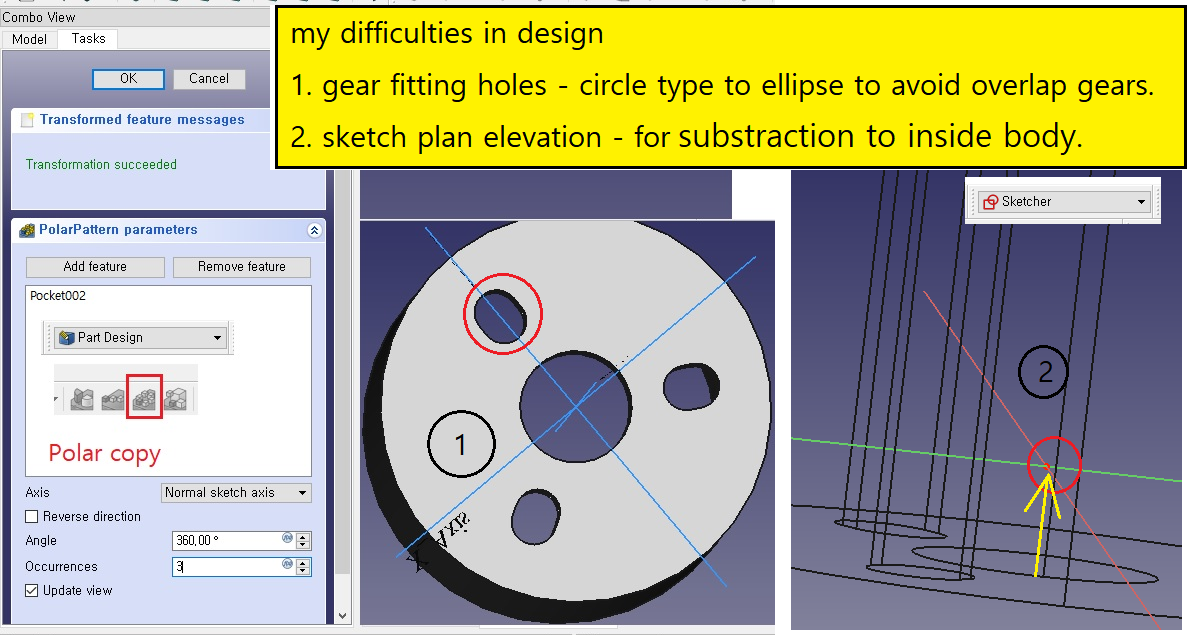
While the first printing, I found something wrong in model that just overlap between gears tooth in center join.
So I try to change designs for improve to join housing and gears its relates as below.
The differences of design compare to subtractive machining
- In case of housing, subtractive machine can not pocketing the closed cylinder.
- In gear machining, even though it can be possible but to make an assembly there is no methods with
seperately machining.
Download files:
-Gear Housing File(FreeCAD format):addbody.FCStd-Gear File(FreeCAD Format):gear.FCStd
-Assembly File(STL Format):asm3Dadd1.stl (It can be used in Cura slicing.)
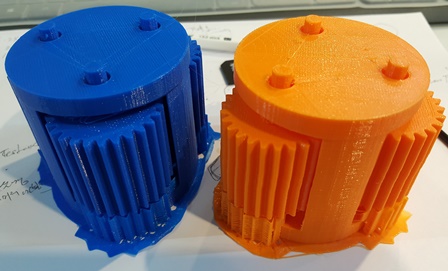
Print Results:
failed printing Successed printing it works up down move.
gear not rotated.it works up down move.
gear rotated.

3. 3D scan an object
3-1. 3D scanner and feature
I check this video for scanning.
3D scanner's shape
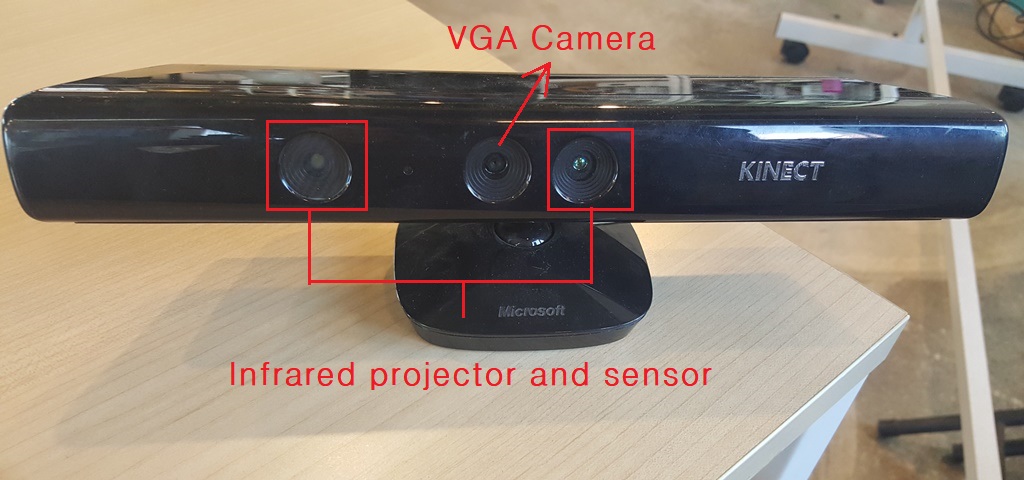
3-2. features of Microsoft Kinect 3D scanner
- sense : voice, motion and distance of user
- sensing configuration : RGB camera, Infra-RED camera, Infra-RED projector.
- operation :
a. RGB camera can do detect motion of movements, capture images in while scanning.
b. Infra-RED projector do the project infra-RED lights as pixels it can be find huse points lights with infr-red camera.
c. At first step, infra-red project to the objects then the reflective light going back to source direction,
infra-red detective camera can do capture these signals. kinect scanner can do analyse this and make image infomations
of object.
3-3. Scanning
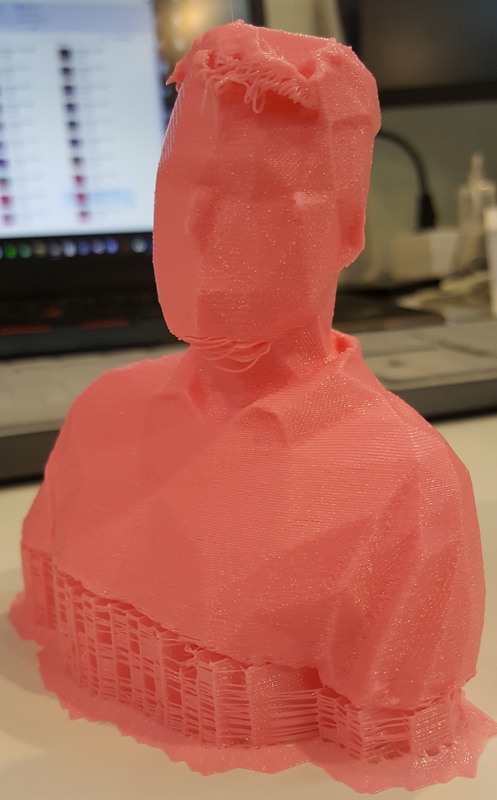
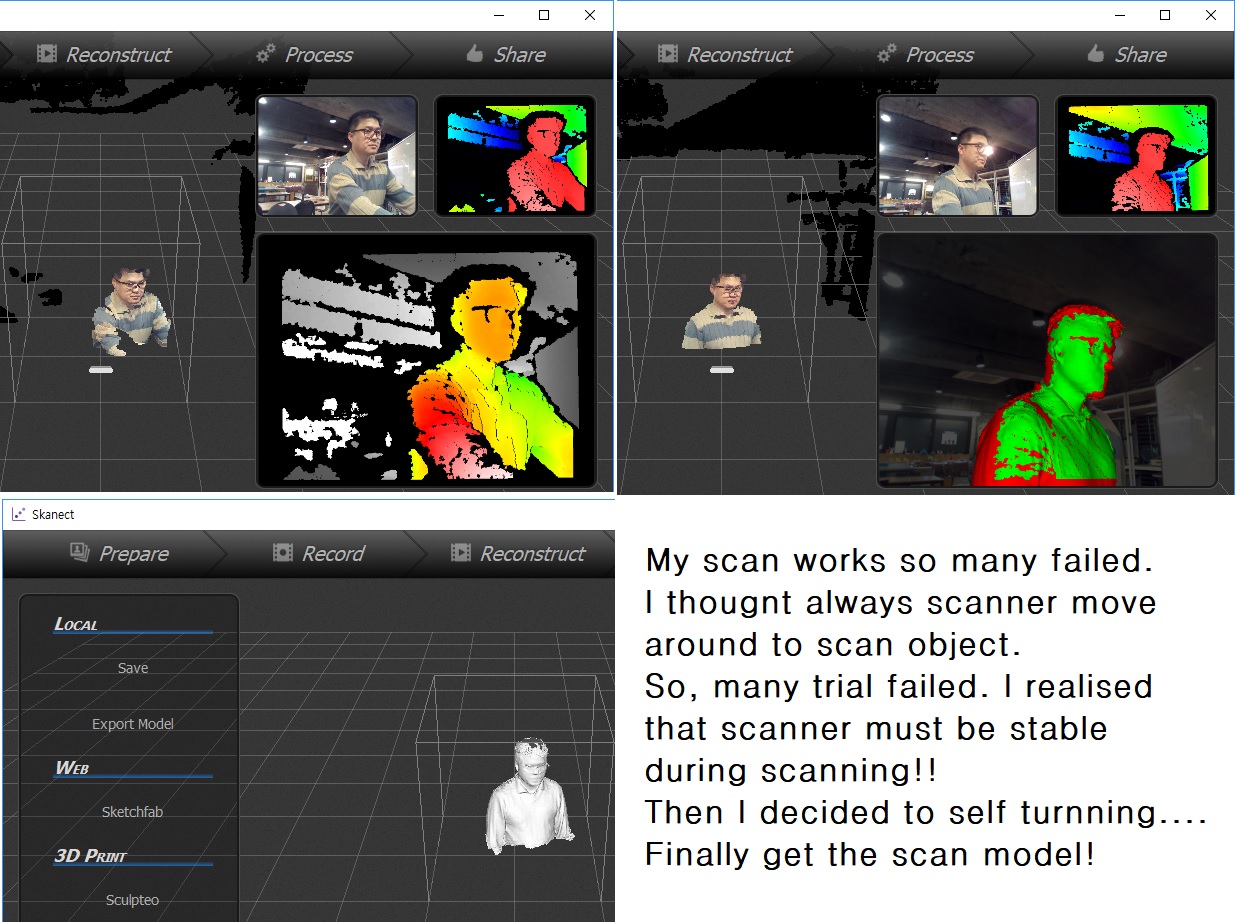
This time I did self scanning for my body, I try to scan many times for simple shape such as a mug-cup.
But, I can't to make a good sample that was stop normally reach 70% of scanning. I thought about a lot of time
why can't complish about this. I thought that my scanning motion is unstable cause of focus out.
Finally, I change methods to scanning with reverse its make a camera set to a rigid position and me turn a round in a
fixed position but, there are some lost infomation of images cause I must do operation in while scanning
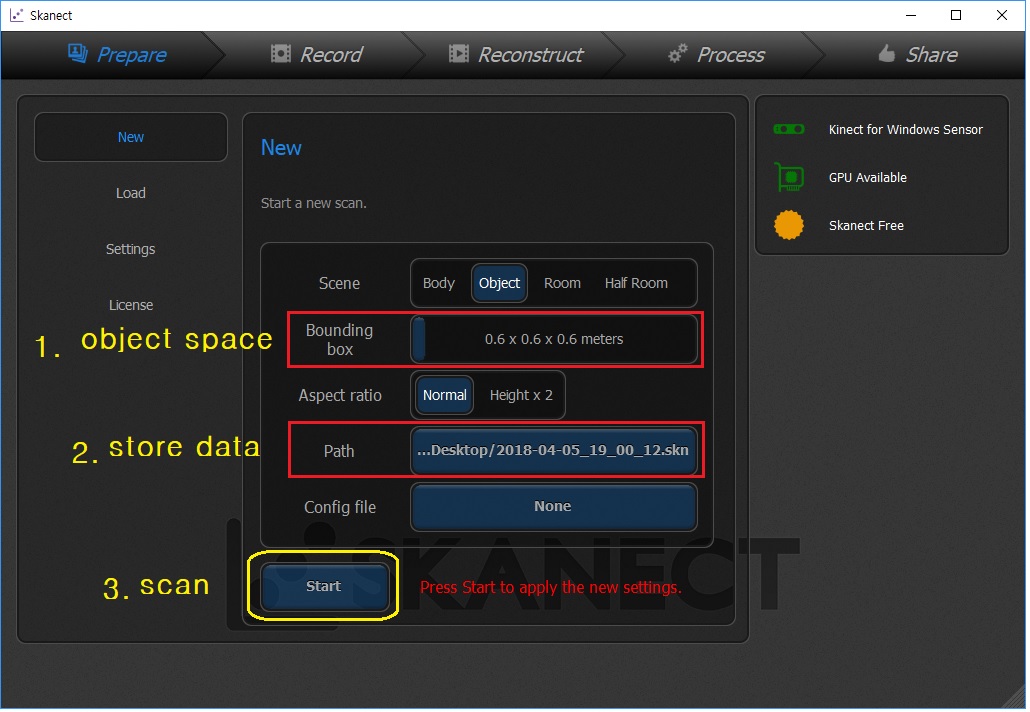
Here, is the setting about 'kinetic' software.
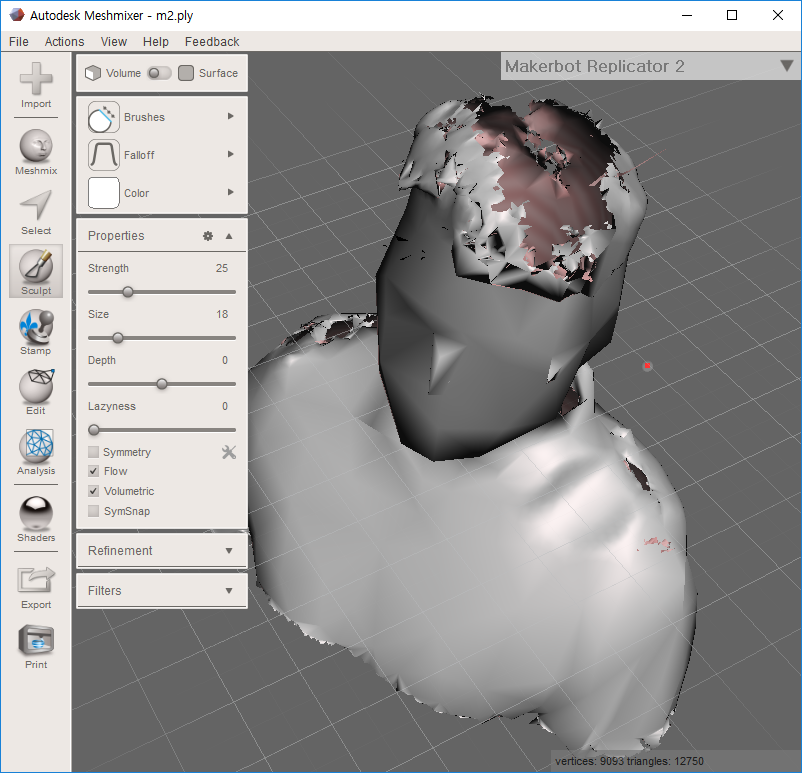
3-4. Edit the scan file to modeling
Scanning output file can be store stl format, if that file has some open space it should be edit and make a solid file.
'meshmixer' software help me to the job.
process
a. import a scanning file and fit to size adjustable
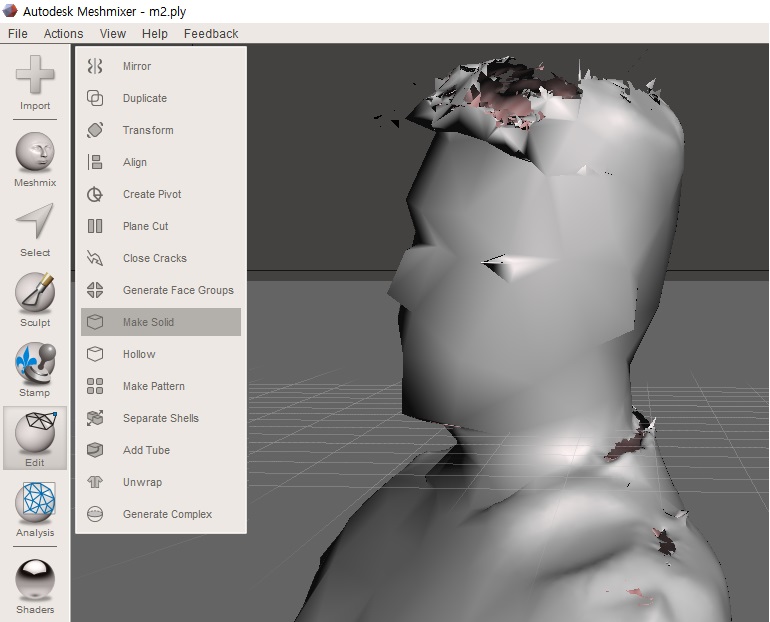
b. check about un linked points , make sure opened space edges make combine to a closed shape if possible.
c. use the 'make a solid' command to make a solid file(stl format).
3-5. Printing
Open the solid conversion file in Cura software, at first scale adjust and set the printing parameter,
then check about g-code file, if there is no errors send to the printer to print.