W10│ Molding and Casting
- Design a 3D mold around the stock and tooling that you'll be using, machine it, and use it to cast parts
1. 3D Model
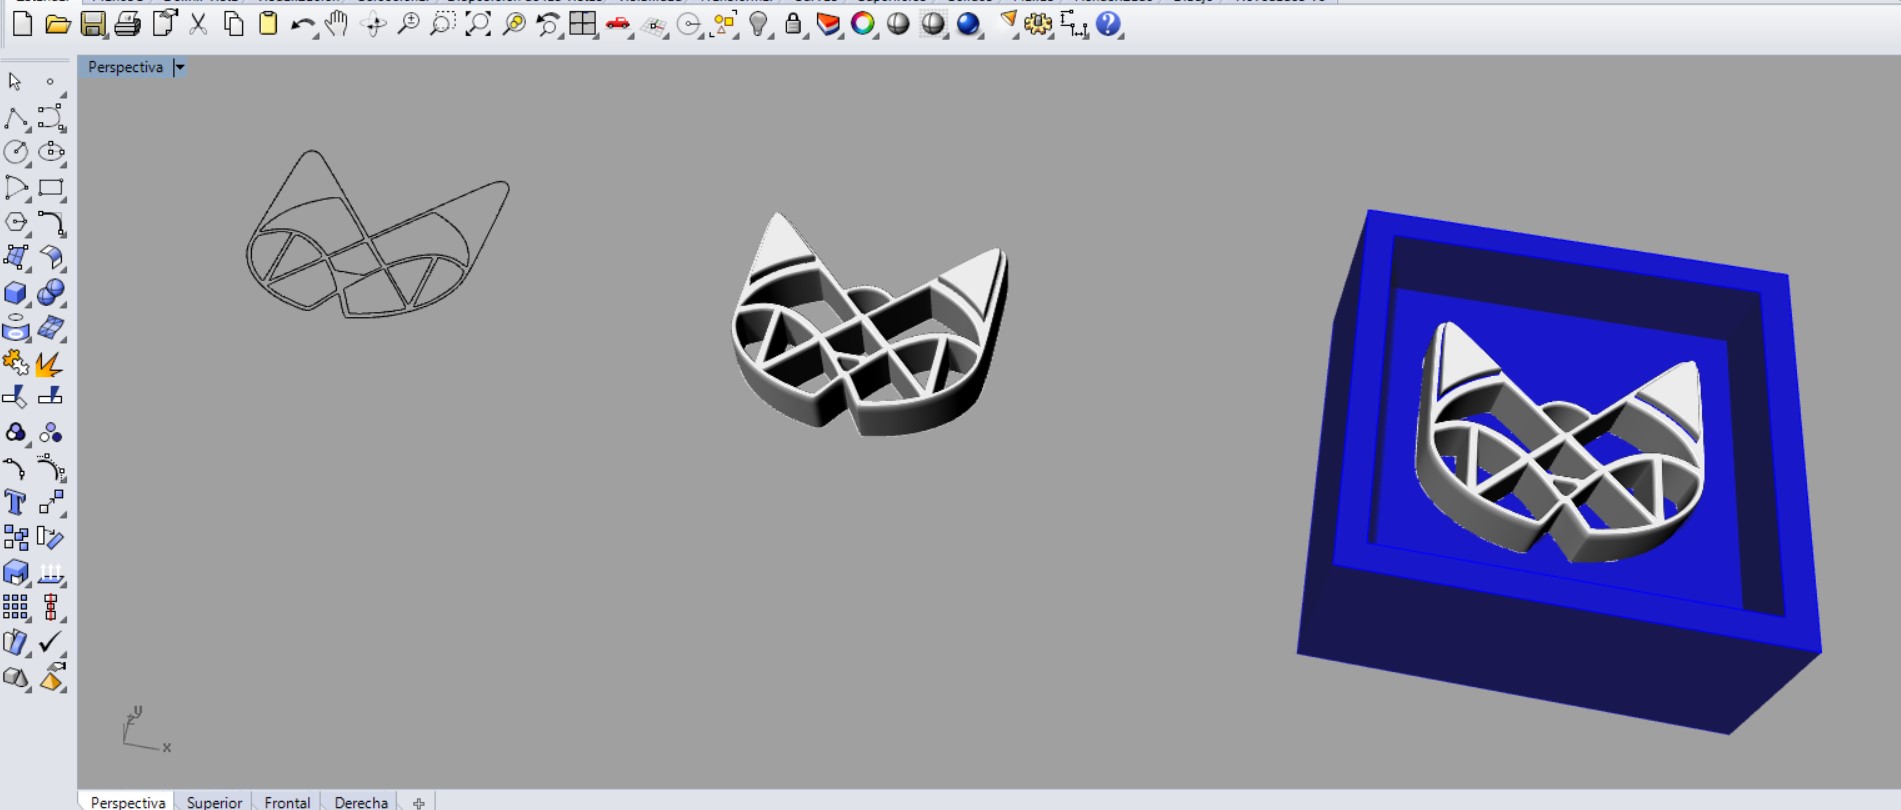
Due to my career I had previous experience with this subject so for this assignment I decided to mold and cast a cat icon I've been using as a logo in several assigments. For the 3D model I used Rhinoceros, the process was really easy.
- First: I imported the DXF file, extruded it and softened the edges.
- Second:I created a box considering the space and depth of cut of the milling tool.
- Third: Exported the model - OBJ file.
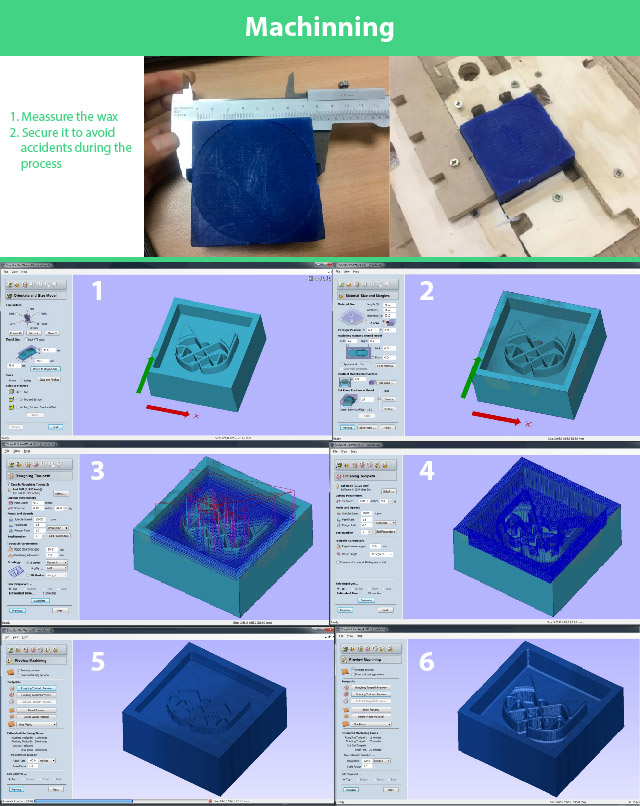
2. Machining
For Setting up the materials I used
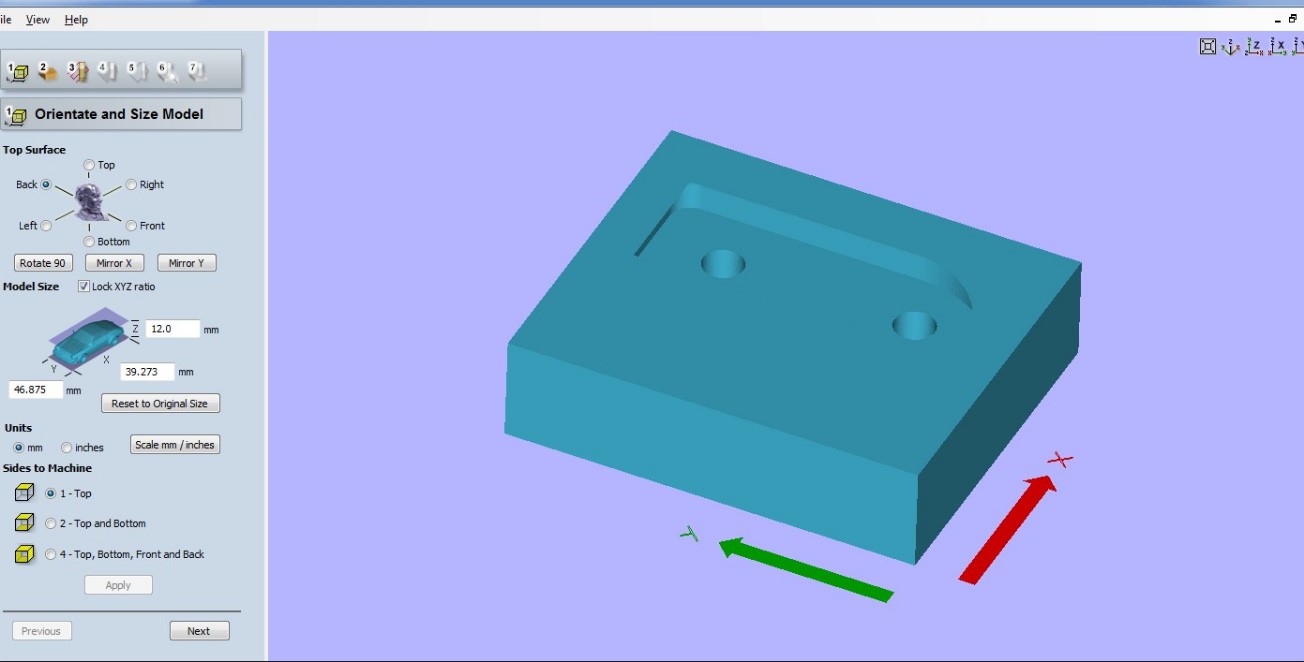
- (1)Set up the Model Orientation & size. Prior going to the software I measure the wax.
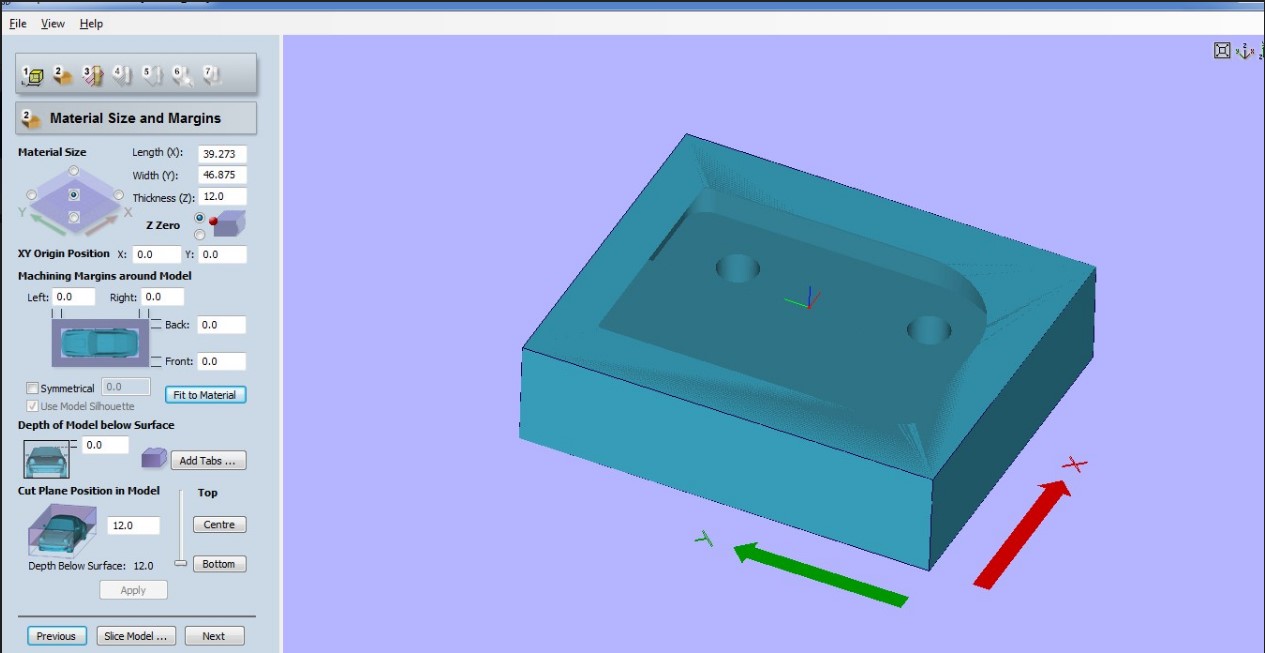
- (2)Material size and margins: Molding wax
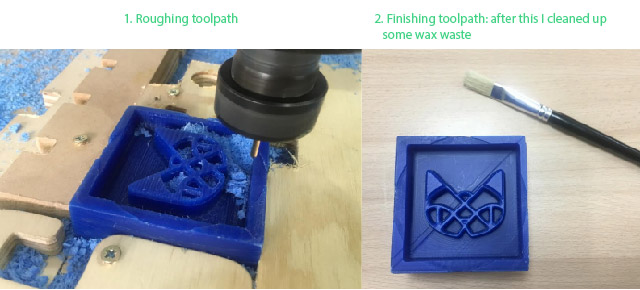
- (3)Roughing toolpath: selecting end mill diameter (0.0625).
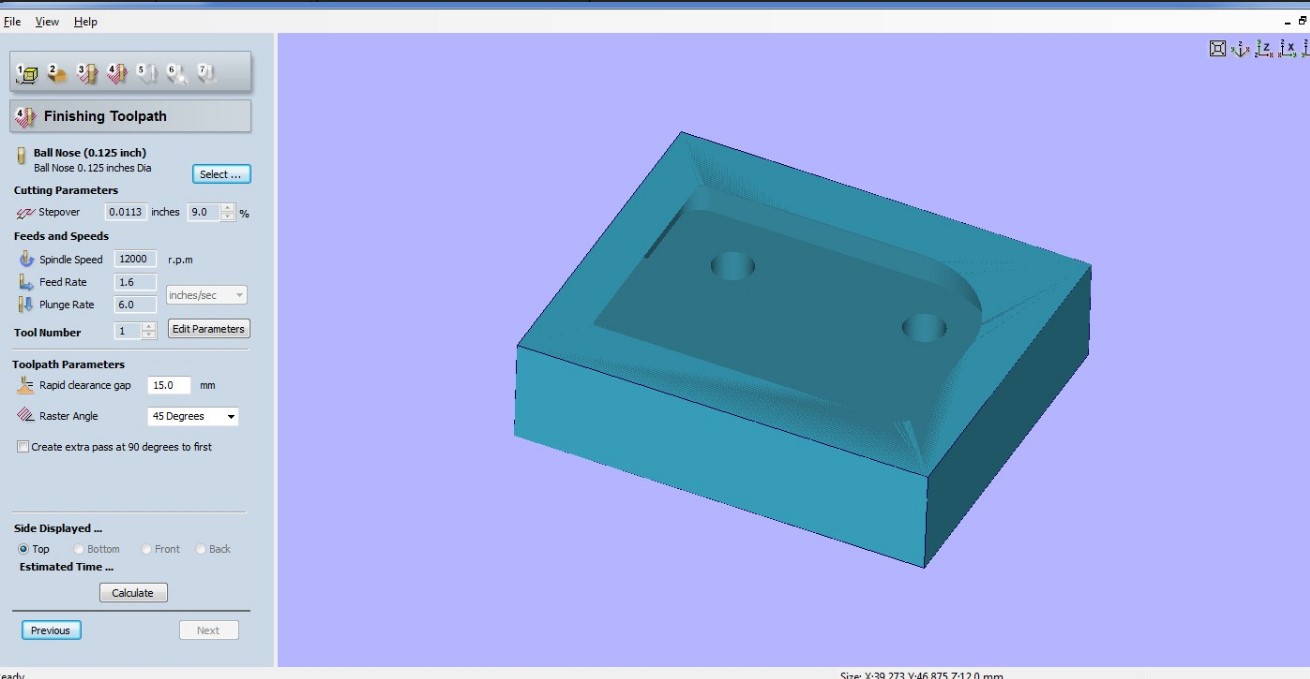
- (4)Finishing toolpath: selecting ball nose mill diameter (0.0625).
- (5-6)Preview machining: this part will show haw both mills will work and how much time it would take. For the roughing 11 minutes and for the finishing 20 minutes.
- Result
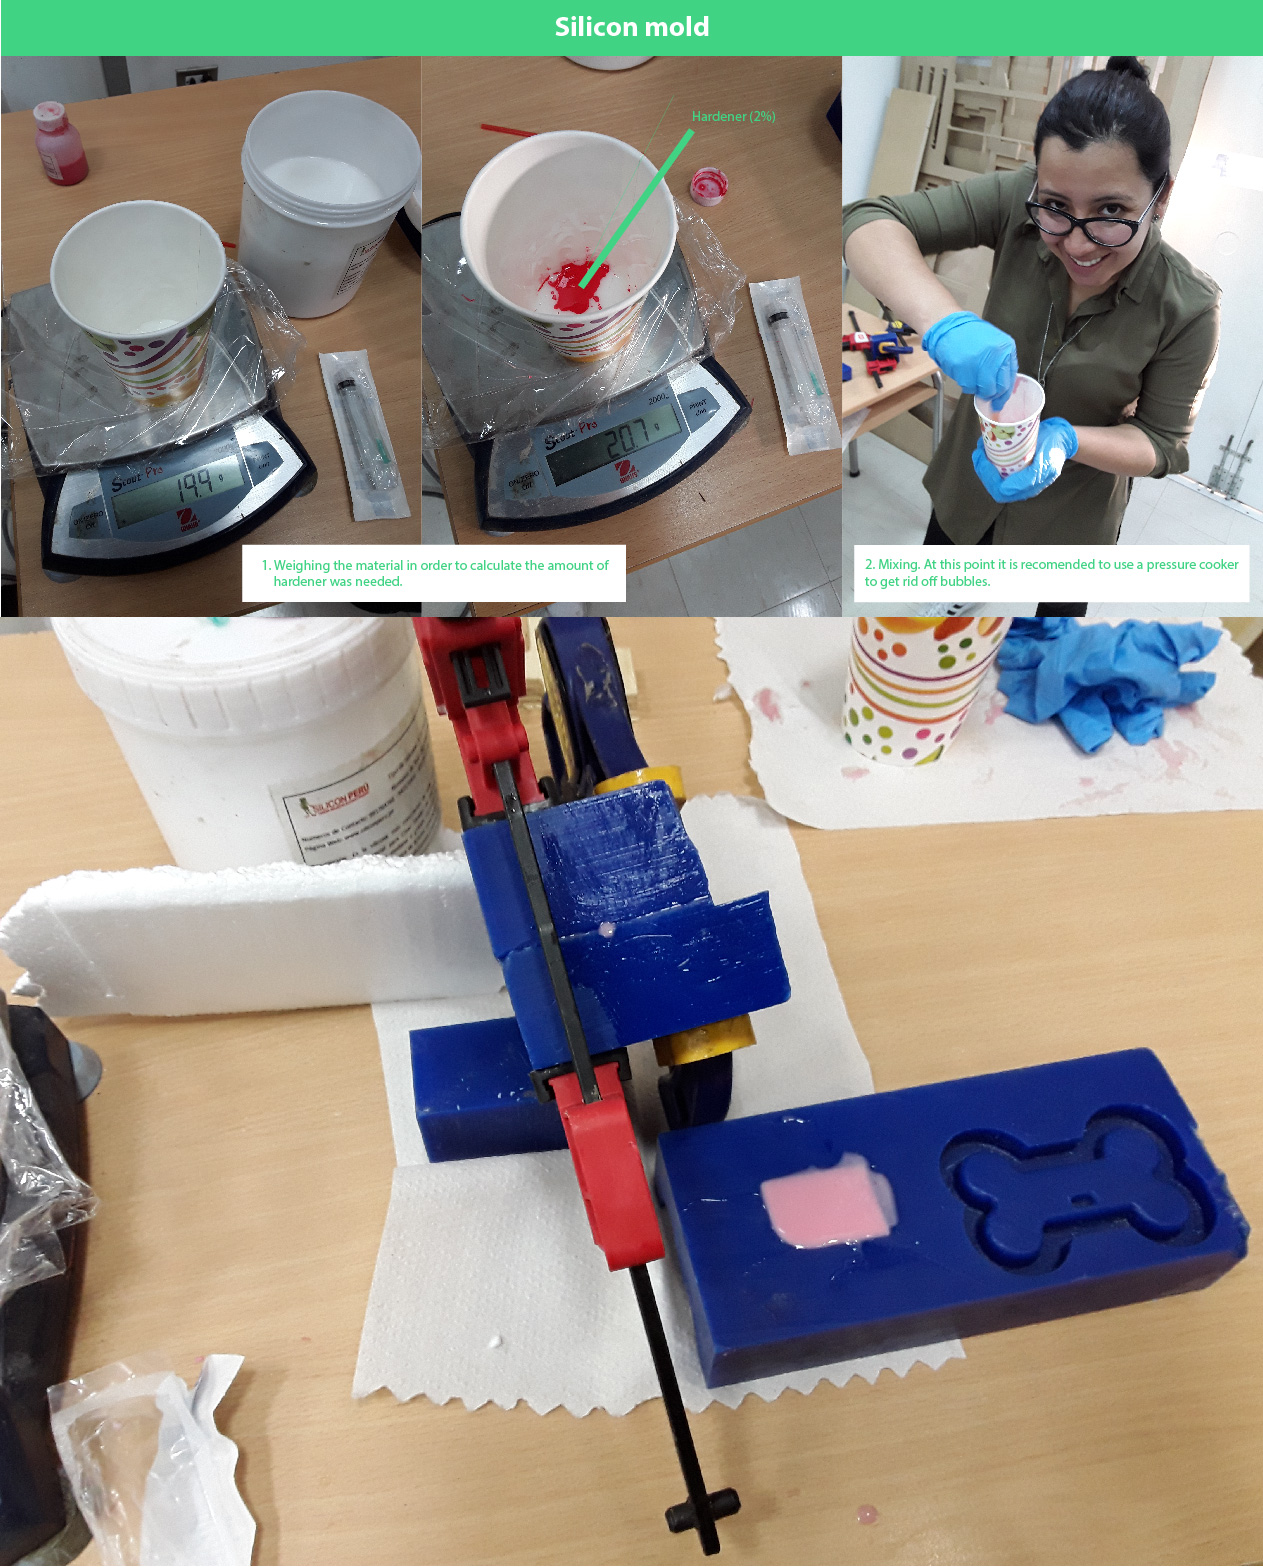
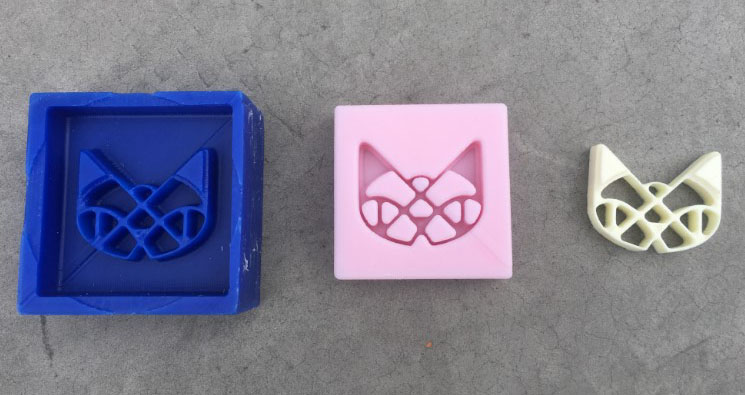
3. Silicon Mold
I used silicon F-30 plus with 2% hardener solution. The curing process took almost a 5 hours (due the size of the model), and when the silicone was fully hardened, it was easy to remove it from the wax. Safety advise, it is very important to use gloves, otherwise the material can cause irritation in the skin.
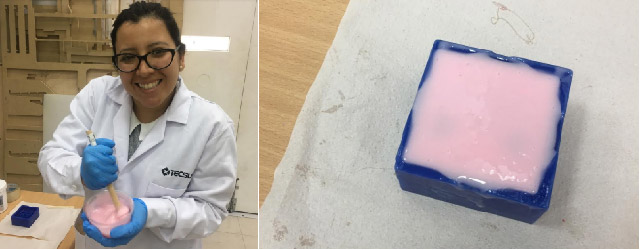
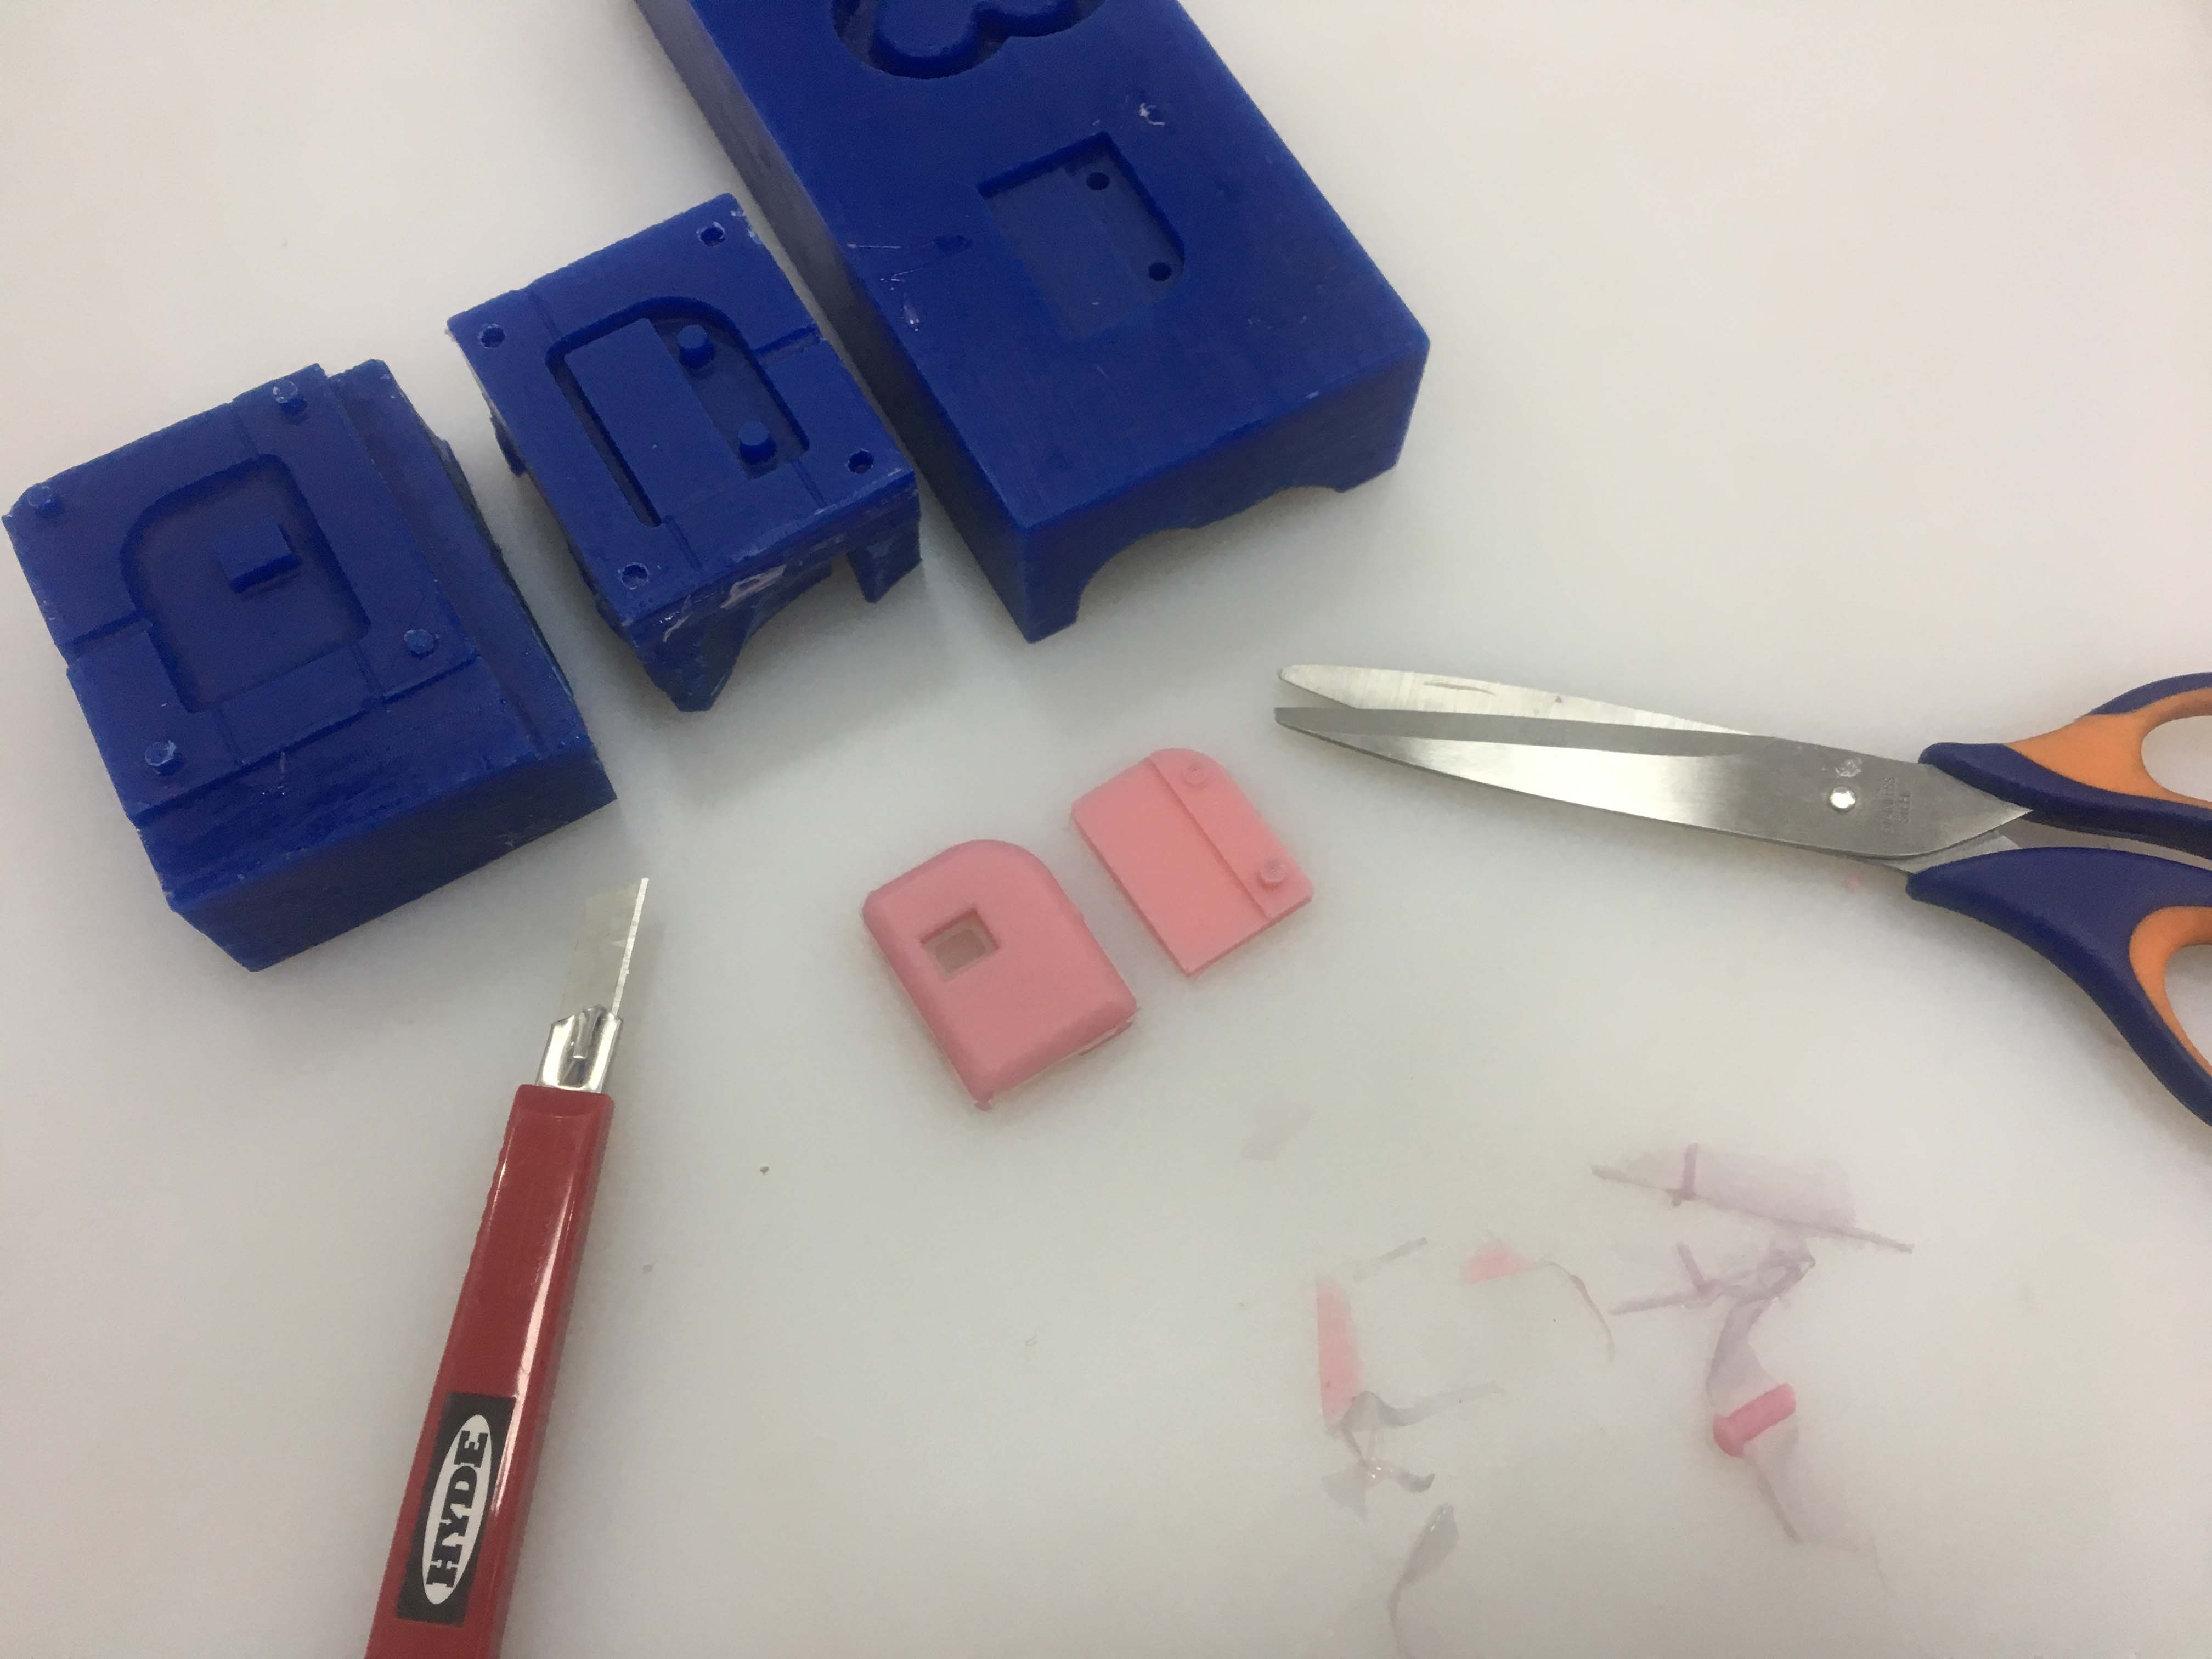
4. Casting
I used Polyurethane Resin- Liquid Plastic, mixing ratio 1:1. It has low viscosity (less bubbles) and cures really fast, it took only 20 minutes.
ADDITIONAL TEST
I wanted to test the 3D model I designed for
Experimentation
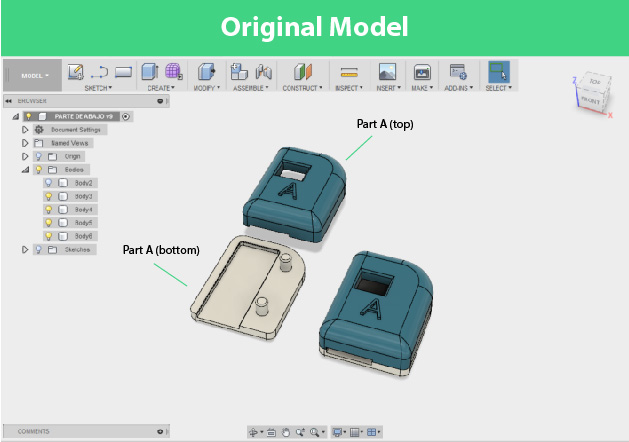
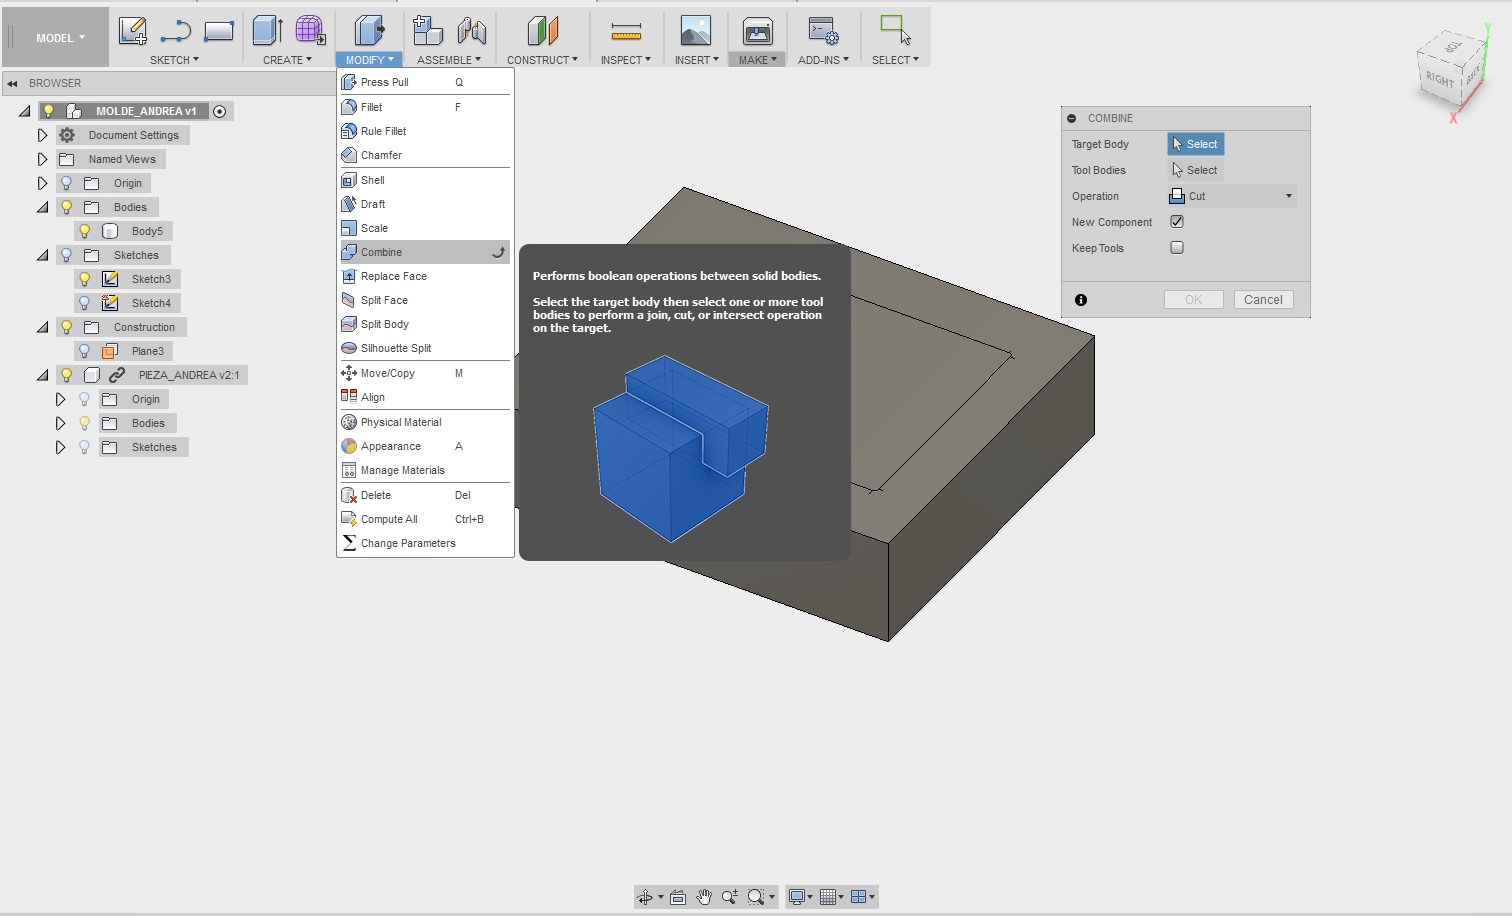
- Create a box with the component inside.
- Got to modify and look for the option combine
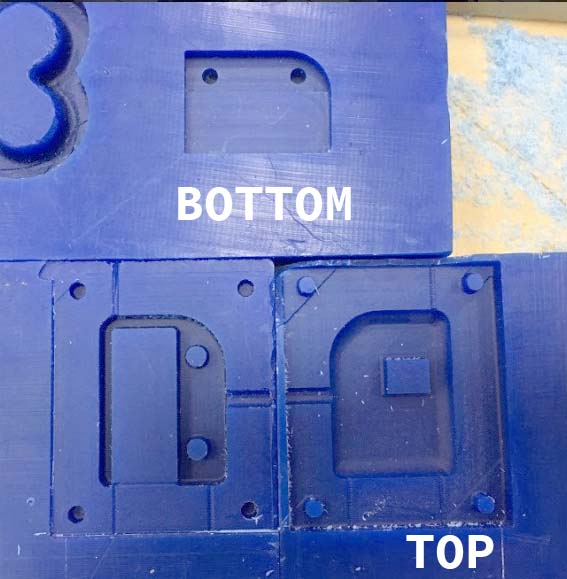
- With the bottom piece was really easy but when I wanted to make the top piece I realized that I needed to make two molds because this piece has special features. I divided it into two pieces as is shown in the model below.
Machinning
To prepare the machining on the Shotbot, I used
Parameters
- Set up the Model Orientation & size.
- Material size and margins: Molding wax
- Roughing toolpath: milling tool configuration. I decided to create the mold in two passes: one roughing pass and one finishing passe, with different mills. The roughing pass was programmed to use the 0.0625 end mill, the finishing pass I use also a 0.0625 ball nose mill.
- Finishing toolpath: using round miling tool
- Simulation and preview machining


Result:
Silicon mold
As in the previous exercise, I used silicon F-30 plus with 2% hardener solution. The curing process took almost a 3 hours (due the size of the models), and when the silicone was fully hardened, it was easy to remove it from the wax.