Composites
Composites, also known as Fiber-Reinforced Polymer (FRP) composites, are made from a polymer matrix that is reinforced with an engineered, man-made or natural fiber (like glass, carbon or aramid) or other reinforcing material.
The matrix protects the fibers from environmental and external damage and transfers the load between the fibers.
The fibers, in turn, provide strength and stiffness to reinforce the matrix and help it resist cracks and fractures.
Objectives
Safety
Epoxy Resin
Pouring and Mixing Resins
Group Assignment
Individual Assignment - three legged boomerang
Safety
Epoxy Resin
Epoxy is either any of the basic components or the cured end products of epoxy resins, as well as a colloquial name for the epoxide functional group.
Epoxy resins, also known as polyepoxides, are a class of reactive prepolymers and polymers which contain epoxide groups.
Epoxy resins may be reacted (cross-linked) either with themselves through catalytic homopolymerisation, or with a wide range of co-reactants including polyfunctional amines,
acids (and acid anhydrides), phenols, alcohols and Thiols (usually called mercaptans).
These co-reactants are often referred to as hardeners or curatives, and the cross-linking reaction is commonly referred to as curing.
Reaction of polyepoxides with themselves or with polyfunctional hardeners forms a thermosetting polymer, often with favorable mechanical properties and high thermal and chemical resistance.
Epoxy resins are low molecular weight pre-polymers or higher molecular weight polymers which normally contain at least two epoxide groups. The epoxide group is also sometimes referred to as a glycidyl or oxirane group.
The Epoxy Resin we used was Easy Cast Epoxy resin, our Fablab gets this one from a local vendor named Aditya East Cast Resins. This is a transperant clear resin and it is made by combining epichlorohydrin and bisphenol A to give bisphenol A diglycidyl ethers.
Some of the features from the data sheet are
1.MELTING POINT °F: Not Determined
2.BOILING RANGE: IBP 352°F (178°C) (IBP = Initial Boiling Point)
3.APPEARANCE AND ODOR: Clear viscous liquid with a slight odor.
4.SOLUBILITY IN WATER: Negligible.
5.EVAPORATION RATE (BUTYL ACETATE =1): N.A.
6.PERCENT SOLIDS BY VOLUME: 100
7.VOC GRAMS/LITER: 0
8.VOC LBS/GAL: 0
9.PERCENT VOLATILE BY VOLUME: 0 %
10.PERCENT VOLATILE BY WEIGHT: 0 %
11.VAPOR DENSITY (AIR =1): N.A. VAPOR PRESSURE(mm Hg @68°F): less than 1
12.SPECIFIC GRAVITY: 1.15 g/cc DENSITY: 9.6 LBS./ GAL.
For Epoxy resins all of their retail formulas are two-part epoxy systems made up of a resin (Part A) and a hardener (Part B).
As with all epoxy resins, our systems are designed to work in a specific mix ratio between the two parts.
Our Epoxy-33-A epoxy resin with Easy cast-33-B Hardener works in a 100:50 mix ratio by weight or a 2:1 volume ratio.
Pouring and Mixing Resins
Measuring and mixing epoxy resins accurately and safely is an essential skill for any resin user that wants to stay healthy and have great results with their project. Eventhough this was not completely happened with my individually assignment this week, pardon me as its my first time.
The basic steps during pouring process we done the Fablab is below
1. Begin by powering on your scale and choosing your unit of measurement.
2. Place your mixing cup on the scale and reset the scale to zero by pressing the Tare or Zero Scale button.
3. Pour your epoxy first and note the amount poured.
4. Calculate the amount of hardener needed based on that amount of epoxy resin that you poured.
5. For my individual assignment case, i used 150 grams of epoxy, that would require 75 grams of Hardener, this will give us a total combined weight of 225 grams of mixed materials.
6.Pour in your hardener, directly from the bottle to the mixtures.
7. If you pour slightly above your target weight, dont worry. As long as you are within the 5% maximum error margin specified for this resin system you are fine.
8. After the two parts are poured at the correct ratio, mix them together thoroughly for a full 2 - 3 minutes with a mixing stick, mix longer for larger quantities.
9. Be sure to scrape the sides, corners, and bottom of the container several times during mixing. This will ensure that all the hardener is thoroughly mixed with the epoxy and should prevent the resin from having an improper cure.
10. Make sure to scrape both sides of the mixing cup also. If the mixture doesn't have a single consistency continue mixing until fully blended.
11. Start pouring or applying the epoxy immediately, the larger the quantity of mixed material in the cup the faster the Pot-life and working time.
Group Assignment
Objective - Produce test coupons for your composite fabrication process
We used Burlap Fiber & linen as Fiber and Epoxy as Resin for our Group Assignment.

We cut the fiber materials in a definite shape and arranged one top of other.
We took out three layers of Burlap and two layers of linen as the fiber bed.
We made three such beds with fibers arranged in different angles for different beds
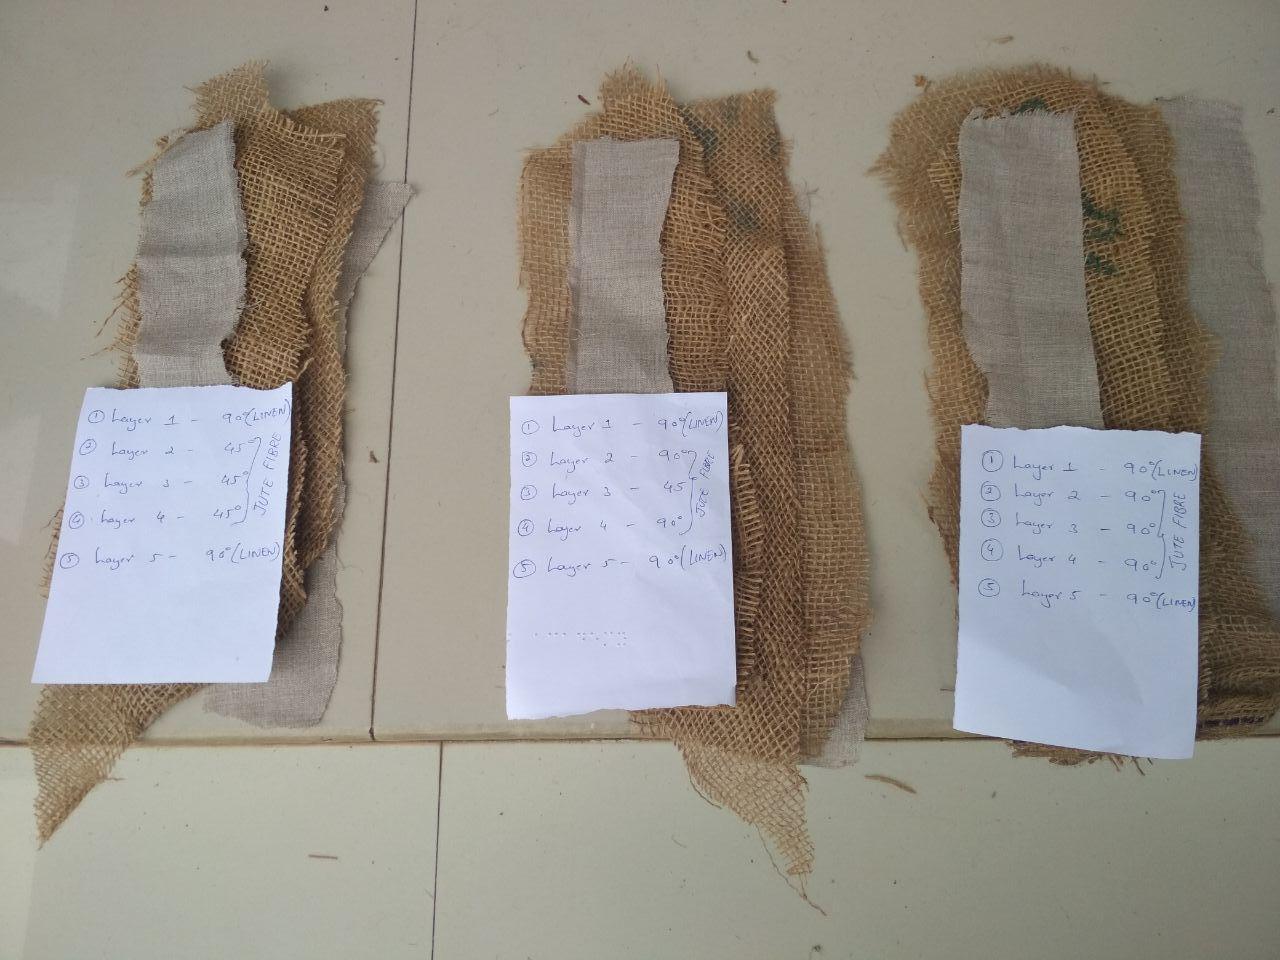
For the first bed Burlap layers were 45 degree and Linen layers were 90 degree.
And the second one,two Burlap layers were 90 degree, the middle Burlap layer 45 degree and Linen layers were 90 degree.
Then the third bed with Burlap layers were 90 degree and Linen layers were 90 degree.
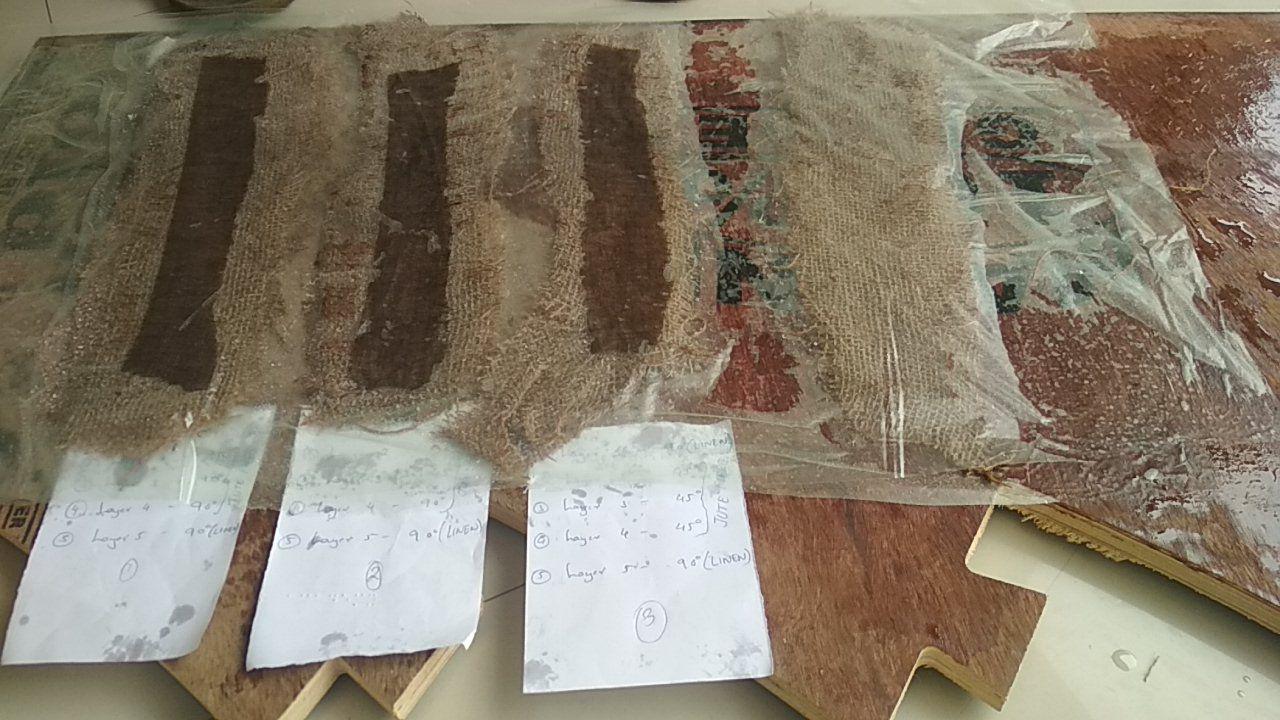
Results
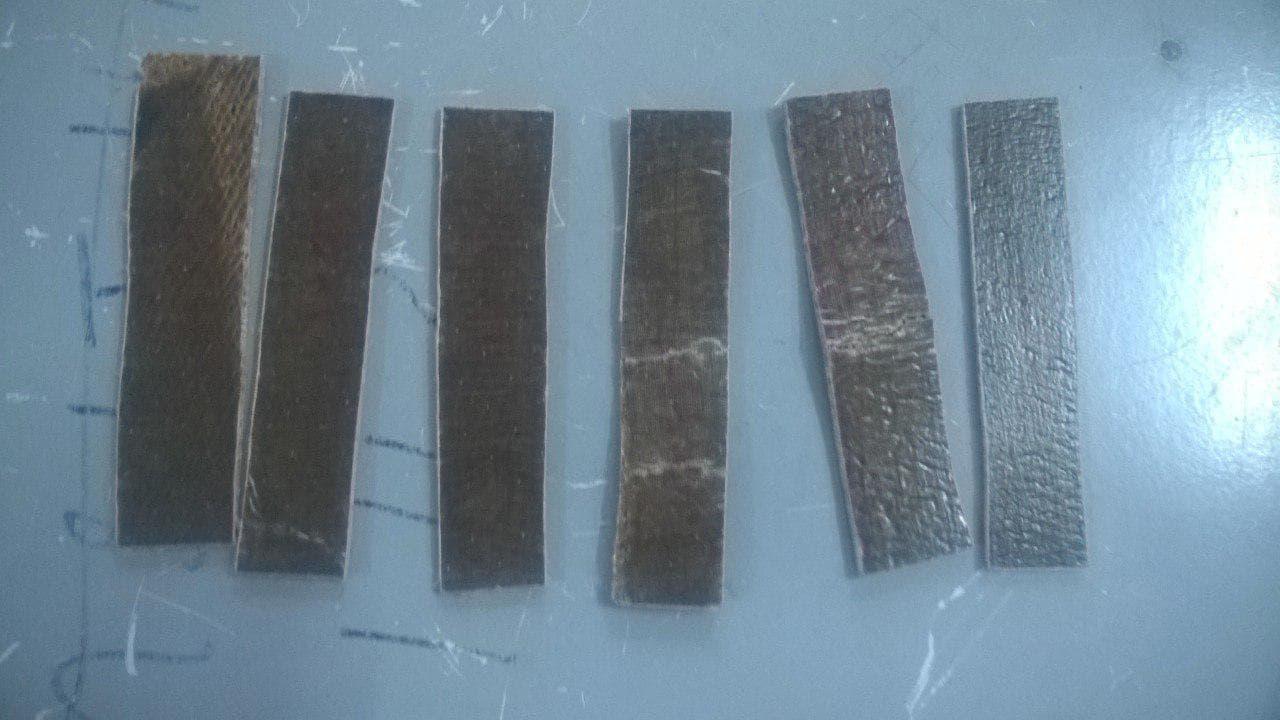
The first one with Burlap Layers 45 degree was the one with the best strength , followed by the second one.
Still all of the three was hard and strong, thus showing the relevence of composite material compared to plastic or fibers.
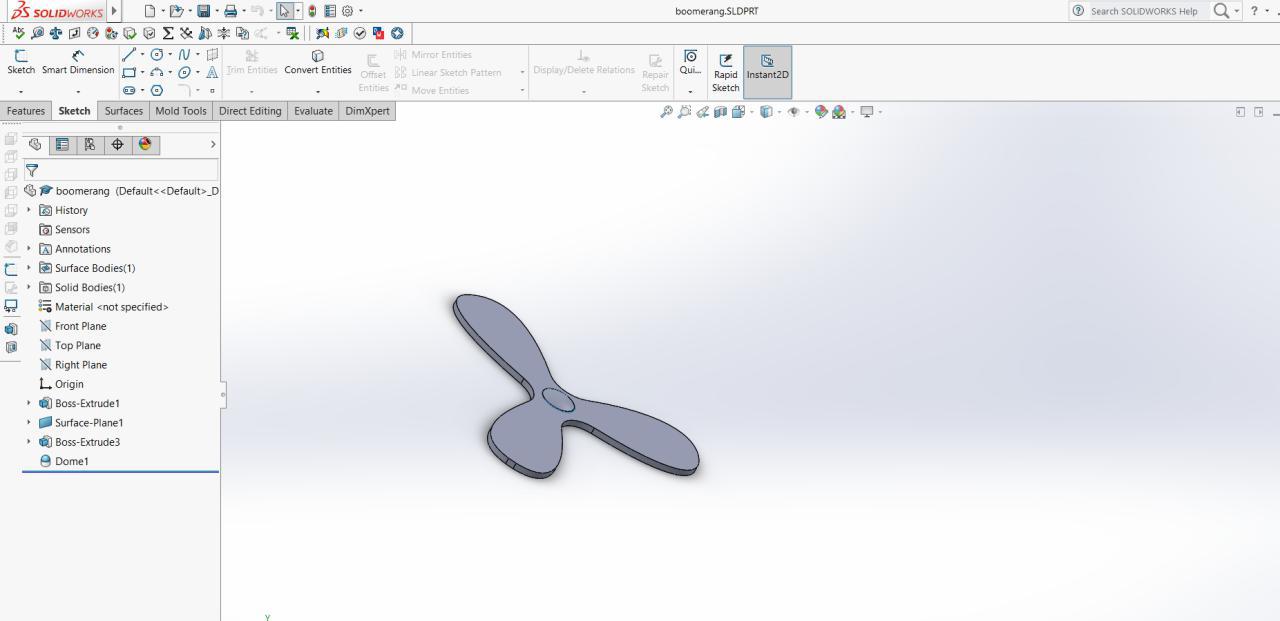
Individual Assignment - A three legged boomerang
Designing
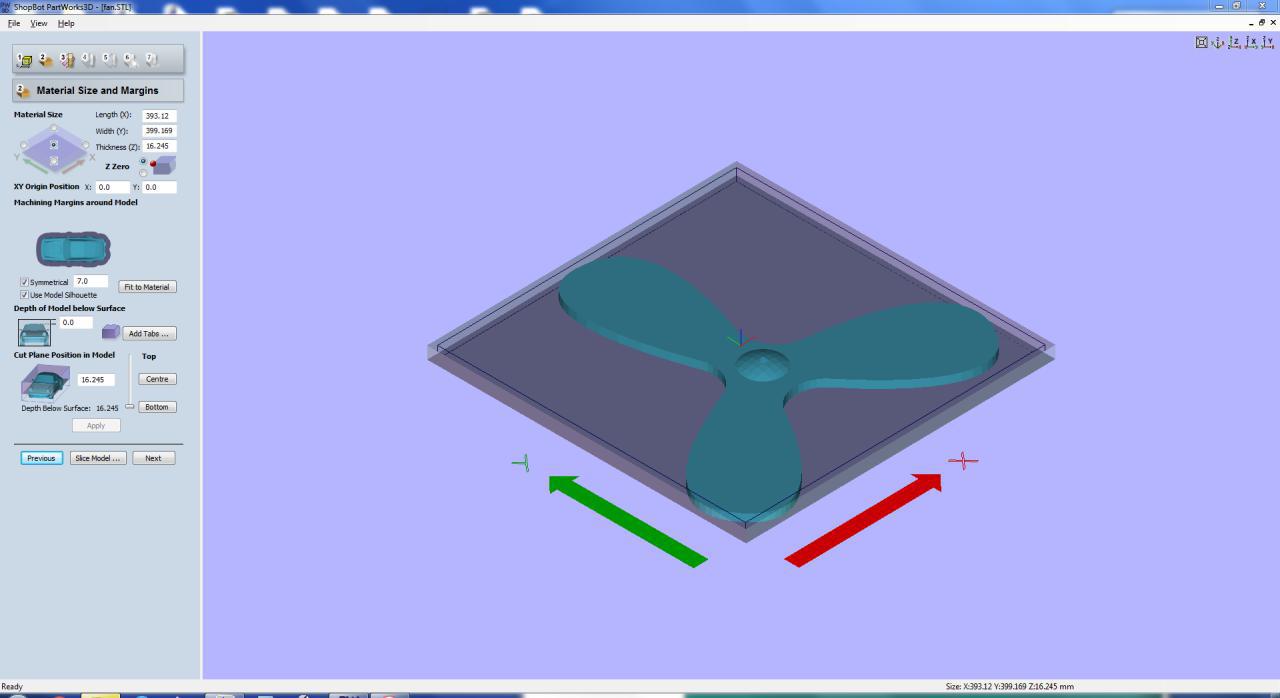
I decide to make a three legged boomerang, it is a weird idea, but i decided to design the mold(positive).I designed it on SOlidworks.
Machining
Unlike the the previous molding week assignment i just have to take the positive mold of the material rather than making a negative mold. So this time we used Shopbot Parts Work 3d software for making the mold gcode and .Stl file of my design was used.
In Shopbots Partworks 3d we could directly give our .Stl file and settings, and make the G-Code for the machining in Shopbot

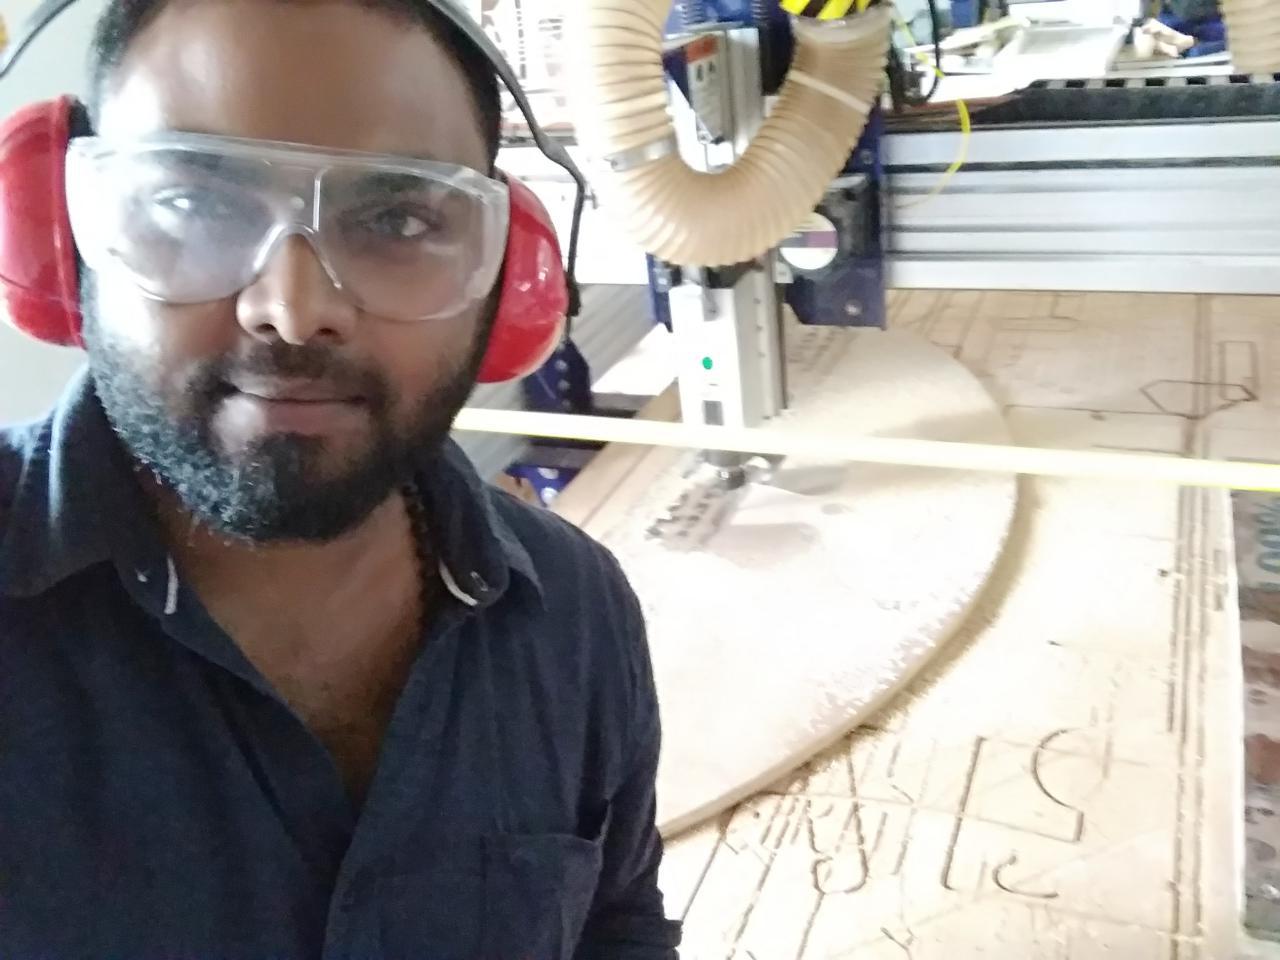
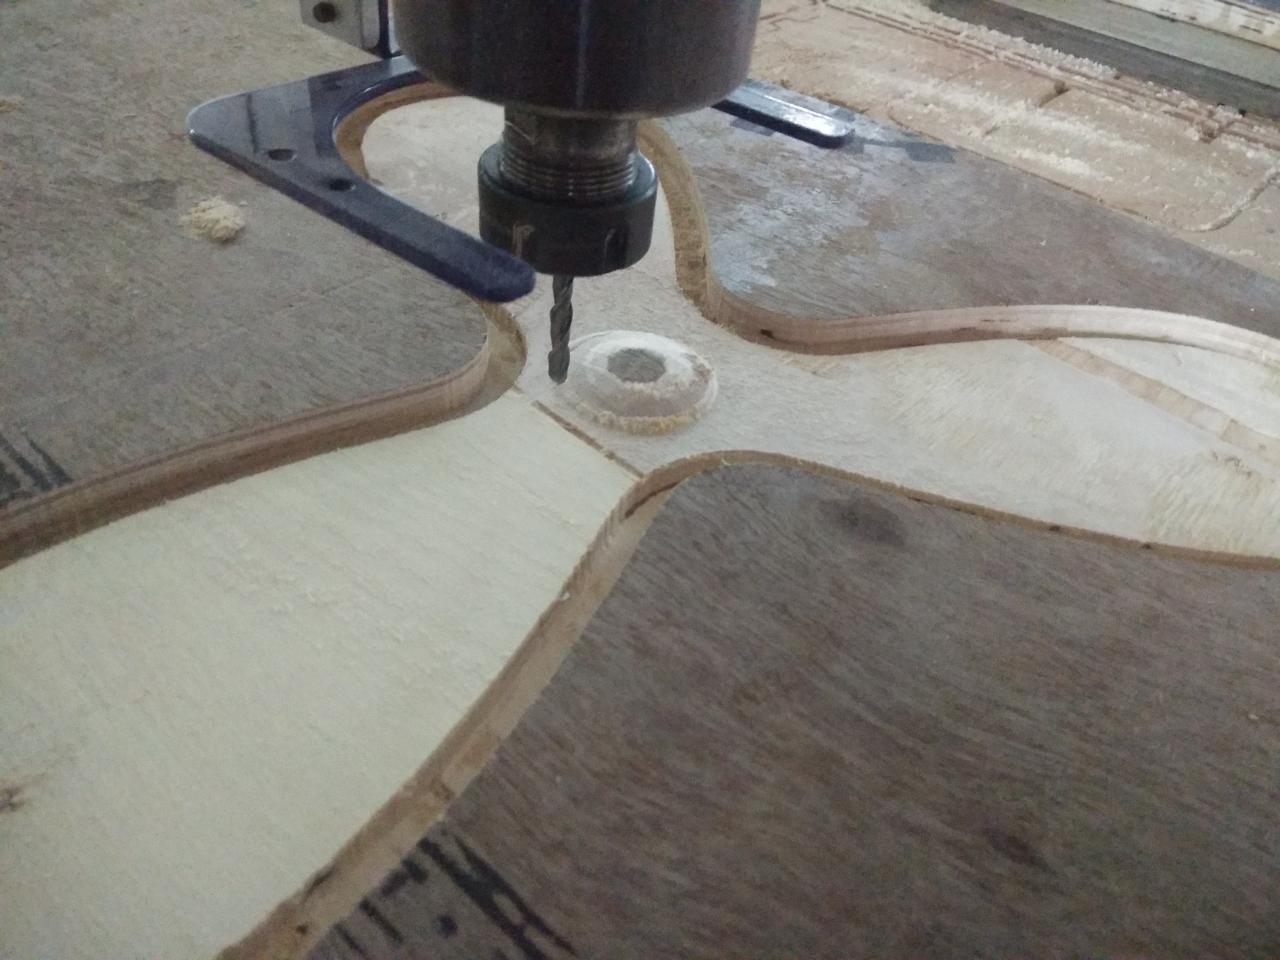
Shots during the machining
Poruing the resin and hardner
As i said earlier I choose 150 gram of Part A and 50 grams of Part B.
I have no photos of me mixing and pouring the resin because i was all occupied with gloves and there was one to take photos of me doing the stuff( this happens if you are the one who takes photos for your teammates).
I used burlap and cloth as fiber material
Two layers of Burlap on bottom and top and two linen Cloth pieces on the middle
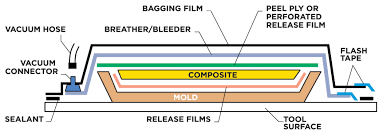
Vaccuming and Setting
So after making the bed, I have to remove the air bubbles to get the right composite setting
I covered it with plastic and vaccumed it
Vaccuming procedure
After vaccuming i noticed still there are some air bubbles inside the setting, but it was high time that i left it for setting. I kept the bag of wooddust from the Shopbot on top of it to set.
So after a day, i opened the cover , see image below
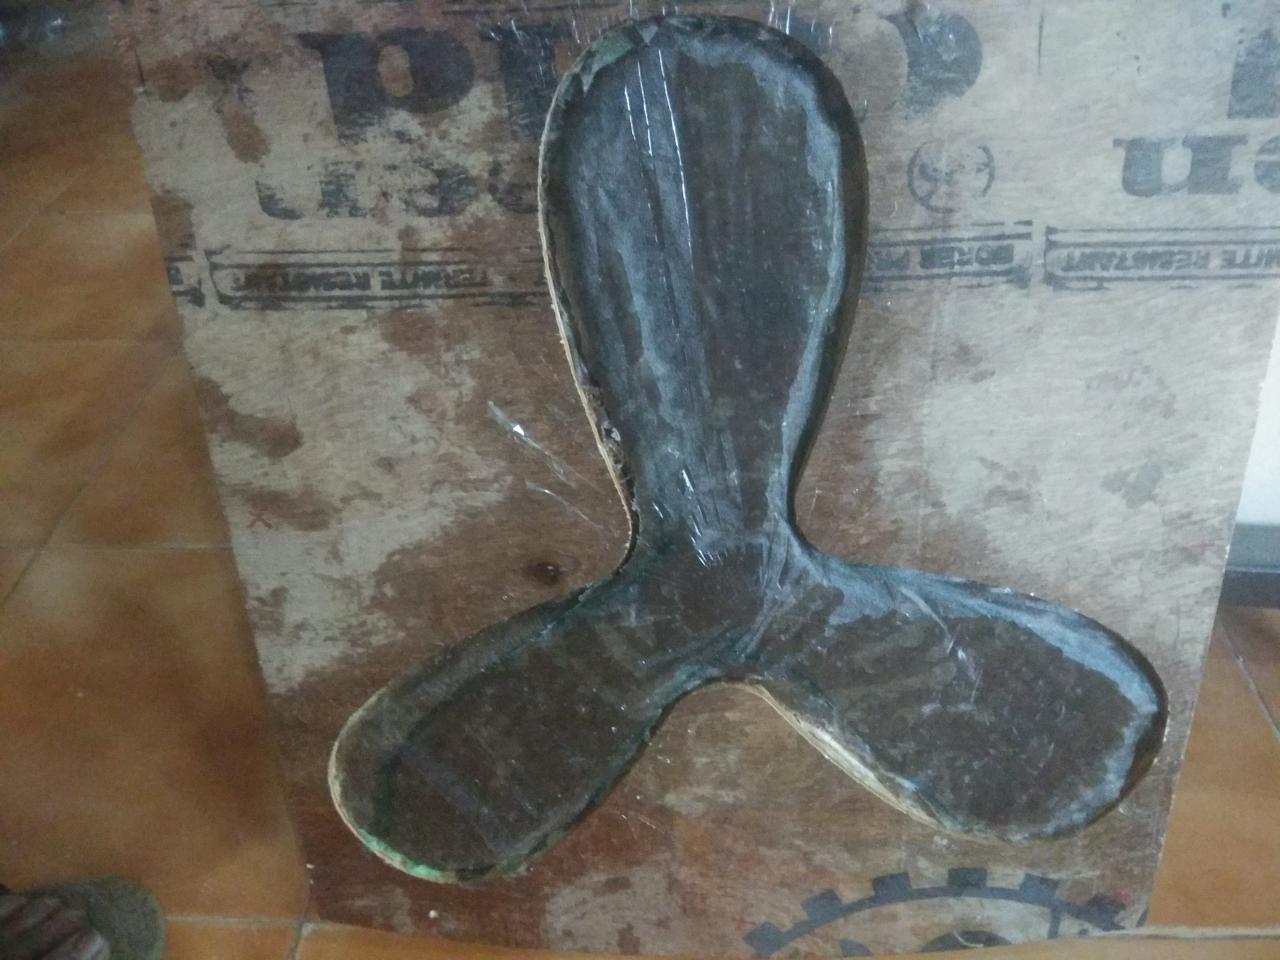
Result
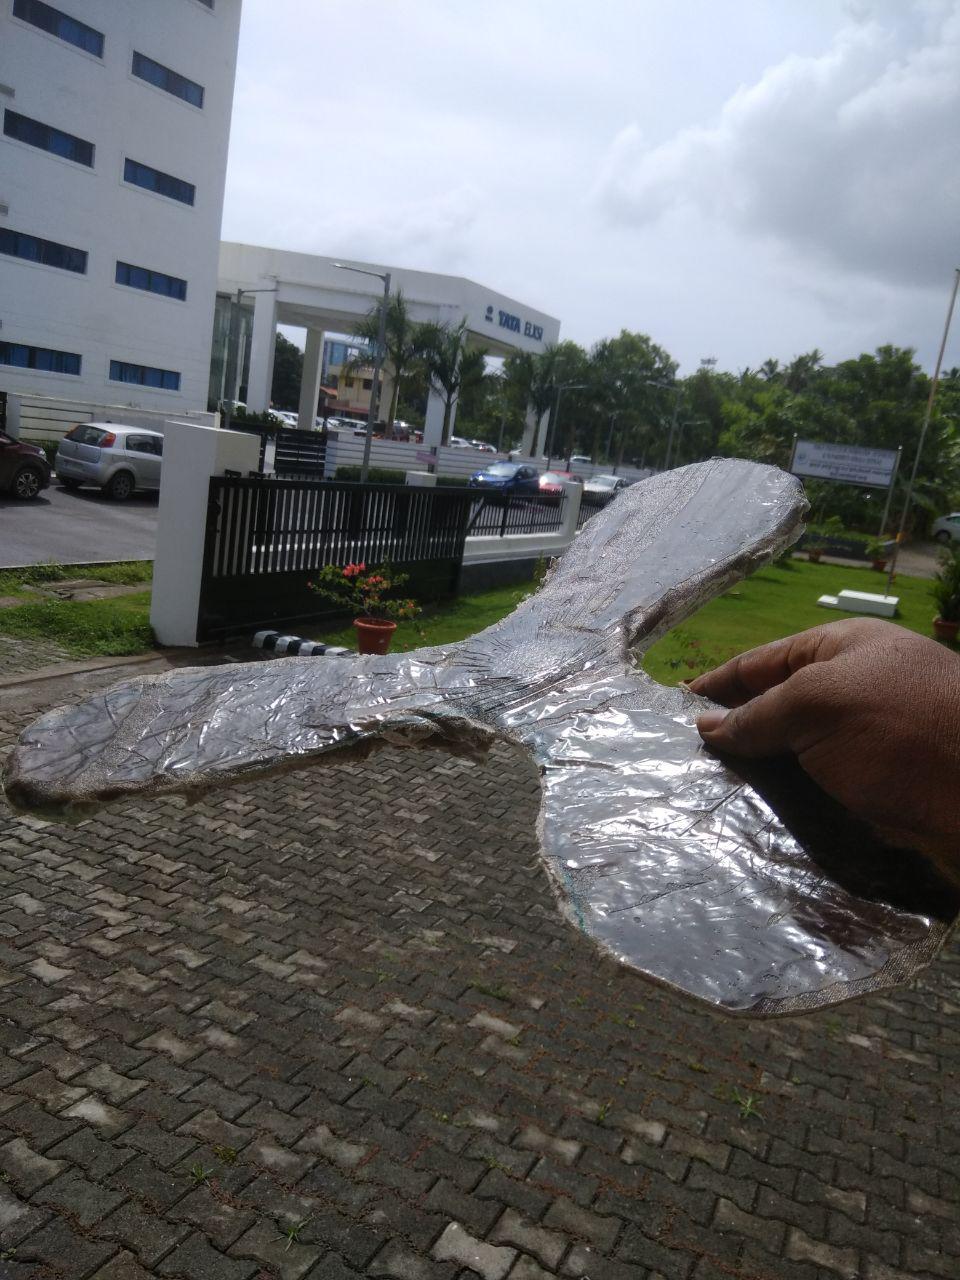
Even with some slight problems at the end , i managed to make my boomerang
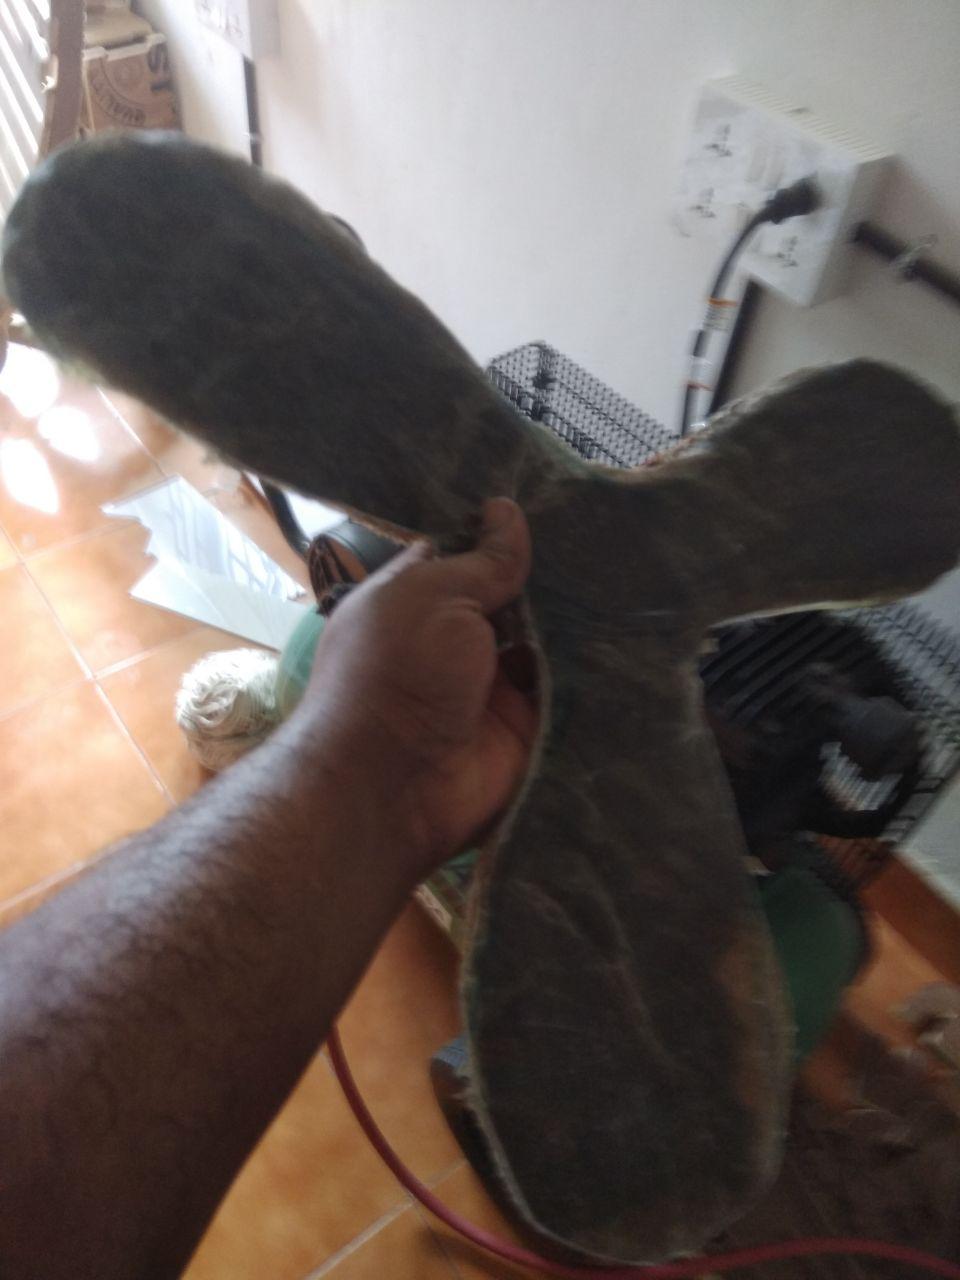
Now I should try to make it fly outside
This work by Aby Michael is licensed under a Creative Commons Attribution-NonCommercial-ShareAlike 4.0 International License.
