#include mainGRBL.h>
and then connect the Arduino and upload the program.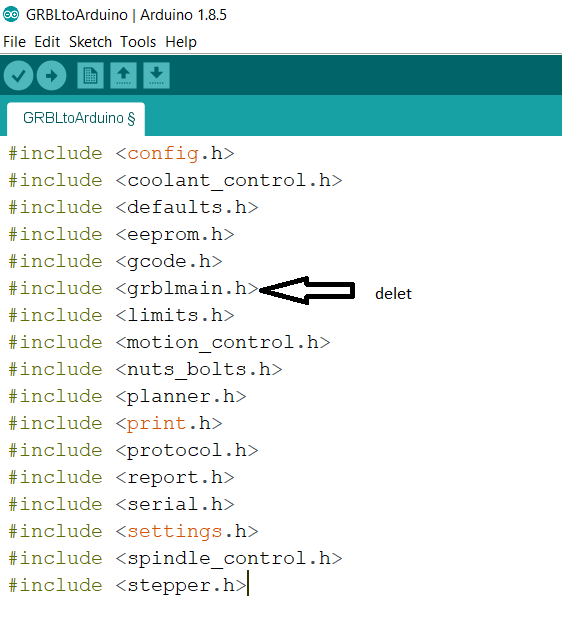
For this week we must actuate and automate our machine.
To know how to convert any image to Gcode for the plotter.
Stepper motor is a motor that moves in steps. There are a lot of types of a stepper motor. Limit switch its a sensor that we put in the start and end of the axis to tell the stepper motor that it reaches to the end. They used it for safety. Servo motor it's a motor that we used to move the pin.
We divided the work like last week Zubair and Darshan will take the stepper motor and the limit switch, zahrah and abdullah will take the servo motor, and salama with me will take care of the software and how to convert the image to gcode and will collect their work to integrate with each other. Here is the group assignment.
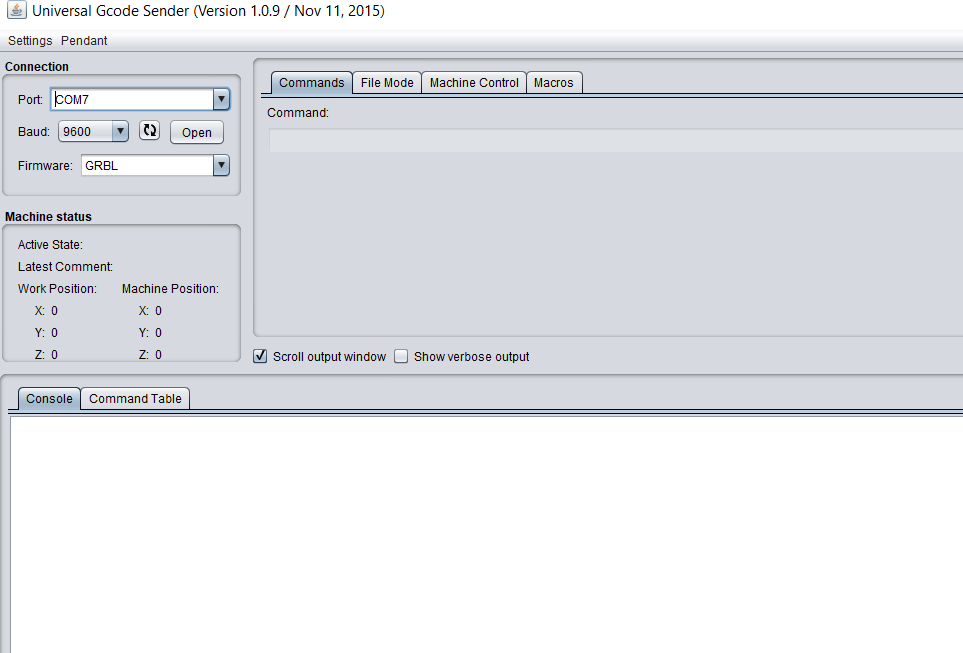
Salama and I searched to download the software. She found it, It requires to download Java and then download Universal Gcode Sender.
Moath gave us a session about Universal Gcode sender and what is the library that we must add to Arduino also what and How to document.
Its a library for controlling the CNC and it work with the software that we will use to move the CNC. Moath told us how to download it also how to add it to Arduino. The library in this site The site also explain how to do the same process we did.
After I download the library we open it from Arduino and we delete #include mainGRBL.h>
and then connect the Arduino and upload the program.
Gcode is a language we used to tell the CNC machine how to move. and this software helps us to interface with it.
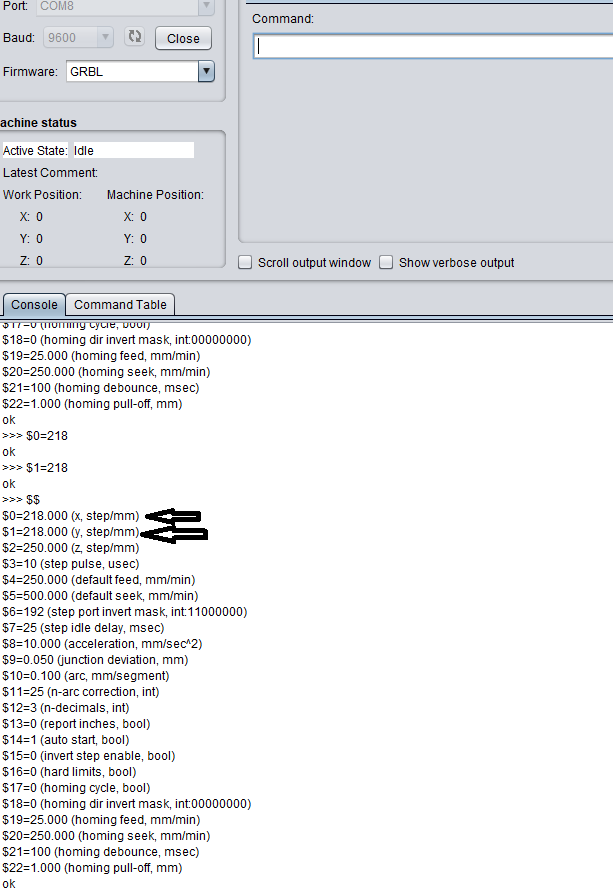
in the first column called command you can write $$ to see the default setting (this site explained the meaning of each number) also you can change the setting for example if I want to change 0=24 to 0=58 I just write in the command $0=58 and it will change.
In order, to calculate the distance and how much revelation it takes. I must know how many steps it needs in the stepper motor to finish one revolutions. After reading the schematic from Digikey I knew that one step is 1.8 degree. So by dividing 360 over 1.8, I know it takes 200 step.
Then to measure the distance it takes. I put a line at the end of the thread to know how many times it rotates and then Salama fixed the caliber above the X-axis box and took note of the distance. Then I move the X-axis from the software by one click and Salama fixed the camera at the end of the thread to see how many time it rotate. After it moves I took the distance again and subtract it from the old distance to take the difference and Salama took note of the rotation. I found it take 9.1 mm in 1.25 rotation. So it was 9.17 mm in 250 step. To know how many steps in 1 mm I divided 250 over 9.17 to get 27.26 step in 1mm.
Then Salama put a jumper in the CNC shield to reduce the noise and it turns to micro-steps. So I learned that 1 step is 1/8 micro-step. This means I must multiply 27.26 steps by 8 to get 218 micro step in 1 mm.
After I knew the steps it takes to finish 1mm I changed the setting of the x and y-axis from 25 steps to 218 micro-steps by writing for the X-axis($0=218) and ($1=218) for the Y-axis.
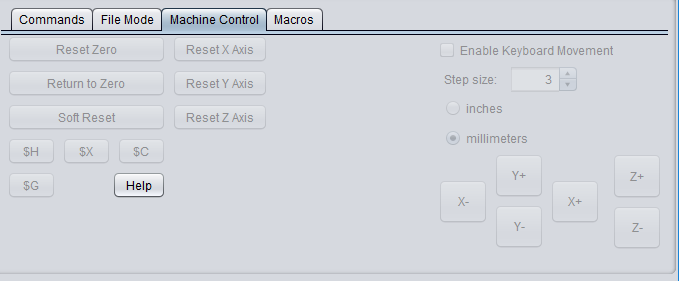
Then I learned how to move them to make origin position by moving any axis and then click reset that axis.
To use Inkscape for drawing Darshan told me about an website that has G-code extension Also it explains how to download it.
After downloding the extinsion I made a circyle and
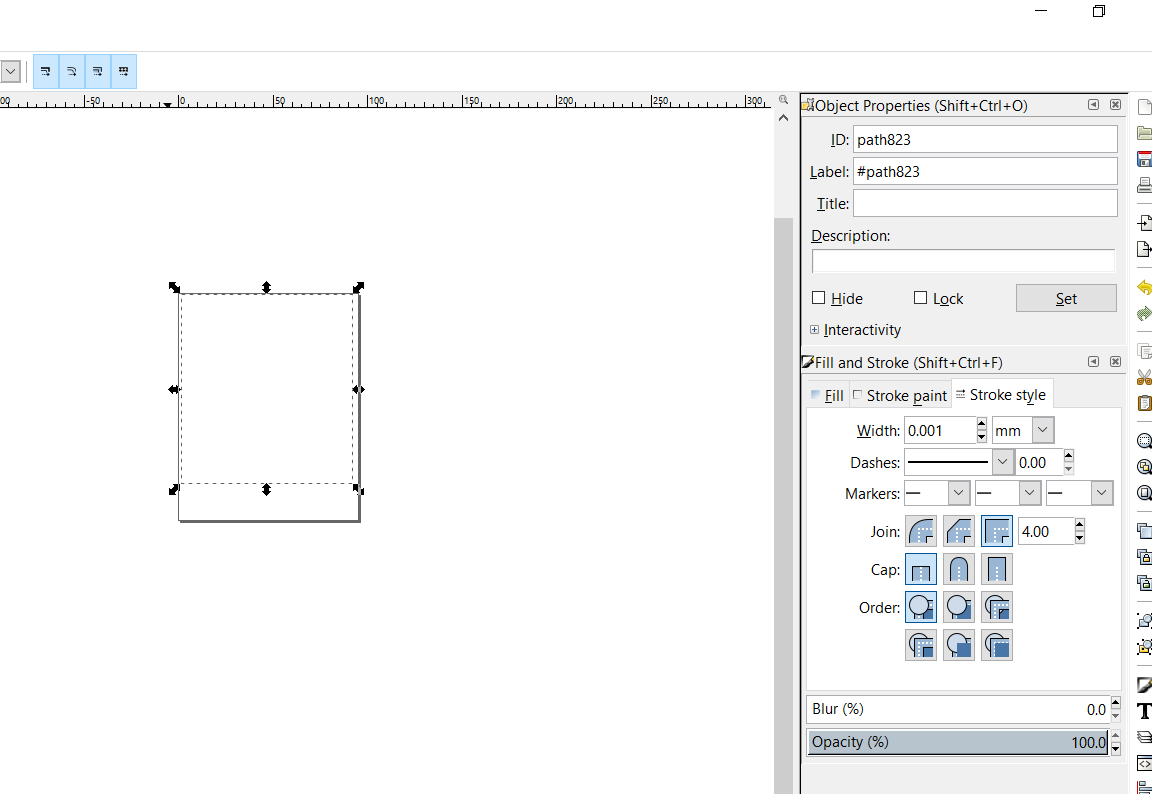
then I make the line hairline.
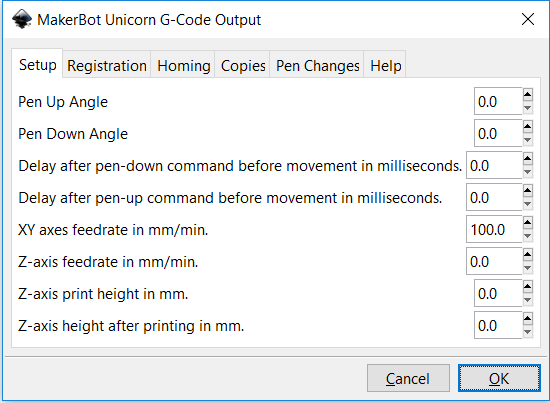
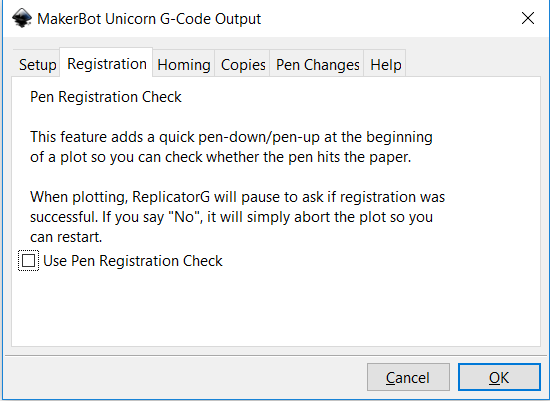
Then I went to the path --> convert the object to path. After that, I went to file then save as then choose the file type to Gcode extension then a window will show. When this window appear (ypu can see it below) I clicked ok without reading and I went to the software then I imported the image from file mode to upload the file. When I uploaded it and send it, It didn't work. Later Zubair traied a lot until he discovers that the window in inkscape is verry important because when he change all values to zero in setup except XY axes Feedrate cause he can't and uncheck the box registration. By changing that I succeed in converting the drawing to a G-code and making the machine work.
After these two wonderful weeks, I learned and enjoyed a lot. It was great to work with the team we all gained an experience from this two weeks. I learned how to move the two axes and how to convert images to G-code I'm happy that I took this role. I want to learn more about G-code and another software like universal G-code.