Once upon a time...
In the old days, we where using the observation of the nature to detect what it was armfull for the living species. The planet is in a constant equilibrium, if their is a change somewhere, their will be a chain reaction to find a new balance between all. The human is not an exception and create impact (good and bad) all around him. For many thing, if our 5 human sens could not sens anything, we than think that everything is perfect. Perhaps, back in 1928, the coals mine workers were always at risk to be intoxicated by carbon monoxide. Their main problem was that this gaz is odorless and transparent and it can kill humans in few minutes but our sens are not capable of detecting it. Hopefully the searcher John Scott Haldane respond to that problem suggesting to use a sentinel species that have more sensitive sens than human reliated to that gaz. If the bird died, the worker was alert to leave immediately the mine.
Nowaday we have plenty of sensor who can do that job, but even than, the pollution of the air is something very difficult to imagine and become acquainted with the impacts of it. It’s transparent and usually odorless so you have difficulty to notice it. In summary even with sensor and technology, the best way to know if a environnement is healthy, it’s with observation during time. Sadly when we observe nature changes, it’s already too late. Is it possible to mix nature observation and technology to see the invisible? Today, 9 of 10 persone breath polluted air and around 7 millions death are link to indoor and outdoor air pollution. What can we do to contribute to a solution?
History of the coal mine and canaries
Statistics world wide air quality
Effect of using an indoor air quality sensor on perceptions of ans behaviors toward air pollution (Pittsburgh empowerment library study): Online survey and interviews
What exist and contribute
They already have a lot of effort from a lot of stakeholder in that field. The city produce air quality data with standardise elements. The thing is, the city install sensors at some strategic points, but the air is not homogeneous. The people who are more sensitive can not trust these data for their local environment if there is no strategic point from the city near them.
Many company lunched their own sensor (fix or portative one) that contribute to the overall solution. Has citizen you can contribute by buying the portable sensor and create new data to have a better reading of the air pollution reality. One in particular who is very interesting is Plume labs. This company compile many source of data and create a weather application that can inform you on the risk of going outside doing activity. Really well made!
An other one is Air casting where the citizen can buy the sensor and is invited to be a citizen scientists and there data can inform public policy, change makers and personal decision-making.They are many other one with a different price range. A lot of these data can be seen on platform like OpenAQ who centralise all the informations and make it accessible.
When we are talking about air quality, we sens 2 type of pollutant (gaz and solide) who can be classify in 2 big category (natural, man-made). Than for the inside pollutant we are in general interested in:
- CO and CO2
- Particules
- COV or COSV
- Gaz (over 200)
- Chemical
- Humidity
- And more
- CO and CO2
- Particules
- NO2
- Ozone
- SO2
- H2S
- And more
Has you see they have differences but other one are the same. For the fab Academy, I will work in spiral and focus on only one pollutant. The particle seems to be a major one that affect the inside and outside. Also in my understanding, everybody is concern by the particules so the data and the researches of solution are also the responsibility of everybody (City and citizen). Let’s work together to improve our life quality, become a citizen scientist-maker empower and most of all make this world a better place. (I am an optimistic person has you see, I hope you too.)
I found great organisation like HackAir or Luftdaten who are more accessible to everyone. They are open-source and invite everyone to built their own air quality sensor and contribute to democratise the air pollution data on an open source platform.
I met a group of reserchers who study the worshop in France to built the luftdaten sensor. One of their observation was that the people who where comming to the workshop built the sensor, but never put them in place. Something missing in the relationship betteween the object and the owner. Also the owner don't have interaction with the object after it's built. He can see the data online but not is real time. I will inspire myself with this project and I will try to invite the citizen around our area of Montreal to built there own object that will show in real time if the data will increase, stay steady or decrease base on the observation.
The project
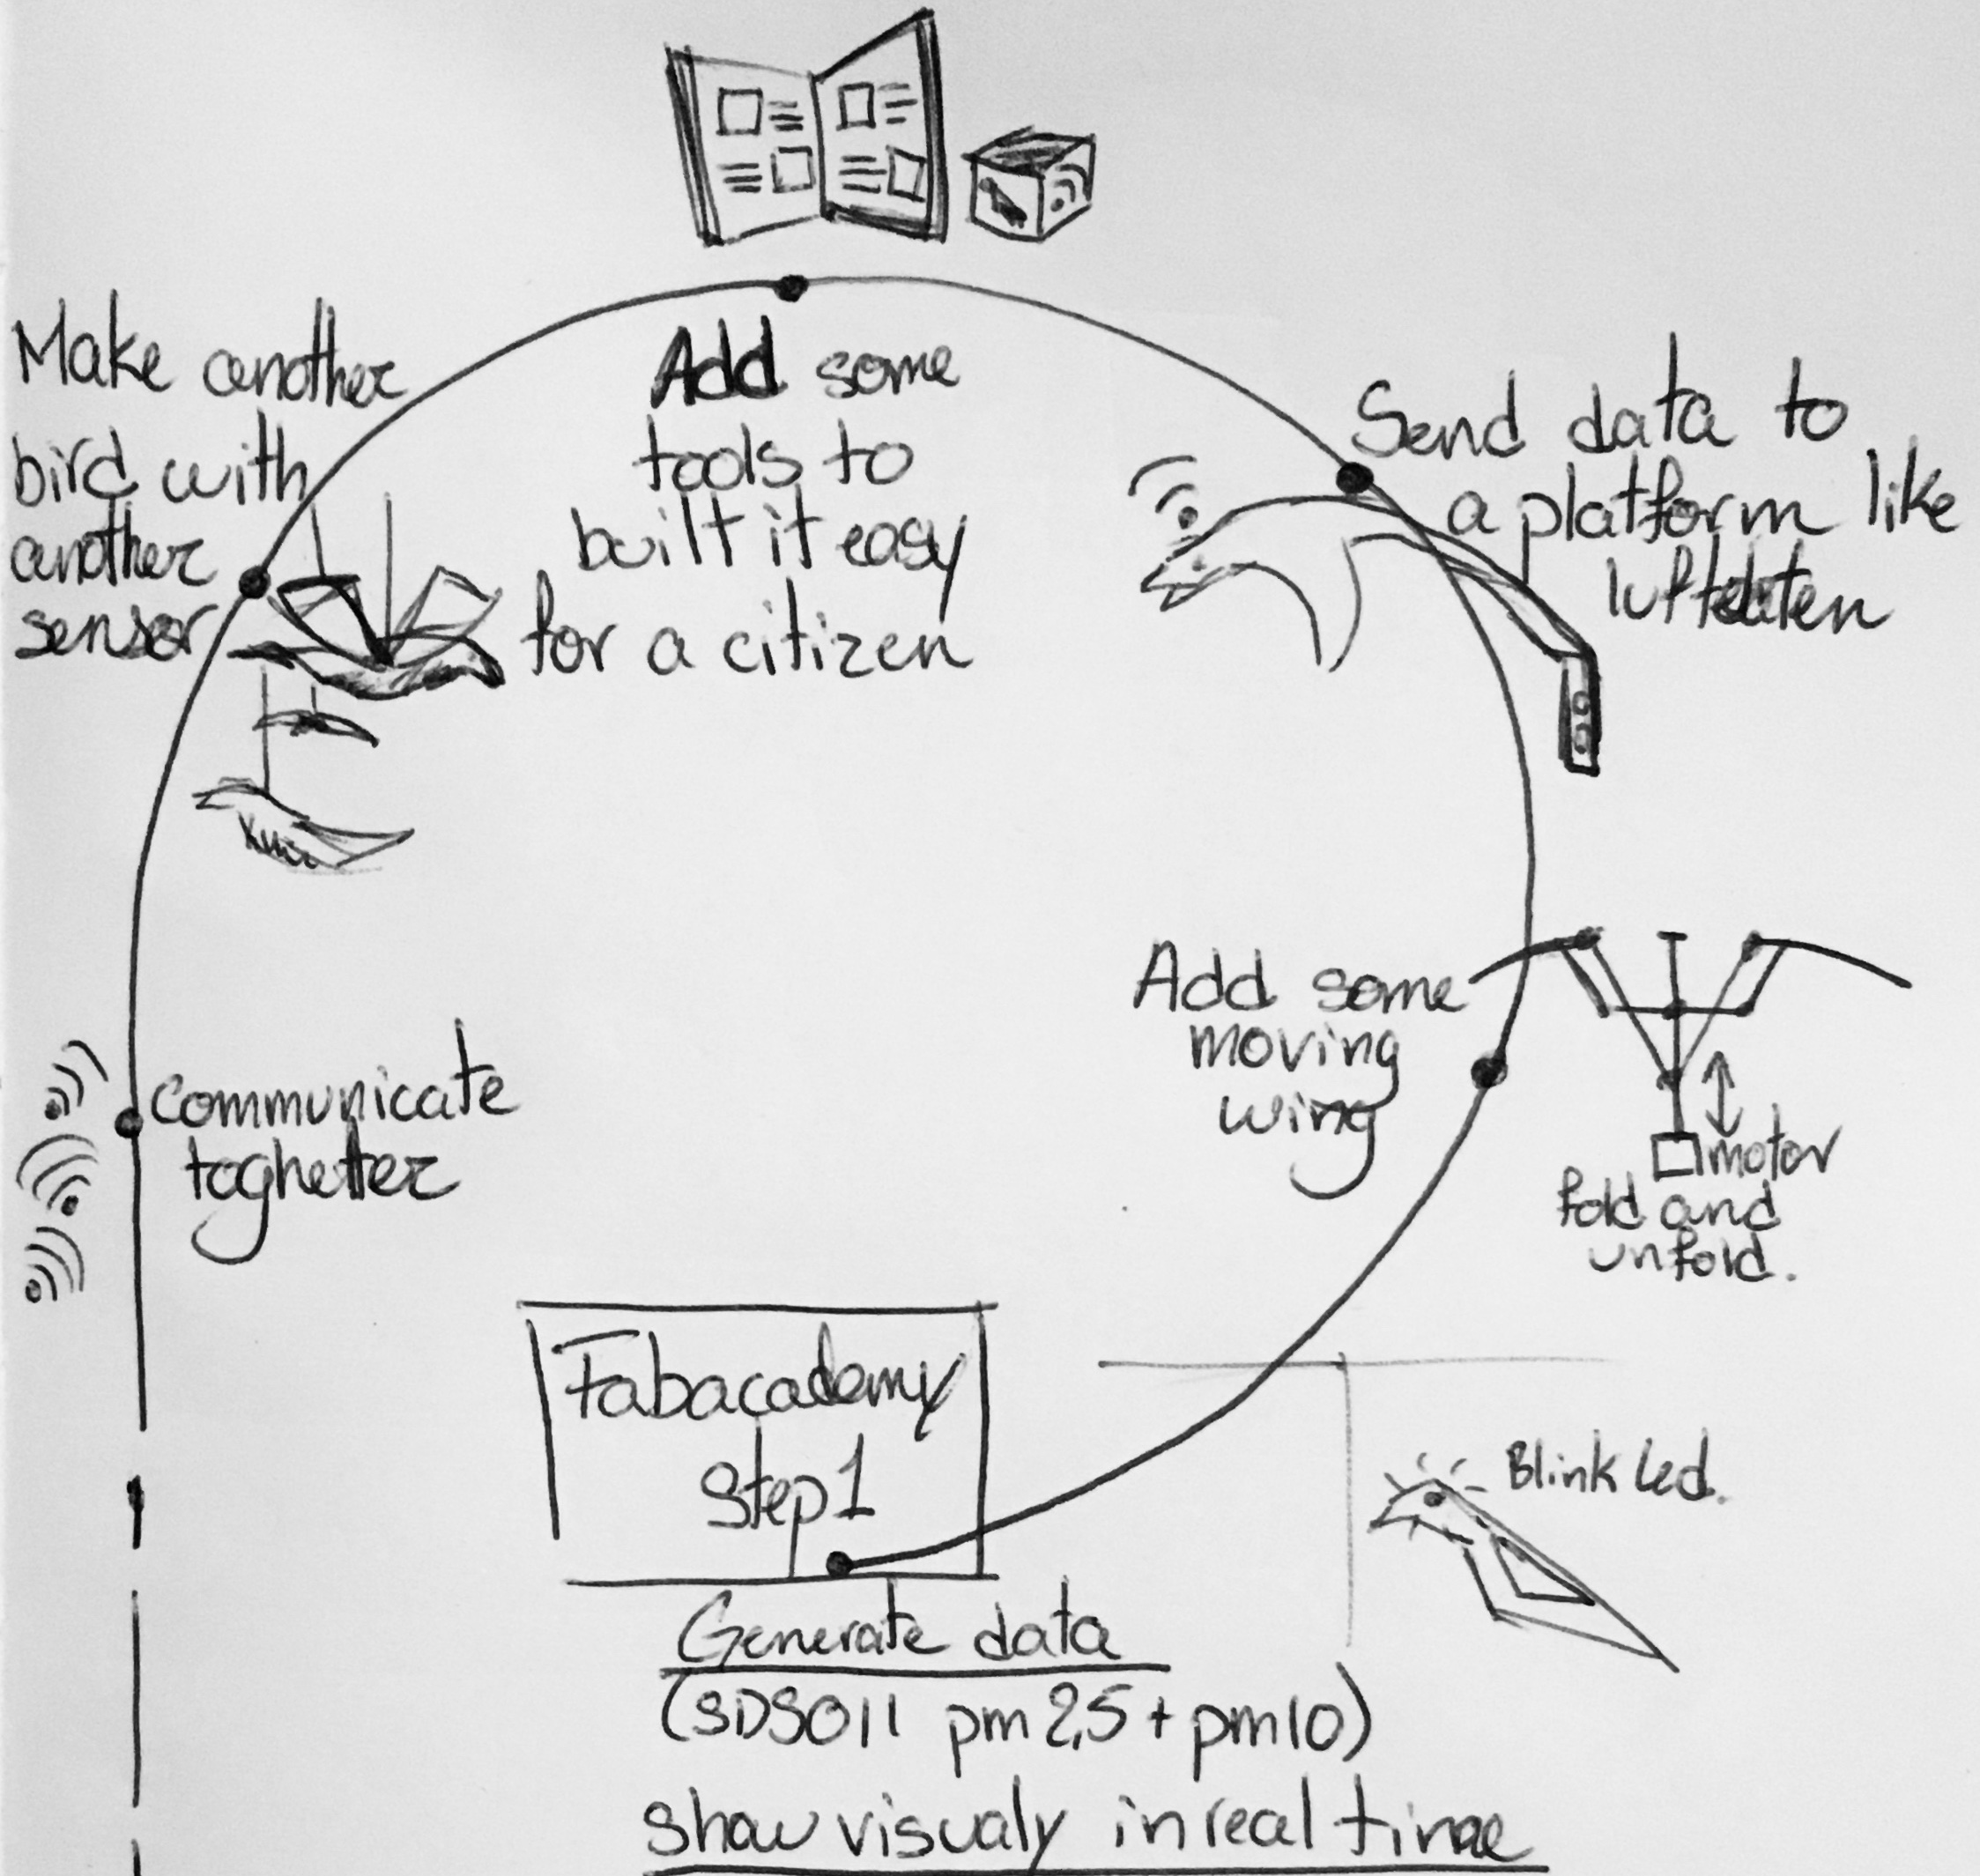
What will it do
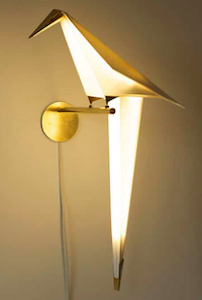
The spiral of the project is illustrated here. I will design a bird that will sens the 2.5 and 10 micron particules and show in real time the data increase, decrese or stay steady with LED.How will it be evaluated
The observation of all three phases will be my fabAcademy evaluation check point.I will inspired myself with the HackAir and Luftdaten sensor and try do developpe something every week.
Systems, questions, parts and process who will be use
The project is divided by 5 main systems- The input code and electronic (particules sensor)
- Is the sensor will be trusty?
- What is the process to create a data?
- When and how or is it needed to make a ajustement test to verify the quality of the data?
- particule sensor SDS0111,Aliexpress, 20$
- Atmega328pDigikey, 1,5$
- Capacitor 1ufDigikey, 0,5$
- Push buttonDigikey, 0,5$
- ISP connectorDigikey, 1$
- FTDI connectors,Digikey, 1$
- The output code and the evaluation of the air.
- How to show visualy the the air quality category.
- How many LED I need? How far do we see it? How much heat does it generate?
- How much electricity input I need?
- 4 LED,Digikey, 1$ each
- Resistance 499 ohmeDigikey, 0,25$ each
- The full body of the bird
- A simple design that people can personalise and play with?
- Sheet of wood 3mm thickness,Langevin forest, 7$
- Sheet of cast acrylic 3mm thickness,Plastique Piedmont, 17$
- A little bit of super glue, Dollorama,1,25$
- Linked the previous 4 main system
- Will it be easy to reproduce in different lab?
- Doest the owner will implement it and care?
- Creativity and patience head of Annie
- For a total of 51,75$
I will need:
I will need:
I will need:
I will need:
Inspiration
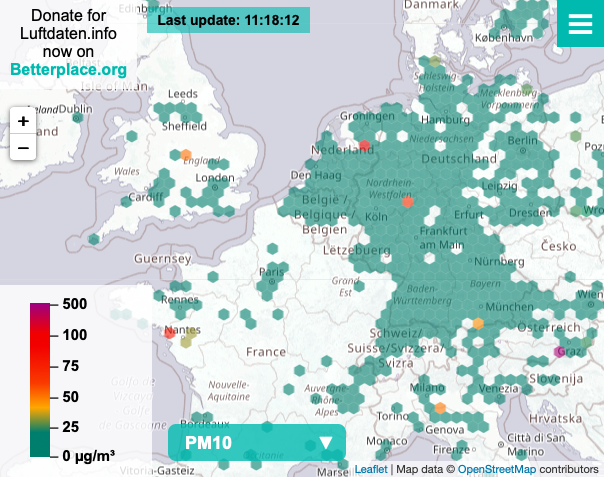
Luftdaten
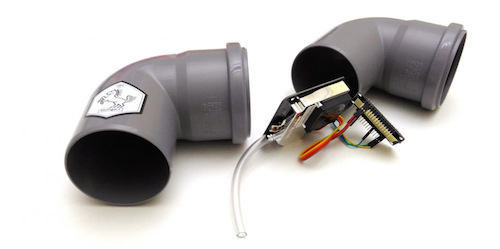
This is the sensor of Luftdaten
This is the platform of data
It's more about the electronic and accessibility.
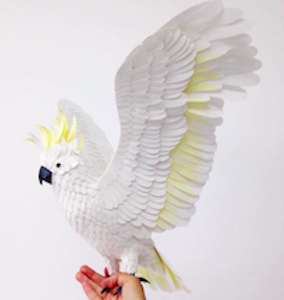
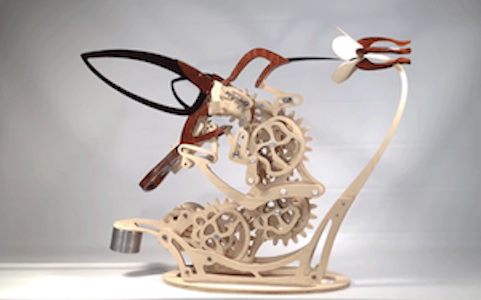
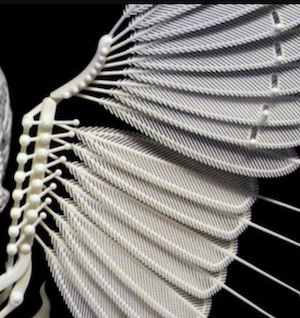
Mecanical bird
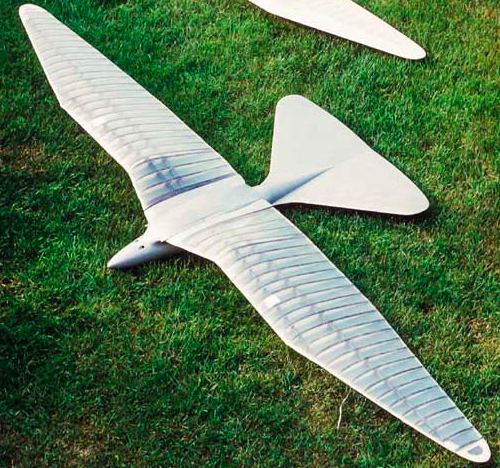
This is a mechanical 3D printed bird nameDove
The wings stay open but the esthetic and the ways the wings work is great! The mouvement of the wing is similar than a real bird. This site,Ornithopter, is also about recreating the wings mouvement to make small robot who fly.
How moving
MORPH: A new soft material microfabrication process from Wyss Institute
Can the bones of the bird can move with air or fluide? Can a different collor can be add for different stage of particules? The texture and the mouvment of the body of the bird can be rich and mysterious like a living thing.Art of bird
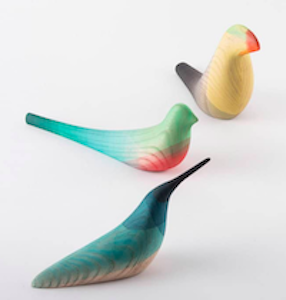
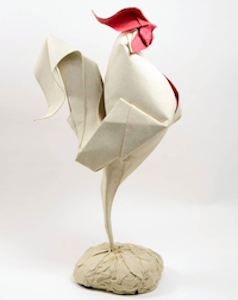
This few artists who create different bird in creative ways.My Modern Met
What do we enhance in a bird: the texture, the colors, the outline, the wings, the tail.
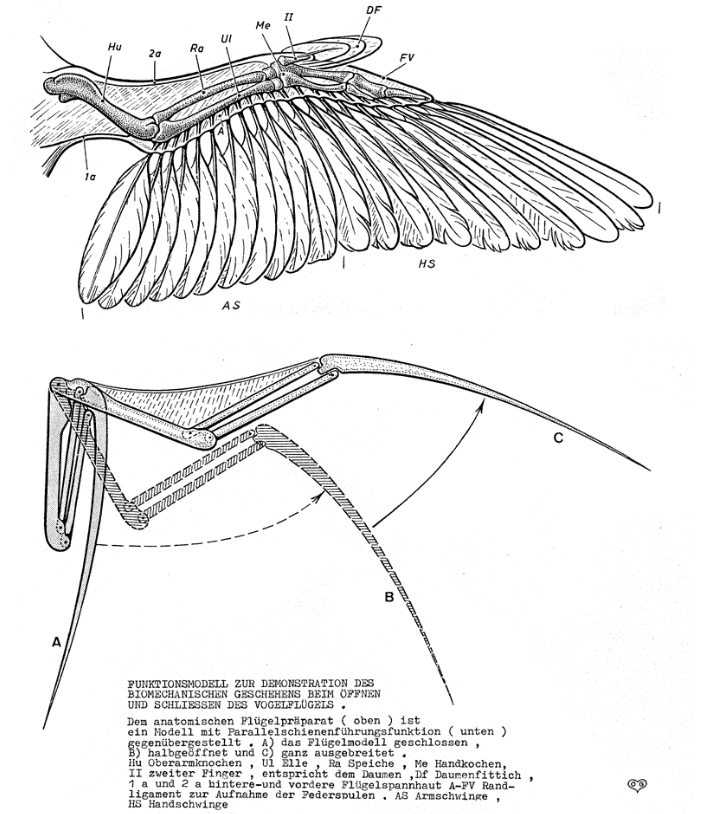
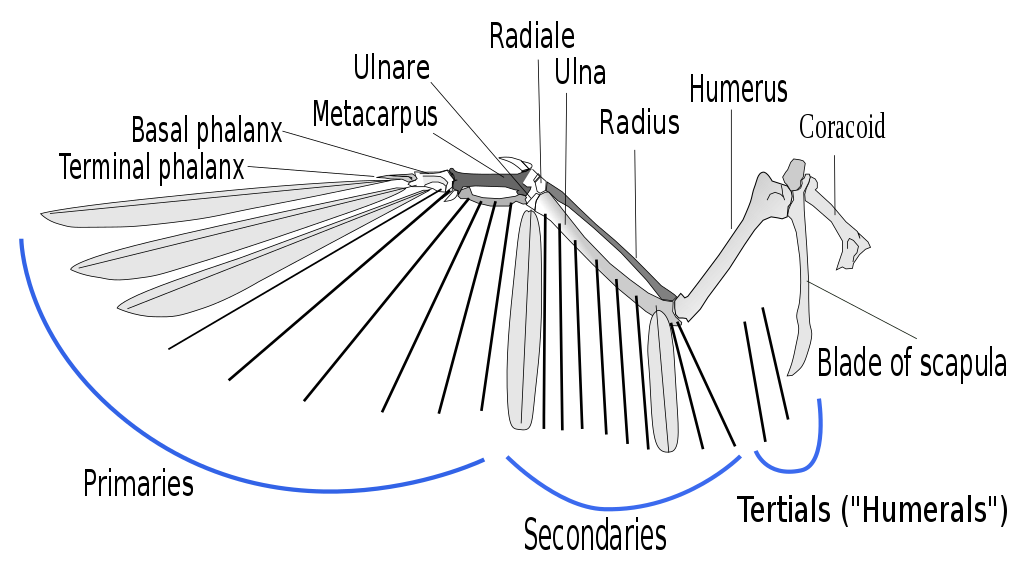
Wing mecanisme
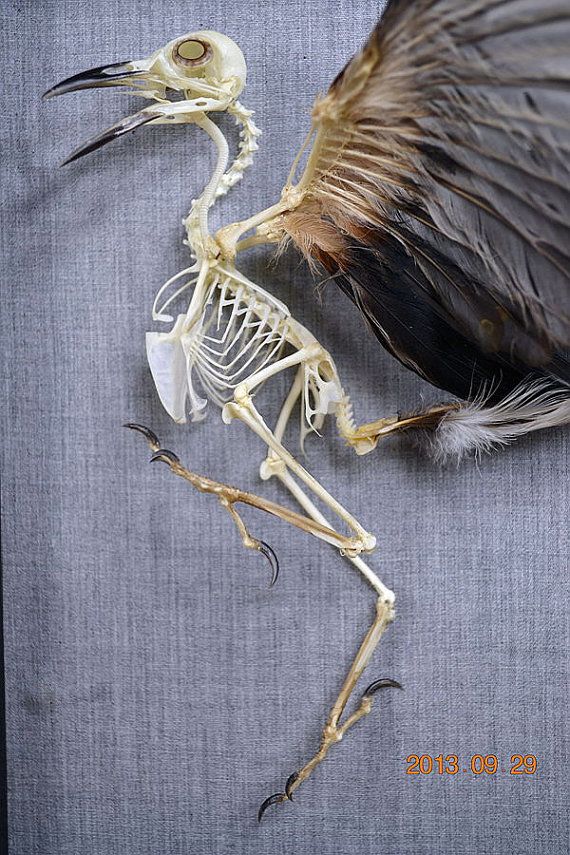


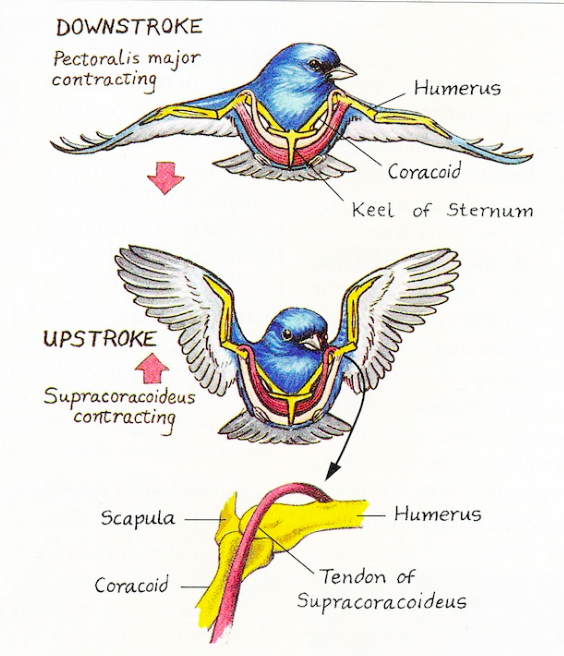
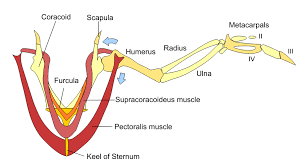
If we analyse the skeleton of a bird we can see that it's pretty similar to the humain. The wing is divided in 3 main zones: the biceps, the upperhand and the hand. We also have 2 main movements that are produce; the lateral extended arm that is reliated to the muscles and bornes of the arm and the front/back mouvement reliated to the sternum. So we can traduce the unfolded wing mouvement will be one mecanisme and the flapping wing mouvement will be another one.
Feathers jonction
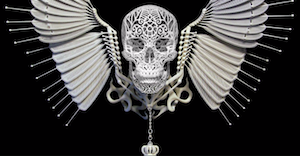
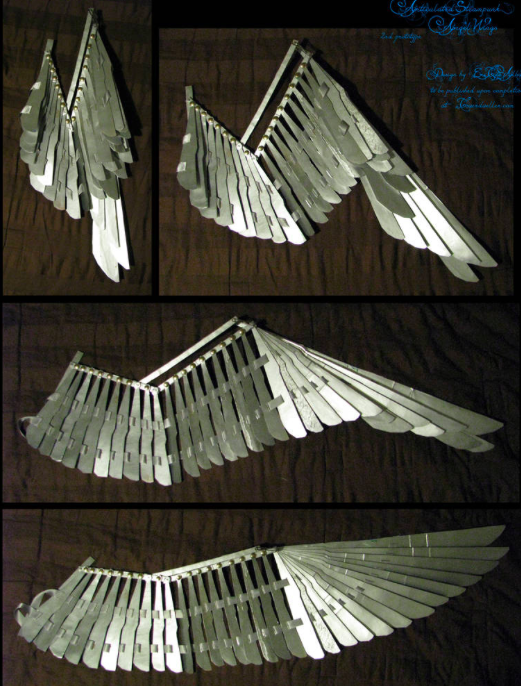
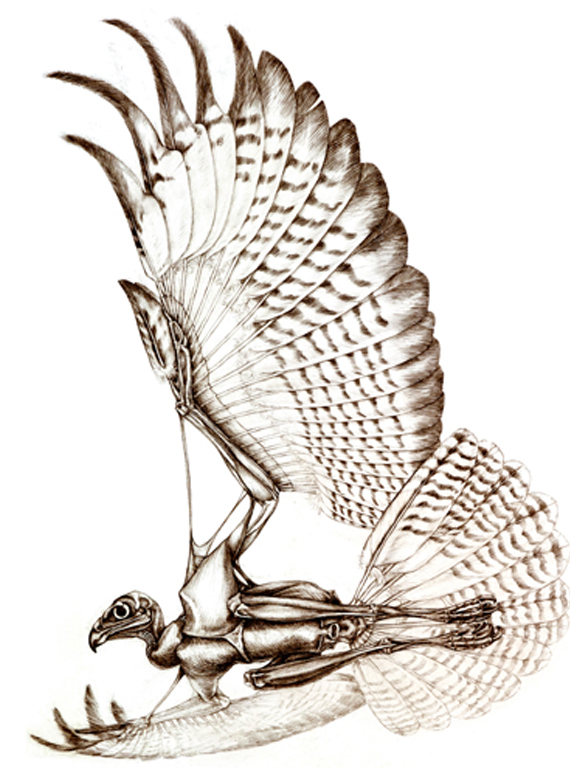
This artist Joshua Harker, create in is 3D printed art, a jonction between feathers that is very interesting. Of my understanding, if you pull the crown down, like in the picture, the wing and feather go up.
They have also alot of costumes that they where made using a similar mecanisme for the feathers by differents artisant
EuTytoAlba and
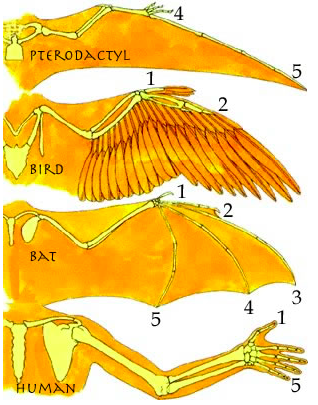
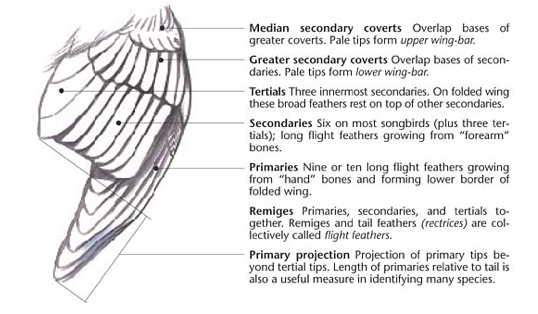
Swandog. The feather can be a challenge for the folded wing. They need to go one on top of each other and extend all toghetter when the wing is unfolded. As you can see also on the 2 lasted diagrams (Place of the feather and
folded wing), the feathers stop at the elbow, so the Humerus is the gap between the inside body and the wing.
Developpement - Step 1 - of the spiral
Each week of the fabacademy is a part of the exploration and developpement of this project and I use this opportunity to complete my first goal witch is to learn and push my boundery around the electronic and be more reactive with the design and fabrication using the fablab spaces.
To achive my goal, this will be my schedule for the project:
- Janurary
- Read on the subject of the air particules
- Specify what the project will be and what the context of if
- Find inspiration for the final shape
- Think of my needs and my futures needs for that project.
- Develop the finale shape of the bird that can be created by everyone and customise by everyone.
- March
- Make a reasearch on creating trusty data with low cost sensor.
- Generate a air paricule data
- April
- Developping the code
- Developping the board
- Finalise the shape of the bird
- May
- Finalise the code of the code of board
- Finalise the integration of the board and the sensor into the bird.
- If I have time, 15th of may until the end of may, develop the structure of the wings.
- June, until the 19th of june.
- Create a slide on the project
- Create the final video of the project
- Complete the documentation
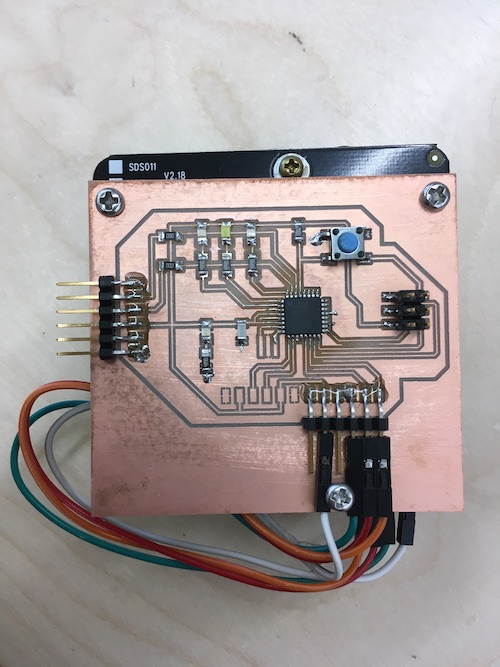
1-Generating data
- Has you can see in the week 11, I focus creating a code and a board that can read the sensor SDS011
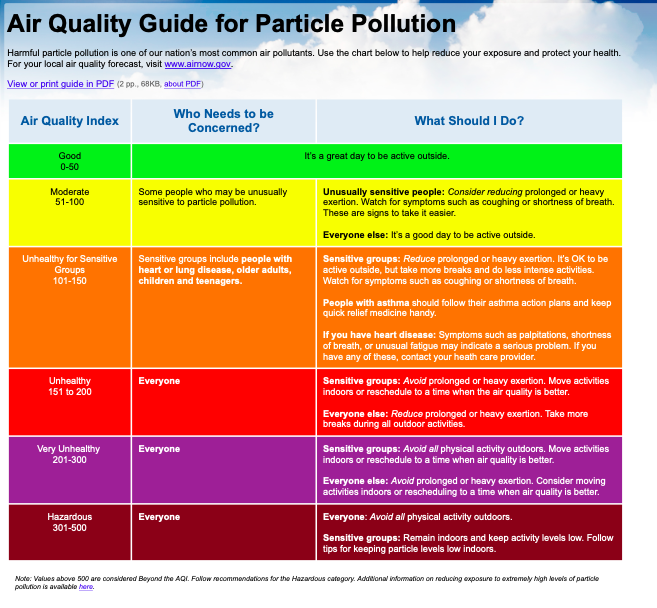
- I search also on associate a reference to this data. What where the acceptable level and how dangerous was it. I found that depending of your contry, you can have differences, but here in Canada, we use the Air Quality Index. They attribut some point to each polutant and make a leveling on 10 point that illustrate the risk of the average situation.
- Here is a calculator that I use to find each level of risk for the particules 2.5 and 10 microns.
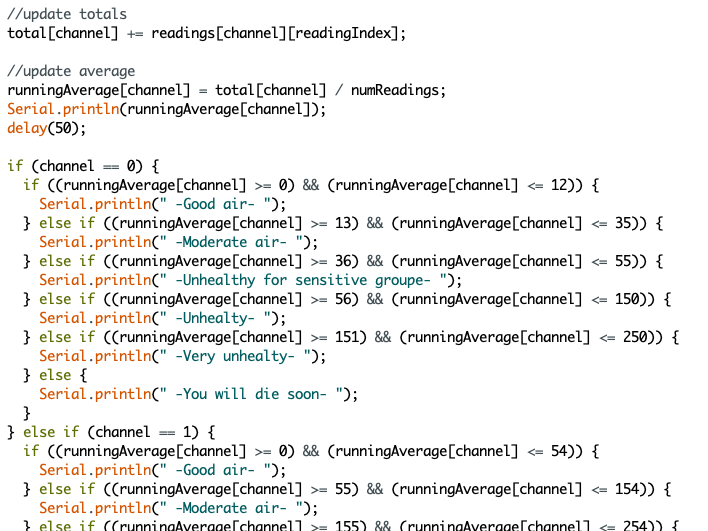
For particules of 2.5 microns:- Good air - 1 to 12 pm
- Moderate - 13 to 35 pm
- Unhealthy for sensitive group - 36 to 55 pm
- Unhealty - 56 to 150 pm
- Very unhealty - 151 to 250 pm
- Hazardous - 251+
For particules of 10 microns:- Good air - 1 to 54 pm
- Moderate - 55 to 154 pm
- Unhealthy for sensitive group - 155 to 254 pm
- Unhealty - 255 to 354 pm
- Very unhealty - 355 to 424 pm
- Hazardous - 425+
- To isolate problems, I explore the sensor SDS011 to know it better with a commercial arduino. Than When I made de board on the week 11-input, I switch to my own board.
- Here is the datasheet of the MCU I use.Atmega328p
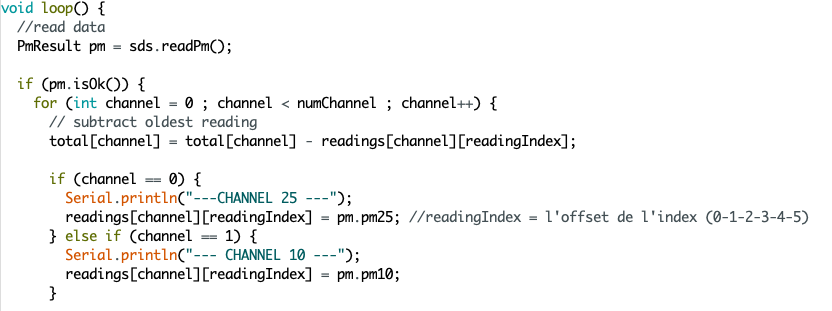
- For the code, it's base on the code w11 and the exemple quickstart of the library SDS011. In the loop here how it work:
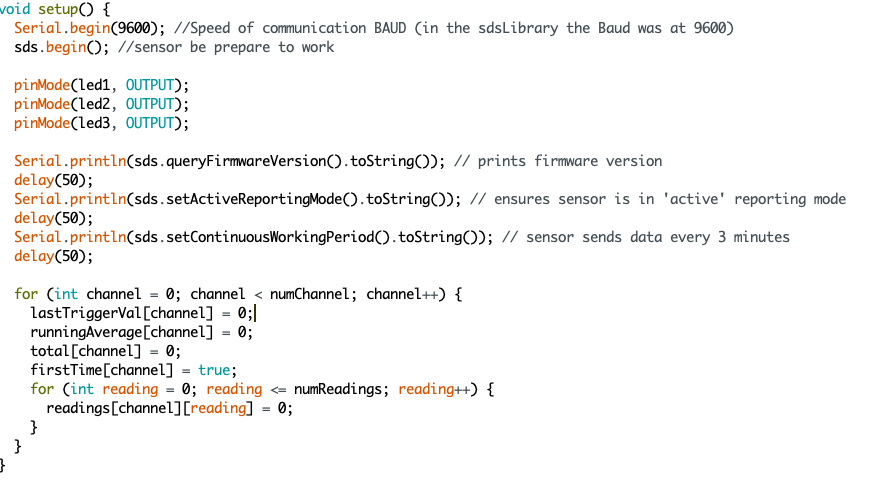
- Declare all your variable and initialise them.
- Activate the sensore and specify the mode he should act (custom period, continuous periode or query for exemple.)
- take off the latest reading
- Reading the data
- Update your refereces number.
- Create a average number and put it in the good categorie of air (good, moderate, unhealty..)
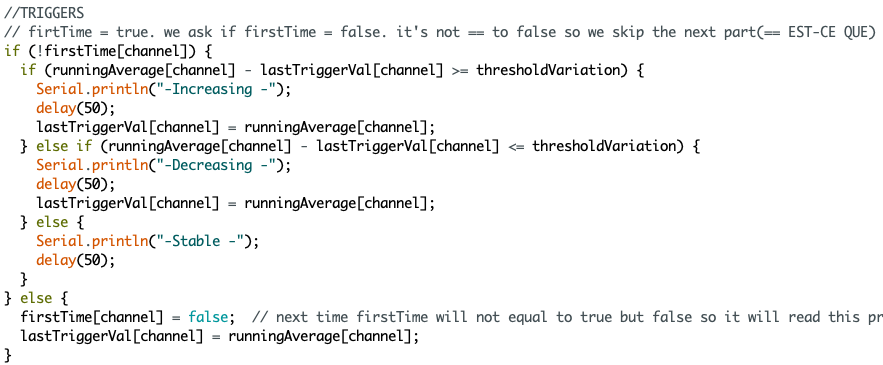
- Compare the data with the previous one so we can see if it increase, decrease or stay stable.
- The all the code the function I liked the most is the boolean fonction. This let you seperate this little piece of code that have sens on the first time the code is reading and not the second time. In my code it's firstTime[channel] = true;. True means that if it's the fist time do this, if not do that. It took me sometime to really understand with true, false categorie but now it's crystal clear.
This is the air quality leveling for only the total particules pollution.
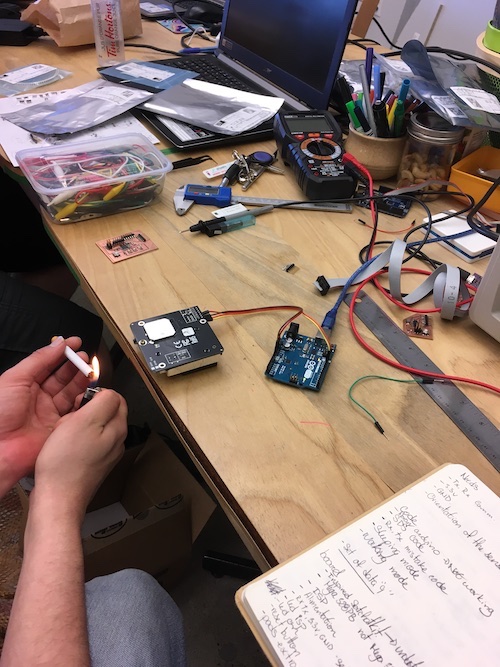
I verify my data with lightning a cigaret.
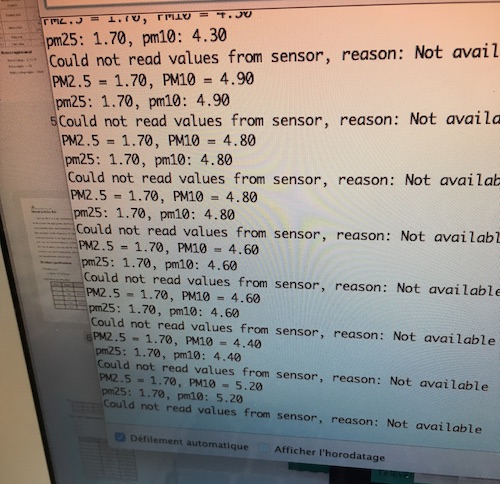
These are my first real data that I produce. See in the week 11 the hole process I whent.
Initialisation of the sensor and specification of the way it should worck
Reading the data
Creating a average number and put it in the good categorie of air quality
Compare the new data with latest data to see if it increase, decrease or stay stable.
2-The shape
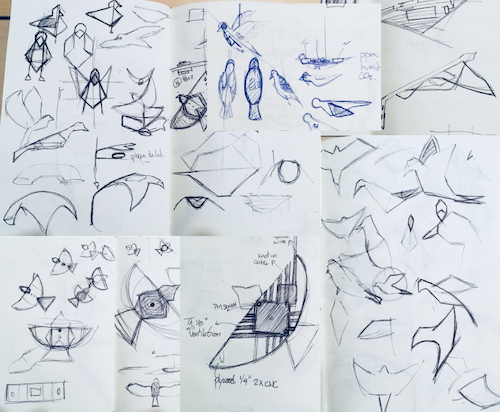
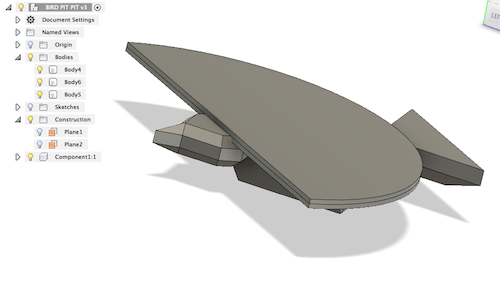
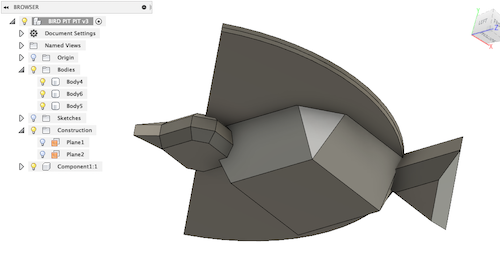
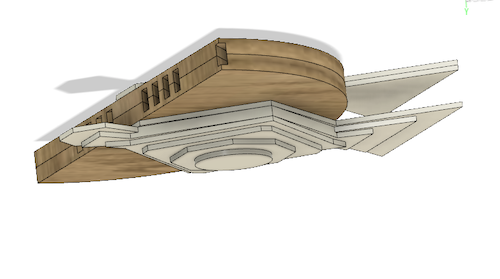
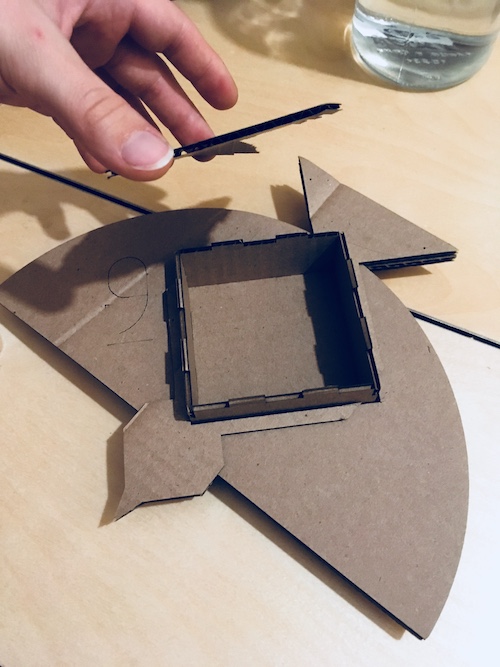
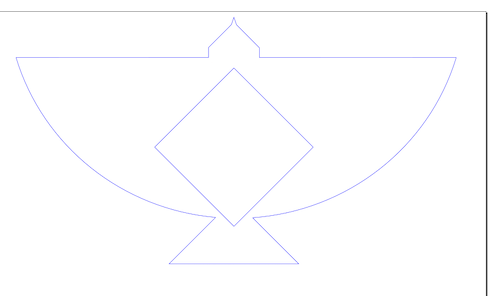
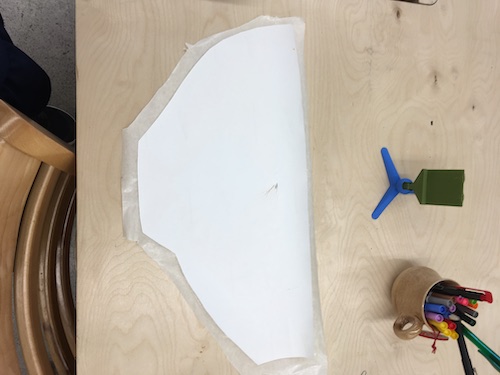
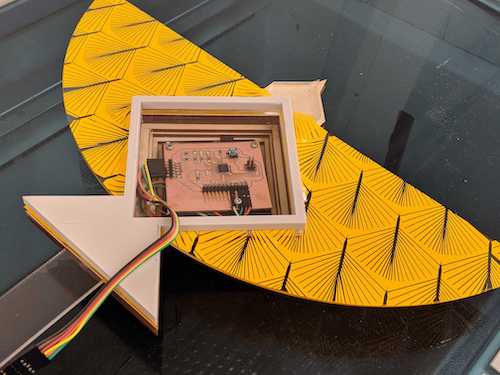
- I sketch shape and forme to discover what could be interesting. This is the step 1 of the spiral, so I can stay in a shape witch will be fix. But I could also think about a shape that can evolute depending of the step I made. To make sure, I create a shape with the wing's on the top so if I have time I could change these rigide wing with flexible wing so they can move. This is why I whent with this shape, where the wings are on the top and the sensor under, creating the body of the bird.
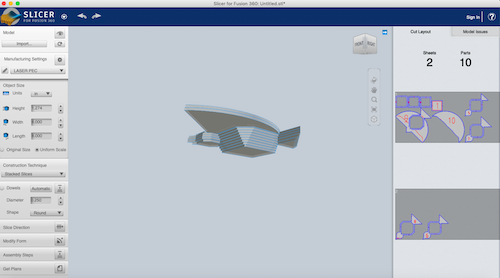
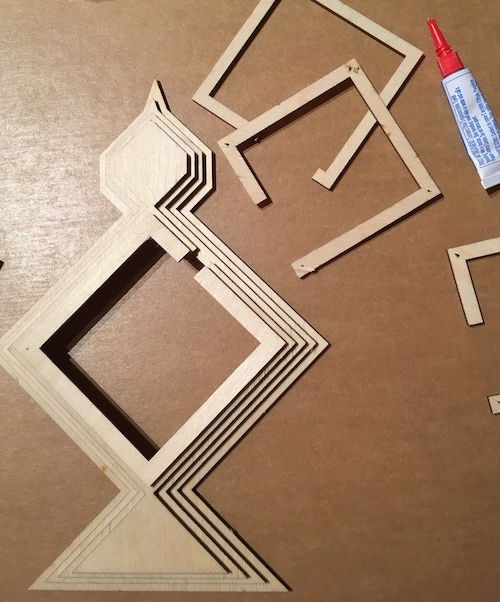
- I model a base that I slice on Slicer and laser cut it in plywood and acrylic.
- I assemble everything.
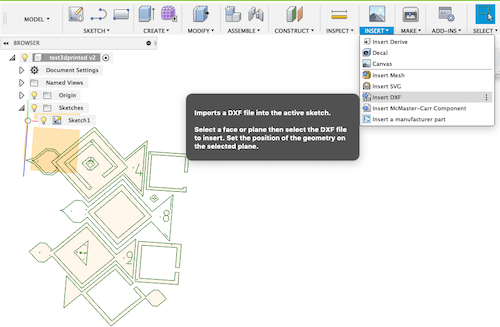
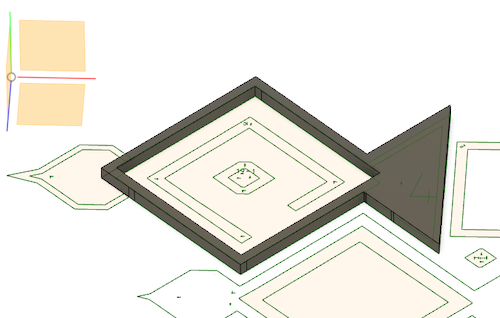
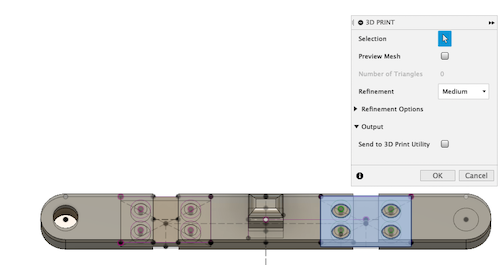
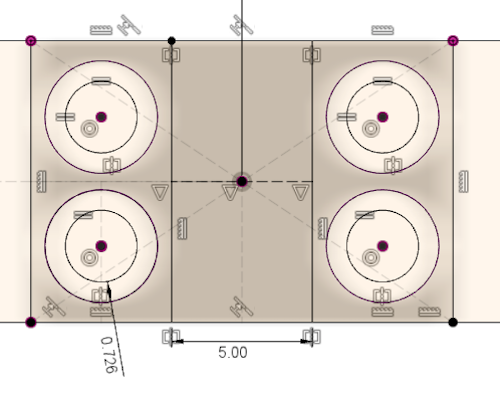
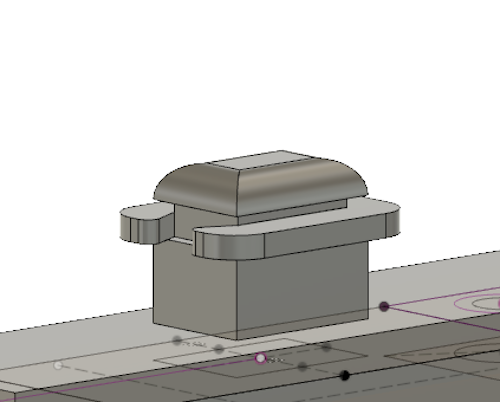
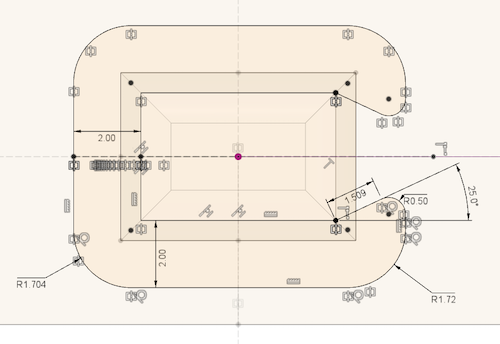
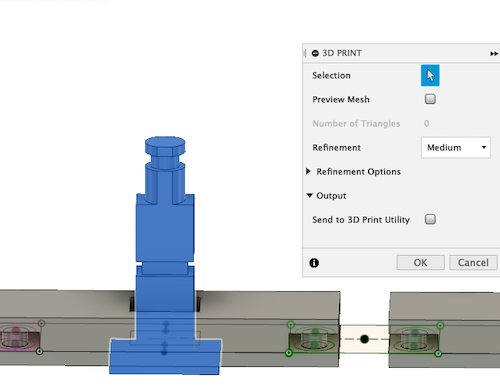
- I wanted to push the design a little bit so I take that svg and extrude from it on Fusion 360 the last part on top and link to it the press fit pin I develop in machine week. The nice thing of Fusion is that it allow you to incorporate previous design in your present desing to make it faster. You can modelise some part and just link them when ever you need.
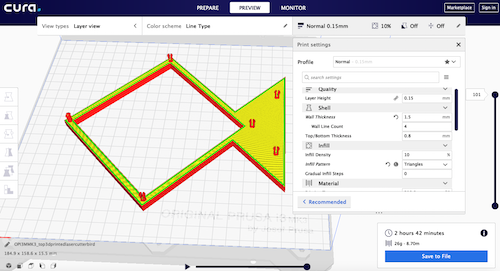
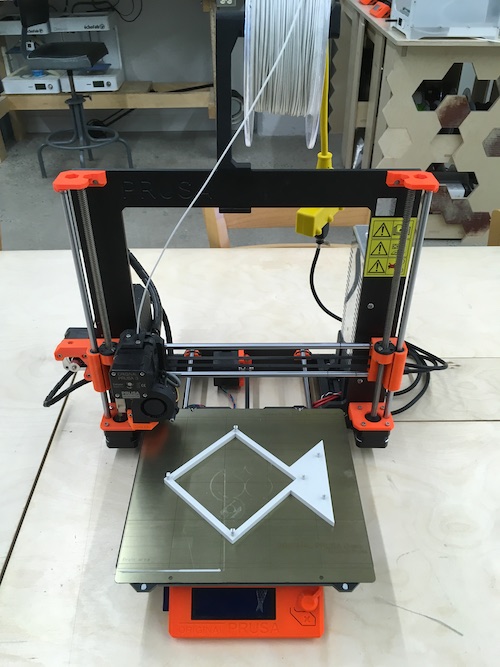
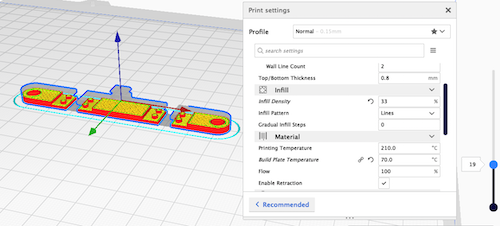
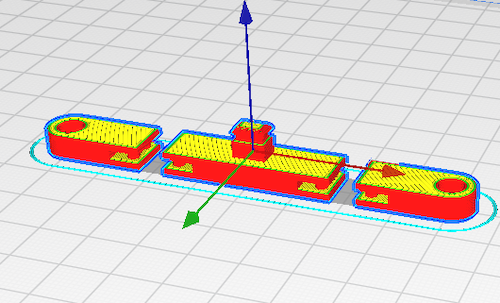
- I printed the part using a 10% infill, I put the shell at 1.5mm to make the press fit pin harder and more structural and send it to the printer.
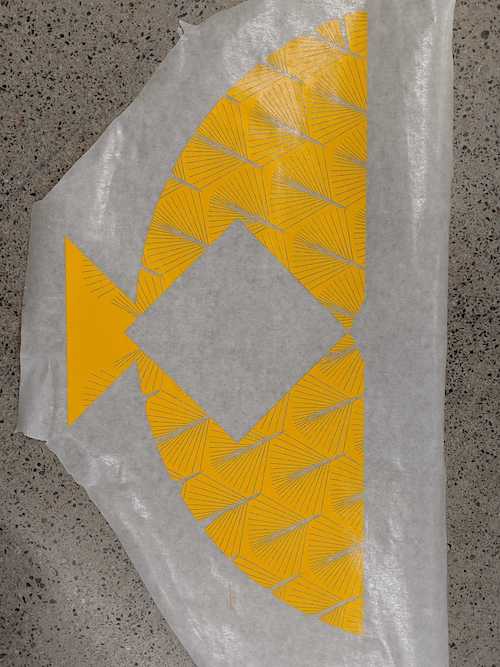
- Next step is to vynile cut a texture on apply it to the transparent acrylic wings.
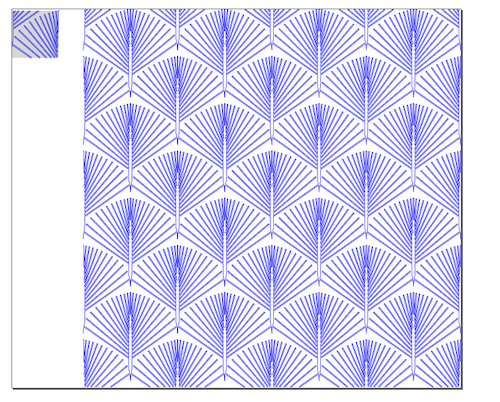
- In week 3, I try generating a parametric texture on inkscape. I did a another one, but thinking that it needed to be vynile cutting.
- I take the drawing that I laser cut the wing and aply the texture on top of it.
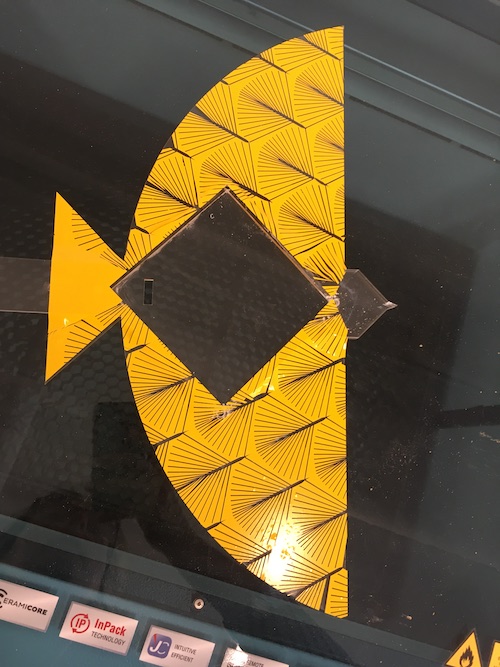
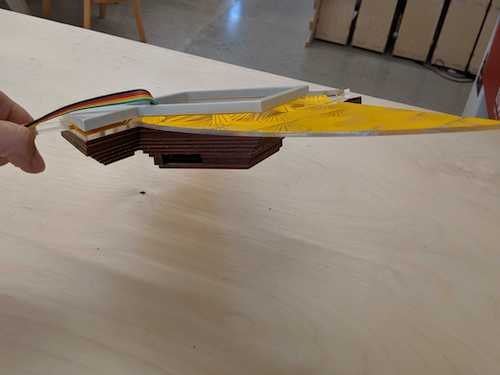
- When everything was cut, I peel what I didn't use and apply a transfert paper on the result. I apply it to the acrylic wing and assemble the wood part, the acrylic and press fit the 3d printed part on top to hold everything toghetter. No need of glue and it let you repare or go inside easily.
I start by sketching some interesting shape
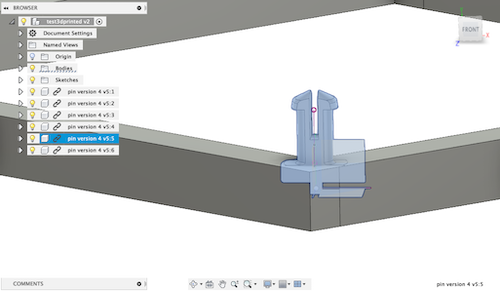
This is the complete electronic I modelise to simulate in the real object
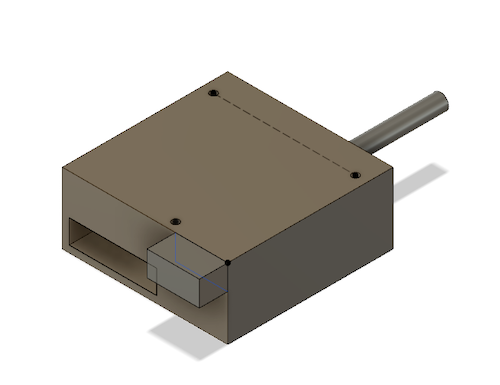
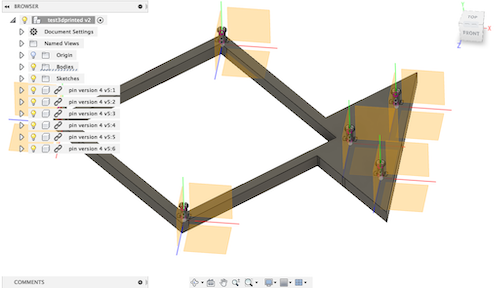
I modelise fiew versions to see the differences
From Fusion 360, I export it in Slicer to produce the laser cutting plan that I modify a little bit before cutting
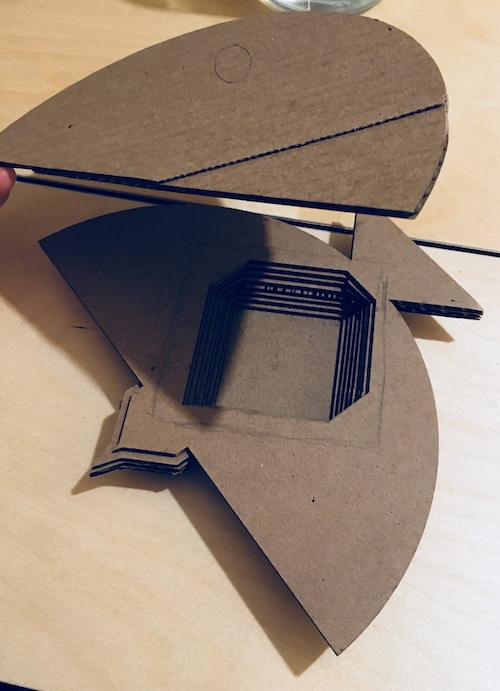
I laser cut this firt version in cardboard.
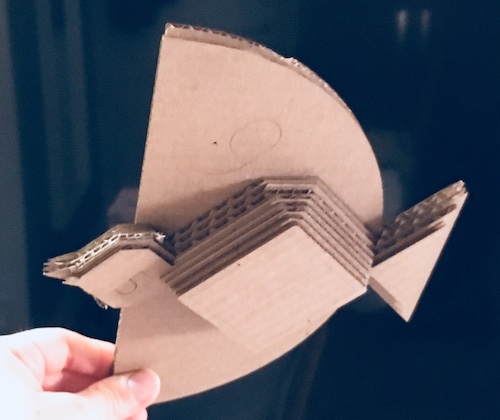
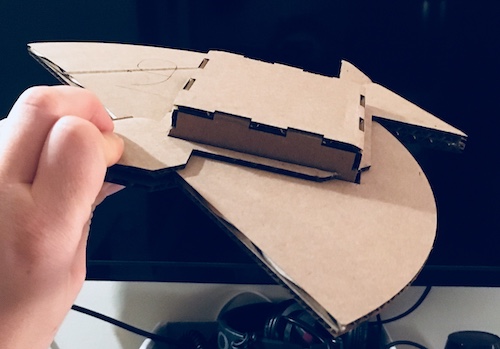
Than it inspired me so I laser cut this other version
I scale the first one and modify the plan on Inkscape to have a mixe betteween the two first try and I laser cut it in wood and acrylic.

The first step finish.


Generate the 3D snap fit cover. Importing a svg and inserte my press fit pin developping in machine week, week 16.
3D print the part using a 10% infill and a shell of a 1.5mm to make sure the pins are strong enough
For the vinyle, I took the laser cutter outline and generate a parametric patern that can be cut in vinyle cutter. Overlay both drawing.

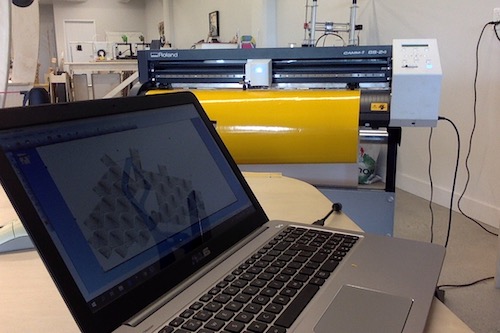
Cutting everything on the vinyle cutter, peeling and put it on acrylic wings
The final result
The moral of this story
The learning of electronic is definitly one of the things who challenge me the most but I learn so much that I am very happy to achive this project. Here is my Files
This first step is achive so I will continue to go in my step two, adding some wings that can mimic a fly. In my week 16, make a machine I developpe the z axis witch can be very similar to wings and in the week 12, I made 2 servo motors moving toghetter to to these movement. So let's try to go further.
1-The wings
- To do wing first we need to understand better the anatomy of the bird. I went on many site on internet but the best source is fromKatrina van Grouw and her book Unfeathered bird who explain visually alot of things. If you want to see more about her work
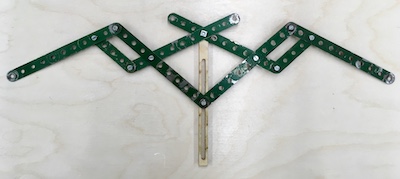
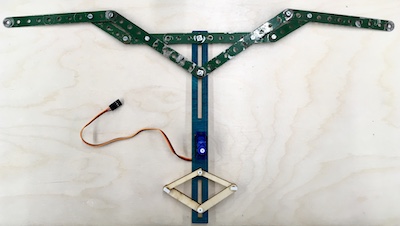
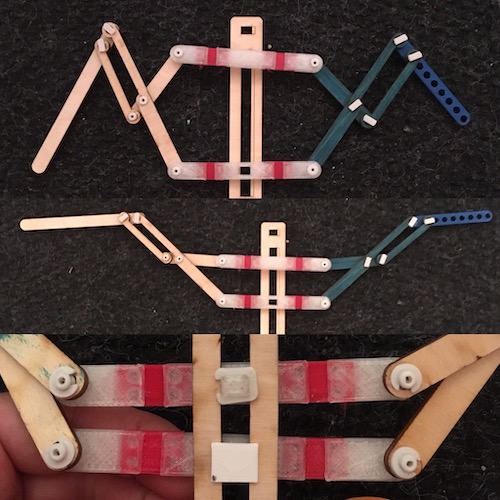
- I create the pincipal mecanisme to see the range of the motion
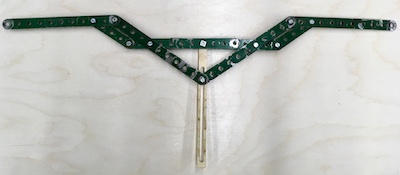
- I than constraint the mouvement with a laser cutting wood slider witch could be the spine of the bird.
- I try a first mecanisme to create the movement, but it was complicated for noting. I try to replace that wood slider spine by a endless screw in 3d printing. But in the other way, in the week 12 - Output device, I look the motor, step motor and servo and the best thing we can have (if we want it to be accessible and be built by citizen) is was step motors that can only do 180 deg rotation. The thread of the endless screw than need to be very streach and deform. I try to make one on Fusion 360, but the best I could was to create a thread of 360 deg revolution. Less than that the thread was realy deform and I was scarded that the mecanisme jam because of that same streach.
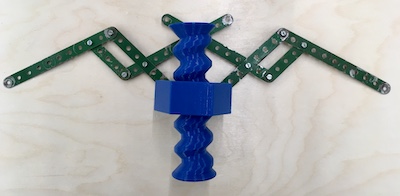
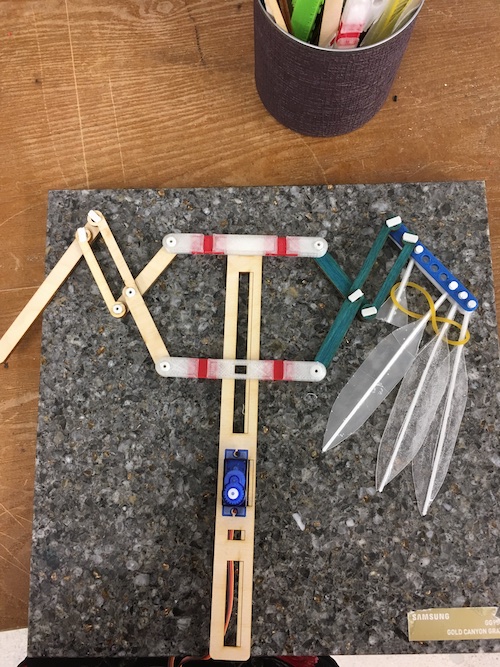
- If we jump to the week 16 - Design a machine, you will see that the mecanisme I develop for the z axe can be the same for my unfolded the wing. Back with the wood slider spine, this gave me the idea to put the step motor between the wing and the tail so that when the wings open, the tail too. The tail of a bird open during the flight to steer in the wind.
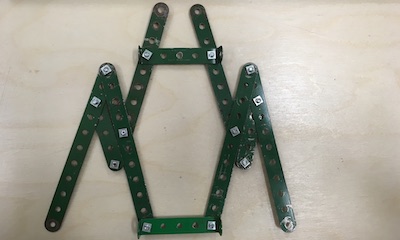
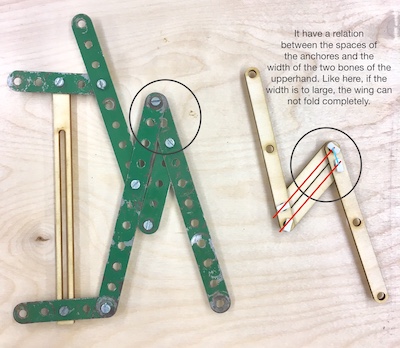
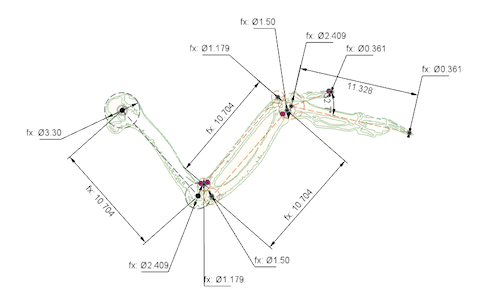
- To make the bones of the wing I use some leftover pieces frome the week 16 - Design a machine, but I discover that it have a relation between the anchors and the width of the bones to have a greater reach. I have the idea of vectorising a picture of bird bones and insert in on Fusion 360. If you analyse the skeleton, the radius is linked by the top and the ulna is linked by the bottom. So I draw a parametric sketch that can move and be ajusted to the size of a bird.
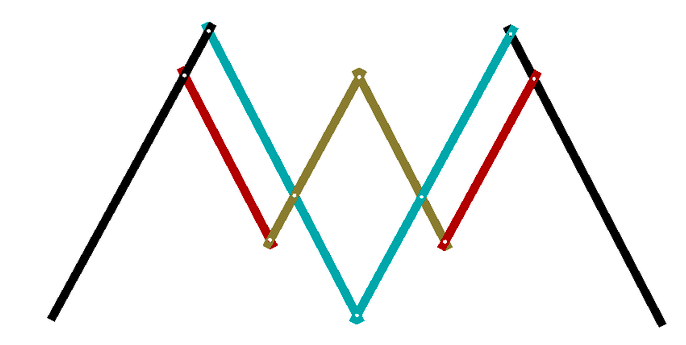
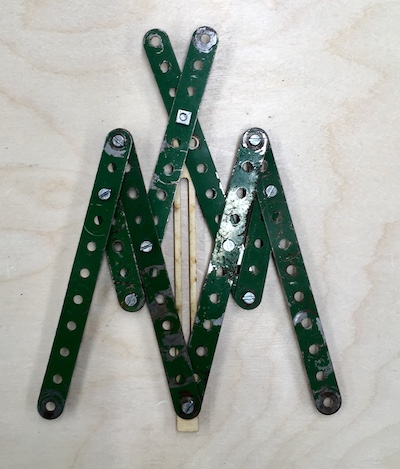
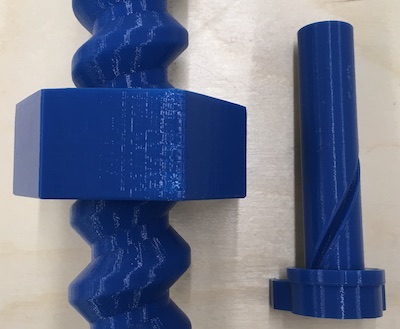
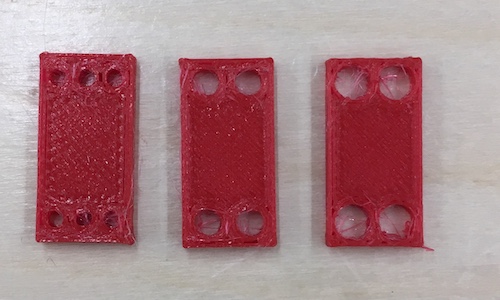
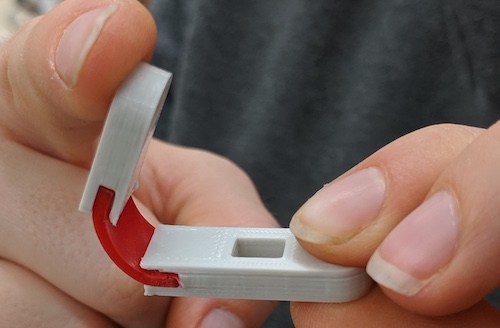
- One movement was pretty set up, but open and close wing is a other challenging movement. I decide to explore the flexible join with 3D printing TPU. I design and modelise the sliding horizontal. I create 1 model that when the printing part, I will stop it, inserte these TPU flexible join and start again the printer. It work realy well. You can see the pictures.
Anatomy of bird
First try
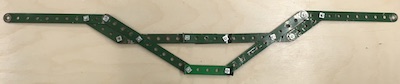
Contraining the mouvement
Endless screw mecanisme

Push and pull mecanisme
The bones of the wings

Developping the shoulders inserting 3D printed TPU join in a rigide encassement.
Where I am in the the experimentation of wing
The moral of this story
It's just a begginning for that Canary! I did alot of R&D on pins, nap fit, jonction and mecanical design that is very interesting for assembling without glue. The next step to complete step 2 is to figure the flexible enveloppe that the wings mecanic will go. That means that the step 3 is not far away from now. The harder is to do something that can be done and modify by citizens. I want them to actualy use Inkscape and fusion to modify some things and produce it by themself. I am very excited to improve that project to another scale.Files
Contact
Annie Ferlatte
ferlatte.annie@gmail.com
Montreal, QC, Canada