Group assignment
Security measures you have to take:
- Before use any material read carefully safety data sheet
- Check list and use PPE´s (Personal protective equipment)
- Prepare the workspace, mixing materials, waste deposits and equipment such as balances.
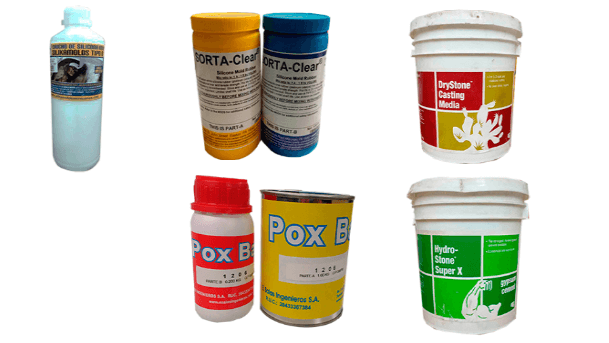
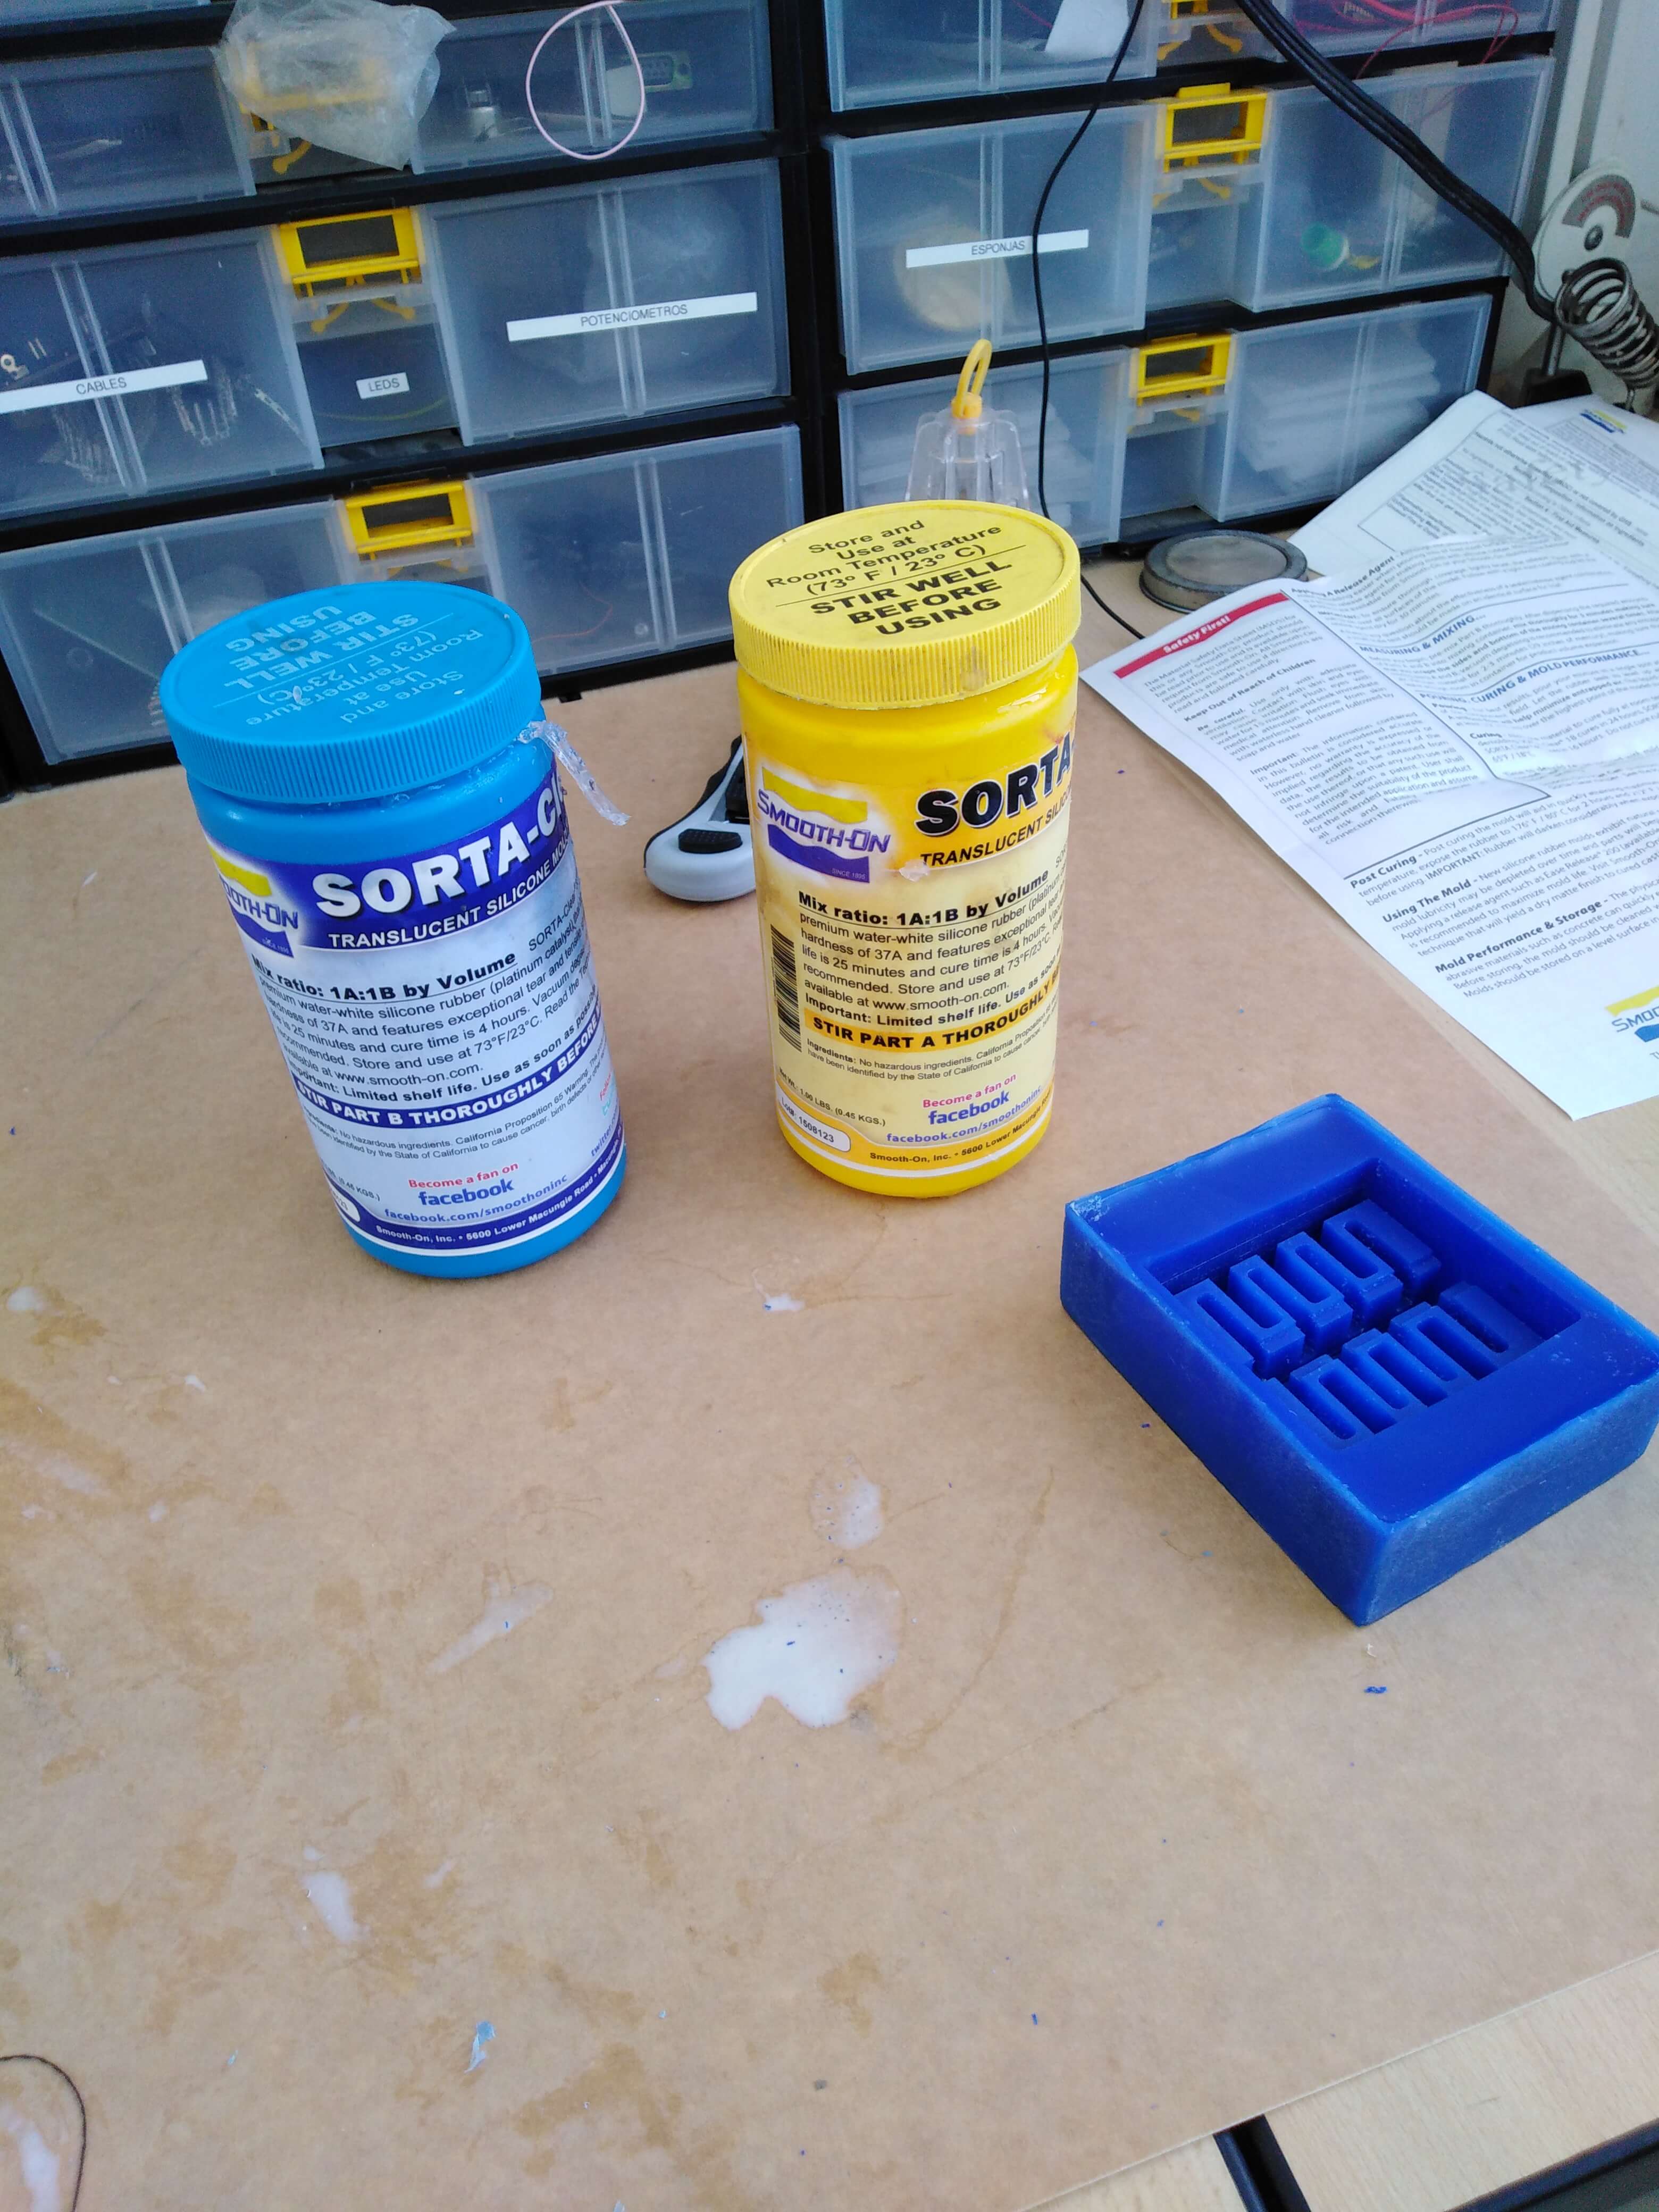
For this week we use or have available in the lab the following materials:
- Sorta Clear 12:safety data sheet
- Poxbak 1206: safety data sheet
- DRYSTONE TM CASTING MEDIA: safety data sheet
- USG HIDROSTONE SUPER X: safety data sheet
- SILICONE RUBBER RTV 6:safety data sheet
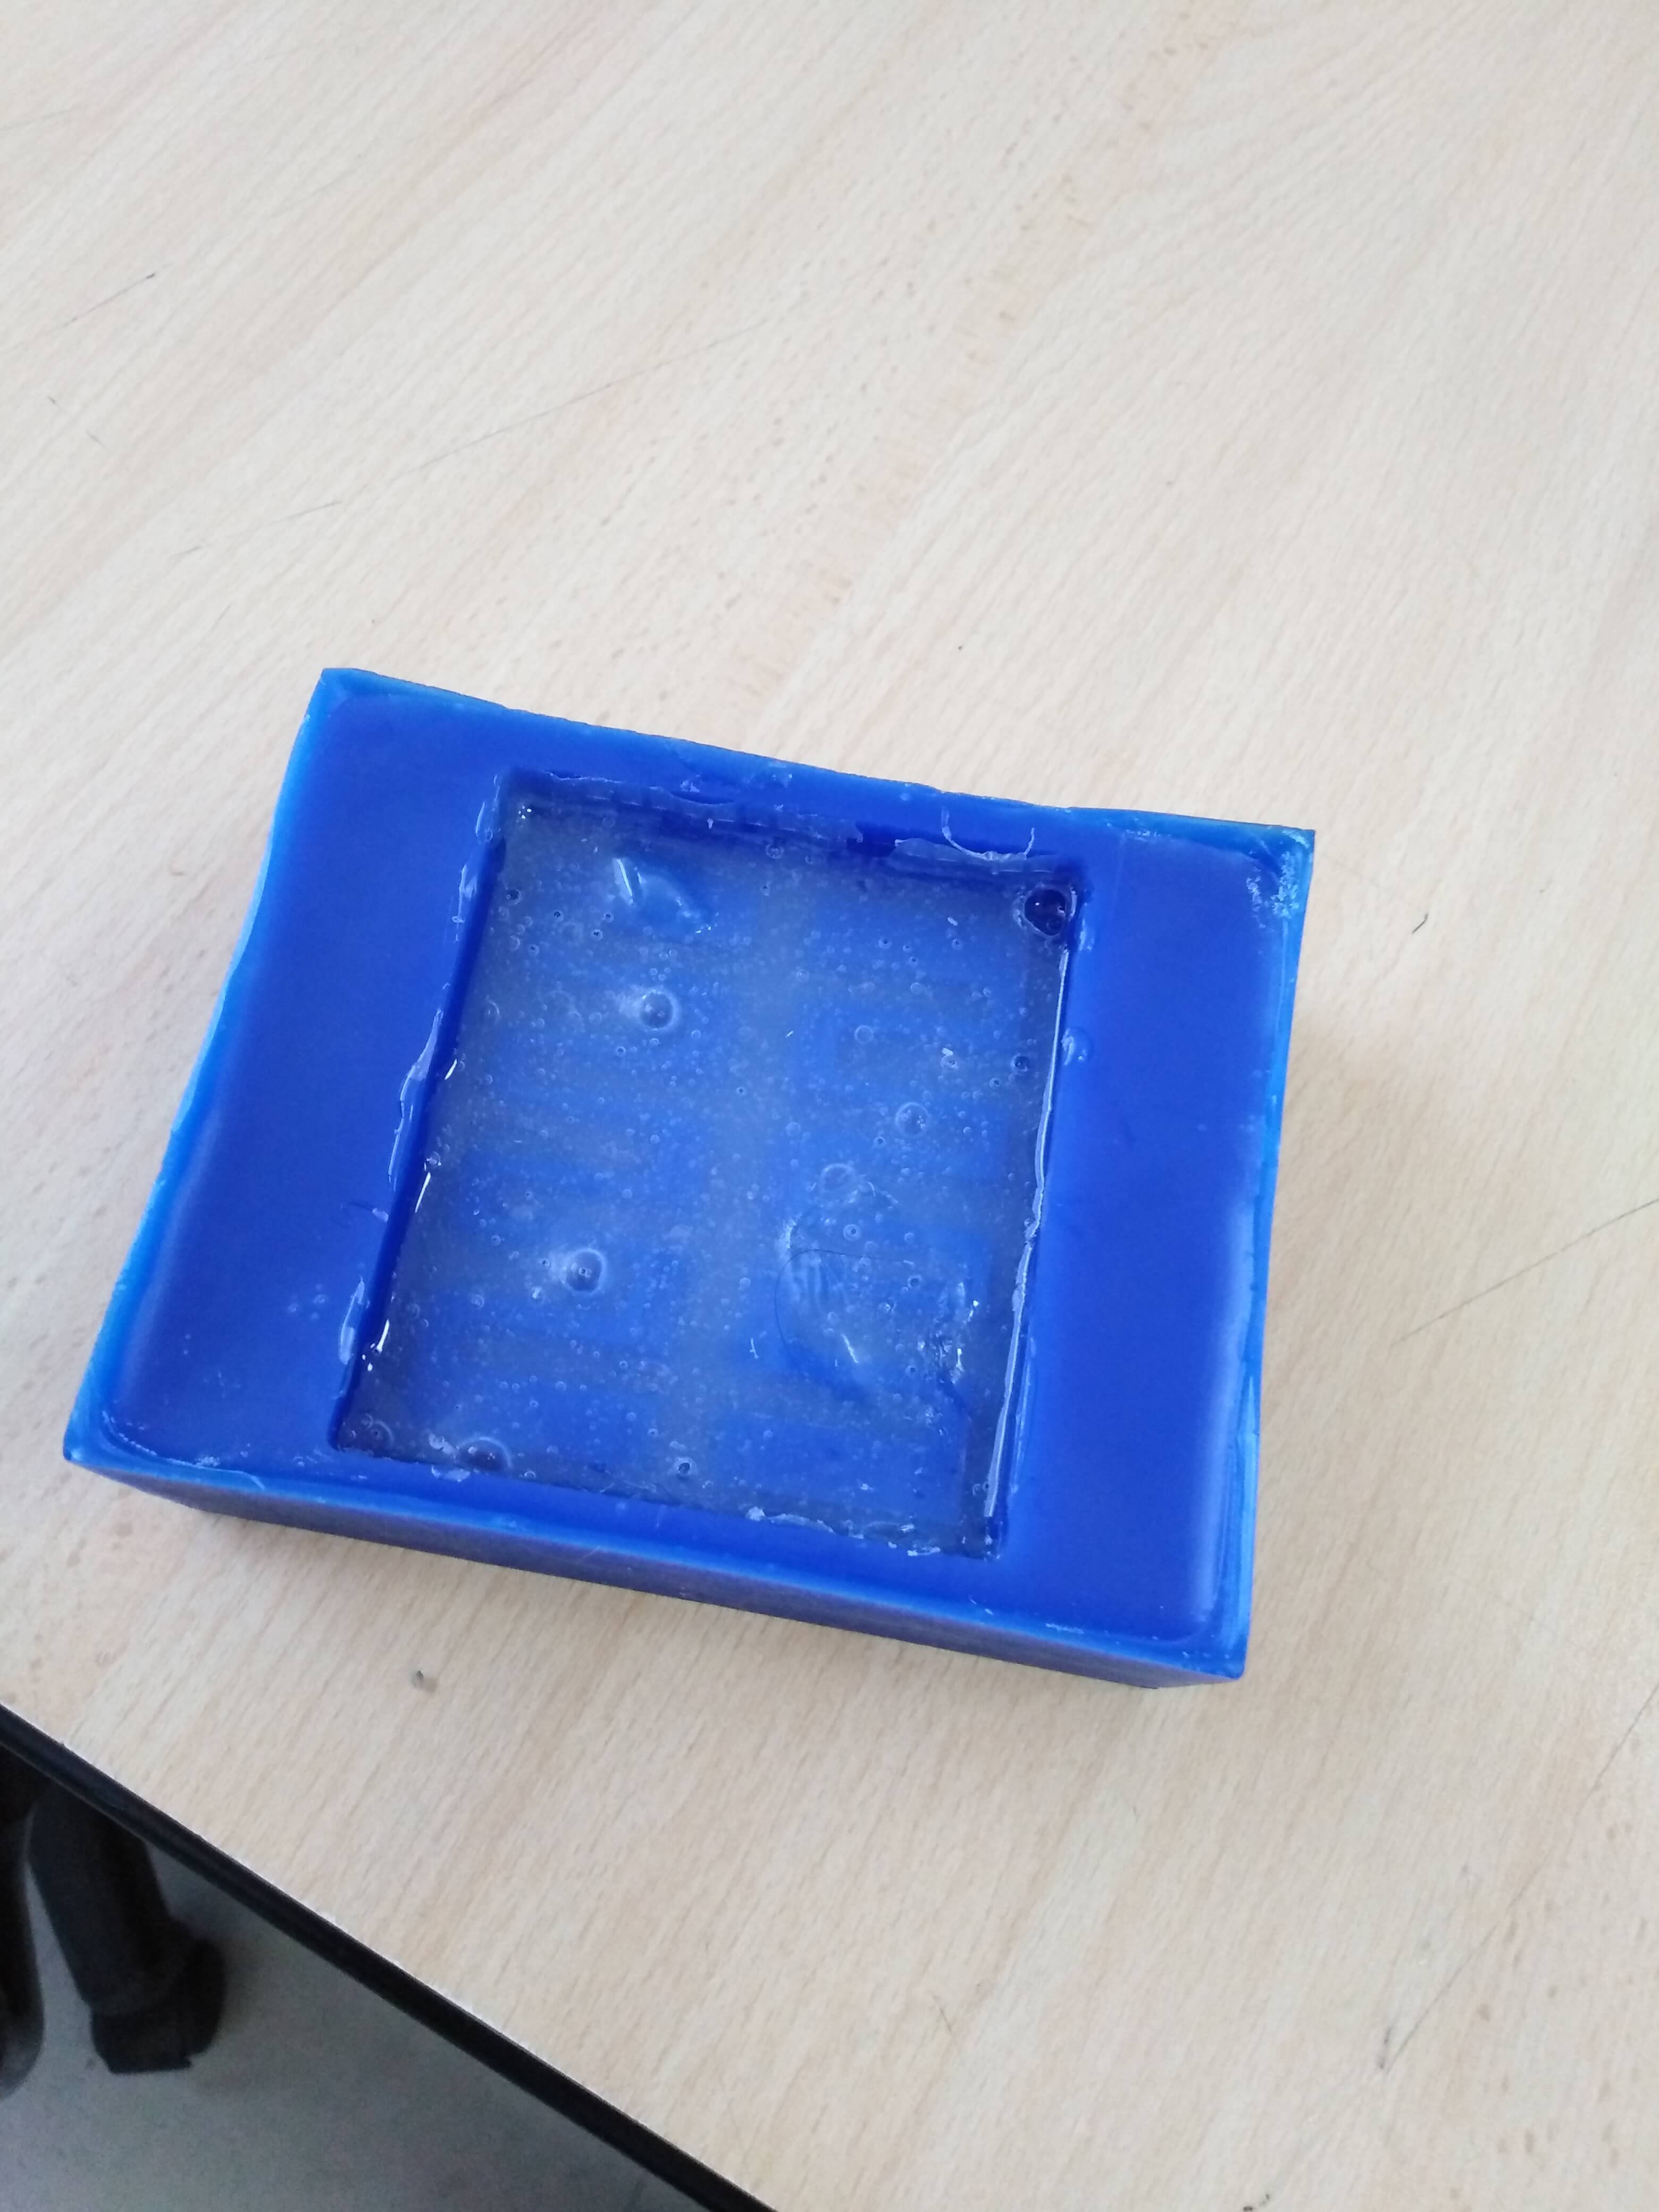
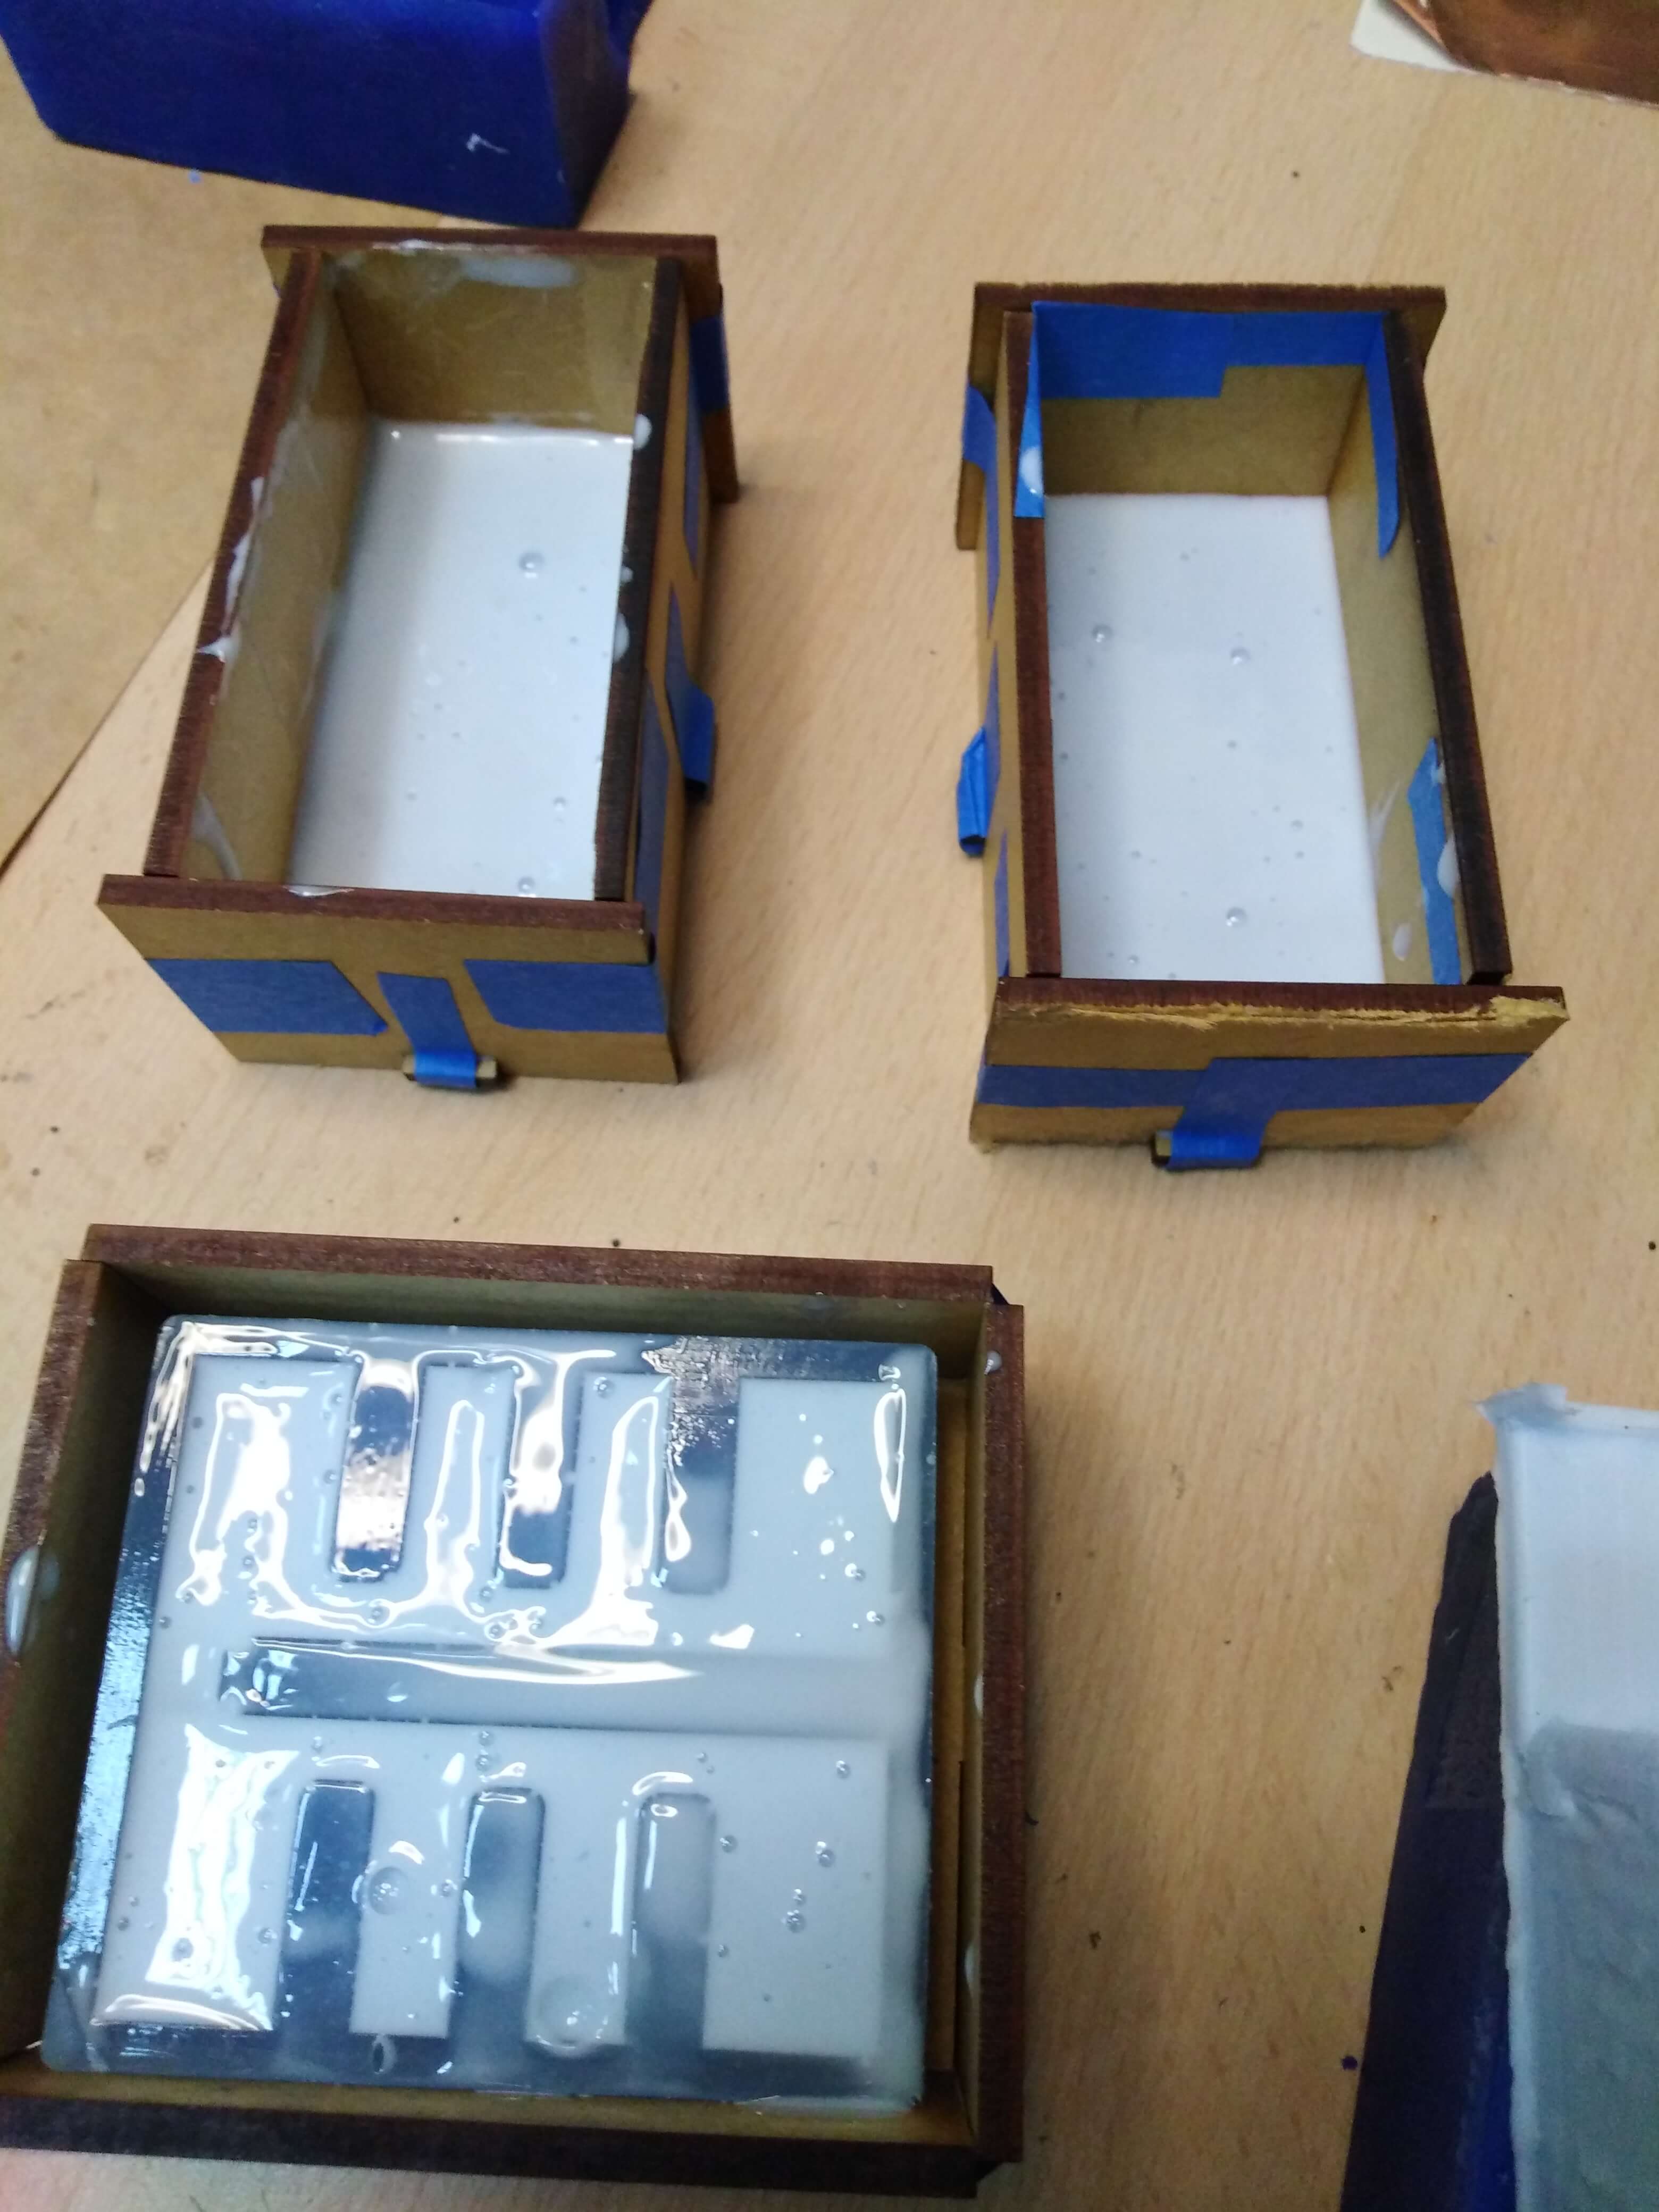
And there are the results of compare the casted materials...
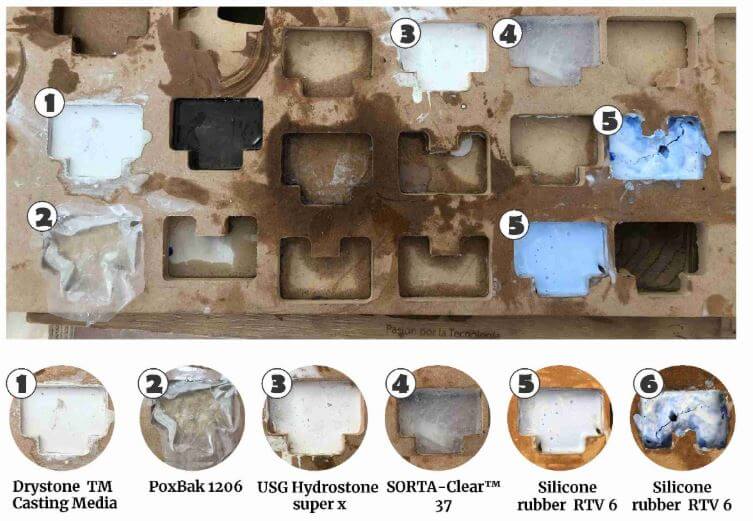
Work time: 2 min
Curing time: 30 min
Easy to do, only need to mix it water.
Work time: 5 min
Curing time: 18 hr
Good results, no bubbles.
Work time: 2 min
Curing time: 30 min
Work time: 7 min
Curing time: 1 hr
Flexible with to many bubbles
Work time: 7 min
Curing time: 12 hr
The best resolution
The same material but added to much catalyst, 70 drops, and at the end it seen broke.
Individual assignment
For this week individual assignment I use Roland SRL Player Software as a CAM, the software is available here and it is necessary to install the updater (available in the same link) after install the SRL Player, additionally I installed a tool (PL2303 CheckChipVersion tool program) to manage the ports of connections between the computer and the milling machine (I use the Roland Modela MDX 20).
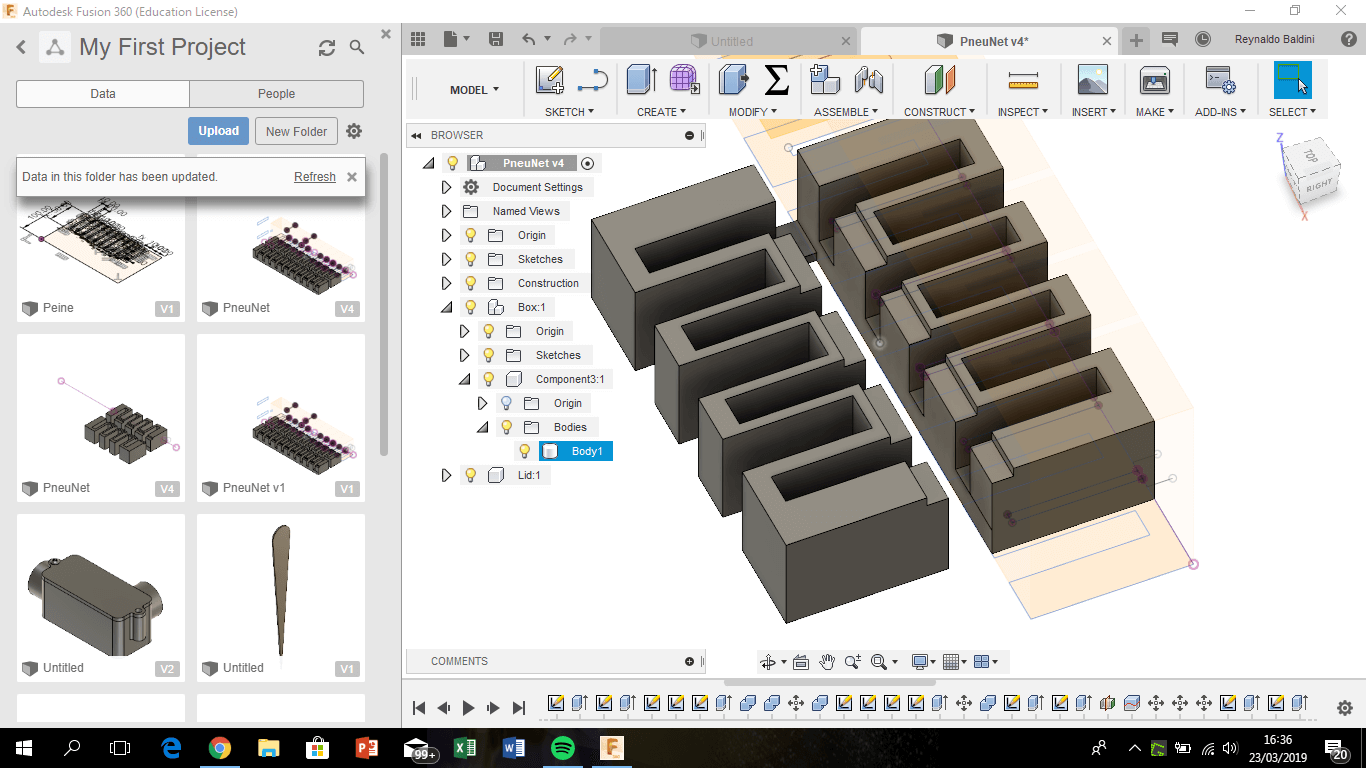
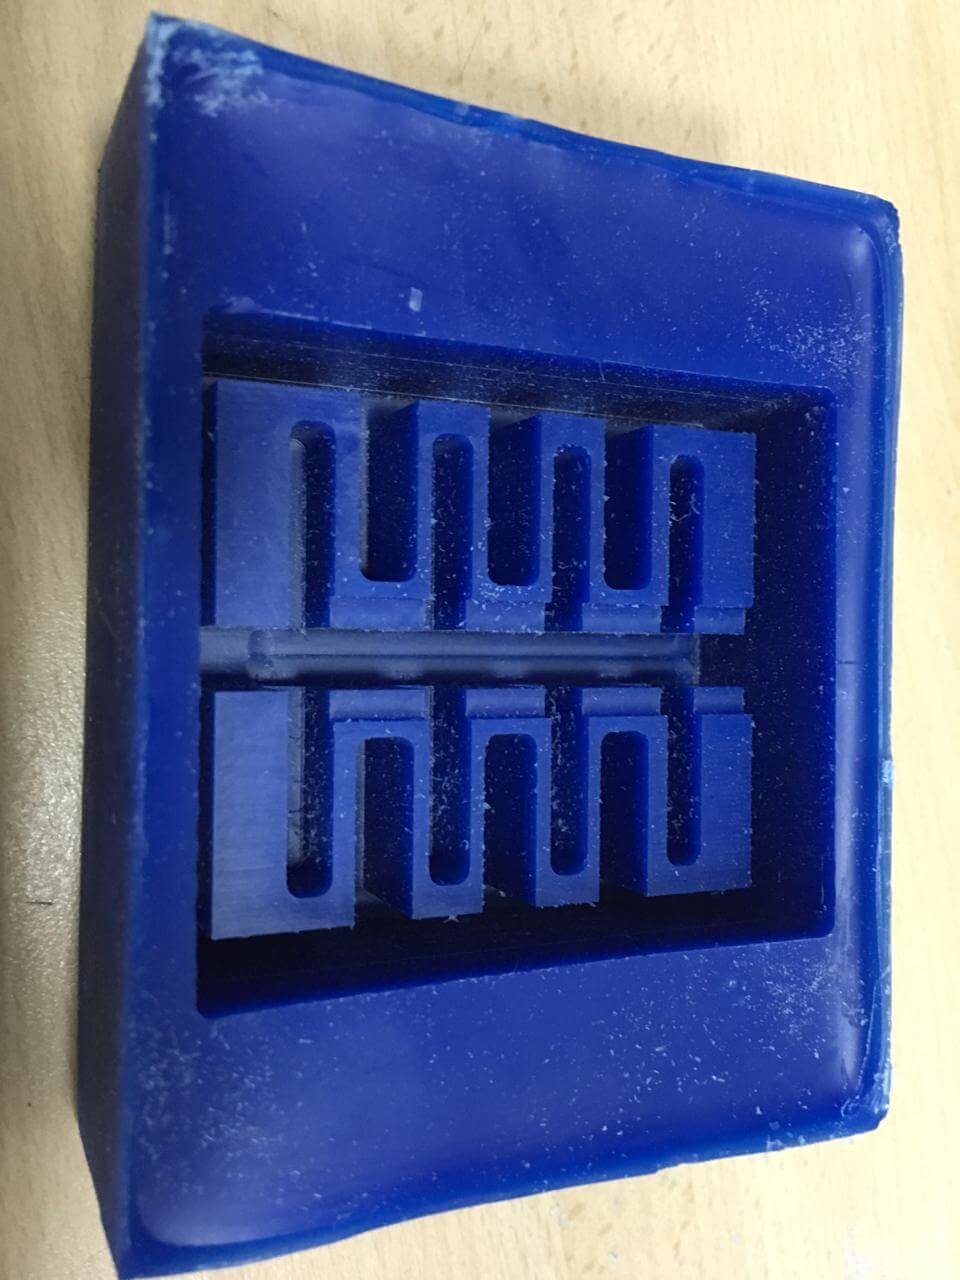
Then, I use Fusion 360 to design a piece, here I found the firsts two main restrictions: In my first design attempt I followed the instructions for design an "actuator" (a pneumatic piece) that has some distances of 1 mm, but the minimum available diameter of the flat end mill is 1/8" or 3.175 mm. The other restriction was the piece that I want to build needs to be machined on both sides, which could mean a tricky process. So I have to adapt the minimum distances in the piece to the diameter of the mill; and divide the piece in the midle through the xy plane and have machined only one side.
Another modification was imposed for the size of the wax block and the distances between the limits of the block and the boundaries of the piece, that is, the software needs a certain distance between the body and the block to generate a coherent toolpath. Therefore, I reduced the long size of the piece.
 click to expand
 click to expand
 click to expand
 click to expand
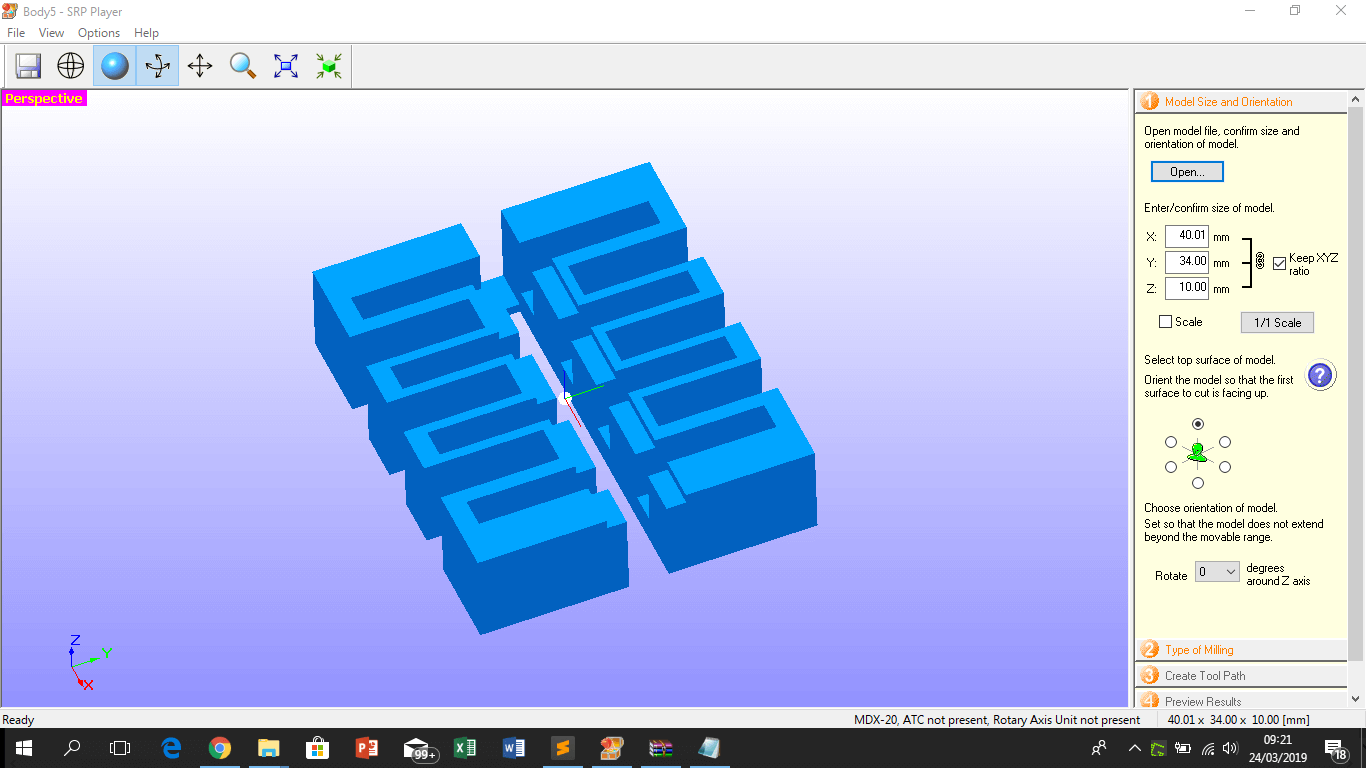
For load the piece in the SRL Player Software, save as a .STL format the Fusion 360 design (right click upon "body" > save as STL). Then open in the SRL Player (1. Model size and orientation)
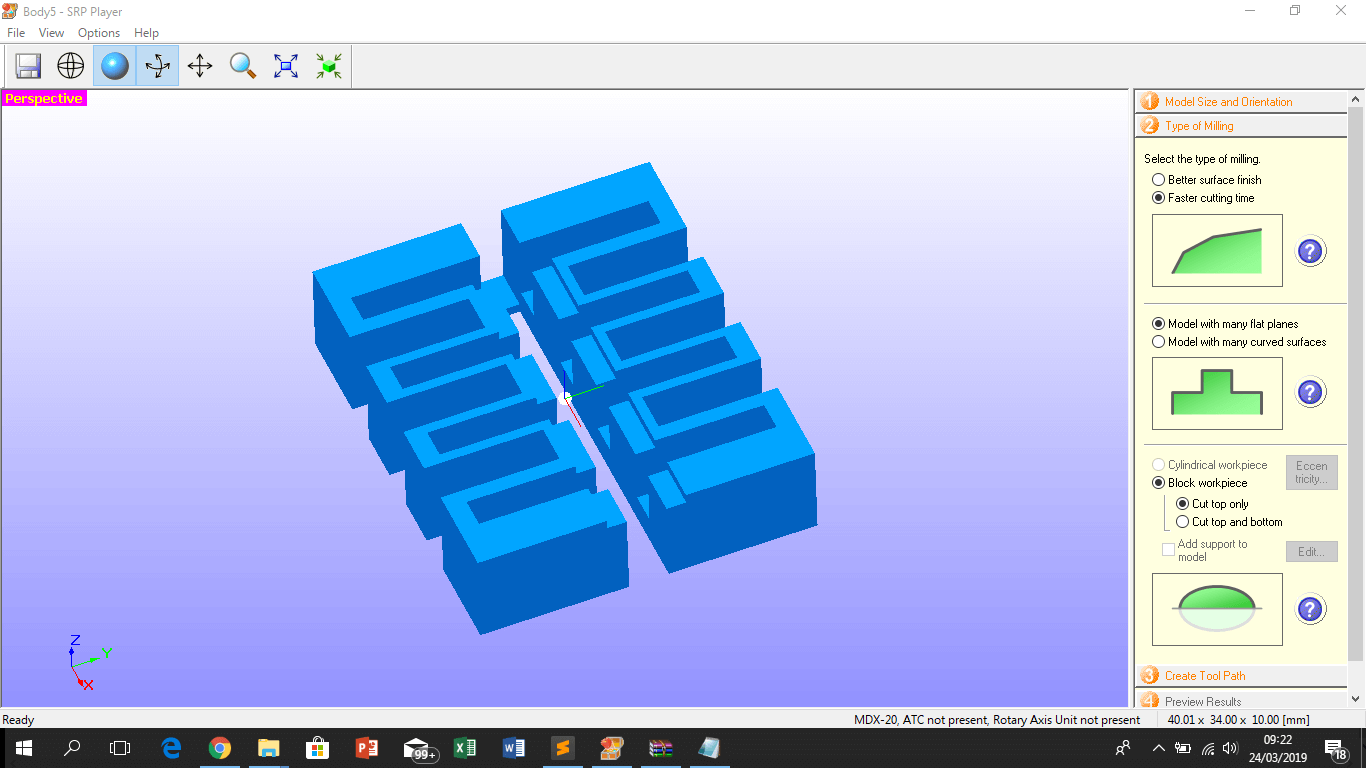
Then, click on "2. Type of milling", here define the preferences of the milling proces, I think it depends of the kind of the model.
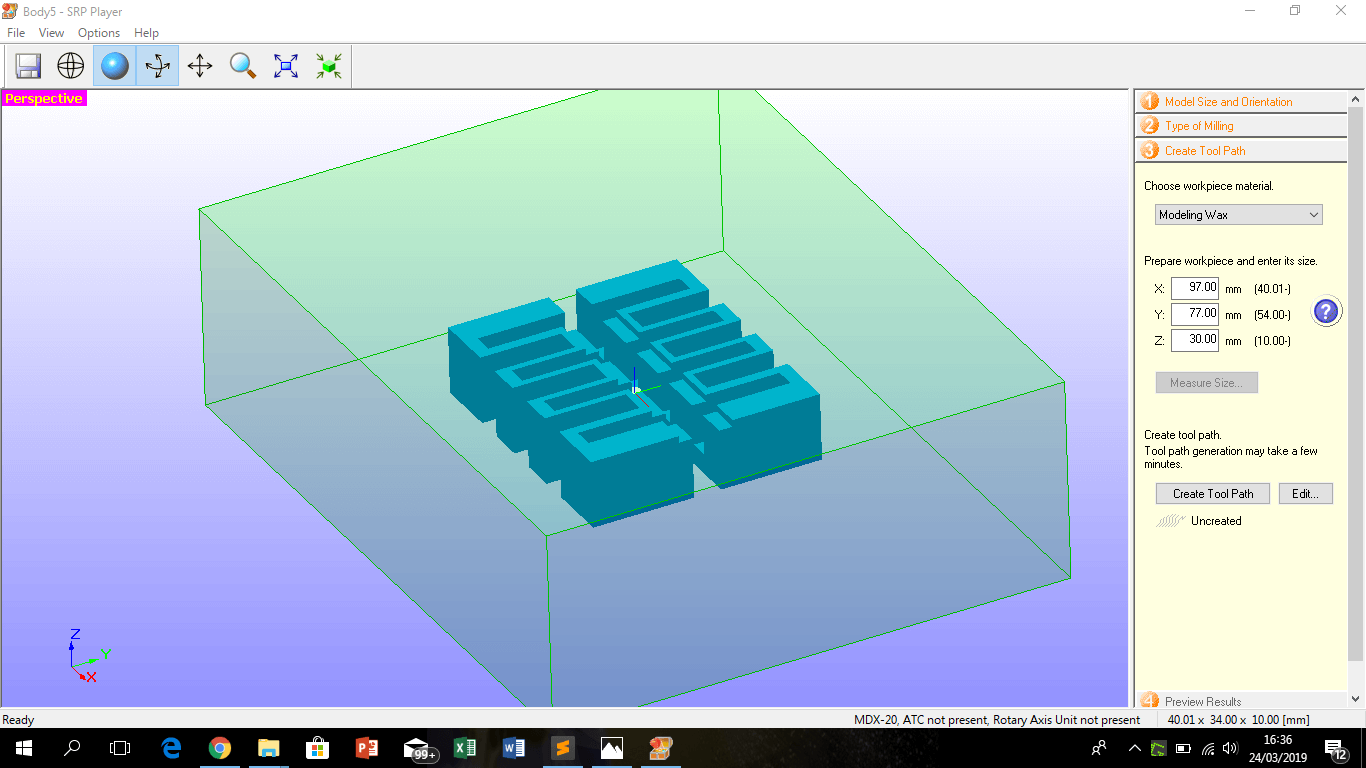
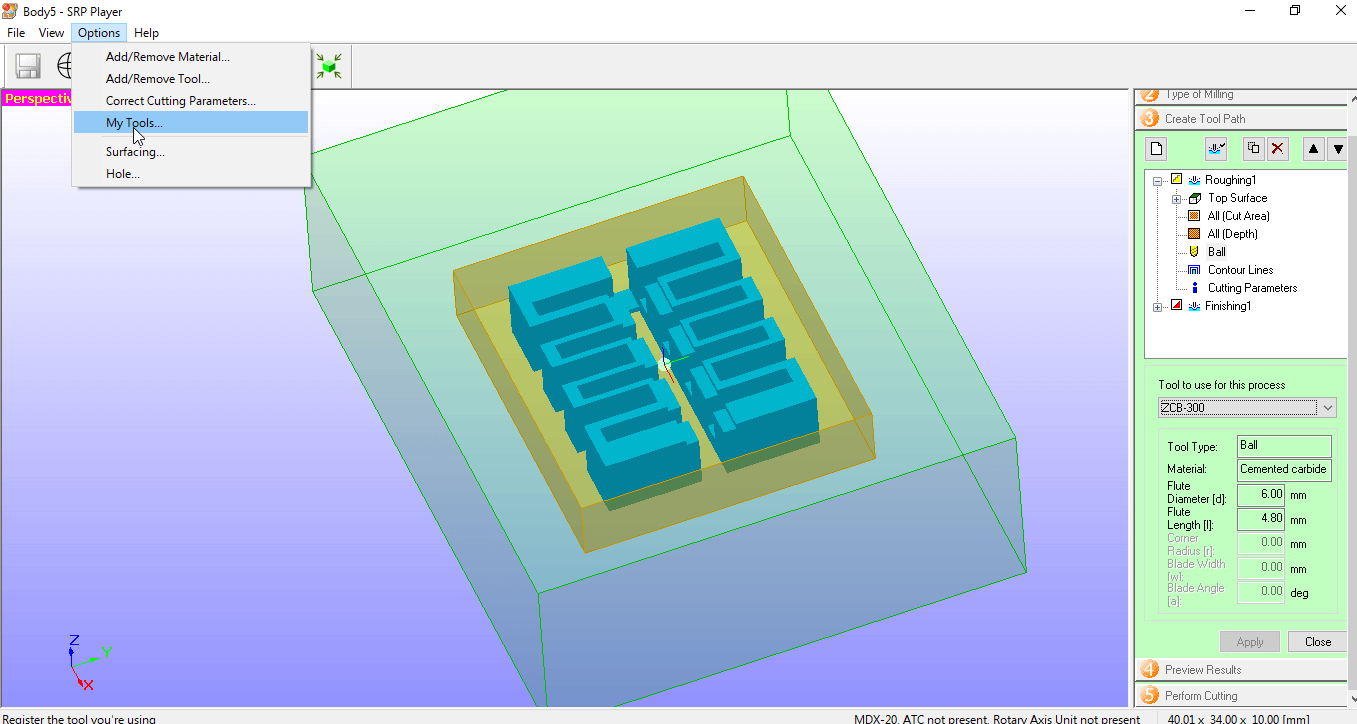
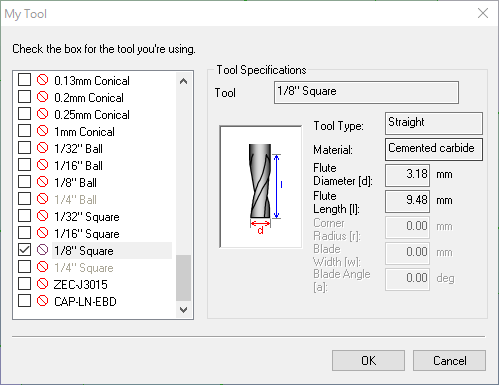
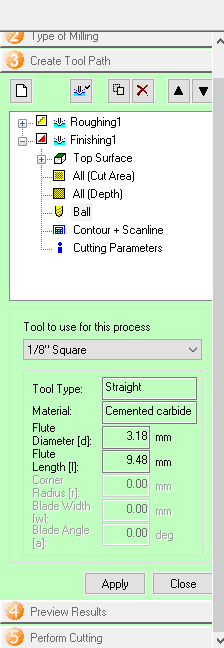
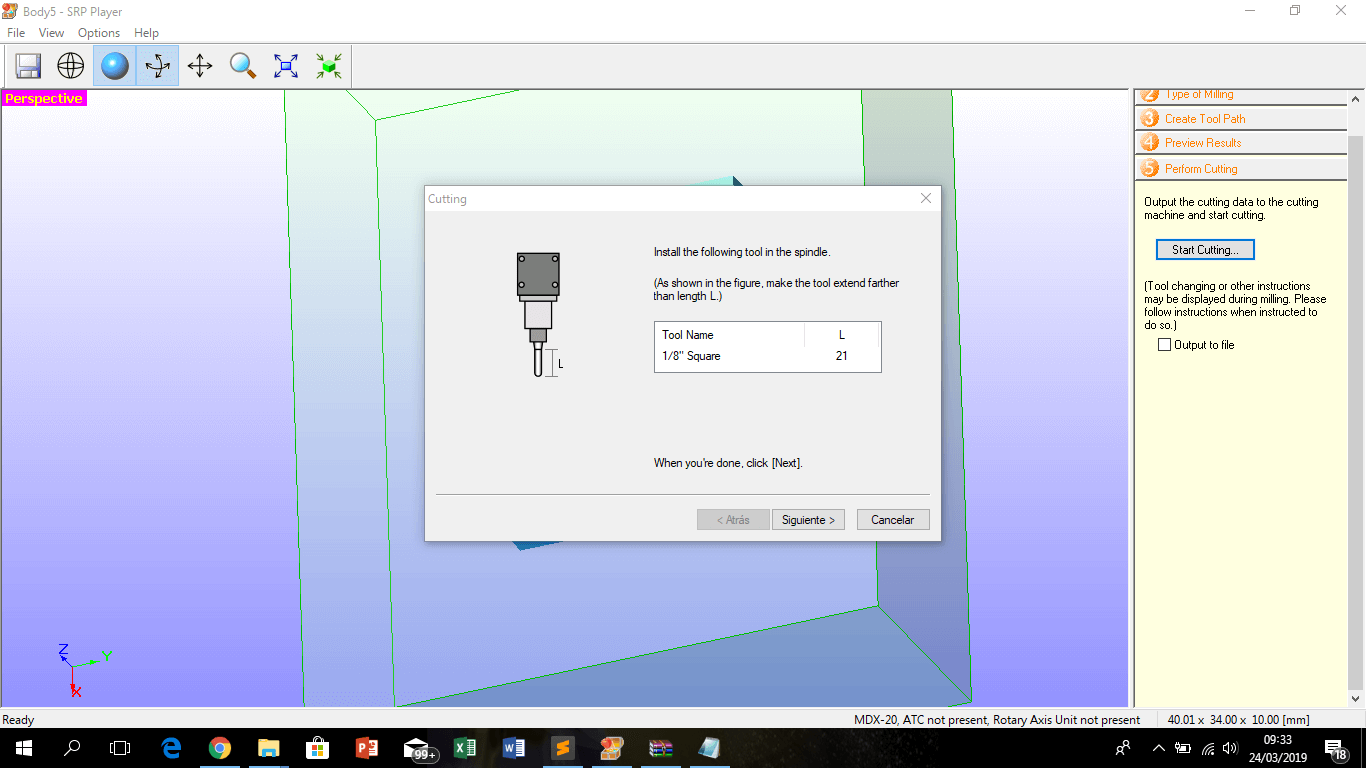
Click on "3. Create Tool Path", here define dimensions and the material of the block and the tipe of mill. I use a flat end mill of 1/8", for add a particular tool, go to "My Tools" and select the current tool, then go to edit and the tool appear in the Roughing and Finishing options, I use the same tool for the both, because I do not need a very detailed finish. The go to create a tool path.
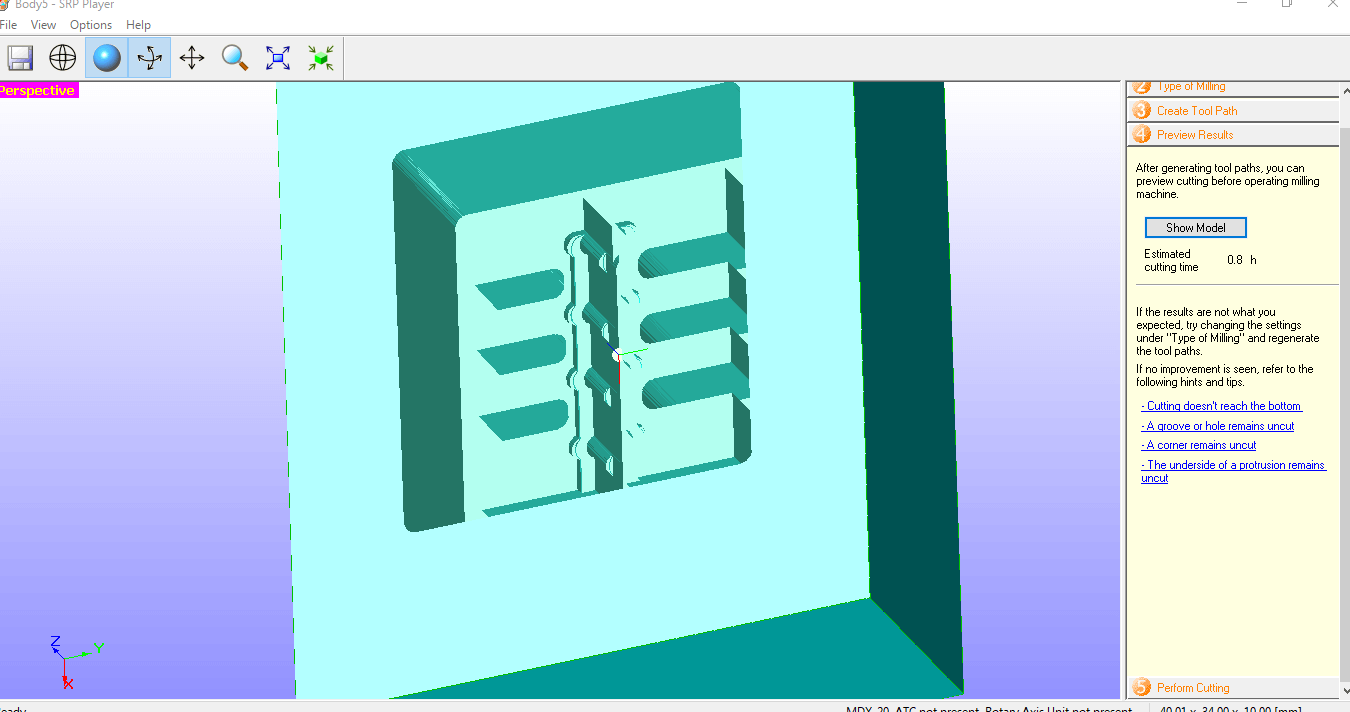
Click on "4. Preview Results", go to "preview cutting" for view the final result, I noticed that some corners were rounded.
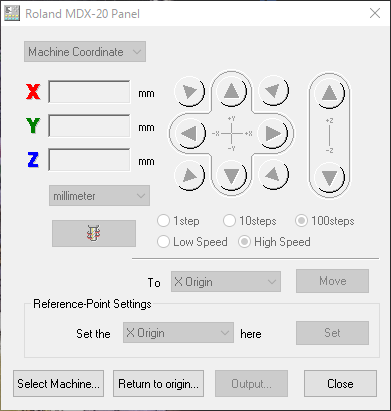
Click on "5. Perform Cutting", and click on "Start Cutting"; then go to the Roland MDX 20 Panel, set up the machine, verify that the ports are the same and then send the job using output option.
 Click to expand
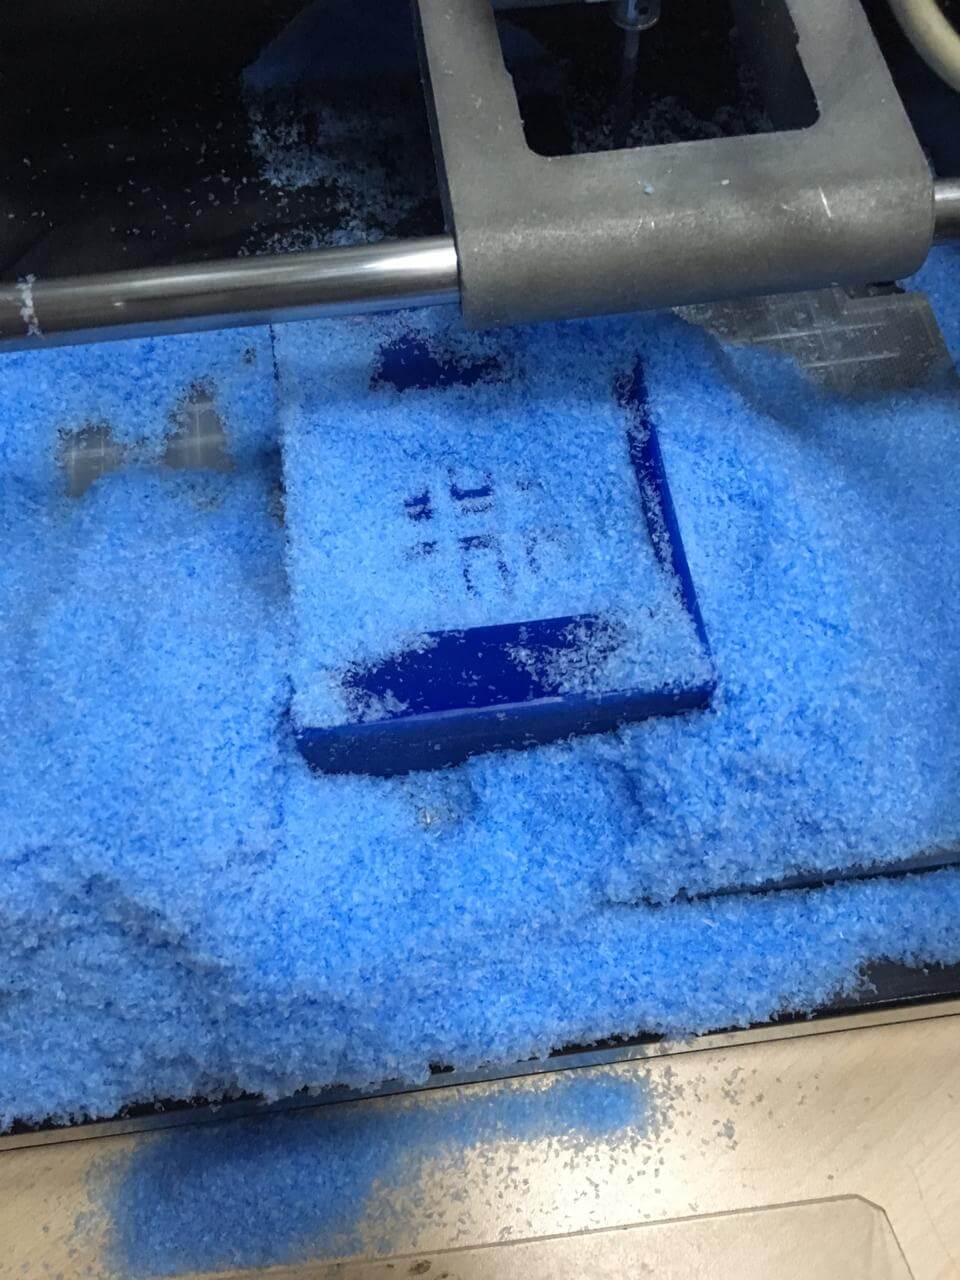
After a couple of hours ...
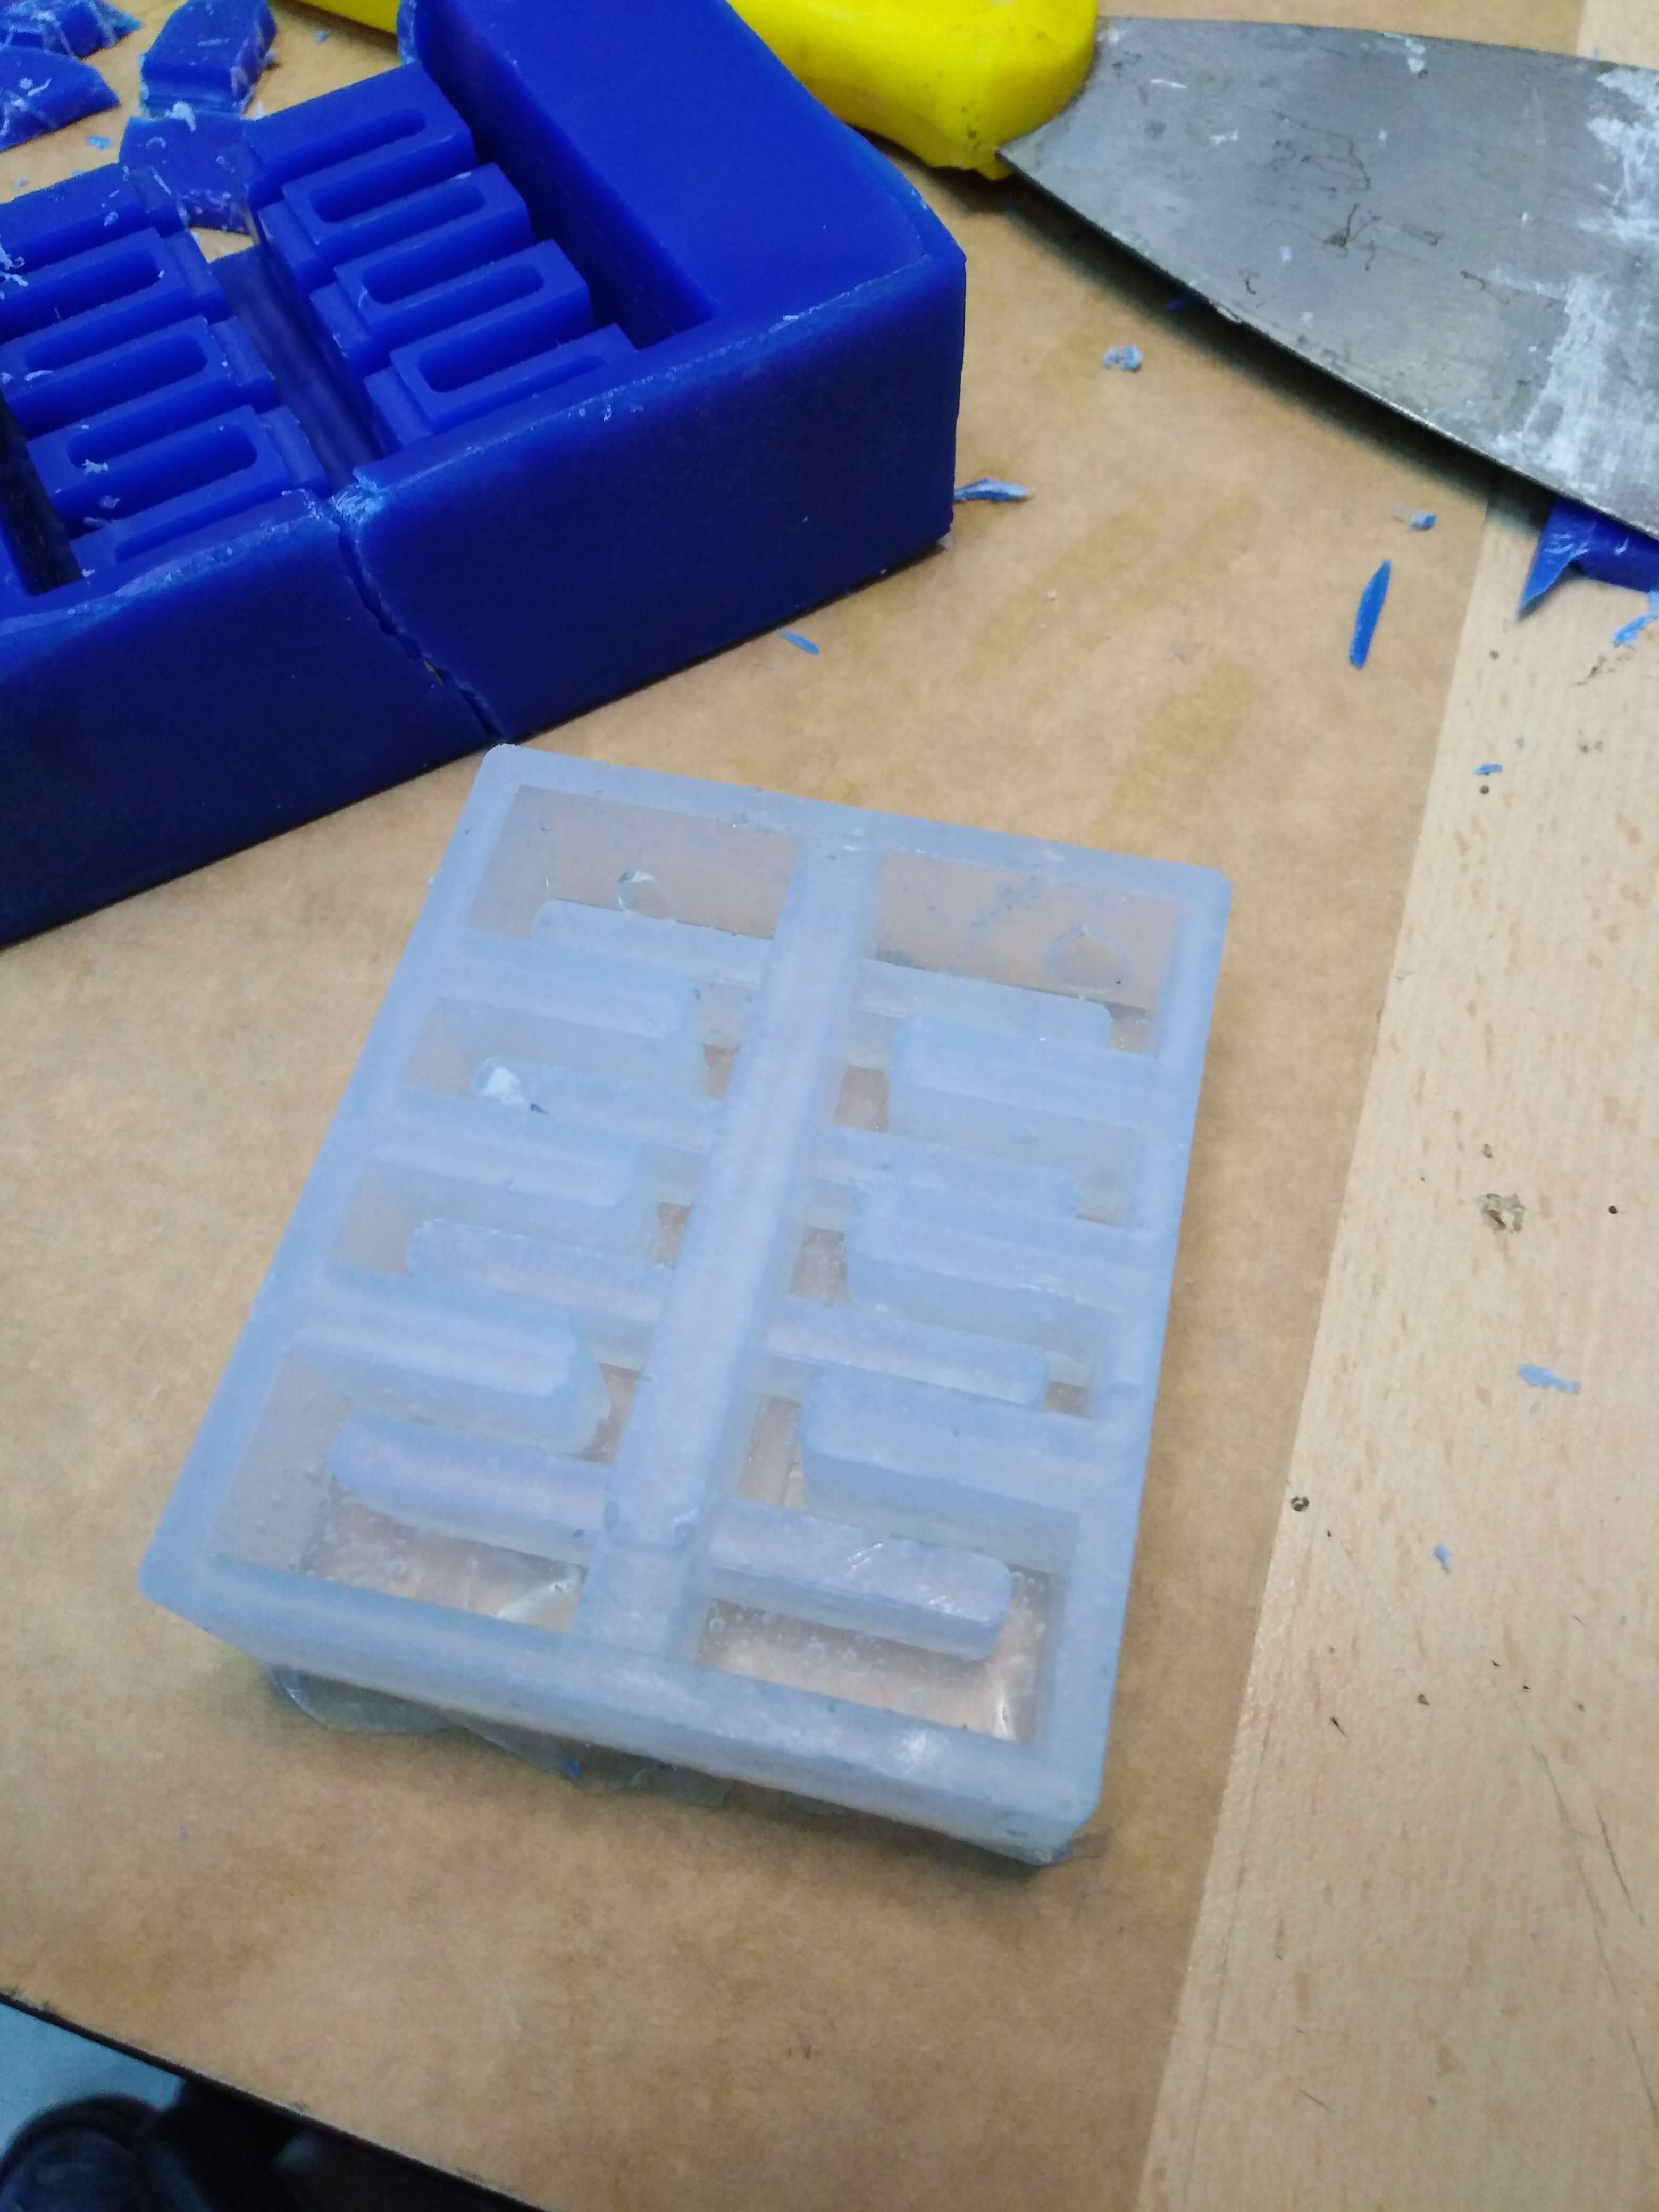
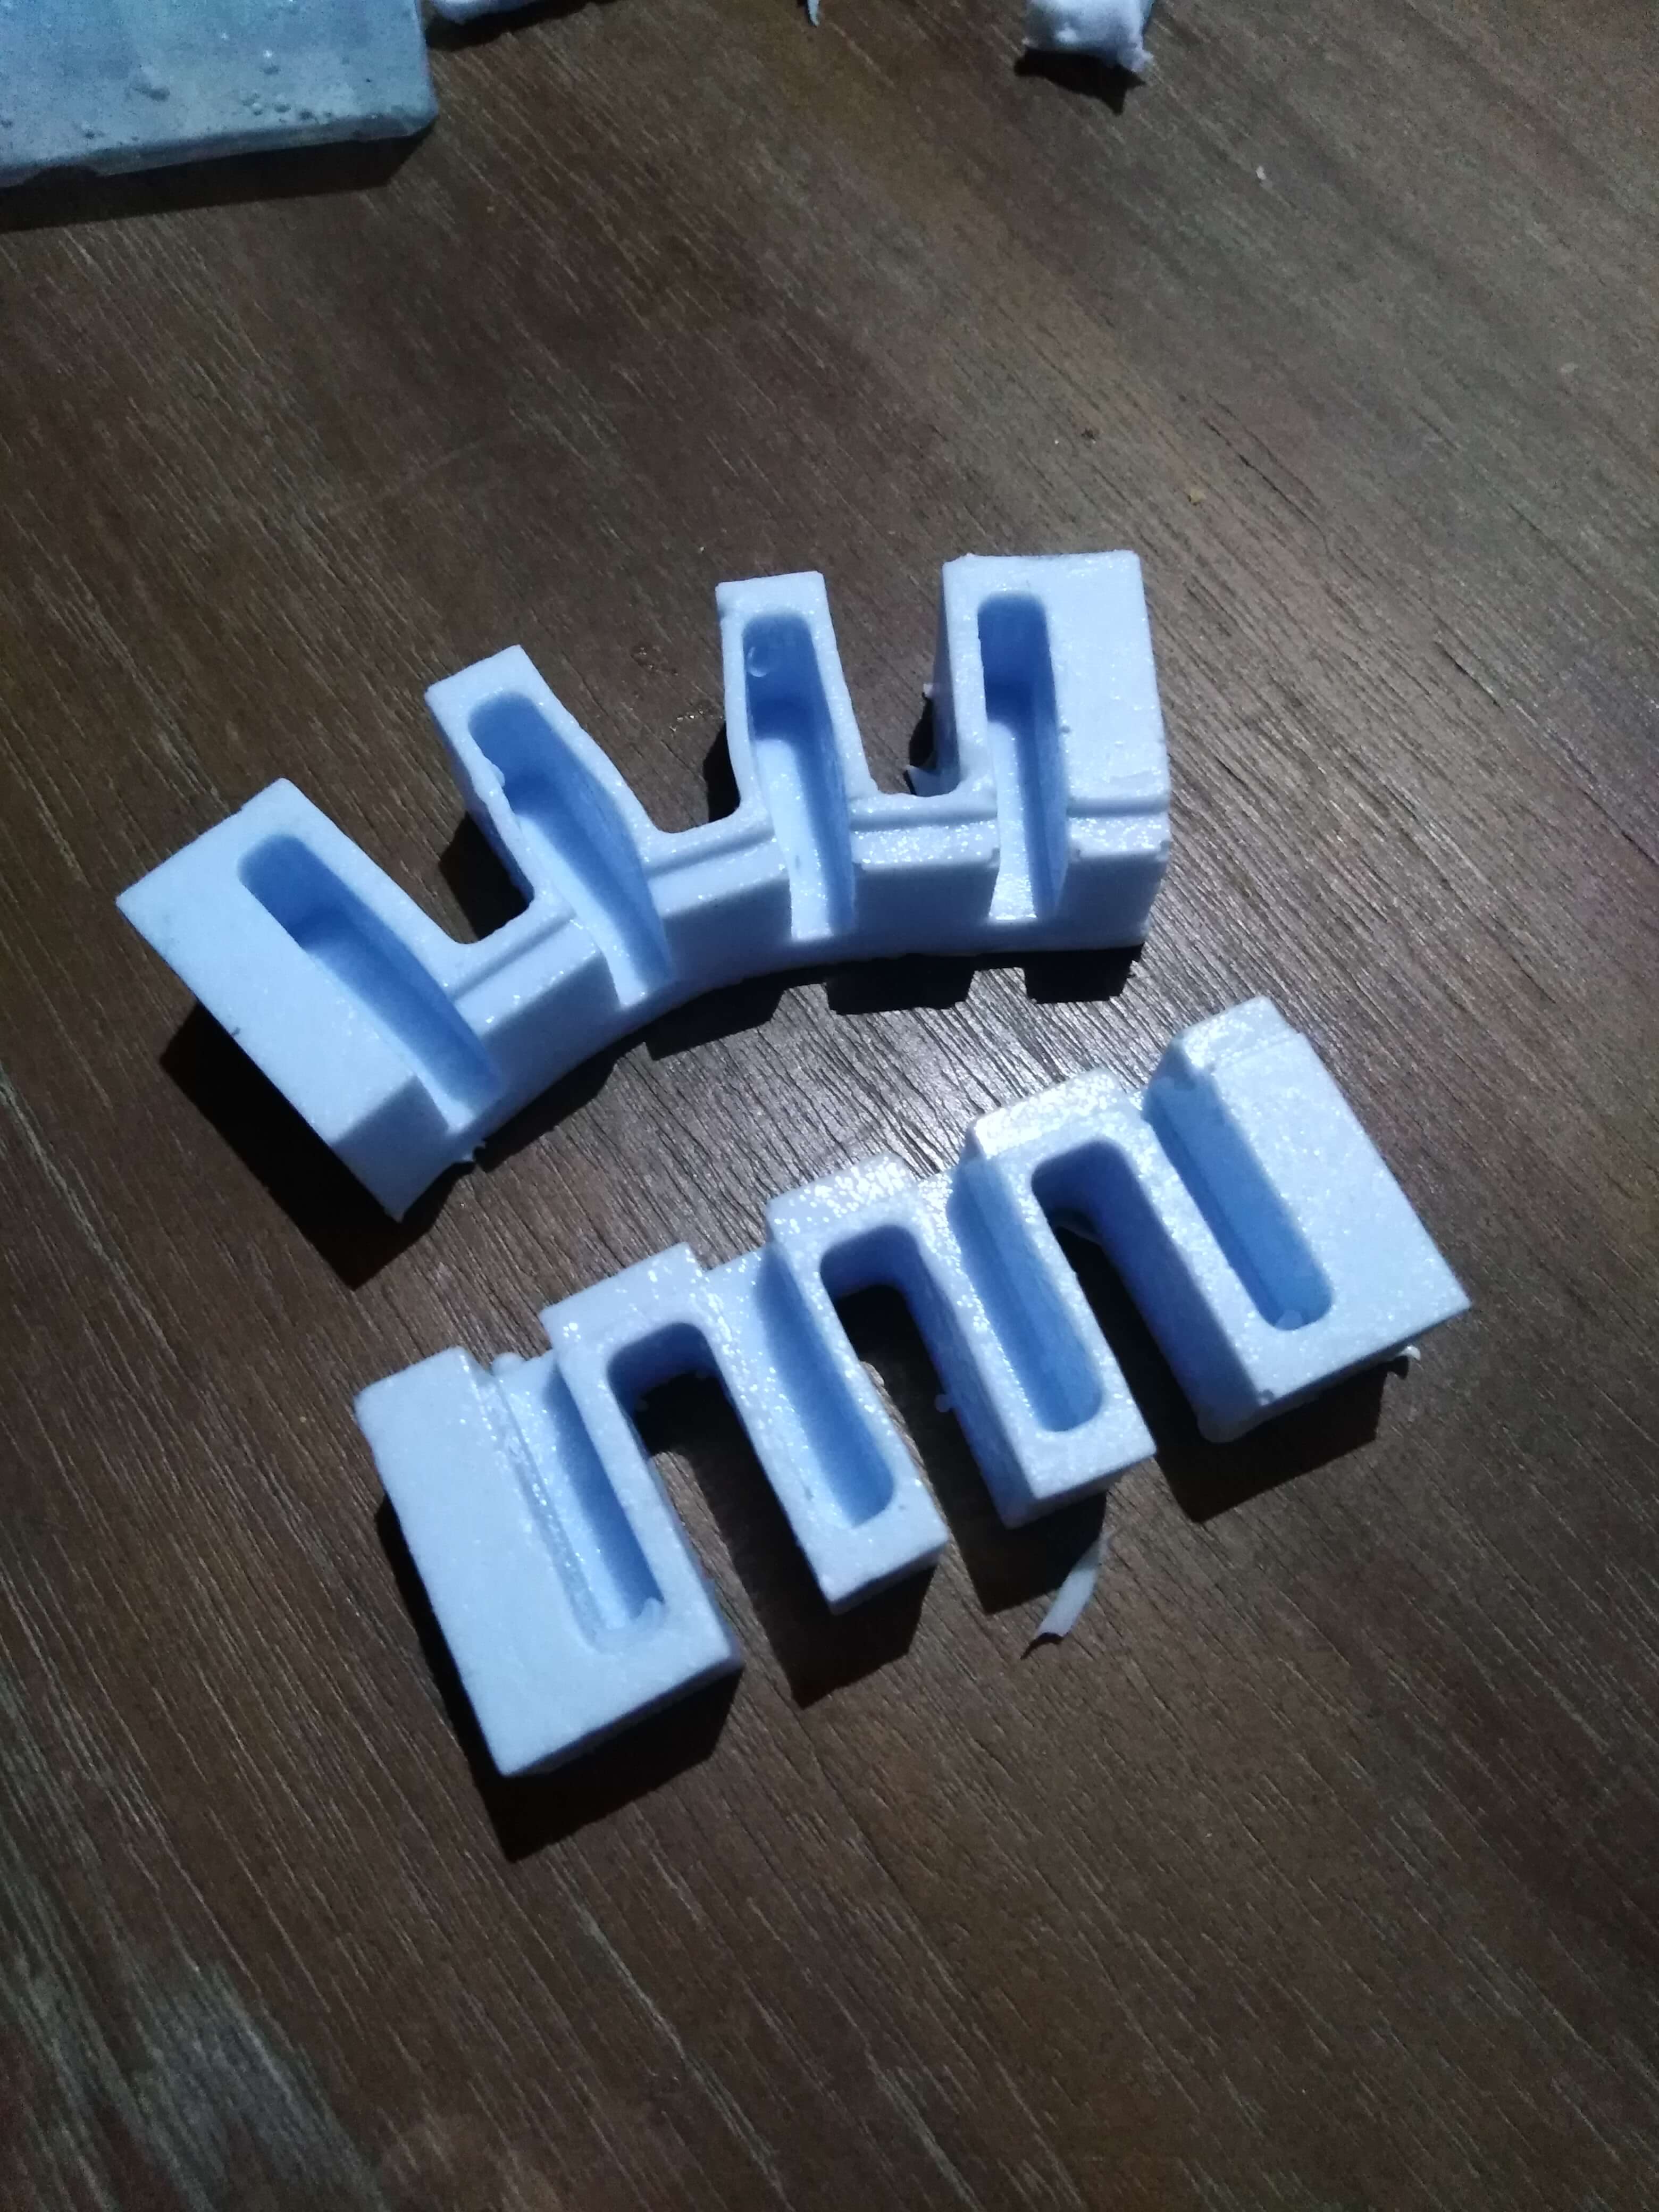
For the mold i use "Sorta Clear 12" silicone elastomer, Two bottles come, A and B, and they are mixed at a ratio of 1: 1. It took a couple of hours to dry.
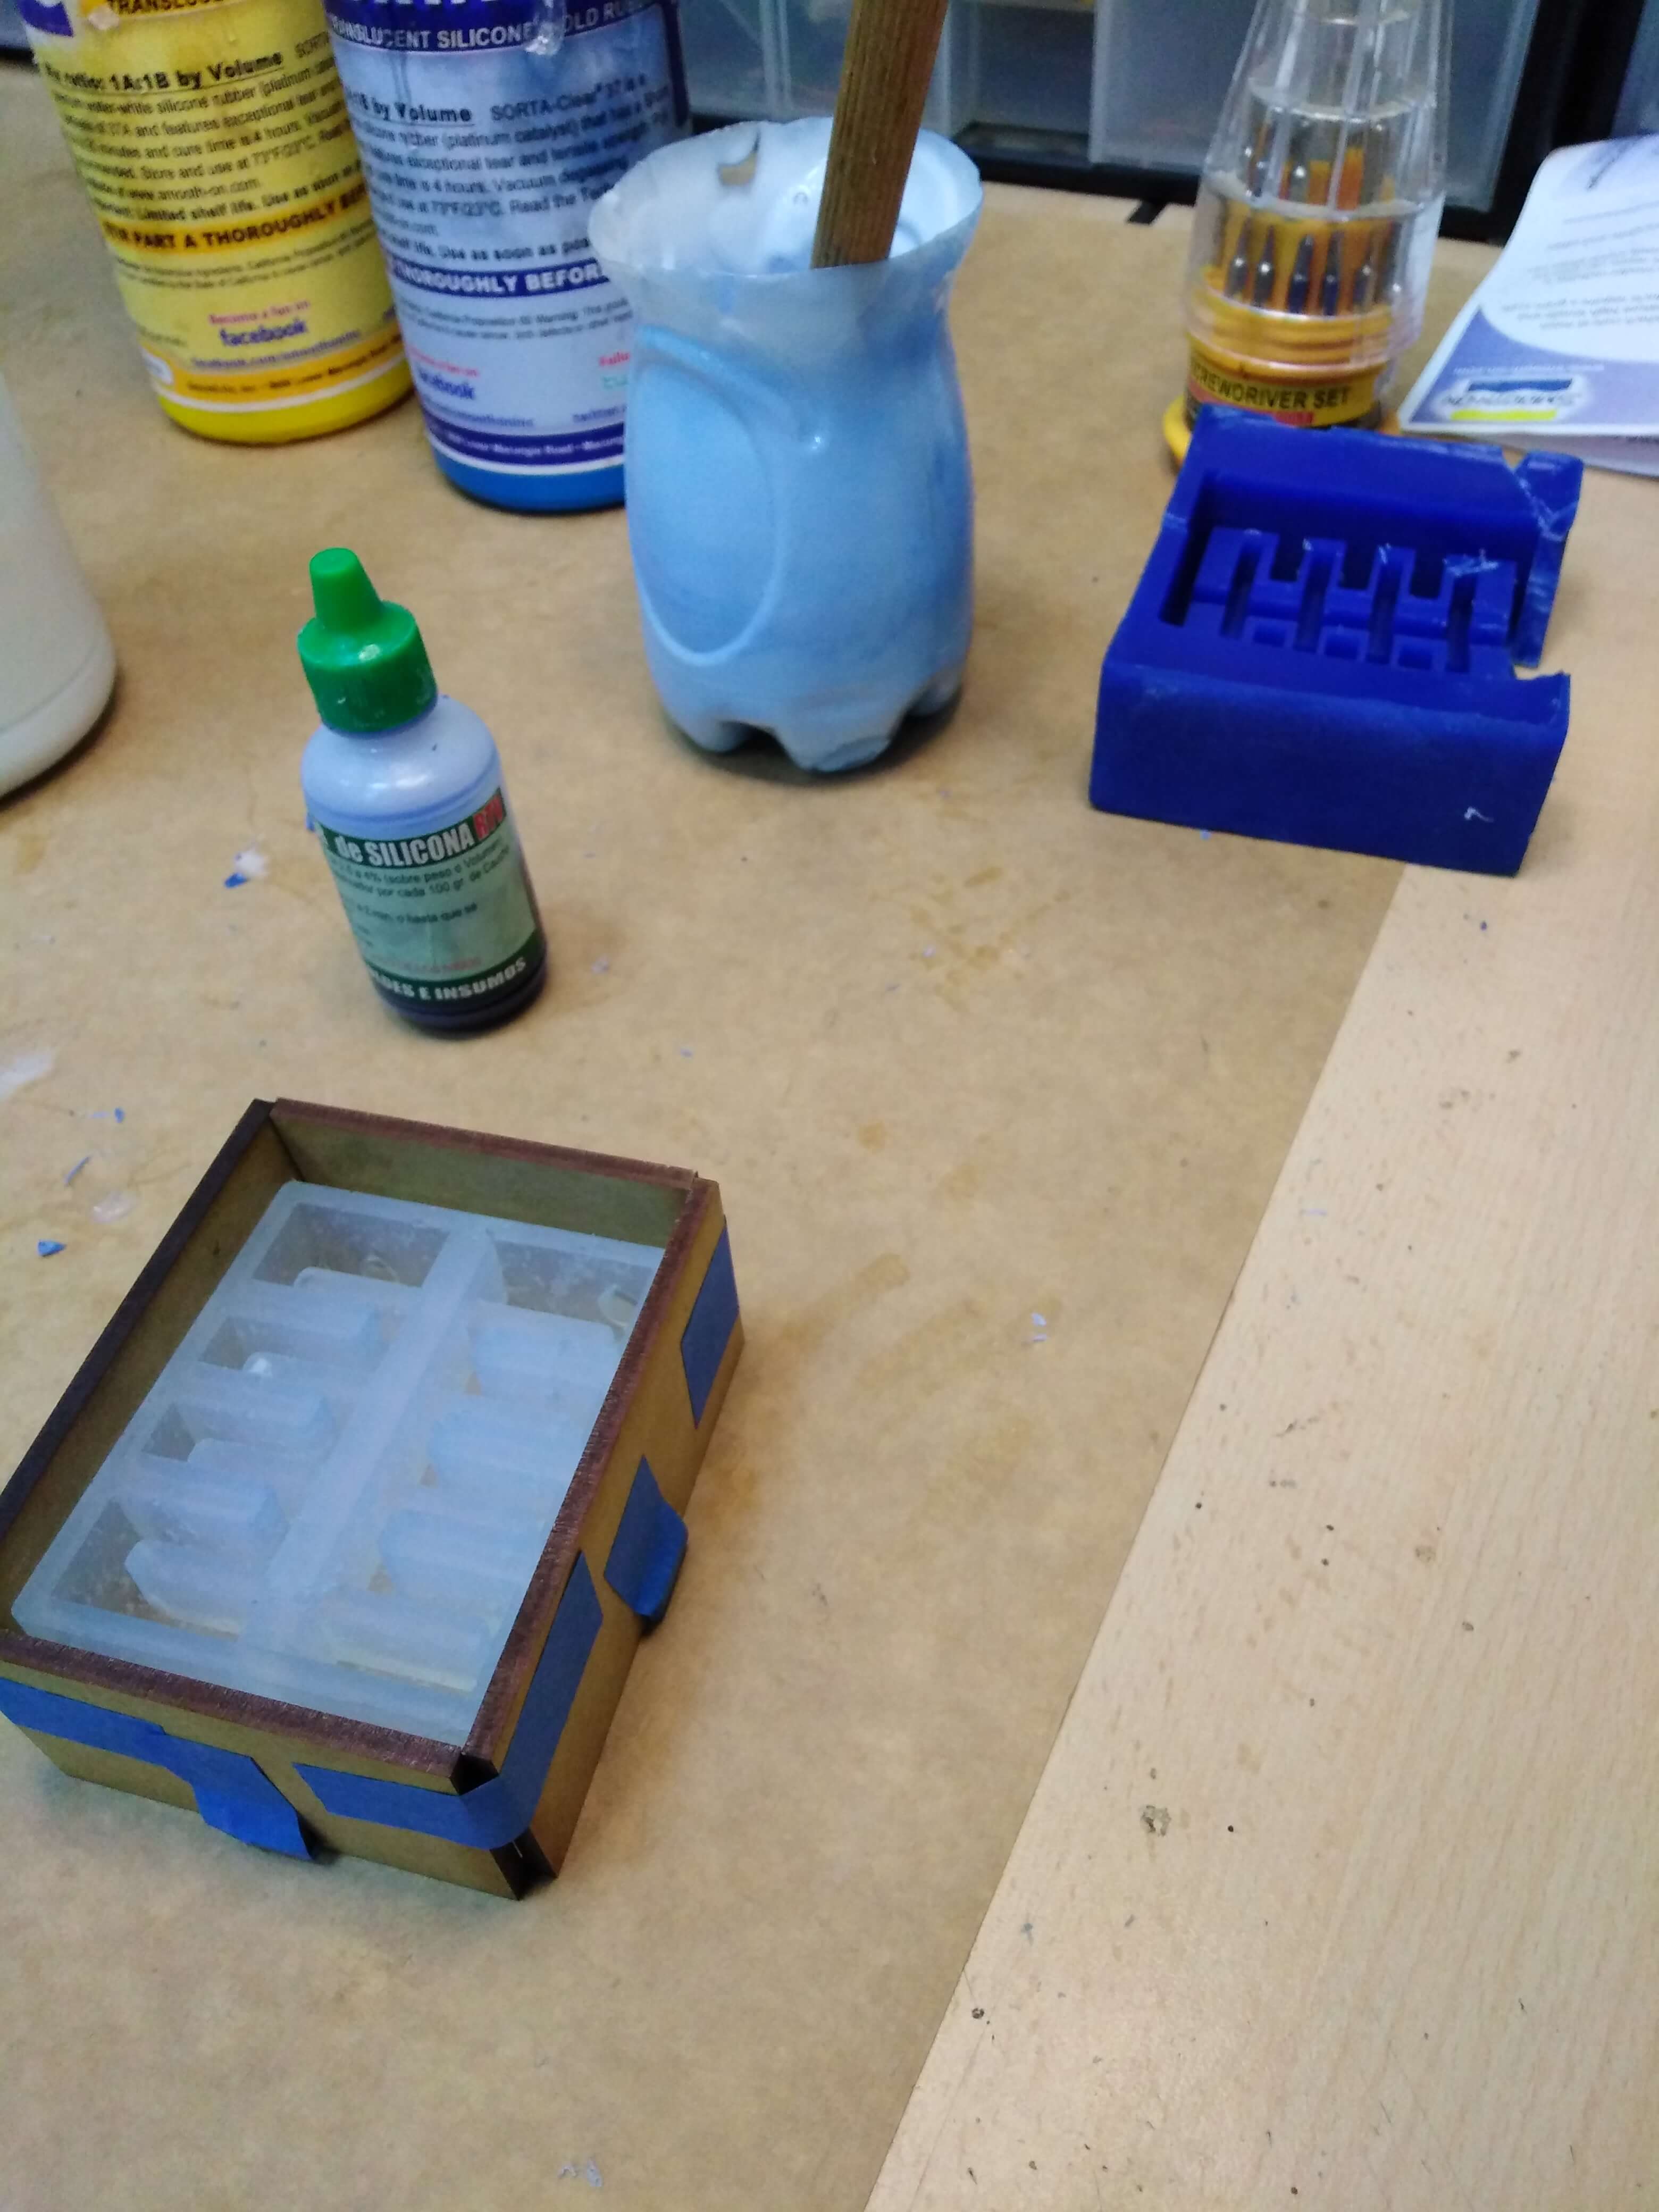
Finally for the "positive" I used another type of silicone, Silicone Rubber RTV6, which requires a catalyst in proportion of 20 drops per 100 grams of silicone. Then mix solution. This took about 6 hours to dry.
To remove the mold I simply flexed it and it came out without problems. Another issue is that bubbles are observed, these were presented outside the object, can be seen clearly in the video that is at the end.
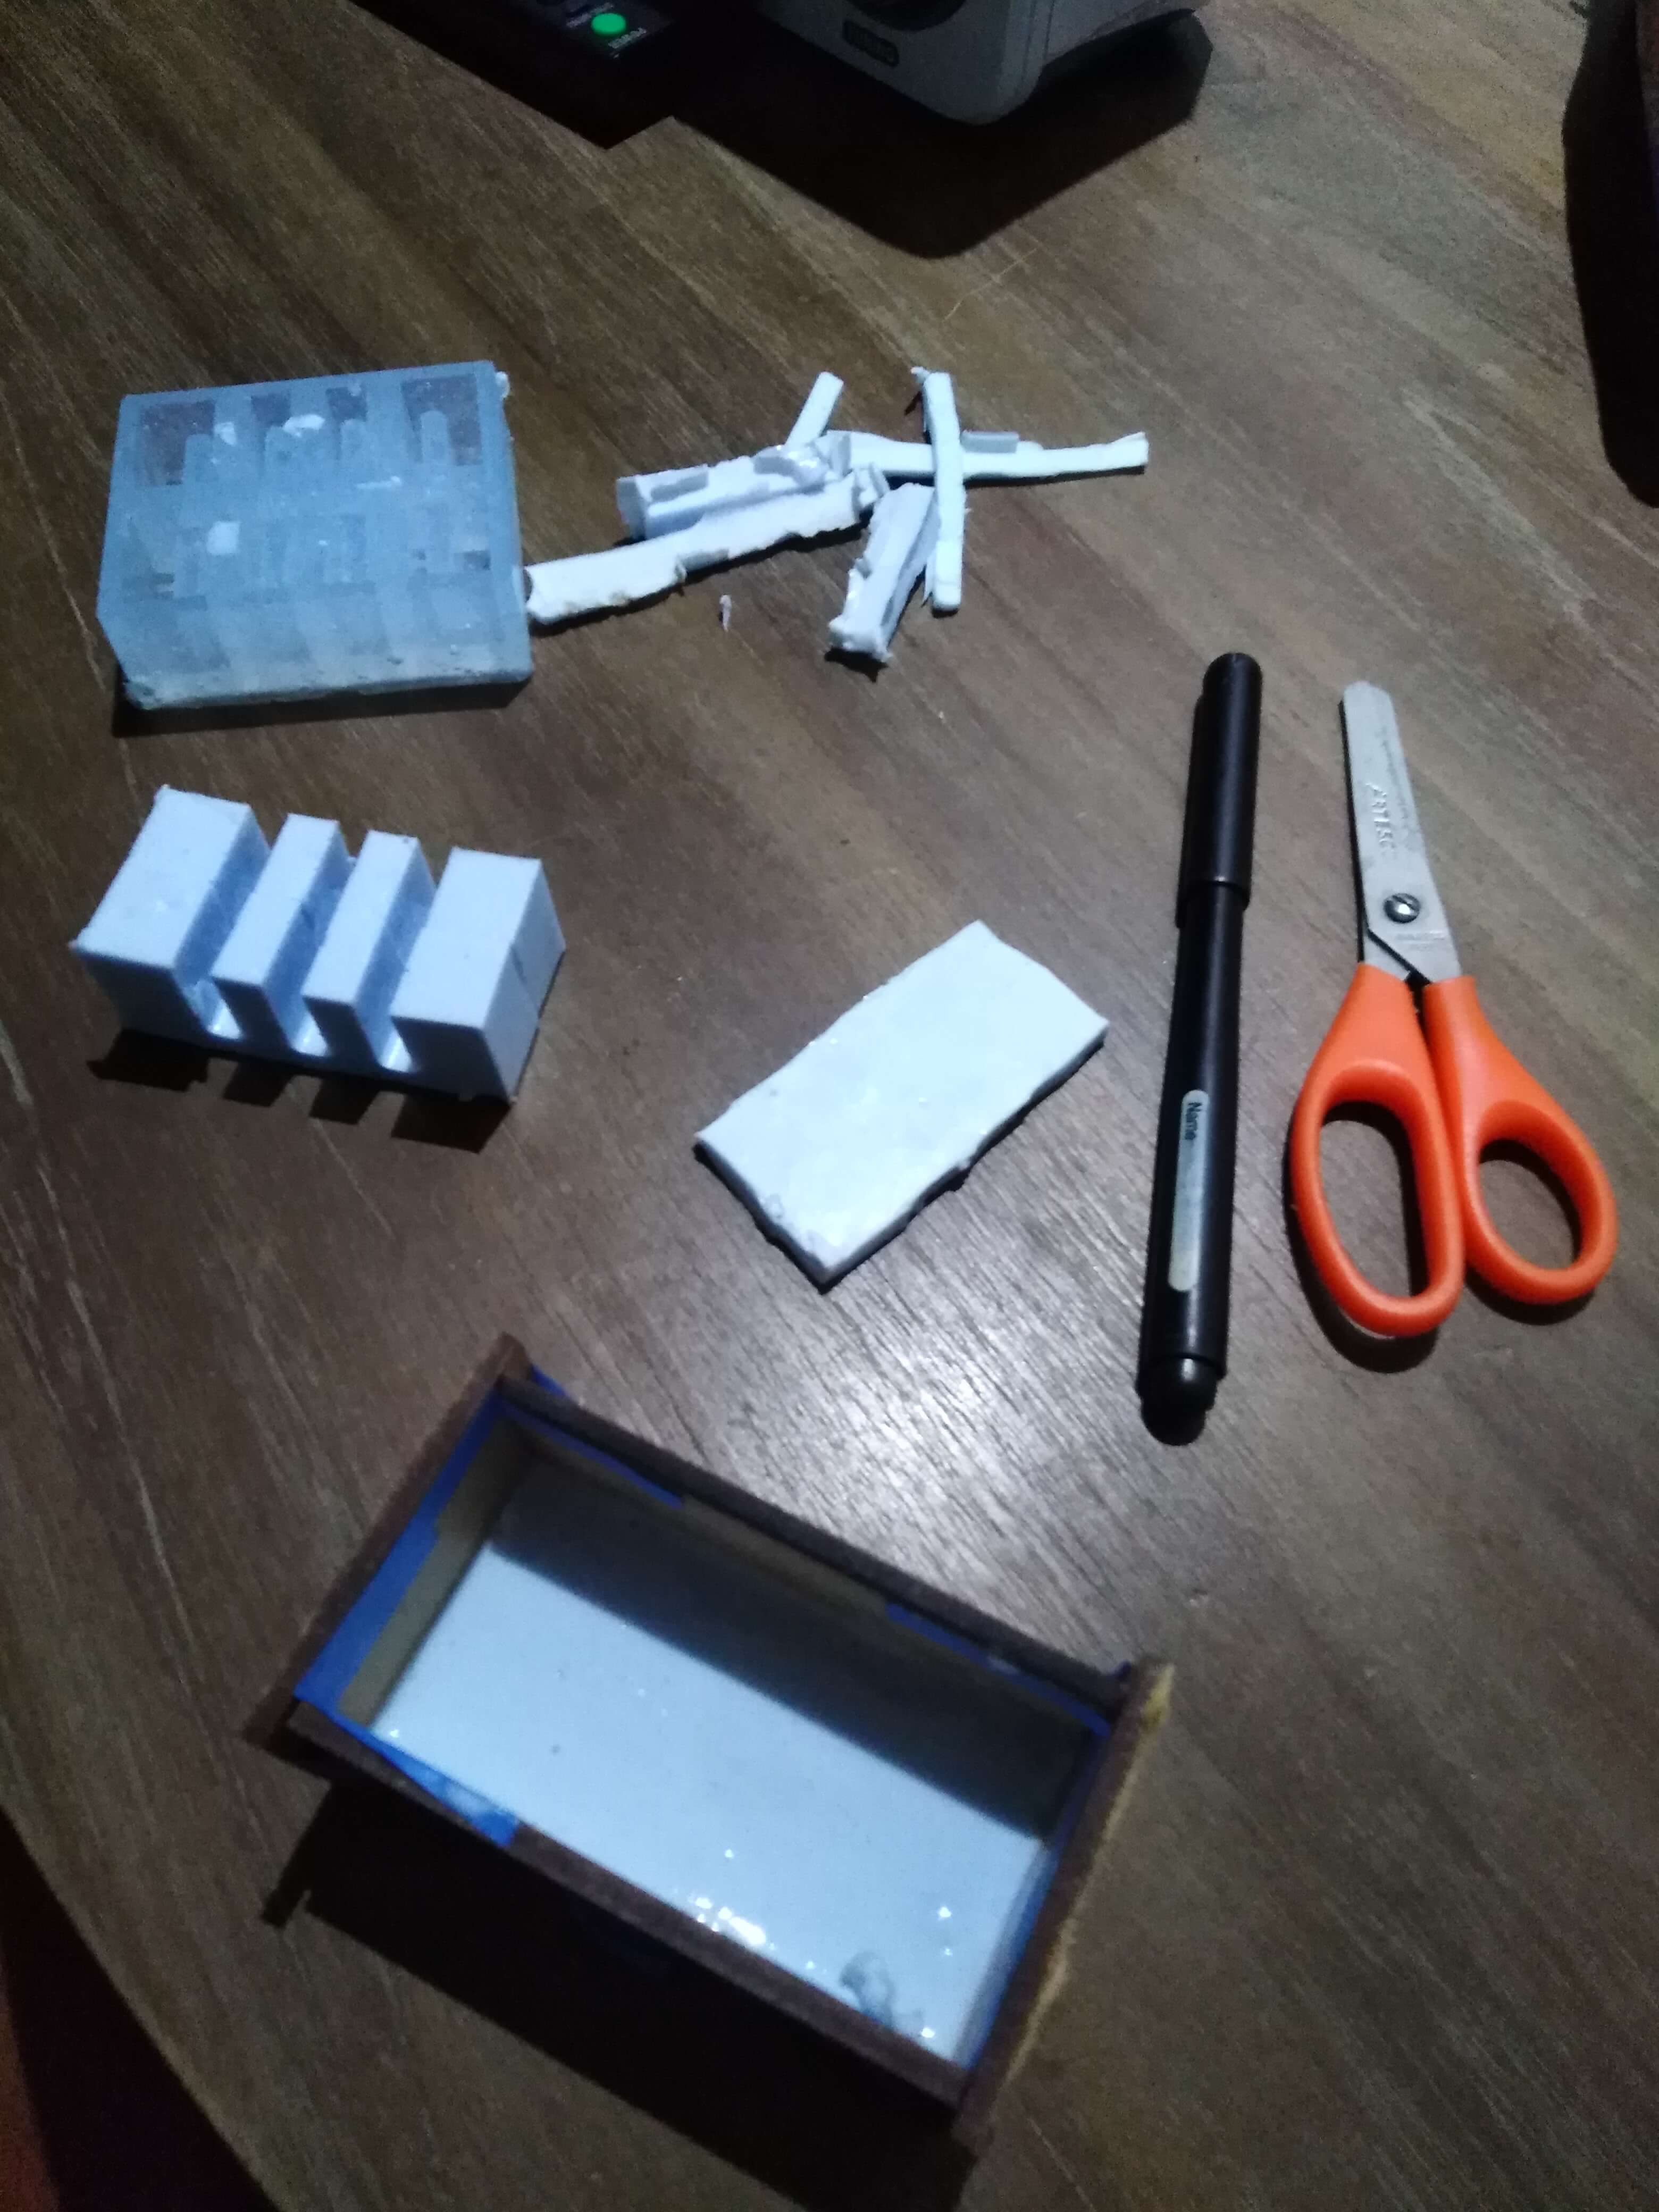
In this rather failed attempt to make a pneumatic actuator, it is observed that some bubbles remained on the outside of the object. Maybe to remove the bubbles I should have made the mold vibrate a little when placing the liquid silicone.
On the other hand, with respect to the pneumatic actuator, to correctly glue the two pieces I should have used the same silicone with which the pieces were made, instead I used a commercial glue. I learned about that data after publishing the assigment

Asignment goals
- Review the safety data sheets for each of your molding and casting materials (group assignment).
- Make and compare test casts with each of them (group assignment).
- Design a 3D mould around the stock and tooling that you'll be using, mill it (rough cut + (at least) three-axis finish cut), and use it to cast parts.
Downloads:
STL 3D Model
Learning outcomes
- Design appropriate objects within the limitations of 3 axis machining.
- Demonstrate workflows used in mould design, construction and casting.
Have you?
- Explained how you designed your 3D mould and created your rough and finish toolpaths for machining.
- Shown how you made your mould and cast the parts.
- Described problems and how you fixed them.
- Included your design files and ‘hero shot’ photos of the mould and the final object.
- Reviewed the safety data sheets for each of your molding and casting materials, then made and compared test casts with each of them.