Weekly Task
Group assignment:
compare as many tool options as possible
Individual assignment:
write an application that interfaces with an input &/or output device that you made
For Interface and Application Programming week, I used MIT app inventor to create an application which can communicate with Bluetooth HC-05.So,I did Control servo motor via Bluetooth
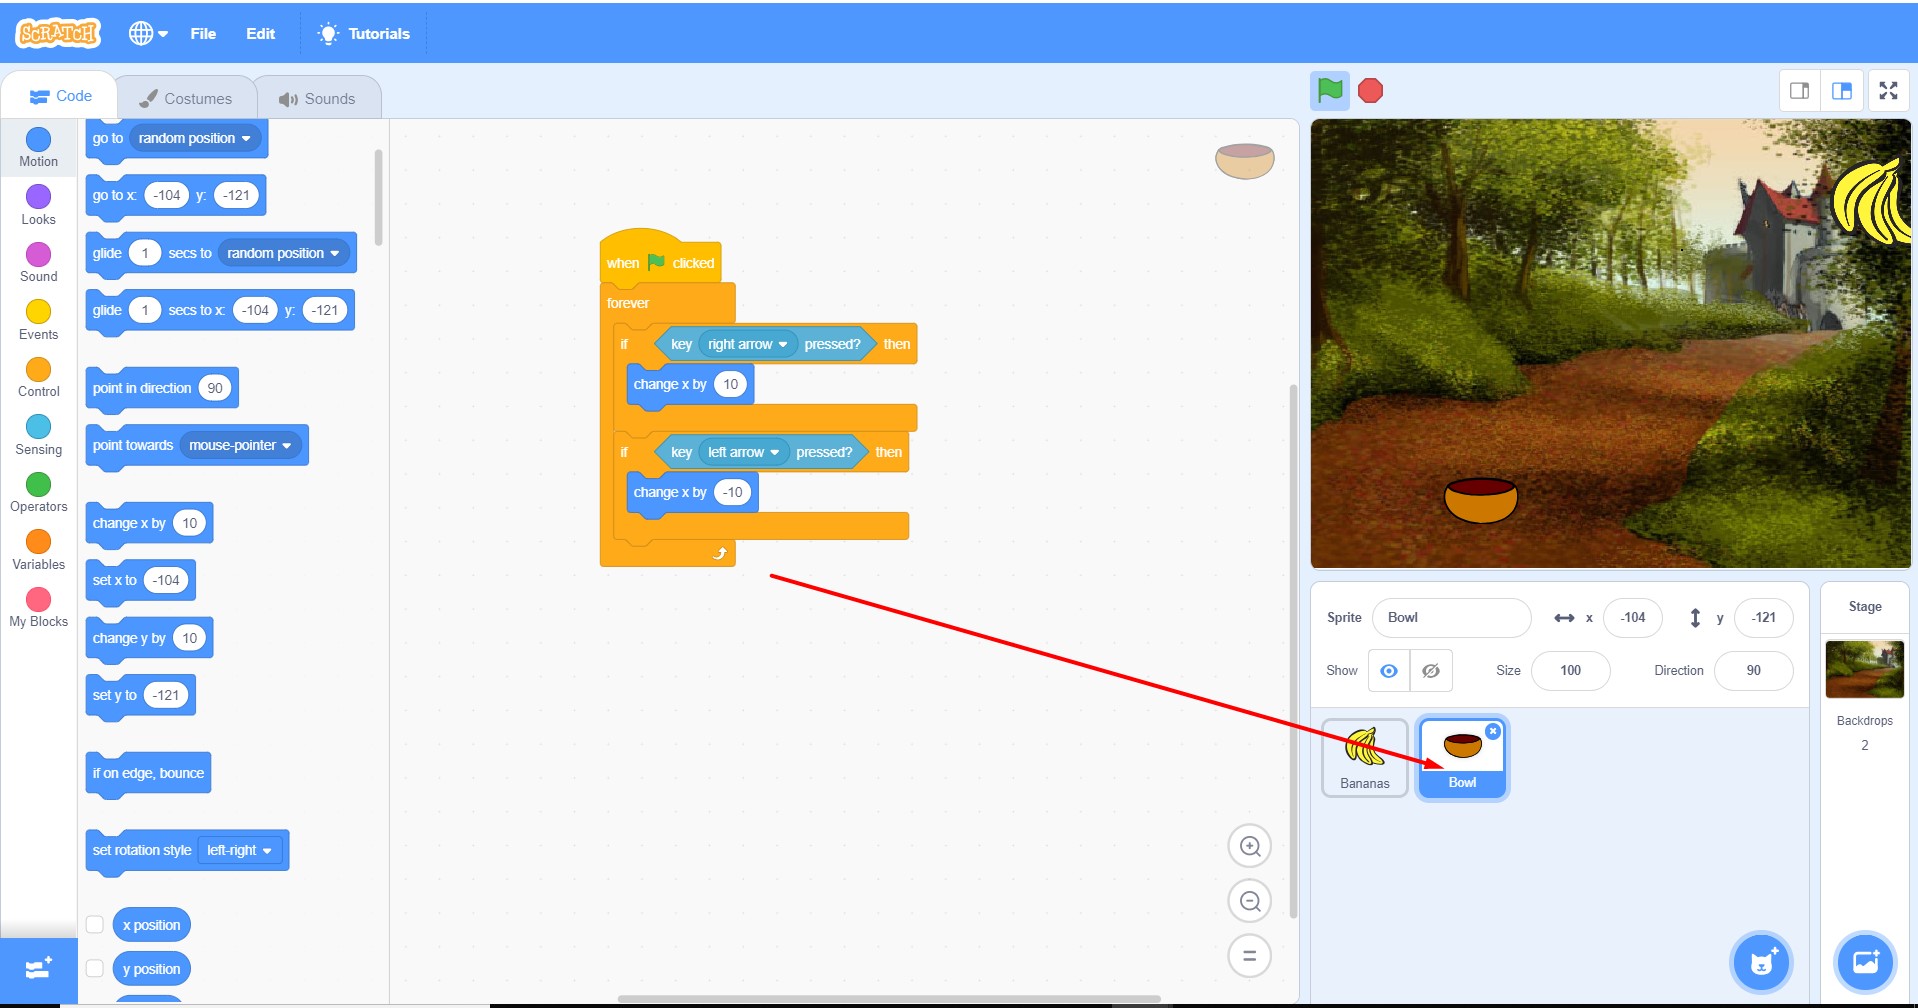
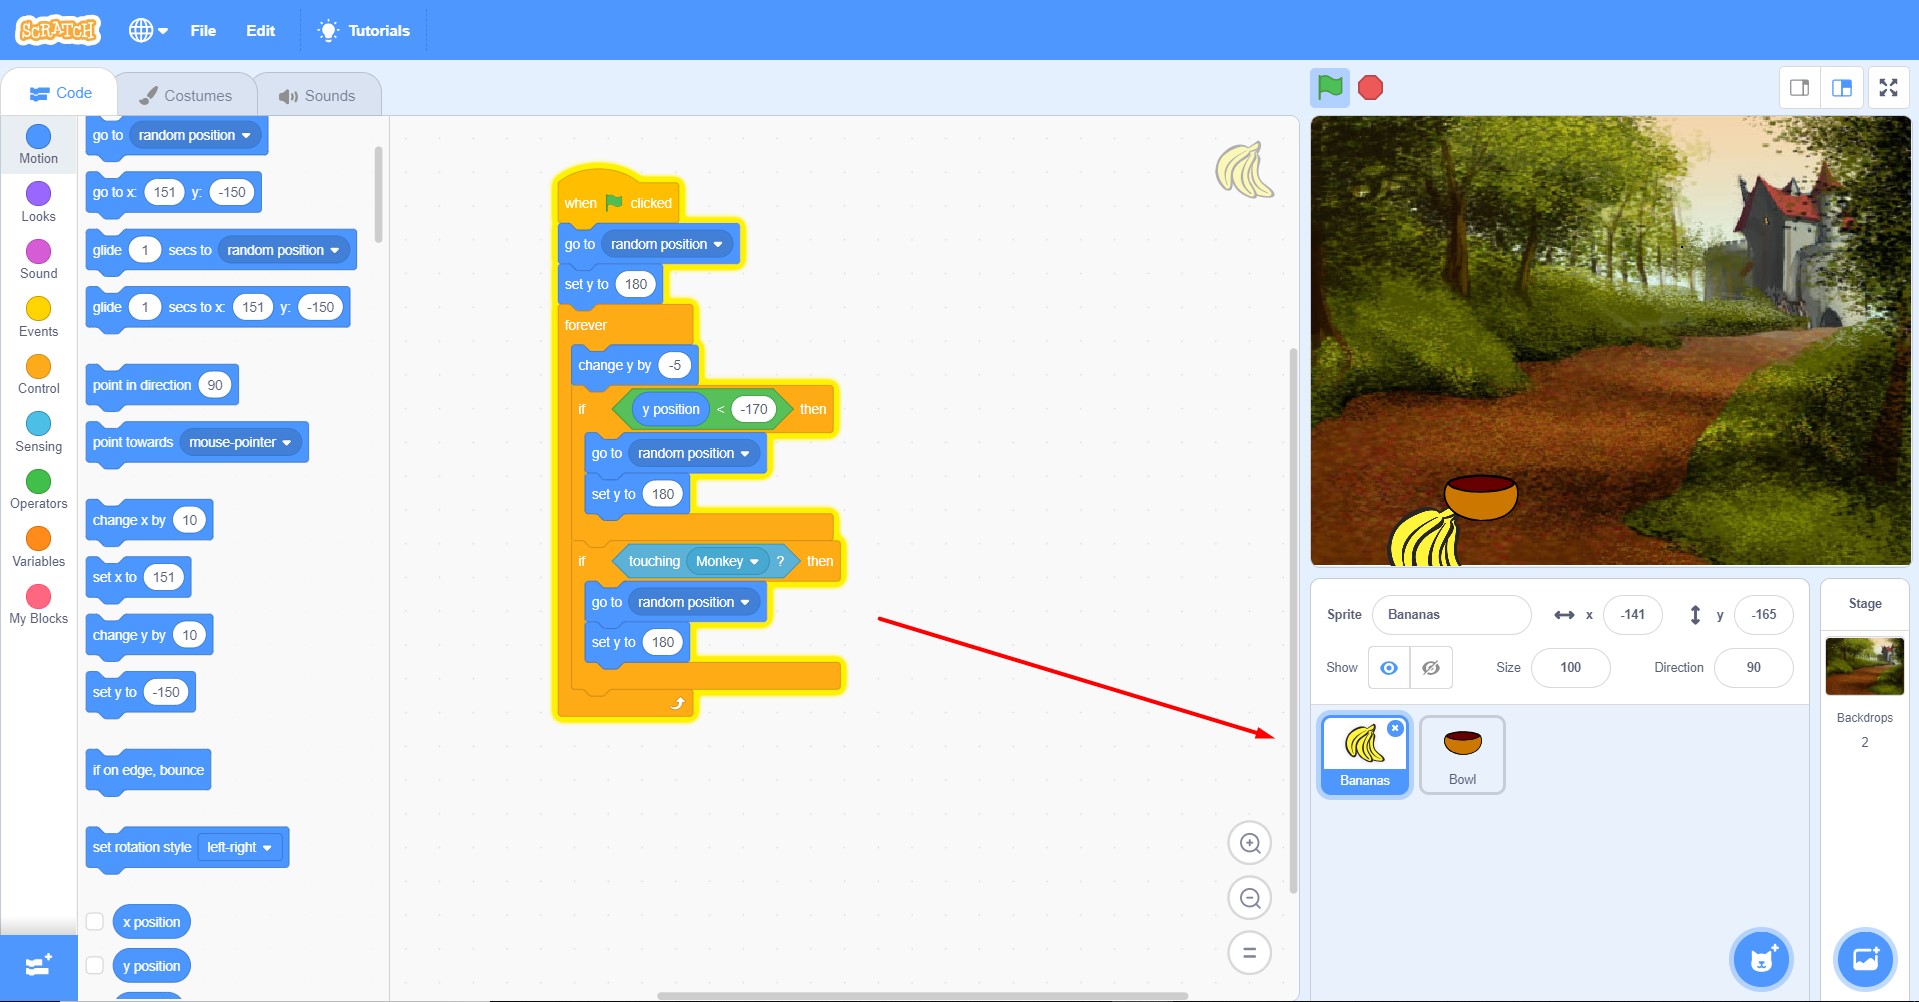
Before starting Learning Of MIT App Inventor,I worked on Scratch.beacause Scratch is a block-based visual programming language and online community targeted primarily at children. Users of the site can create online projects using a block-like interface.
So,Firstly I started from basic concept. I used scratch and making simple game and program it using block
I tried to doing hold the Bananas in Bowl.I wrote code for bowl.
MIT App Inventor
From Youtube Video I started learning MIT App Inventor and designed a Application to control Servo Motor. Its simple to make Apllication in MIT app Inventor.
I searched MIT App Inventor on google and Sign in using my google Account.we can make an app in more screen. for this there is option like add screen.
Then I go to Project --> start new Project.
reasons why we need application interfaces are seen here:-
I decided to control servo motor using Bluetooth.I am using bluetooth client because my app will use the blue connection to talk to my board. Thus I pick bluetooth client from the component section and also clock to give me the show me connection in real time.
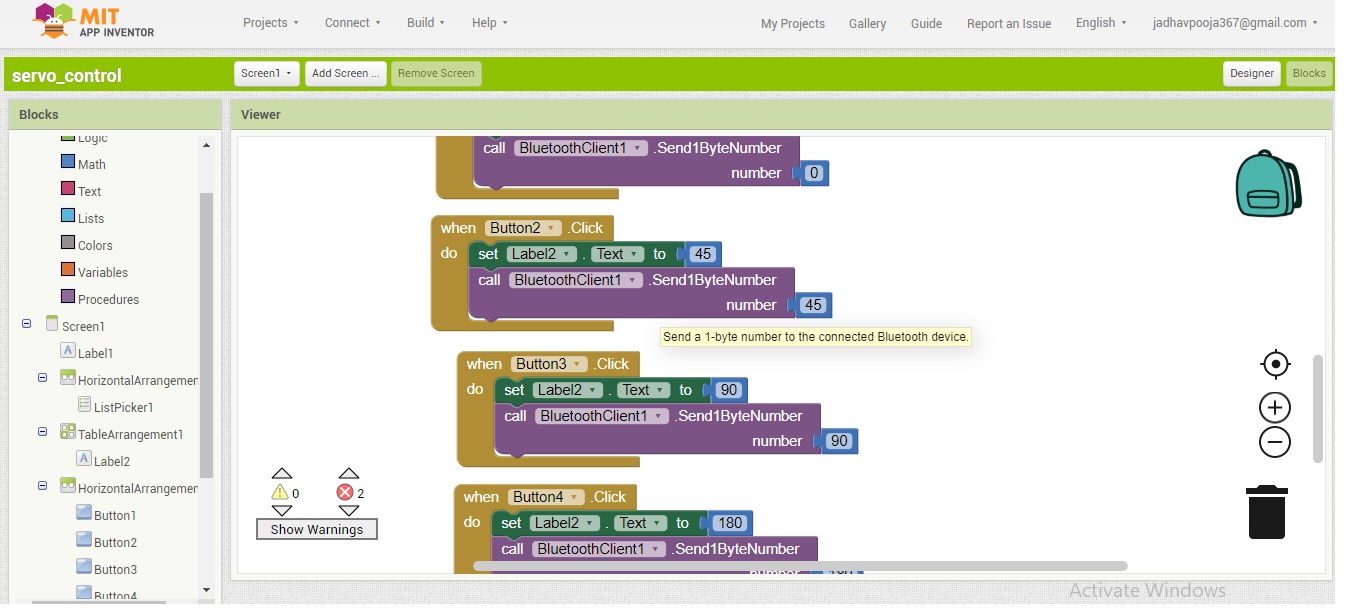
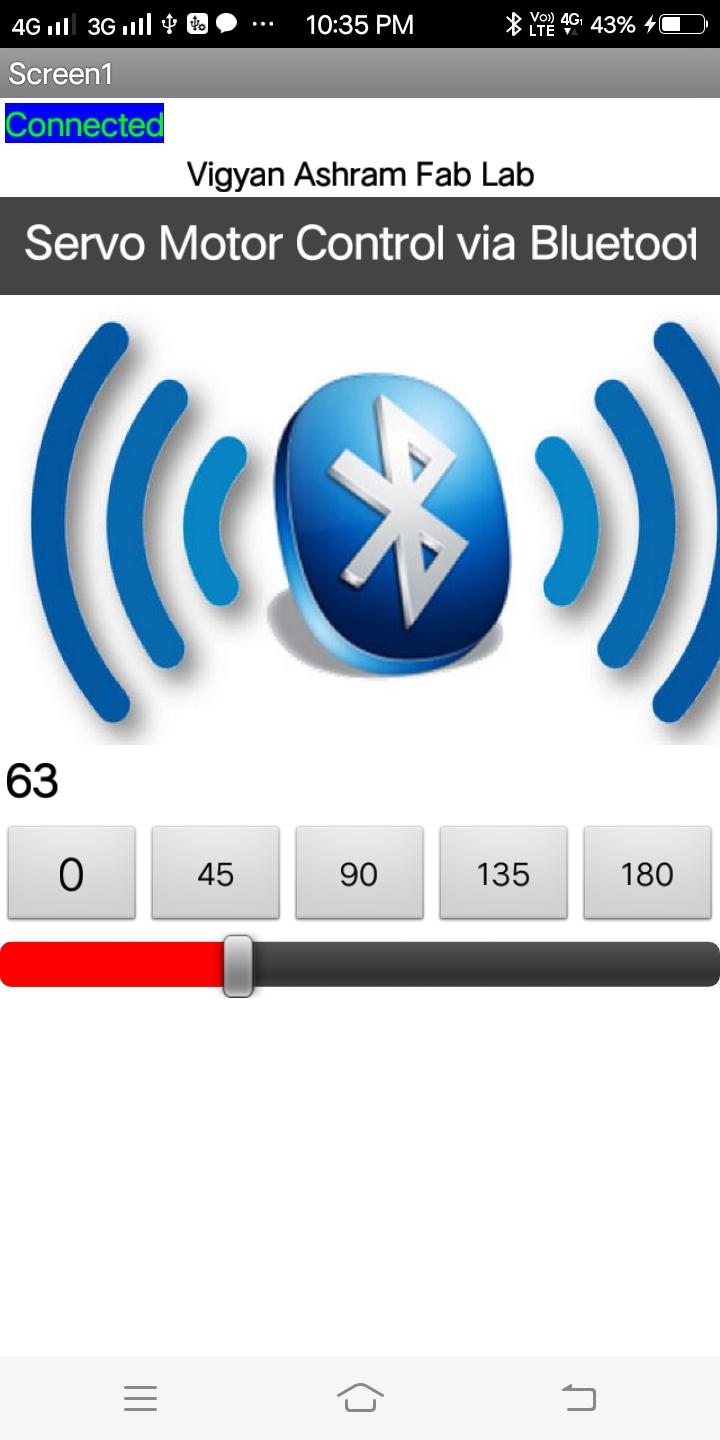
Which includes five buttons, for moving servo in degree .
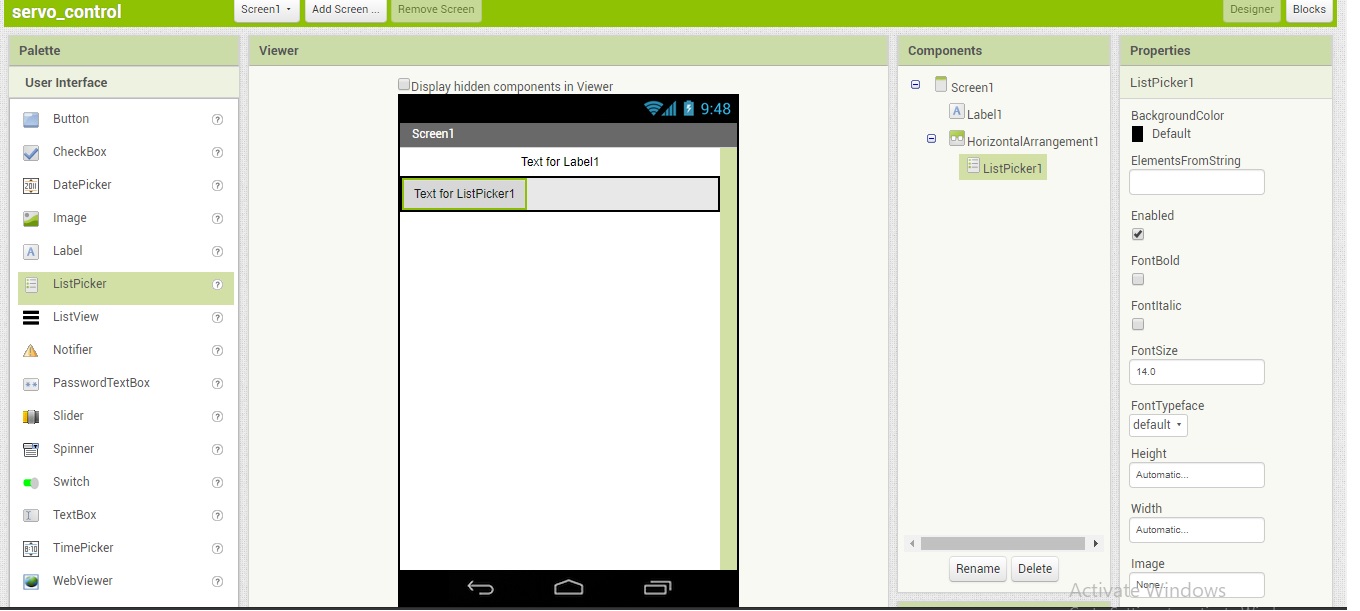
I included a List picker which is used to select which bluetooth device we are going to communicate with.
App inventors bluetooth client block module provides functionalities to communicate and transfer data with-to bluetooth device.
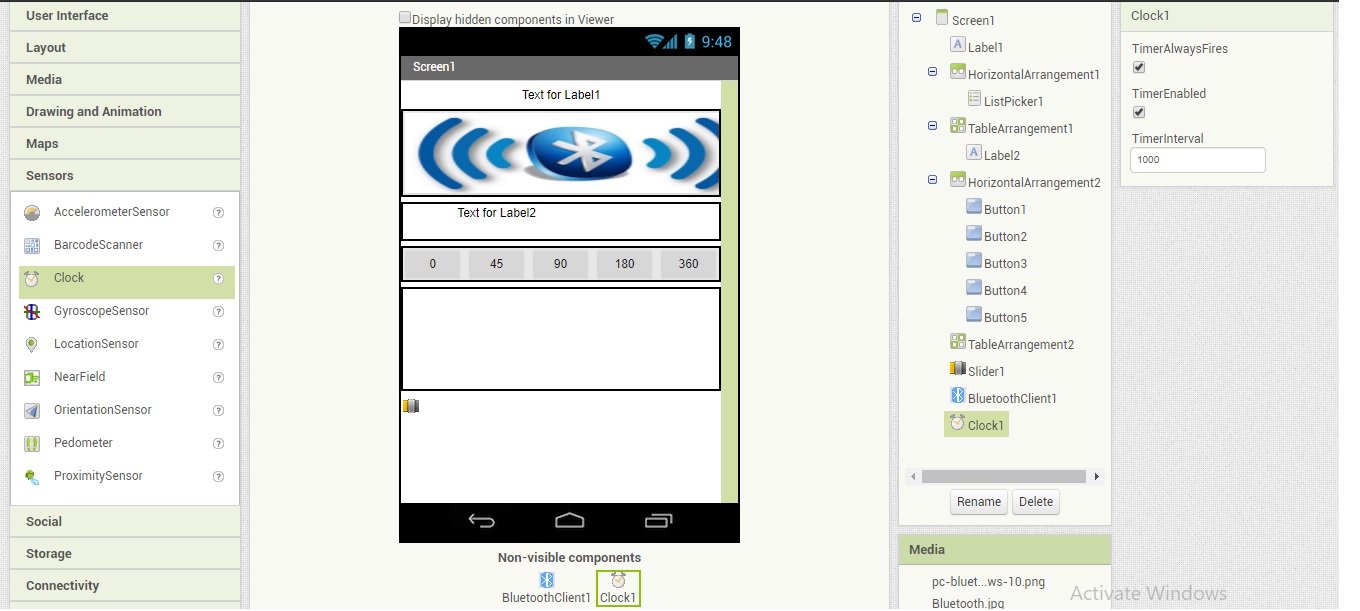
Now I select label, this will tell me the status of my device whether it is connected or not connected to the selected bluetooth device.
Here the designer portion was completed.

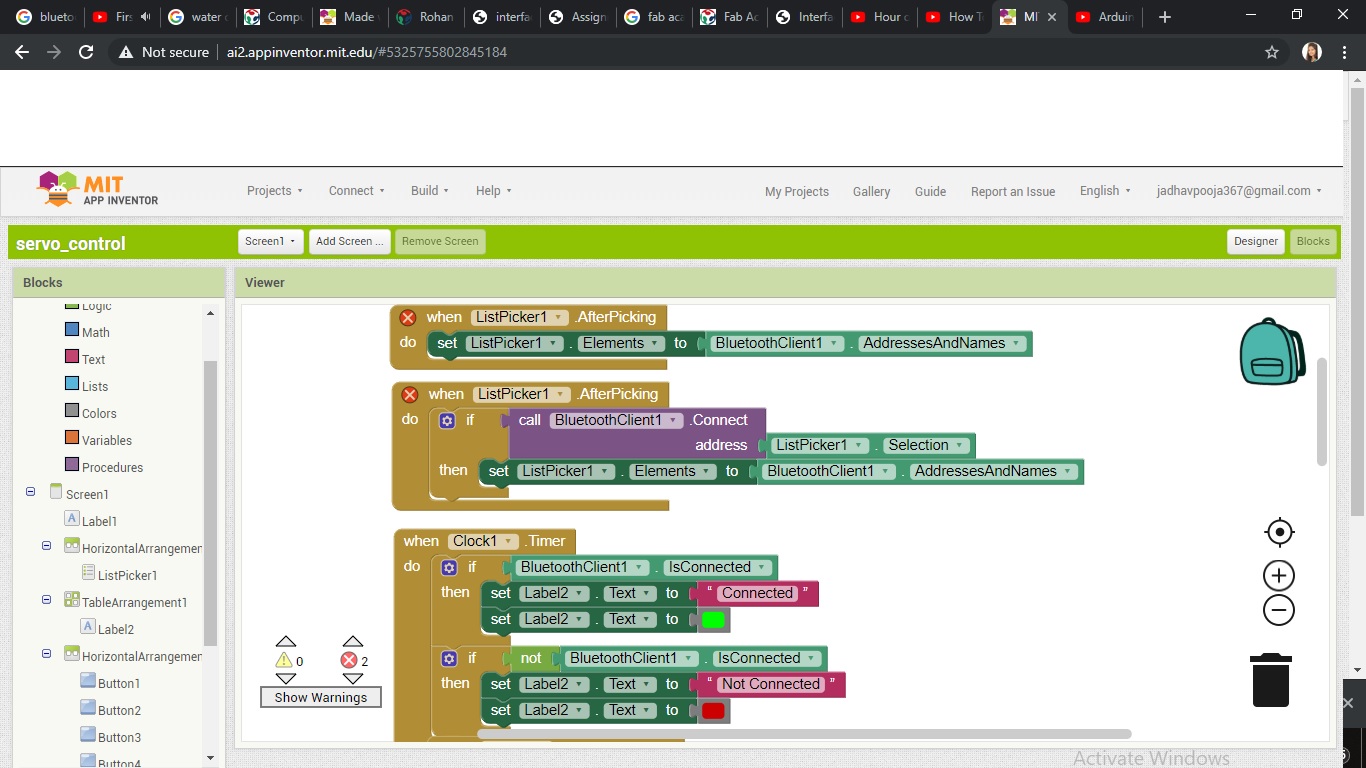
Then I moved towards blocks editor.
The Blocks Editor is where you program the behavior of your app. There are Built-in blocks that handle things like math, logic, and text. Below that are the blocks that go with each of the components in your app.
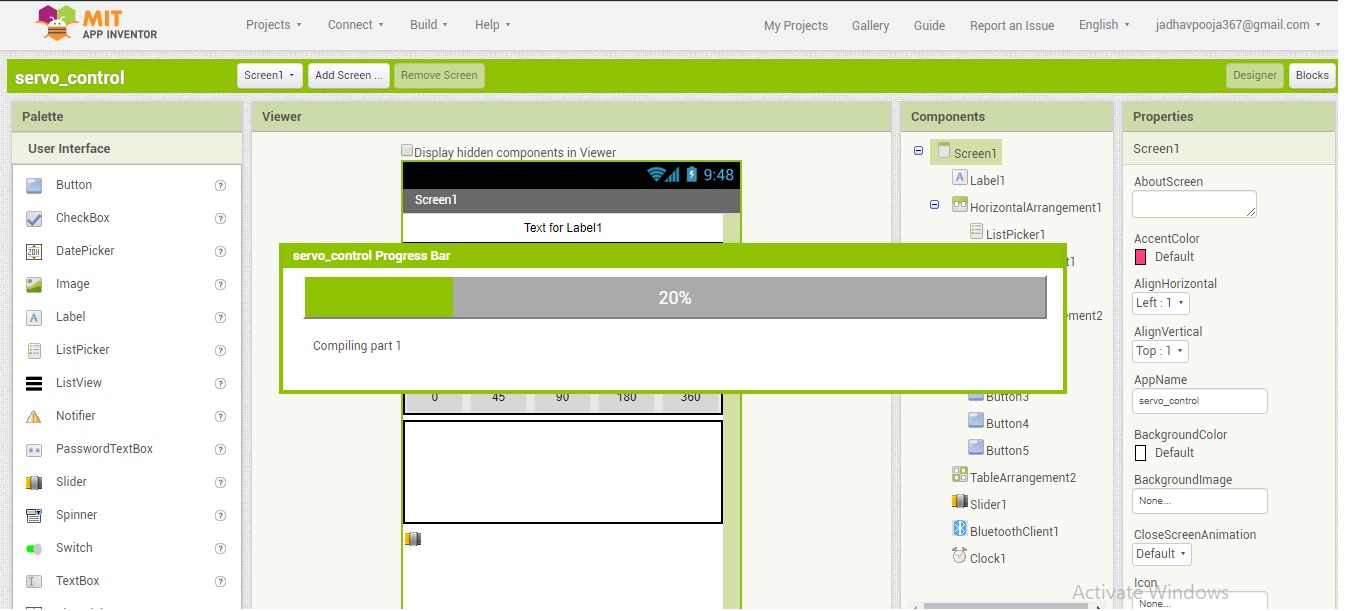
After completing the Program in MIT app inventor, go to Build and select App( save .apk to my computer).
Then I Transfered the file to your android mobile phone.
I Go to setting in your android mobile,select security and device administration and give access to allow install application from unknown sources.
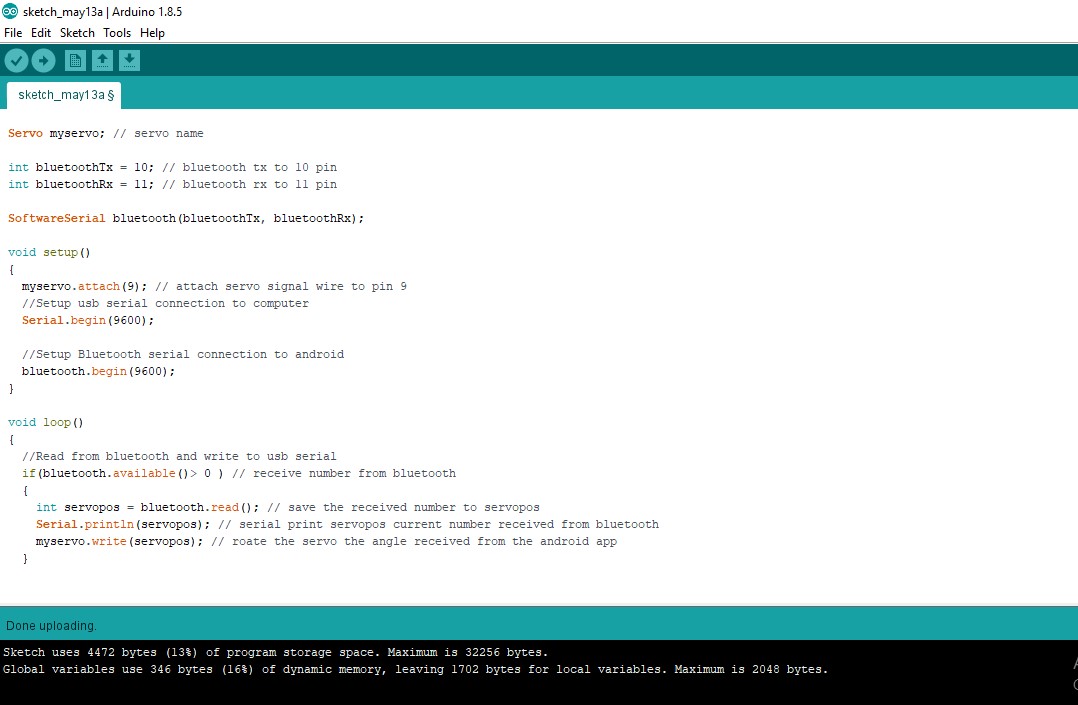
Here the code
About code - Digital pins 10 and 11 on your Arduino or Genuino boards are used as virtual RX and TX serial lines. The virtual RX pin is set up to listen for anything coming in on via the main serial line, and to then echo that data out the virtual TX line. Conversely, anything received on the virtual RX is sent out over the hardware TX.
#include  // TX RX software library for bluetooth

#include  // servo library
Servo myservo; // servo name

int bluetoothTx = 10; // bluetooth tx to 10 pin
int bluetoothRx = 11; // bluetooth rx to 11 pin

SoftwareSerial bluetooth(bluetoothTx, bluetoothRx);

void setup()
{
  myservo.attach(9); // attach servo signal wire to pin 9
  //Setup usb serial connection to computer
  Serial.begin(9600);

  //Setup Bluetooth serial connection to android
  bluetooth.begin(9600);
}

void loop()
{
  //Read from bluetooth and write to usb serial
  if(bluetooth.available()> 0 ) // receive number from bluetooth
  {
    int servopos = bluetooth.read(); // save the received number to servopos
    Serial.println(servopos); // serial print servopos current number received from bluetooth
    myservo.write(servopos); // roate the servo the angle received from the android app
  }


}
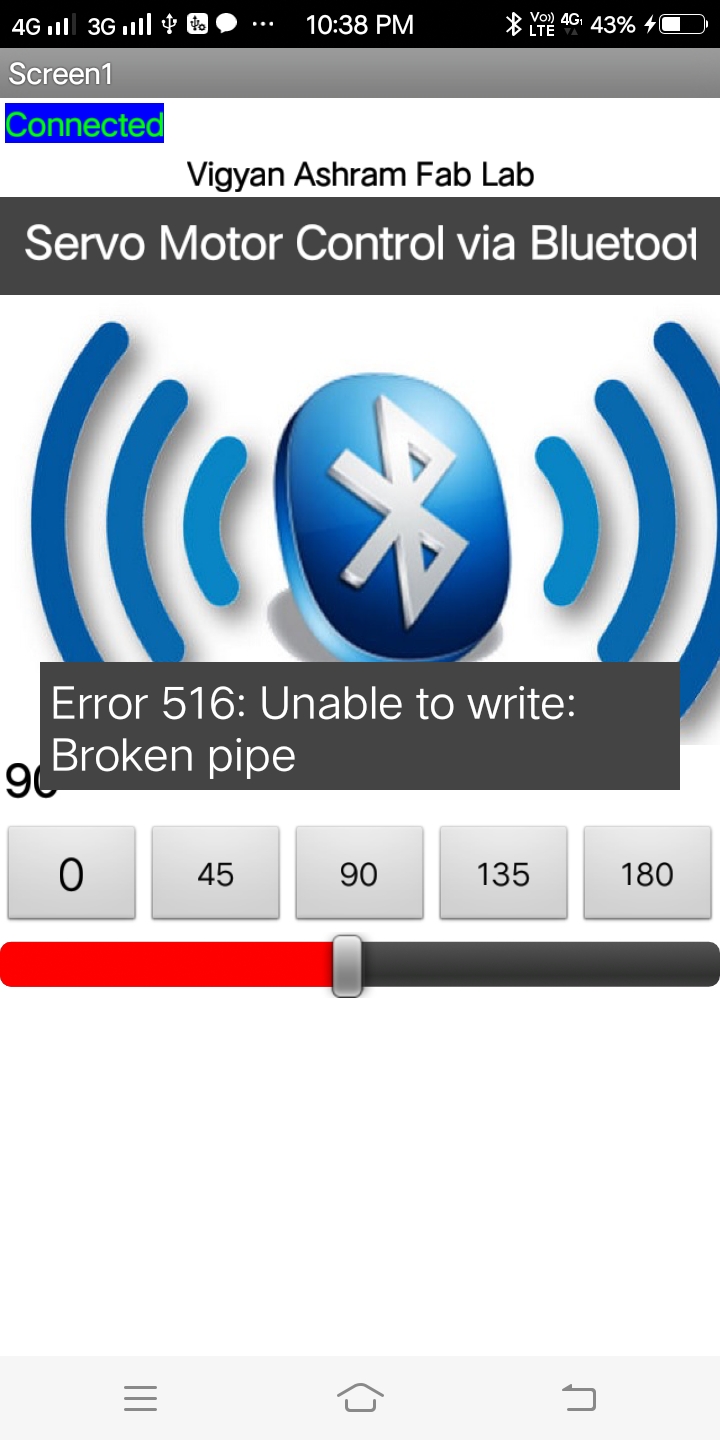
When I uploaded program I got error and even my bluetooth was not working.
Before uploading the code, remove the VCC cable from bluetooth module. then I also got an error similar to (ERROR 507 or 516 broken pipe) please try to connect a few times. Sometimes connection will be broken.
Finally its working
For the trobleshooting problem of my Input- controller board.I tested it on Arduino Board.
here is the setup of Arduino.with app.
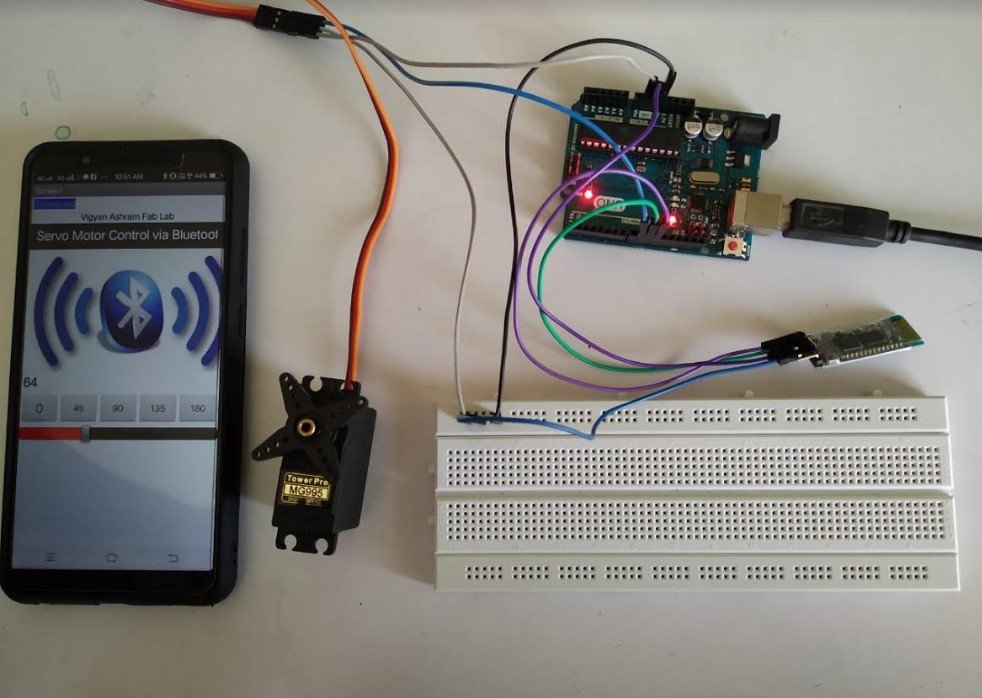
Then I connect the boards and run the program..
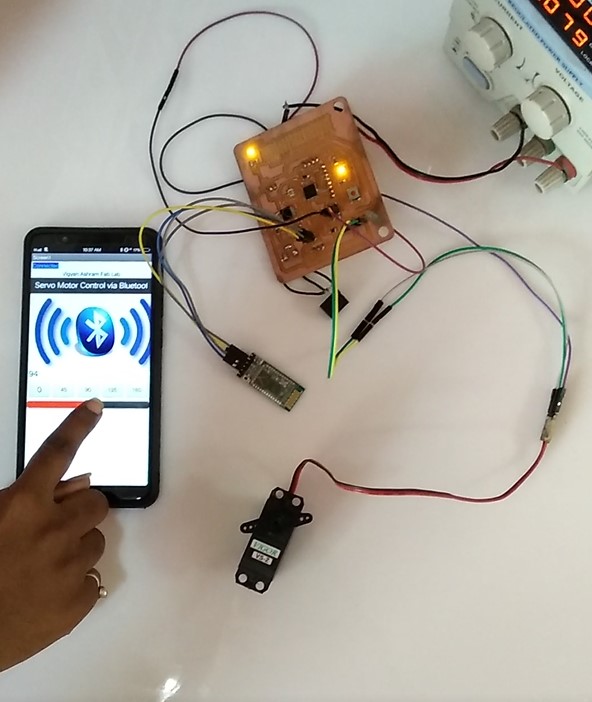
After Arduino testing I done on my atmega328board
Group assignment
For this week’s group project, we decided to divide up the different tools between the four of us.
MIT App Inventor
App Inventor for Android is an open-source web application originally provided by Google, and now maintained by the Massachusetts Institute of Technology (MIT), which allows newcomers to computer programming to create software applications for the Android operating system (OS).
Scratch
but for apps You can test your apps on Android devicesScratch is a real programming language. Scratch isn't just a good introduction to programming; it is a real programming language in its own right. ... Some people worry that because you snap together blocks in Scratch rather than typing text, it isn't a real programming language.Dec 5, 2016
Processing
Processing is a visual, user friendly interface tool. Arduino IDE is built on Processing. It works with Java or Python; there are additional adaptations of the architecture linked below.
Different Adaptations of the Program: - Processing Javascript - Processing Python - Processing Android - Processing Pi
Hit play to run the code, visually similar to serial monitor to python Might not have visuals - screen running indicates that program is running Define window size (in pixel size) - use variables to make program parametric
You can Download Apk.file
You can Download Original code
Learning Outcomes
In this week I made app using MIT App Inventor.I learned all this things. and interfacing this to arduino.