Sixteenth assignment
08 May 2019
Week's assignment
This weeks individual assignment was to write an application that interfaces a user with an input &/or output device that you made.
GUI programming
programming Language
I had to choose the language I was going to be using first I checked some of it but what actually decided after finding a web page Open Processing. As a designer I couldn't avoid falling in love with all the graphic examples I found there. The Processing language and IDE were the precursor to numerous other projects, notably Arduino, Wiring and p5.js and off course a language similar to arduino which I have already used a lot seemed appealing to me.
I also tried with glade, but I failed completely. Installing everything that I needed was extremely difficult for me. And when I finally got to use the application program, well, let's just say it is not friendly at all.
Working with processing
Processing
Processing is an open-source graphical library and integrated development environment (IDE) based in Java, built for electronic, media art and visual design projects. Serving as a tool for artists, designers and other community outside programming.
You can download Processing from here.

Communicating Arduino and Processing
I am going to be using my board from week 7, and I will use the serial port communication to send information between my board and the computer.
This serial port uses pin0(RX) and pin1(TX) which, in my board, I have attached to the FTDI header via the Universal Serial Bus (USB)
In this case I will be sending data from my board to Processing, and for this I need to program my microcontroller first. I will be sending data from Arduino to Processing
I will work with the last code I used for the Embedded programming assignment as a base and then add some modifications in order to make the communication, I wanted to try with this code because it will be similar to the one I'm going to be using for my final project.
From attiny44 to processing
Making the code
Programming with Arduino
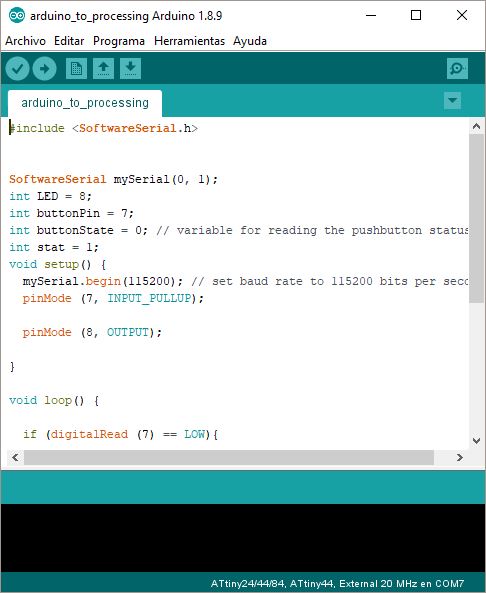
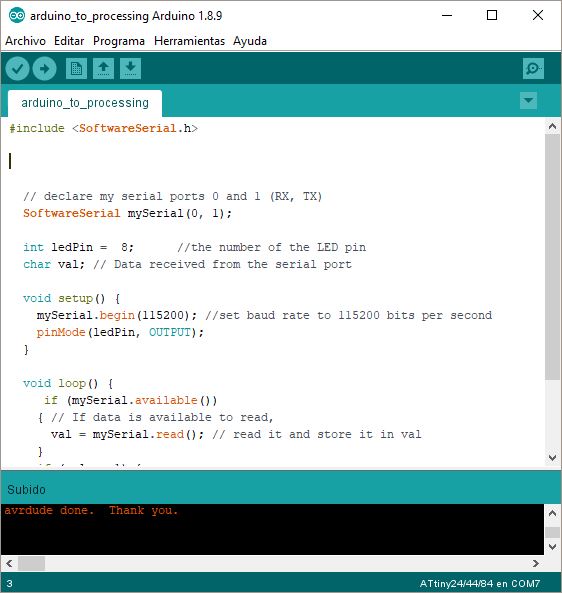
First step is programing our board to send data to Processing. In order for it too work we need to include the SoftwareSerial Library.
#include < SoftwareSerial.h > // Include the SoftwareSerial library to run serial on Attiny44
*If you are copying the code you it sometimes works better erasing it and add the SoftwareSerial library manually. Program>Add Library>SoftwareSerial.
Then we need to declare our serial ports
SoftwareSerial mySerial(0, 1); // declare my serial ports 0 and 1 (RX, TX)We also should declare our button and LED pins
int LED = 8;

			int buttonPin = 7;

			int buttonState = 0; // variable for reading the pushbutton status

			int stat = 1;
For the setup we will set the data rate in bits per second, remember it should be the same in Arduino and in Processing. We will also set the output and input pins.
			void setup() {

			  mySerial.begin(115200); // set baud rate to 115200 bits per second

			  pinMode(buttonPin, INPUT);

			  pinMode(ledPin, OUTPUT);
Now we will determine the actions. If the LED is on (8,HIGH) it will send 1 if our LED is off (8,LOW) it will send a 2. Also we determine that if the switch is off (in this case HIGH) it will send a 2.
void loop() {


			  if (digitalRead (7) == LOW){


			    digitalWrite (8,HIGH);

			    delay(500);

			    mySerial.write(1);

			    digitalWrite (8,LOW);

			    delay(500);

			    mySerial.write(2);

			  }

			  else

			  {

			    digitalWrite (8,LOW);

			    mySerial.write(1);

			   }


			}
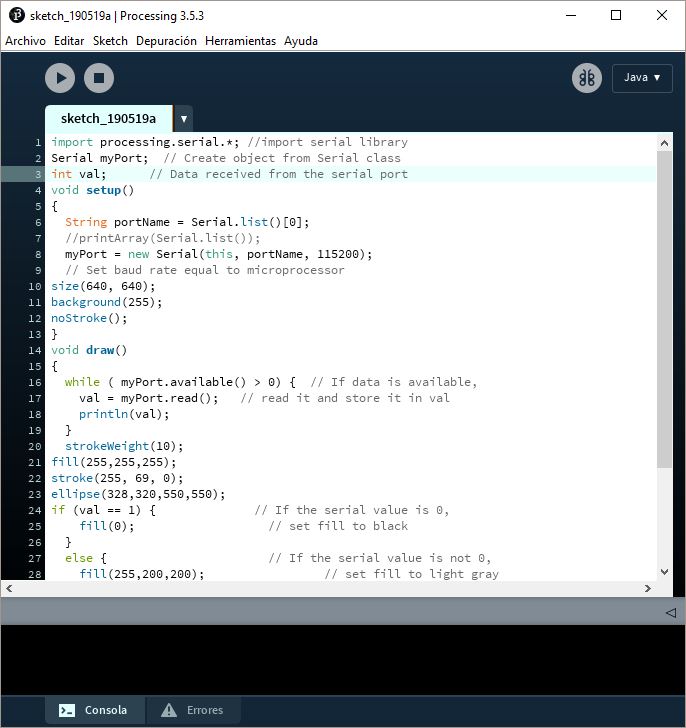
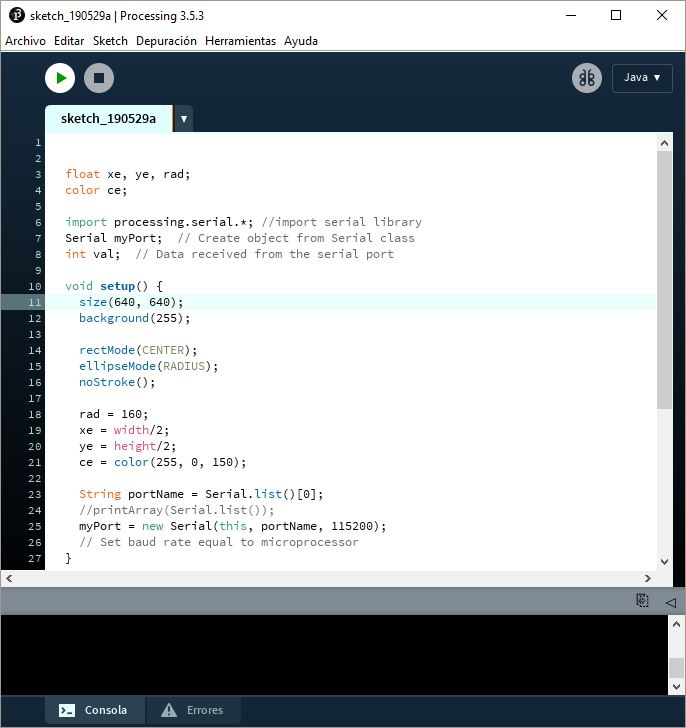
Programming with Processing
In this case processing will be receiving the data, it needs to read it as it is received from the Attiny44.
Here we also need to import the Serial Library
import processing.serial.*; //import serial libraryThe program needs to listen in on a serial port in our computer for any incoming data. We need to declare a Serial Object
Serial myPort; // Create object from Serial classWe also need to declare a variable for that data.
int val; // Data received from the serial portFor the Setup we will declare our port number, the port through which the attiny is sending data
void setup()

				{

				 String portName = Serial.list()[0];
 //printArray(Serial.list());
Set the same baud rate as we did in Arduino.
myPort = new Serial(this,
 portName, 115200);

 				 // Set baud rate equal to microprocessor
Here we also set the size, color, etc of the background of our interface.
size(640, 640);

				background(255);

				noStroke();

				}
For the 'draw' part we can do anything we want. I was trying with ellipses because of my project but I also found some very fun free sketches to play with.
Here you should consider also the actions taken depending on the data received.
void draw()

				{

  				while ( myPort.available() > 0) {  // If data is available,

    			val = myPort.read();   // read it and store it in val

    			println(val);

  				}

  				strokeWeight(10);

				fill(255,255,255);

				stroke(255, 69, 0);

				ellipse(328,320,550,550);

				if (val == 1) {              // If the serial value is 0,

    			fill(0);                   // set fill to black

  				}

  				else {                       // If the serial value is not 0,

    			fill(255,200,200);                 // set fill to light gray

    			noStroke();

				ellipse(320,320,250,250);

  				}

			    }
Here you can see some tests. Off course I had to try different things, and actually it took me a while to pull this through the way I wanted.
And here it is..
Processing to Arduino
Making the code
This time I tried comunitating from processing to my board. You can copy the codes I used, or you can download the files at the end of this page.
programming with arduino
programming with processing
Here you can see how it works.