

Success is a journey, not a destination
Individual Assignment:
- design a 3D mold around the stock and tooling that you'll be using, machine it, and use it to cast parts
Group Assignment:
- review the safety data sheets for each of your molding and casting materials, then make and compare test casts with each of them
Task 01- Making the mold
Molding and Casting is a very new making tool to me, I had no experience with making molds and casting, the mateials used for molding and casting , and the other necessary specifications. But, I do remember that when i was a kid, I had loved the flower made of plaster and I had colored that too. I lost that , but thanks to this Fab Acadmey Course that I once again got the chance to make many interesting and catchy models using different molding and casting matrials. Below is just a simple illustration of how delicate and beautiful things can be made with molding and casting

I decided to make something easy so that I can complete the whole process of molding and casting in the right time. I got some basic idea about molding and casting, different types of molding and the applications of a partiular kind of mold from the lecture Week 10: Molding and Casting.
What actually molding and Casting is?
The term molding refers to the process of making the mold of the desired geometry or shape. Mold is further used to make different materials by casting process.A mold is a hollowed-out block that is filled with a liquid material such as plastic, glass, metal, or ceramic raw material. The liquid hardens or sets inside the mold, adopting its shape. A mold is the counterpart to a cast. There are different methods for molding to name a few: blow, injection, matrix, extrusion, rotational, spin and transfer discussed briefly below:
- Injection Molding
- Blow Molding
- Compression Molding
- Rotational Molding>
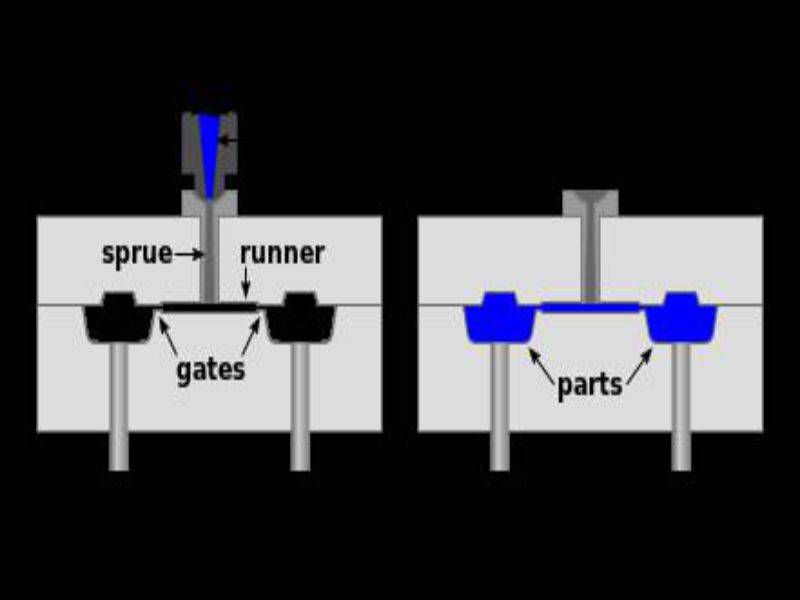
Injection moulding is a manufacturing process for producing parts by injecting molten material into a mold. Injection molding can be performed with a host of materials mainly including metals, (for which the process is called die-casting), glasses, elastomers, confections, and most commonly thermoplastic and thermosetting polymers. Material for the part is fed into a heated barrel, mixed (Using a helical shaped screw), and injected (Forced) into a mould cavity, where it cools and hardens to the configuration of the cavity.
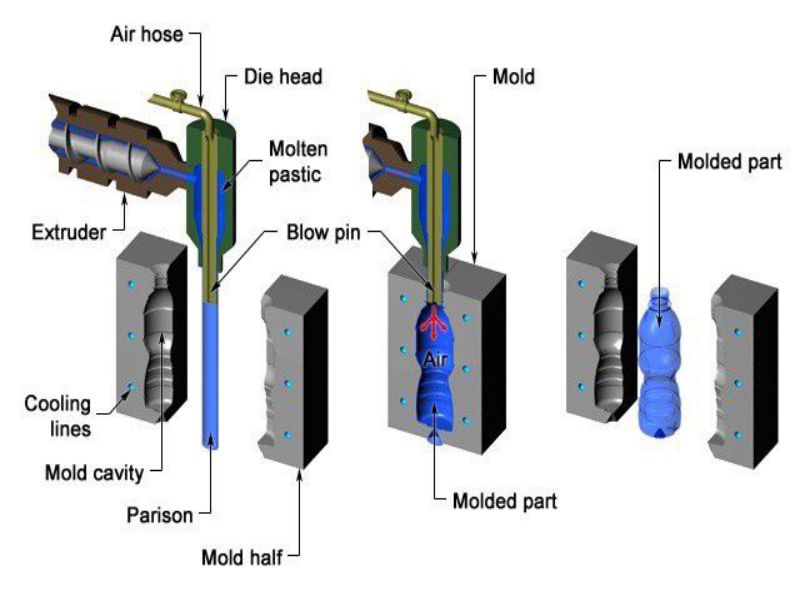
It is a manufacturing process to make hollow plastic parts.Blow molding is used to make pipping and bottles.The process is shown below:
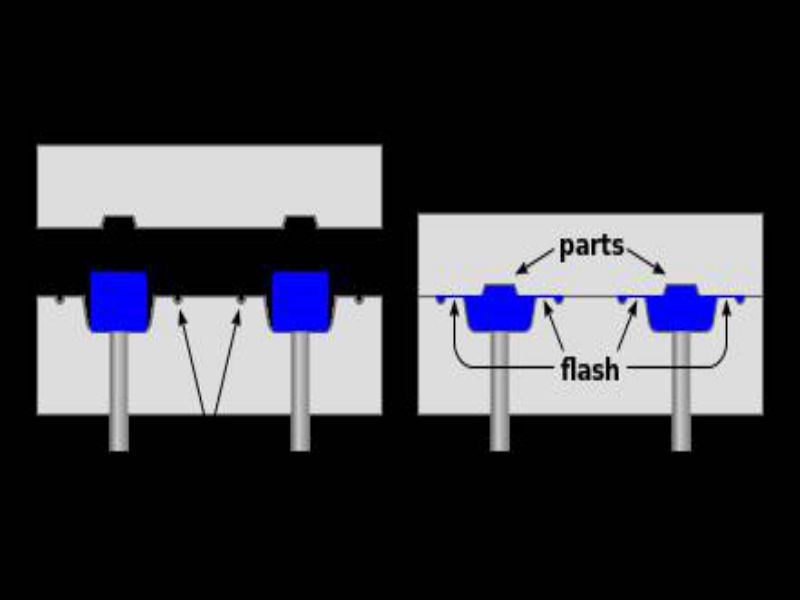
Compression Molding is a method of molding in which the molding material, generally preheated, is first placed in an open, heated mold cavity. The mold is closed with a top force or plug member, pressure is applied to force the material into contact with all mold areas, while heat and pressure are maintained until the molding material has cured. The process employs thermosetting resins in a partially cured stage, either in the form of granules, putty-like masses, or preforms. Compression molding is a high-volume, high-pressure method suitable for molding complex, high-strength fiberglass reinforcements.
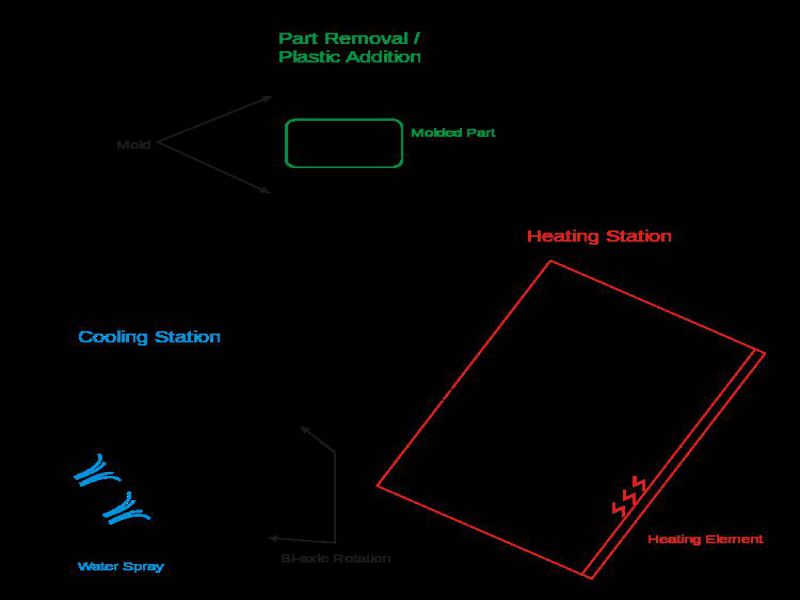
Rotational Molding involves a heated hollow mold which is filled with a charge or shot weight of material. It is then slowly rotated (usually around two perpendicular axes), causing the softened material to disperse and stick to the walls of the mold. In order to maintain even thickness throughout the part, the mold continues to rotate at all times during the heating phase and to avoid sagging or deformation also during the cooling phase.
Making the mold
for making the mold, following necessary steps are followed:
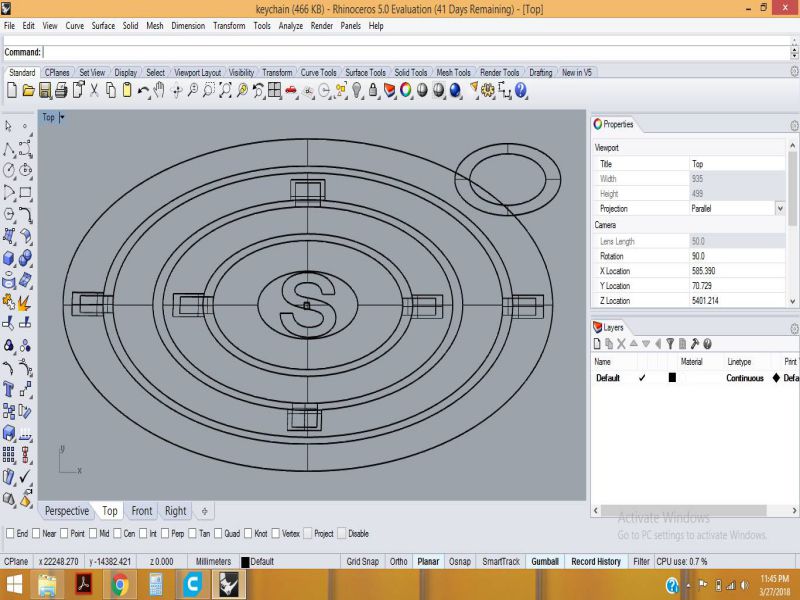
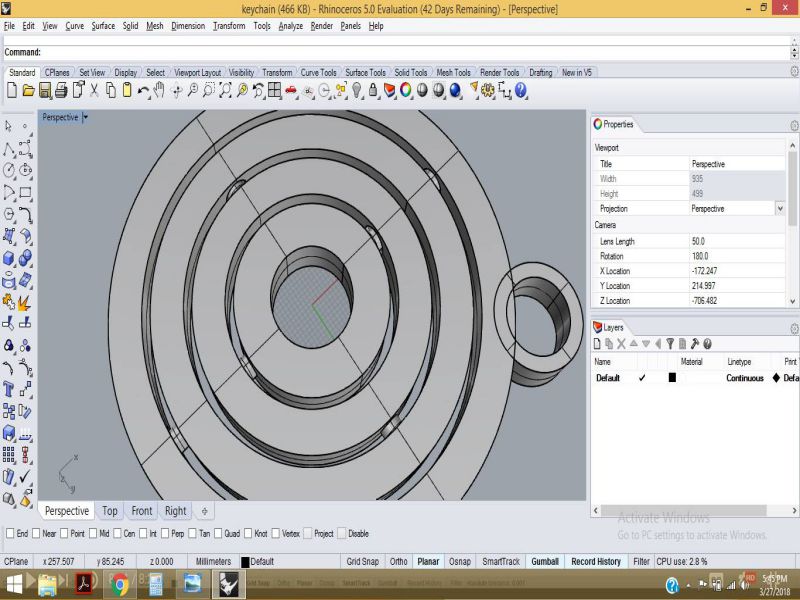
- Making the desired model shape in Rhino software
For this assignment, I decided to make a simple keychain. The steps are given below:
- First of all , I created some spheres with different offset values.
- Then, I made some cylinders , and using mirror command I copied on different angles.
- In the next step, I extruded the spheres
- Finally,I applied boolean operations like addition and difference to get the desired shape
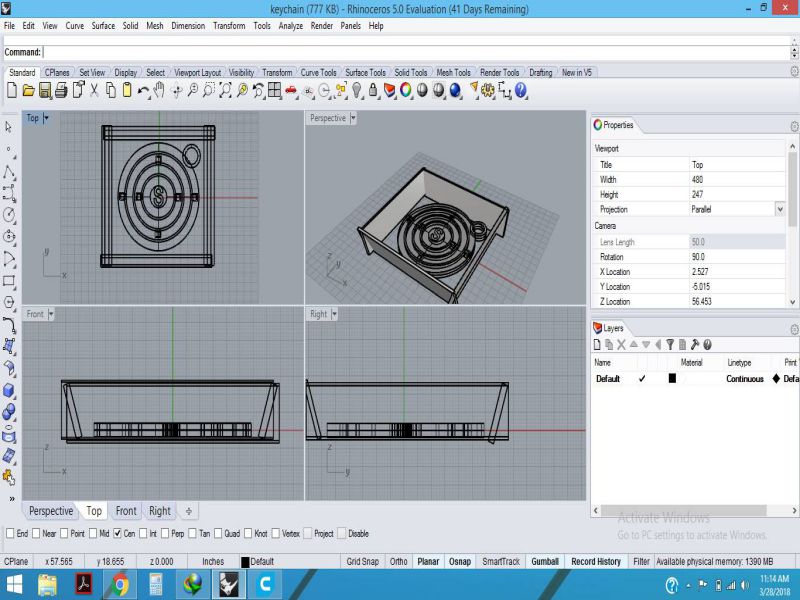
- I also added boundary , so that mold can be further used in casting.
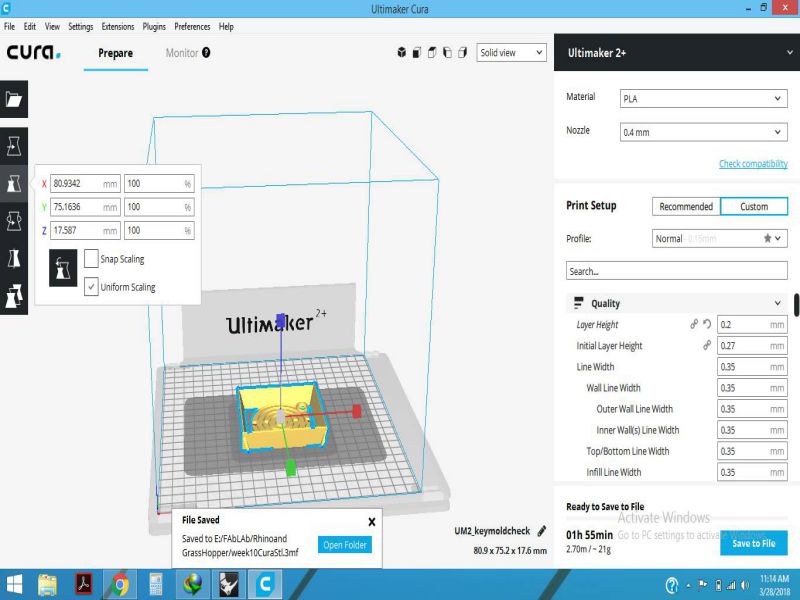
- The file is then exported to stl and opened in Cura to check the dimensions.
- Milling the mold on Machinable Wax
The machinable Wax is used to mill the mold using Rolland SRM-20 machine. Rolland Player 4 has been used to generate the .prn files required for the milling.Follwoing are the steps and video attached for generating the .prn file in Modela player 4 .
- Open the Rolland Player 4 software
- Open the stl file that you have generated
- Select the material as molding wax
- Open the model in the top view
- Set the orientation , origin for the model
- Now, click on New process and select roughing and set the milling size , for roughing as "3mm"
- Set the speed to "26m/s"
- Click on partial and set the boundary lines.
- After checking the preview of milling, it was verified that it has been done properly.
- I followed the same steps for finishing, except setting the tool size to "1mm" and speed to "14m/s" and scan direction to X+y .
All the steps discussed above have been perfomed in the video below :
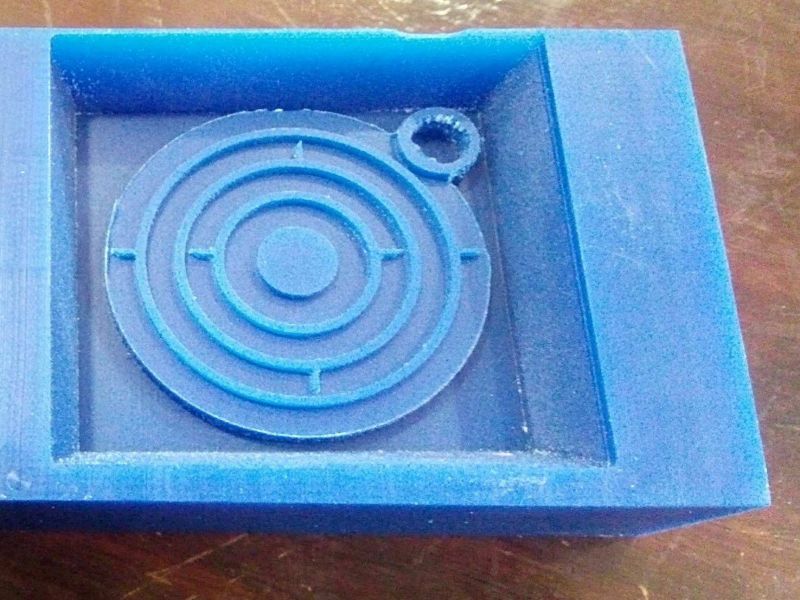
The .prn files were milled using Rolland SRM-20 and Vpanel software. the result after cleaning the machianble wax is shown below. It's quite good in terms of details and depth.
- Making the Silicon Mold
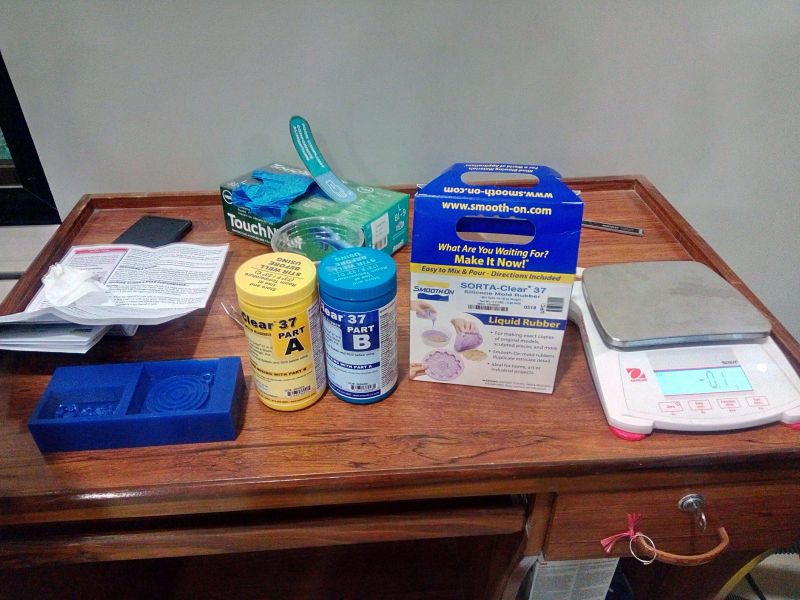
For making the SMOOTH-ON Rubber silicon mold , I studied the datasheet of the mateirals given below:
As per the datasheet, 100% of Part A and 10% of Part B were ued. To know this , we have to check the amount of silicon required to make the mold. It is shown in the following steps:
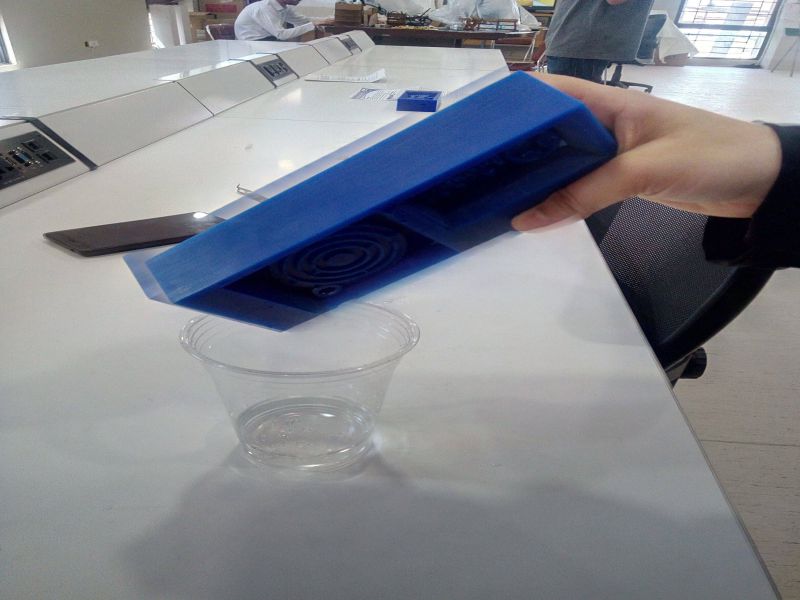
- Pour water in the master mold made on machinable Wax
- Pour the water back in glass
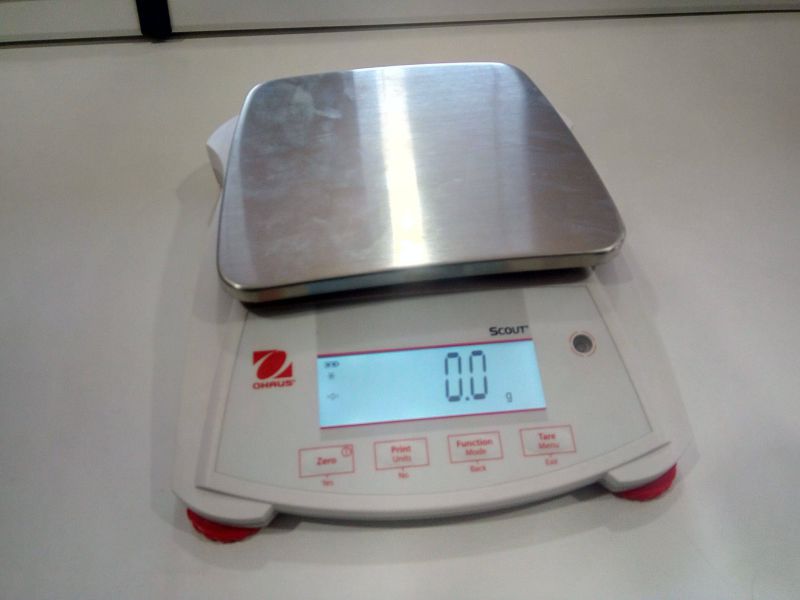
- Set the weight machine to zero
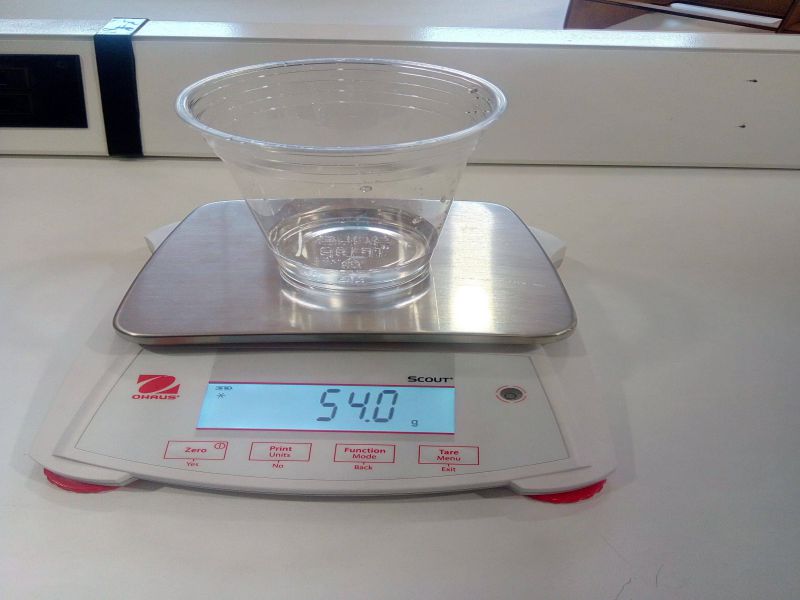
- Put the glass on weight machine and measure the weight
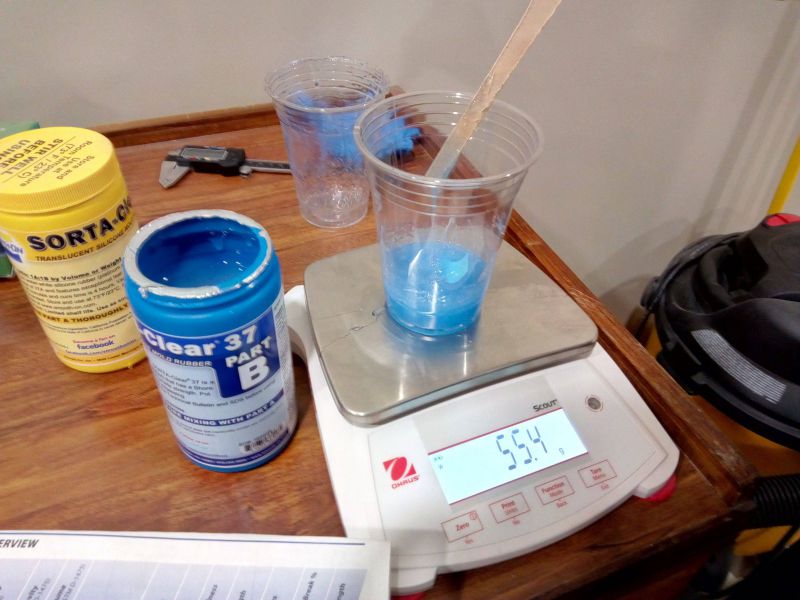
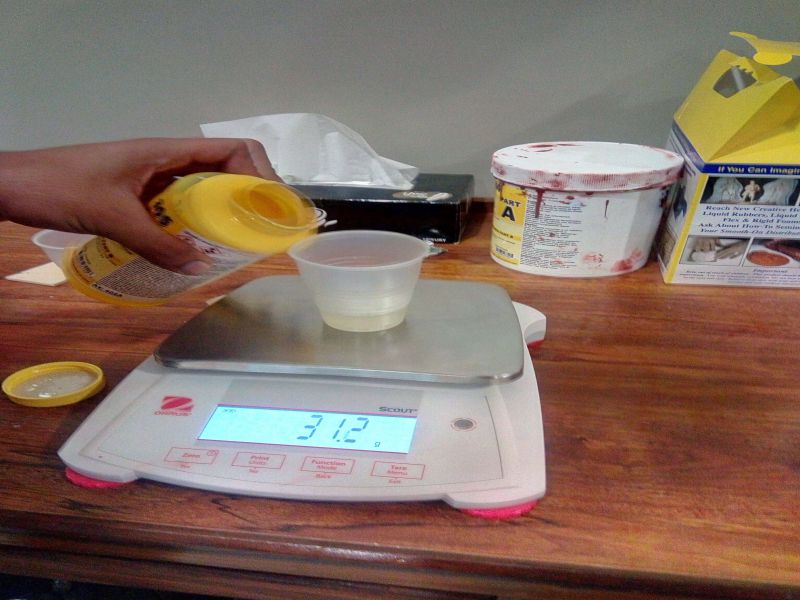
In the next step, I took (100%) 54g of Part A and 10% of part B (5.4g) , and 4% of catalyst. I mixed the mixture for approximately 4 minutes.
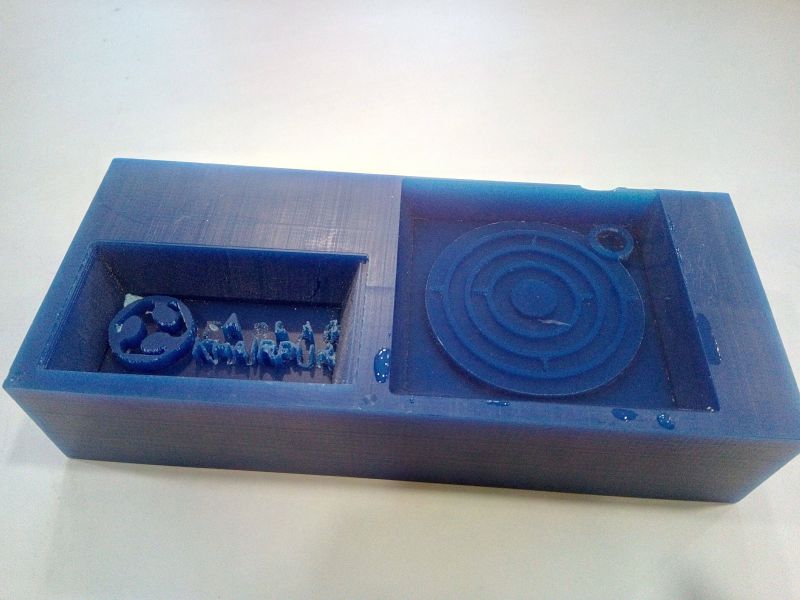
The mixture was ready and I poured it in the mold, and kept it for curing. There were a lot of bubbles and the vaccum mechanism that we had created wasn't working fine.So, I let the mold cured and check the trial results.
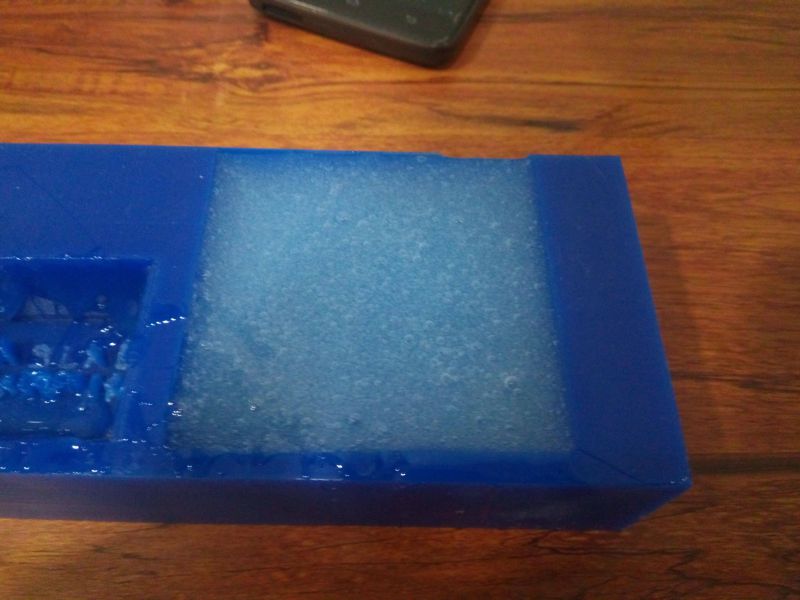
Unsuccessful Results:
I kept the mold for curing on Saturday and checked it on Monday , but the results were unsatisfying. The mold wasn't cured properly and then I noticed what mistake I had done. I had mixed the proportions incorrectly. Part A and Part B were to be mixed by 1 :1 . So I had to remove this mold. It was really an annoying thing , but as this was my first job with molding and casting , So failure leads success , until you don't give up.
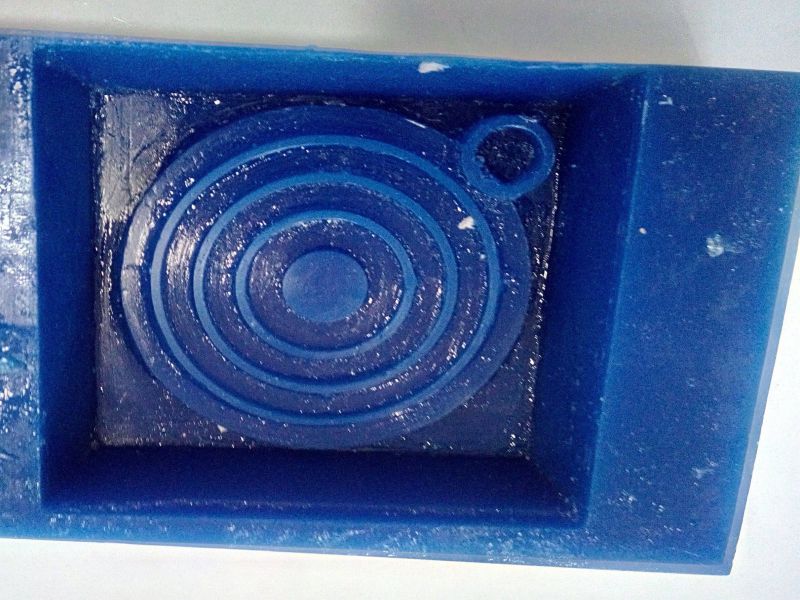
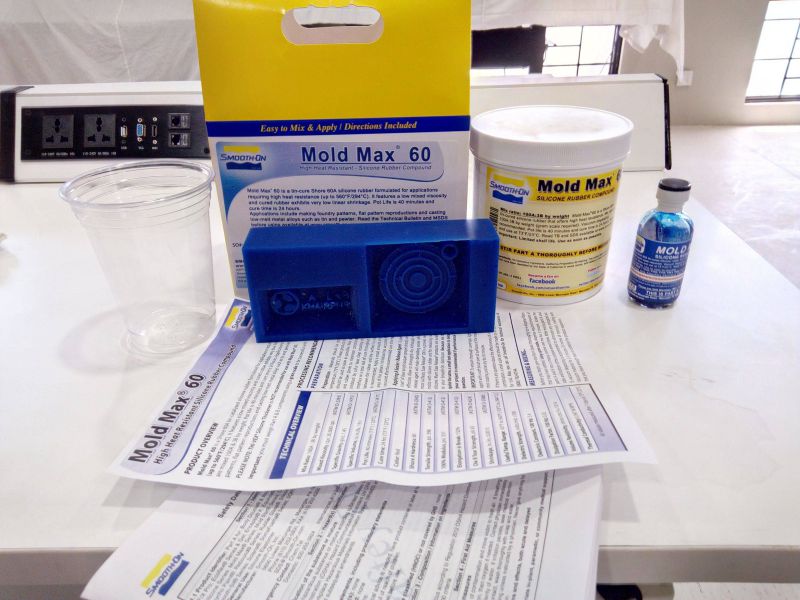
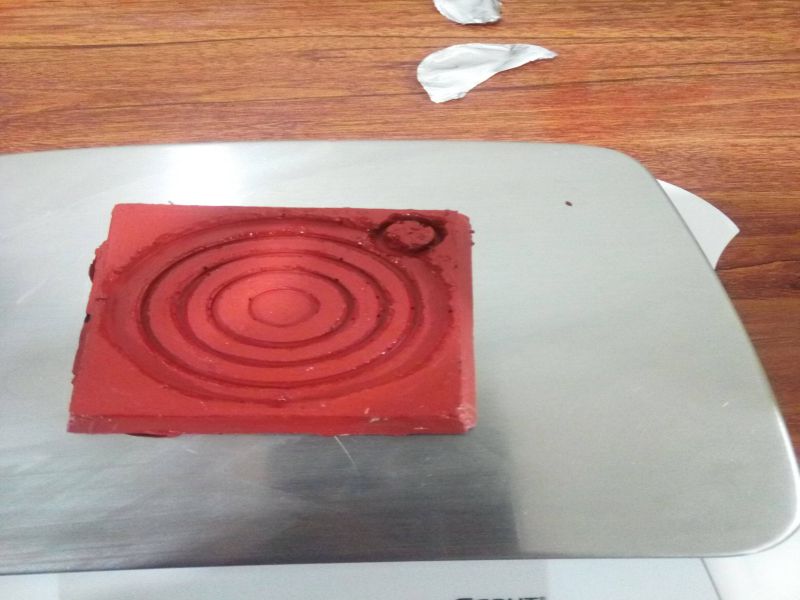
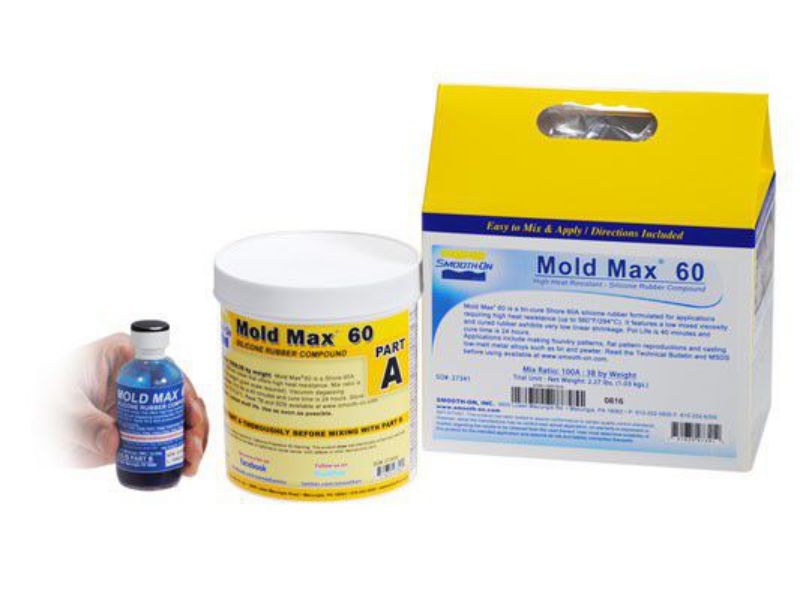
- Making the Mold Using Mold MAx 60
For making the mold this time I used SMOOTH-ON Mold Max 60 , I studied the datasheet of the mateirals given below:
As per the datasheet, 100% of Part A and 3% of Part B were ued.
I had measured the amount of materials required , so this time I simple poured the materials in right proportion. the preocess is shown below:
I kept the mold for curing about an hour .
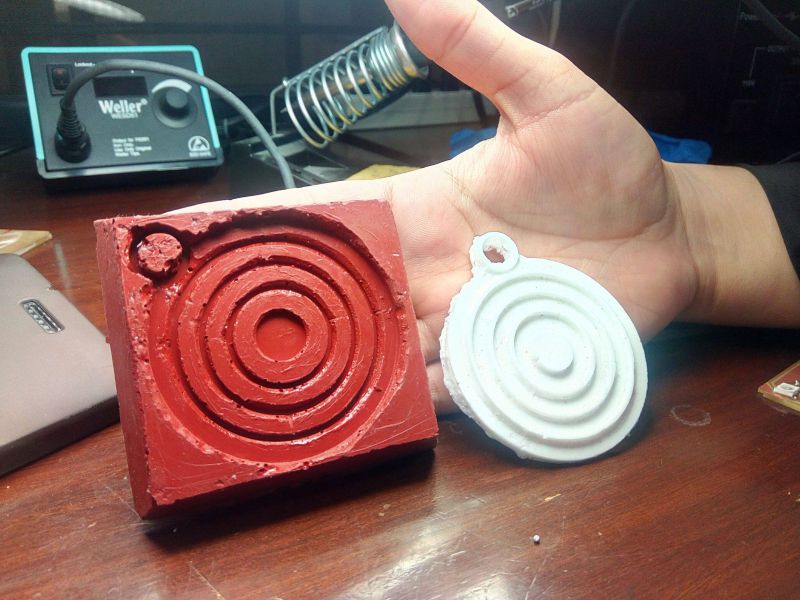
The mold was left for about an hour, and the results are shown below:
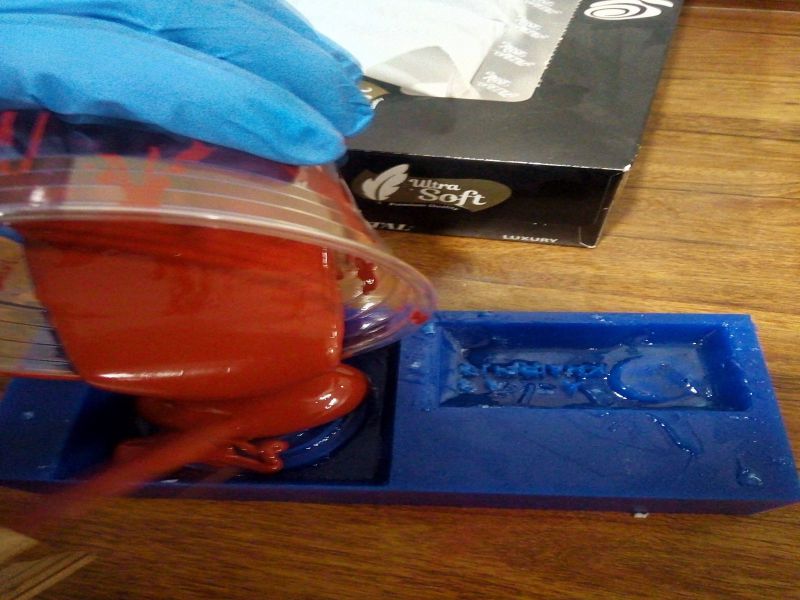
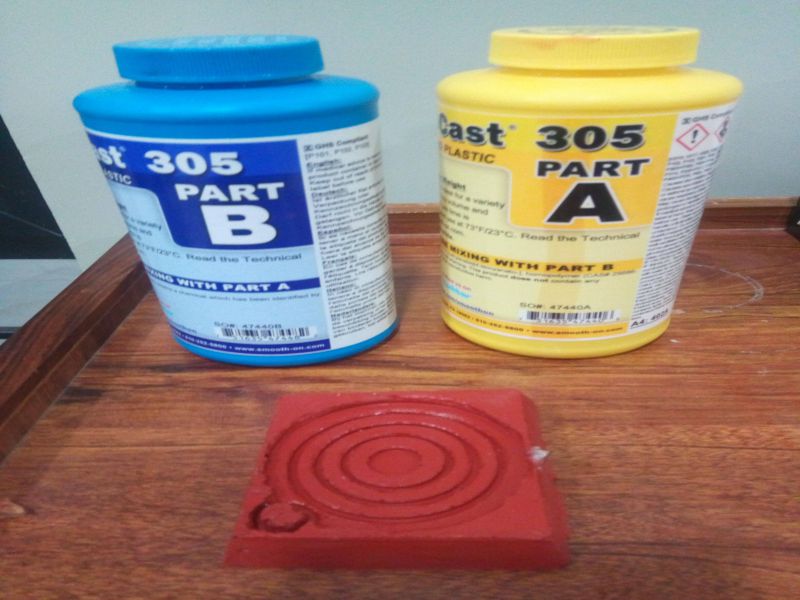
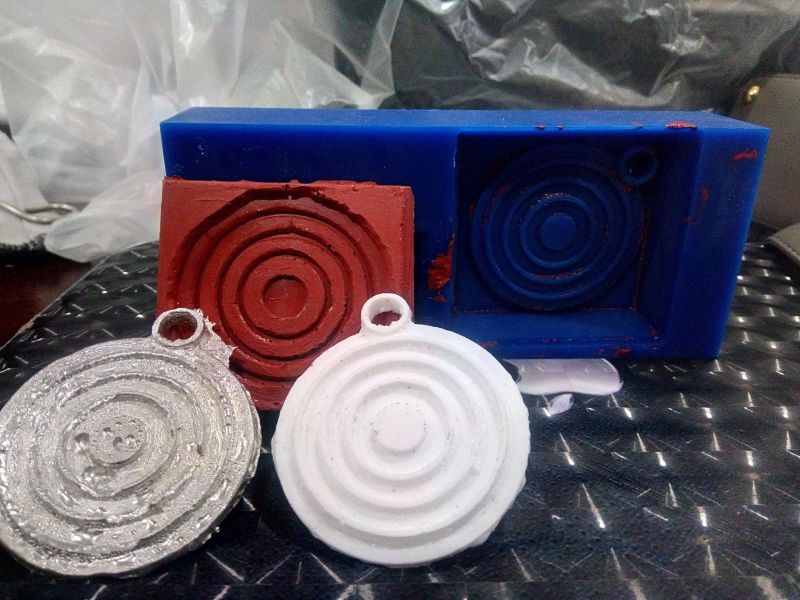
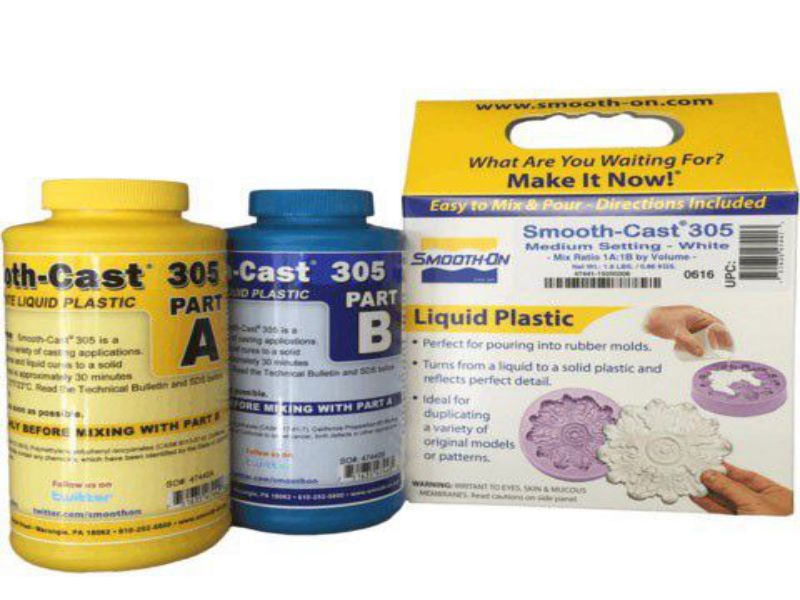
- Casting with SMOOTH ON Liquid Plastic Cast 305
For casting, we have used plastic Cast 305. Both Part A and Part B are mixed in 1:1.
The next step was making the mixture by 1:1 and mixed for 7 minutes before it starts hardening.
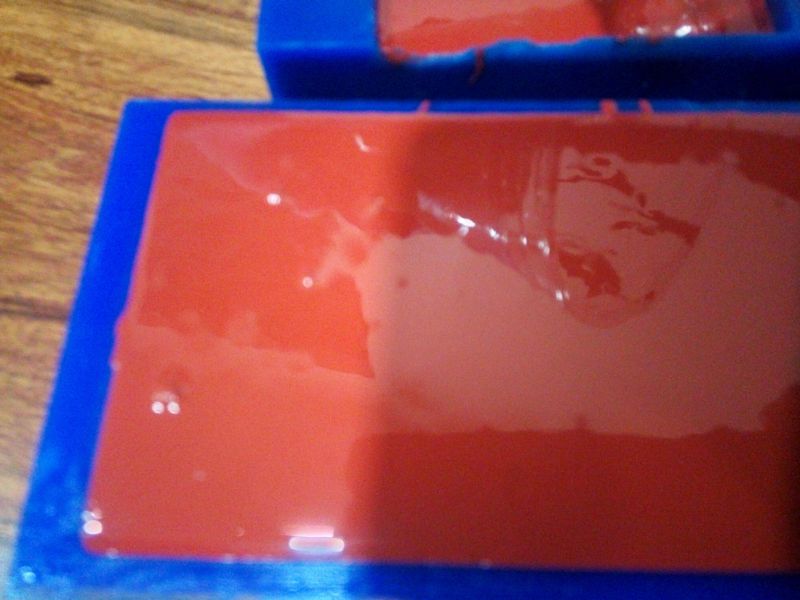
The mold was then filled with the casting material and left to dry
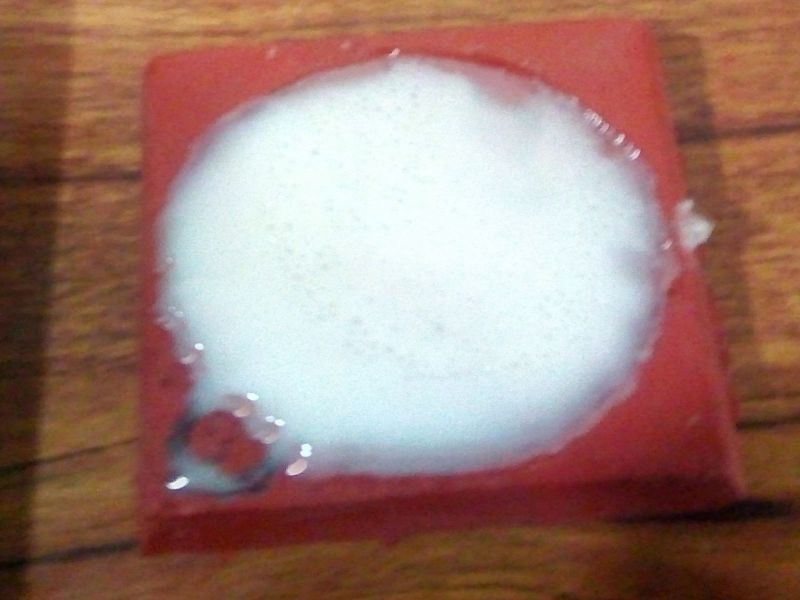
Finally, It was done and the mold and cast are shown below:
I have always like to work with metals, although i never got to work much, but due to this assignment I got the chance to do some cool stuff. The metal is molten first and then poured into the mold , where the metal solidifies to get the desired shape. The whole procedure is illustrated below in details:
For metal casting , we are using Bismuth .Bismuth is a brittle, silvery-green metal that has a low melting temperature of 272 °F (521 °C)and high specific gravity. Being both stable and non-toxic, bismuth is often used as a replacement for toxic metals such as antimony, cadmium, lead, and mercury. Like water, bismuth is less dense as a solid than as a liquid (it expands as it cools), a property unique for a metal.
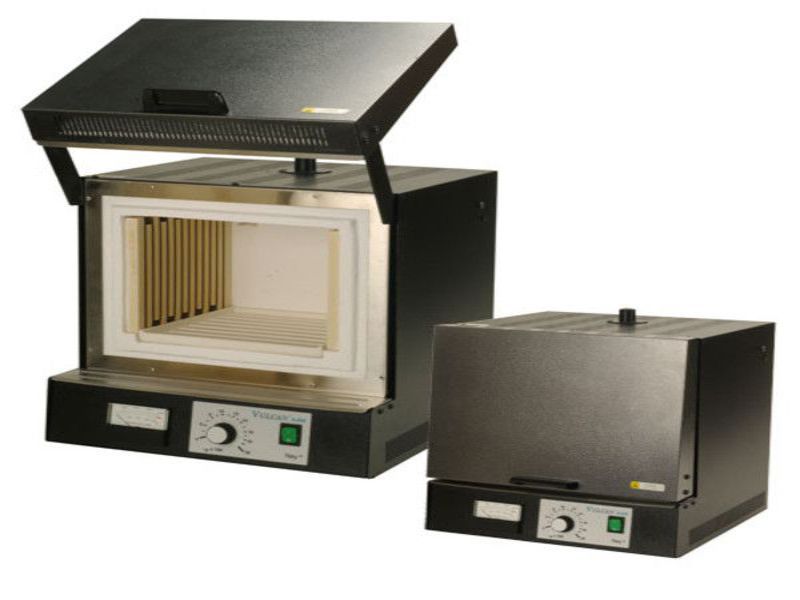
For melting the Bismuth, we have used Neycraft Vulcan A-550 Set Point Control Burnout Oven-Kiln machine. It can reach upto 1000F(538C) in 15 minutes, and has Max. operating temp. 2012F(1100C). Using the setpoint control , we can manually set the desired temperature.
The First step was to melt the metal at the given melting point, as this is a high temperature so safety gears were followed.
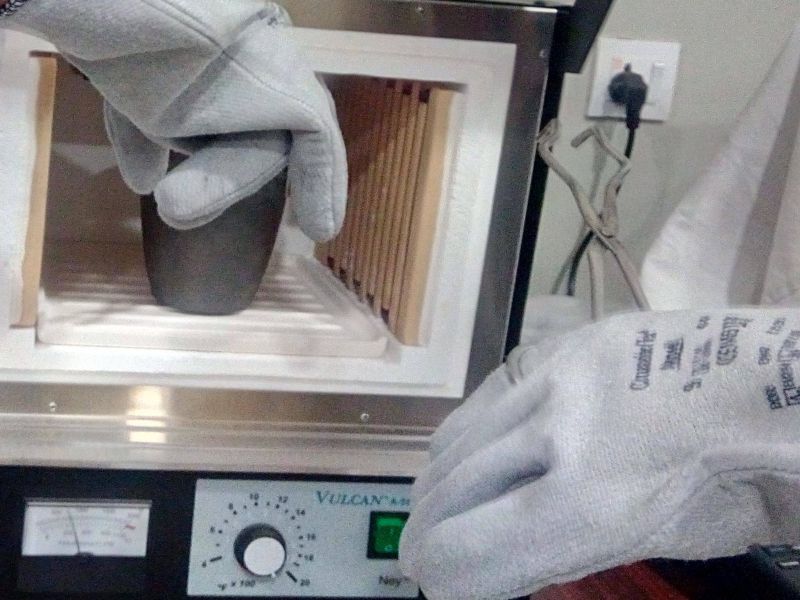
When, the temperature reaches the desired level, the molten Bismuth willbe carefully taken and poured into the molds.

Now, it's time to pour the material into the mold carefully, as shown below:
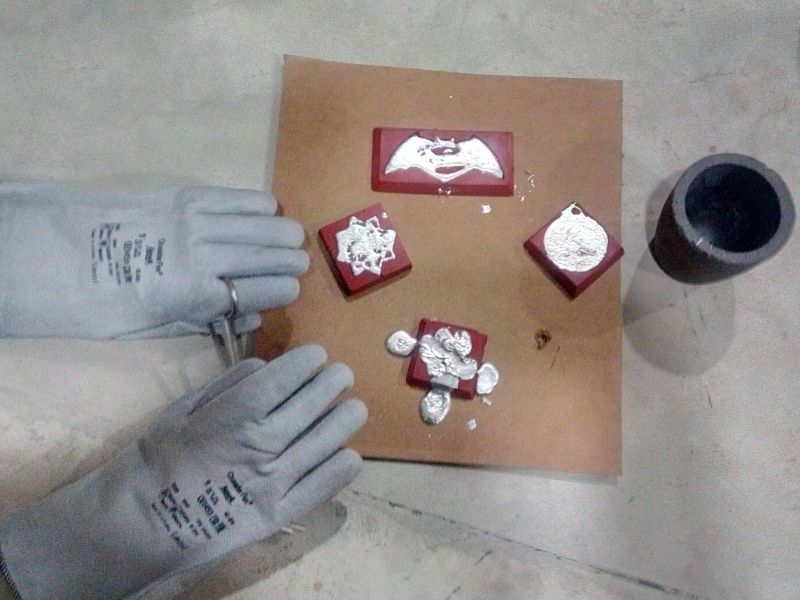
After poring the molten metal, it was kept for about 20-30 minutes so that it can be cure.
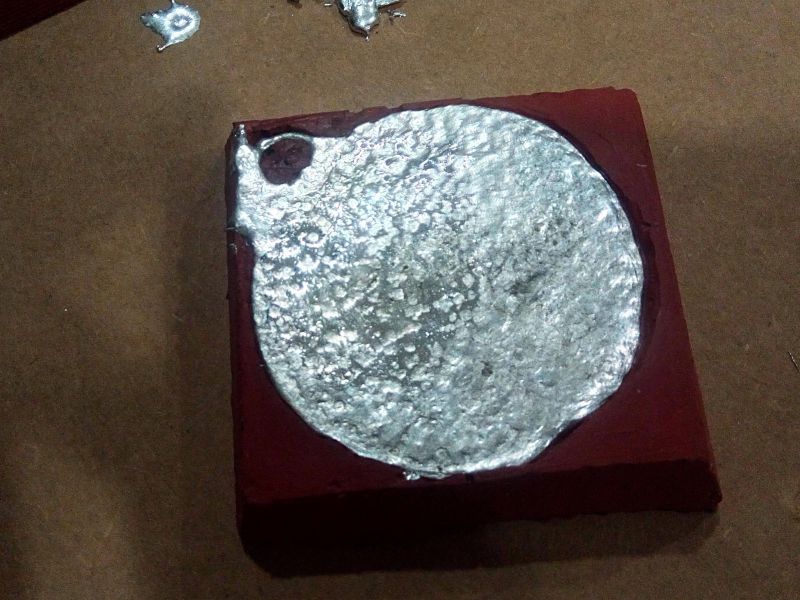
The metal casting was done, although there were some issues due to bubbles, and it was not as smooth as it should be , but overall it was a fair result.
Group Assignment:
This week group assignment is to review the datasheets of the materials we are using in making mold and cast. Below we are sharing some important points after reviewing safety datasheets of Mold Max 60 for molding and Smooth-Cast 305 for casting materials
Mold Max 60 Safety DataSheet Review:
Product/Chemical Name: Mold Max® 60 Part A:
- Hazards Identification -Not hazardous according to United States Occupational Safety and Health Administration (OSHA)
- Inhalation - Remove source(s) of contamination and move victim to fresh air.
- Eye Contact - Flush eyes with plenty of water. If irritation persists, seek medical attention.
- Skin Contact -In case of skin contact, wash thoroughly with soap and water; remove contaminated clothing and launder before reuse.
- Ingestion -Do not induce vomiting unless instructed by a physician. Contact physician immediately
- After first aid, get appropriate in-plant, paramedic, or community medical support.
- Flash Point -300 °F
- Handling Precautions - Minimize breathing of vapors and avoid prolonged or repeated contact with skin. Wear proper protective equipment. Use good general housekeeping procedures.
- Storage Requirements - Store in cool dry, well-ventilated area
- Protective Clothing/Equipment -Wear chemically protective gloves to prevent prolonged or repeated skin contact. Wear protective eyeglasses or chemical safety goggles, per OSHA eyeand face-protection regulations 29 CFR 1910.133 and European Standard EN166. Contact lenses are not eye protective devices. Appropriate eye protection must be worn instead of, or in conjunction with contact lenses.
- Toxicological Information:
- Eye Effects:Irritation
- Skin Effects:Irritation
- Carcinogenicity:not Determined
- Mutagenicity: Not Determined
Product/Chemical Name: Mold Max® 60 Part B:
- Harmful if swallowed.
- Irritating to eyes, respiratory system and skin.
- Harmful to aquatic organisms may cause long term adverse effects in the aquatic environment.
- Inhalation -Remove source(s) of contamination and move victim to fresh air. If breathing has stopped, give artificial respiration, then oxygen if needed. Contact physician immediately.
- Eye Contact -Flush eyes with plenty of water. If irritation persists, seek medical attention.
- Skin Contact -In case of skin contact, wash thoroughly with soap and water; remove contaminated clothing and launder before reuse; seek medical attention if rash develops.
- Ingestion -Do not induce vomiting unless instructed by a physician. Contact physician immediately
- After first aid, get appropriate in-plant, paramedic, or community medical support.
- Handling Precautions -Minimize breathing of vapors and avoid prolonged or repeated contact with skin. Wear proper protective equipment. If ventilation is not sufficient, wear proper respiratory equipment. Reseal partial containers. Use good general housekeeping procedures.
- Flash Point - 150 °F
- Storage Requirements -Store in cool dry, well-ventilated area Protective Clothing/Equipment - Wear chemically protective gloves and aprons to prevent prolonged or repeated skin contact. Wear protective eyeglasses or chemical safety goggles, per OSHA eye- and face-protection regulations 29 CFR 1910.133 and European Standard EN166. Contact lenses are not eye protective devices. Appropriate eye protection must be worn instead of, or in conjunction with contact lenses.
- Toxicological Information:
- Eye Effects:Irritation
- Skin Effects:Irritation
- Carcinogenicity:not Determined
- Mutagenicity: Not Determined
Smooth-Cast 300 Series Safety DataSheet Review:
Product/Chemical Name: Smooth-Cast 305 Part A:
- Hazards Identification
- Harmful : by inhalation.
- Irritating to eyes, respiratory system and skin.
- Limited evidence of a carcinogenic effect
- Harmful; danger of serious damage to health by prolonged exposure through inhalation environment.
- Inhalation -Remove source(s) of contamination and move victim to fresh air. If breathing has stopped, give artificial respiration, then oxygen if needed. Contact physician immediately.
- Eye Contact -Flush eyes with plenty of water. If irritation persists, seek medical attention.
- Skin Contact -In case of skin contact, wash thoroughly with soap and water; remove contaminated clothing and launder before reuse; seek medical attention if rash develops.
- Ingestion -Do not induce vomiting unless instructed by a physician. Contact physician immediately
- After first aid, get appropriate in-plant, paramedic, or community medical support.
- Handling Precautions -Minimize breathing of vapors and avoid prolonged or repeated contact with skin. Wear proper protective equipment. If ventilation is not sufficient, wear proper respiratory equipment. Reseal partial containers. Use good general housekeeping procedures.
- Flash Point - 262 °F
- Storage Requirements -Store in cool dry, well-ventilated area Protective Clothing/Equipment - Wear chemically protective gloves and aprons to prevent prolonged or repeated skin contact. Wear protective eyeglasses or chemical safety goggles, per OSHA eye- and face-protection regulations 29 CFR 1910.133 and European Standard EN166. Contact lenses are not eye protective devices. Appropriate eye protection must be worn instead of, or in conjunction with contact lenses.
- Toxicological Information:
- Hazardous Component: 4,4’ Methylene, bis(phenylisocyanate)
Product/Chemical Name: Smooth-Cast 305 Part B:
- Inhalation - Remove source(s) of contamination and move victim to fresh air.
- Eye Contact -Flush eyes with plenty of water. If irritation persists, seek medical attention.
- Skin Contact - In case of skin contact, wash thoroughly with soap and water; remove contaminated clothing and launder before reuse.
- Ingestion - Do not induce vomiting unless instructed by a physician. Contact physician immediately
- After first aid, get appropriate in-plant, paramedic, or community medical support.
- Flash Point - 262 °F
- Handling Precautions - Minimize breathing of vapors and avoid prolonged or repeated contact with skin. Wear proper protective equipment. Use good general housekeeping procedures.
- Storage Requirements -Store in cool dry, well-ventilated area
- Protective Clothing/Equipment - Wear chemically protective gloves to prevent prolonged or repeated skin contact. Wear protective eyeglasses or chemical safety goggles, per OSHA eye- and face-protection regulations 29 CFR 1910.133 and European Standard EN166. Contact lenses are not eye protective devices. Appropriate eye protection must be worn instead of, or in conjunction with contact lenses.
- Toxicological Information:
- Acute Inhalation Effects: None Established
- Reproductive Toxicity:None Established
- Mutagenicity:None Established
- Teratogenicity:None Established
- Sensitization:None Established
Conclusion
Molding and casting is really fun! but few things that we need to keep in mind is that the design should be having specific depth so that , the mold is made properly and you get enough mold depth to put the casting material in it, otherwise you won't get good results of casting. The other thing to be kept in mind is that the materials should be mixed in the proper proportions and datasheets are the best way to do that. You also need to have a good vaccum system otherwise you will have a lot of bubbles like I have in my mold and casted parts, because I could not get my vaccum system ready at time but later I was able to do it with the help of instructor, so one needs to take care of it too to get good results.
The files for this Week are attached Below:
