

Success is a journey, not a destination
Contents
1. Reading the Datasheet
The first task of this week's assignment is to read the Datasheet of microcontroller ATtiny44 and ATmega328 used in Arduino uno, used for programming the Hello World board:
- Pin1 --> VCC Supply voltage
- pin14 --> GND Ground
- RESET --> Reset input.
- Port B--> PB3-PB0 It is a 4-bit bi-directional I/O port with internal pull-up resistors
- Port A (PA7...PA0)
Port A is a 8-bit bi-directional I/O port with internal pull-up resistors
Port A has alternate functions as analog inputs for the ADC, analog comparator, timer/counter, SPI and pin change interrupt
Following useful information was obtained from the Datasheet.
1. The Pin Configuration for ATtiny44 is shown below
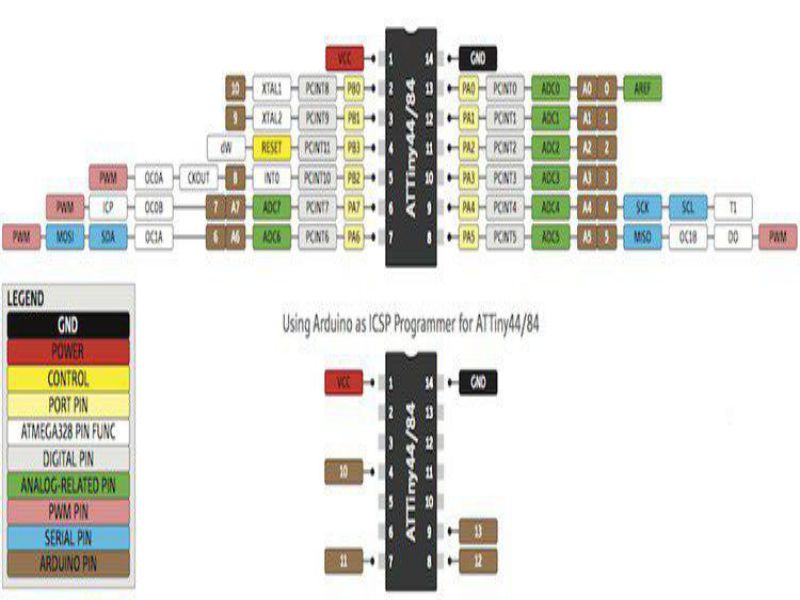
ATtiny24/44/84 is a low-power CMOS 8-bit microcontroller based on the AVR enhanced RISC architecture.ATtiny comes with several features- 2/4/8K byte of In-System Programmable Flash, 128/256/512 bytes EEPROM, 128/256/512 bytes SRAM, 12 general purpose I/O lines, 32 general purpose working registers, an 8-bit Timer/Counter with two PWM channels, a 16-bit timer/counter with two PWM channels, Internal and External Interrupts, a 8-channel 10-bit ADC, programmable gain stage (1x, 20x) for 12 differential ADC channel pairs, a programmable Watchdog Timer with internal oscillator, internal calibrated oscillator, and four software selectable power saving modes. Idle mode stops the CPU while allowing the SRAM, Timer/Counter, ADC, Analog Comparator, and Interrupt system to continue functioning.
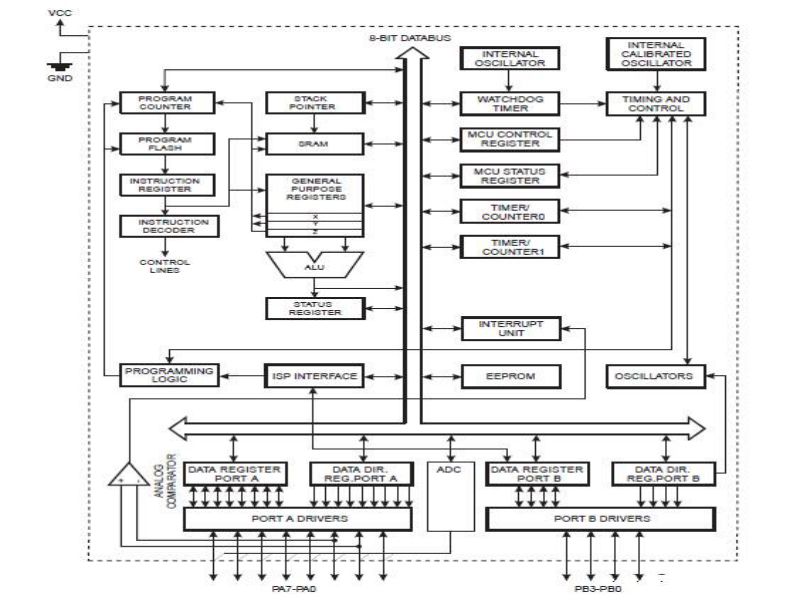
2. Overview of ATtiny44
ATtiny24/44/84 is a low-power CMOS 8-bit microcontroller based on the AVR enhanced RISC architecture. By executing powerful instructions in a single clock cycle, the ATtiny24/44/84 achieves throughputs approaching 1 MIPS per MHz allowing the system designer to optimize power consumption versus processing speed.The functional block diagram helps in understanding the internal architecture of the microcontoller.
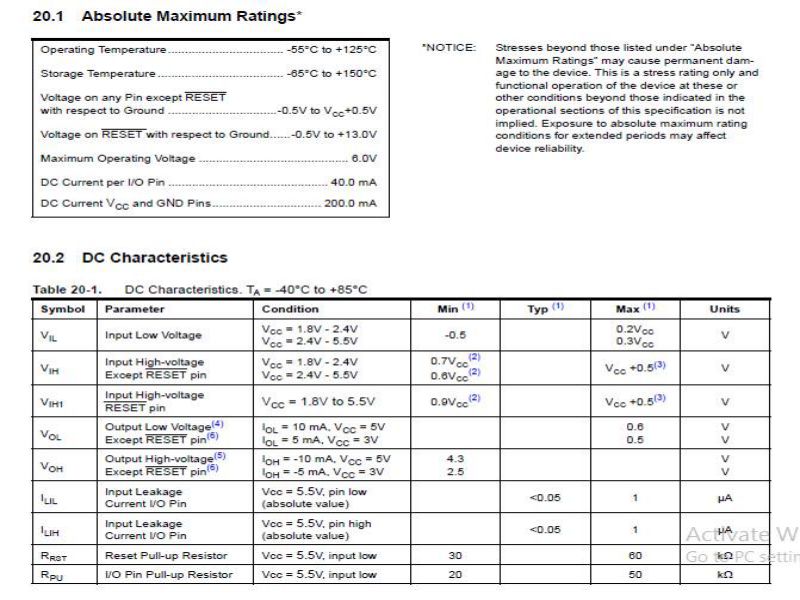
3. Electrical Characteristics
Electrical characteristics are really important to be taken into considerartion, especially while working on the circuitry.
2. Programming the Board using Arduino IDE and Fab ISP
The device is manufactured using Atmel’s high density non-volatile memory technology. The onchip ISP Flash allows the Program memory to be re-programmed in-system through an SPI serial interface, by a conventional non-volatile memory programmer or by an on-chip boot code running on the AVR core. The ATtiny24/44/84 AVR is supported with a full suite of program and system development tools including: C Compilers, Macro Assemblers, Program Debugger/Simulators and Evaluation kits.
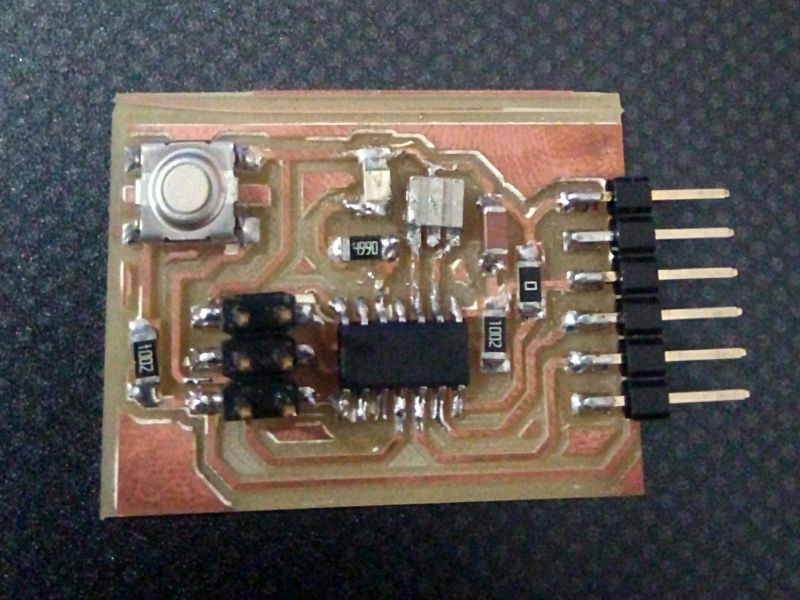
In week 06, we were required to make the Hello world board using ATtiny44 microcontroller and add at least an led and push button also. The circuit was tested also, to check the connectivity and circuitry. My Hello World Board is shown below!
I chose to program with Arduino because I've used Arduino IDE before , it is really easy to use and everything on Arduino website and IDE is open source. Arduino has so much built in libraries.Follwoing steps are required to program the ATtiny44 using Arduino UNO
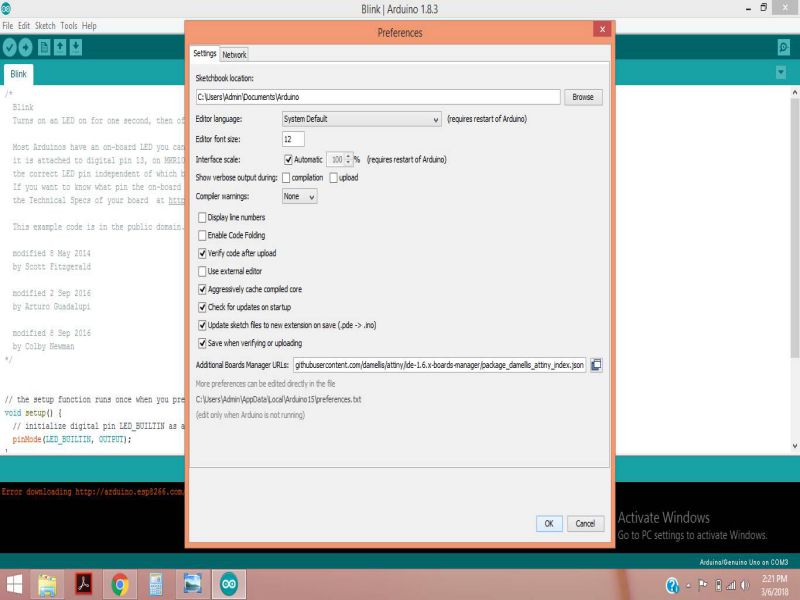
- Open the preferences from the file Tab
- Add this link, and close
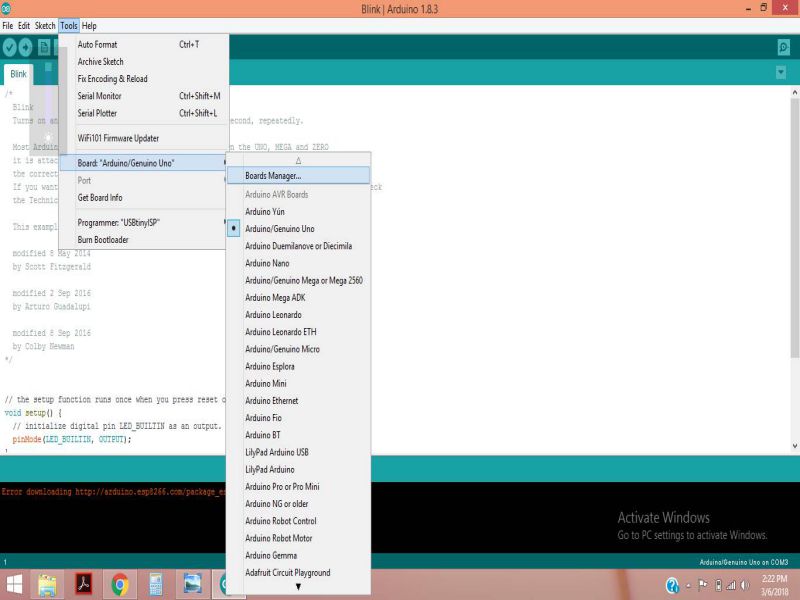
- Go to Tools > Board Manager, to install the arduino library for ATtiny44 microcontroller
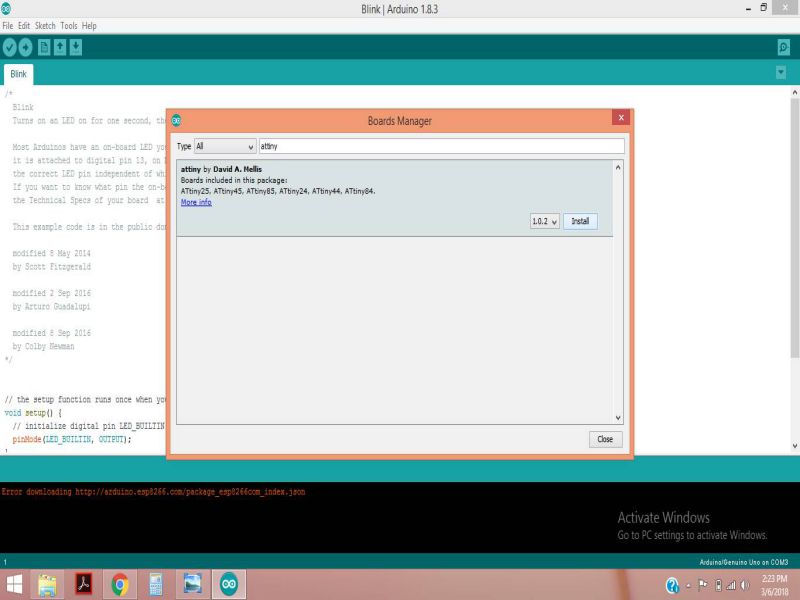
- Search for ATtiny44 and install it
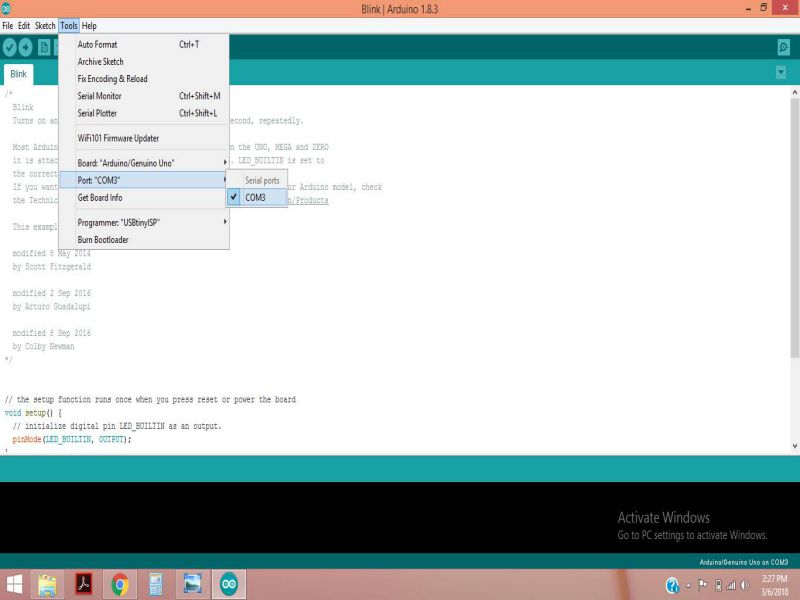
- Check the Port connection
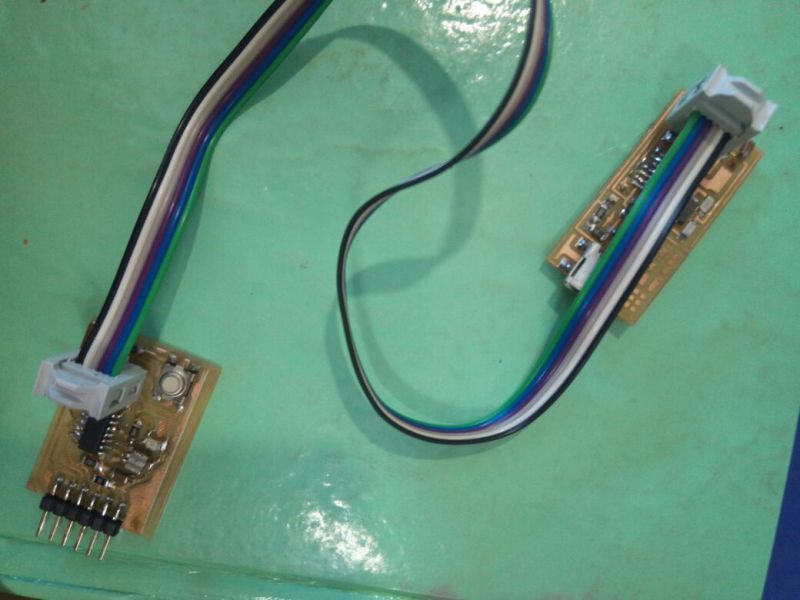
- Connect the 6 pin (2x3) crimp-on IDC connectors of both the boards using the ribbon cable as shown below.
- Now, connect the Fab ISP USB mini using the connector cable to the PC, and Connect the Hello World board using FTDI cable.
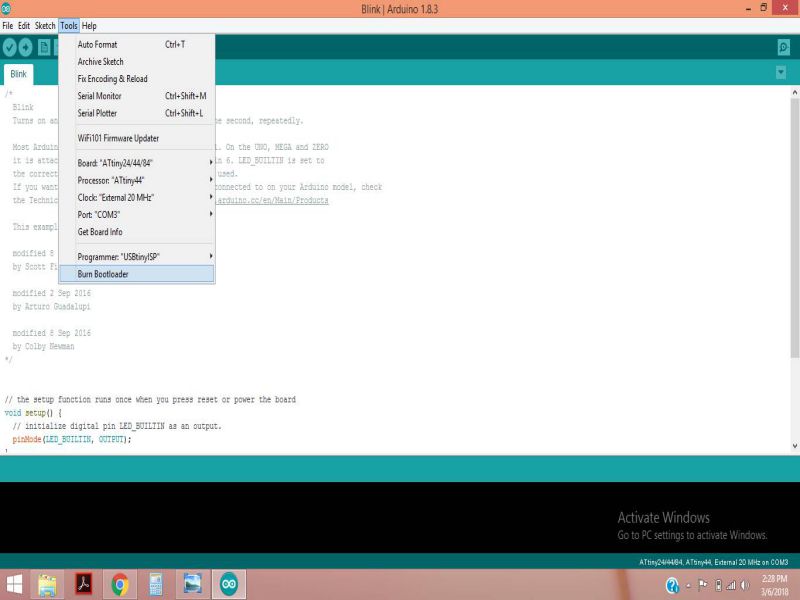
- Open The Arduino IDE, go to Tools Tab and check the following settings
- Port --> COM3 (in my case)
- Programmer --> USB Tiny ISP
- Board --> ATtiny24/44/84
- Processor --> ATtiny44
- clock --> External 20MHz
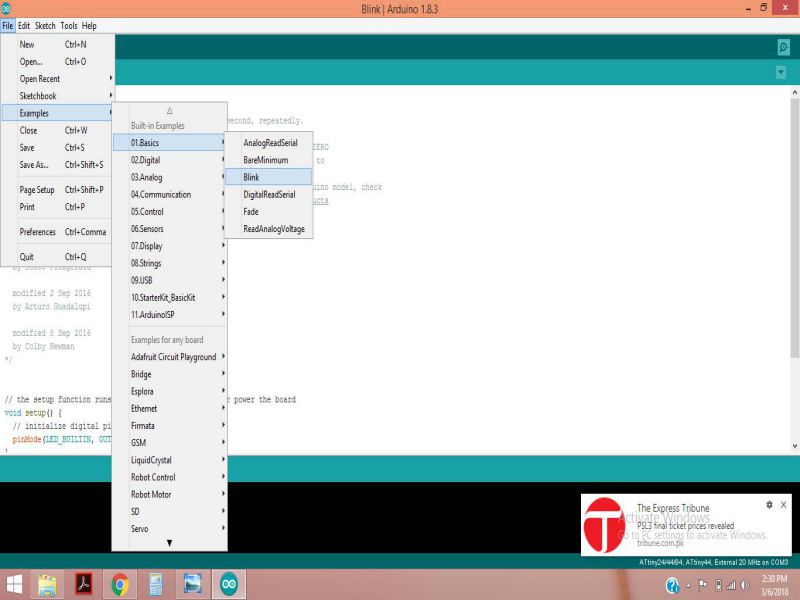
- Make the led blink ,click on file >Examples > Basics Blink and change the led Pin as per your board
- When the successful uploading is completed , Done uploading message appears.

In Arduino, it is easy way to Customize and install additional boards and libraries.So, I added Adiitional board URL , "https://raw.githubusercontent.com/damellis/attiny/ide-1.6.x-boards-manager/package_damellis_attiny_index.json"
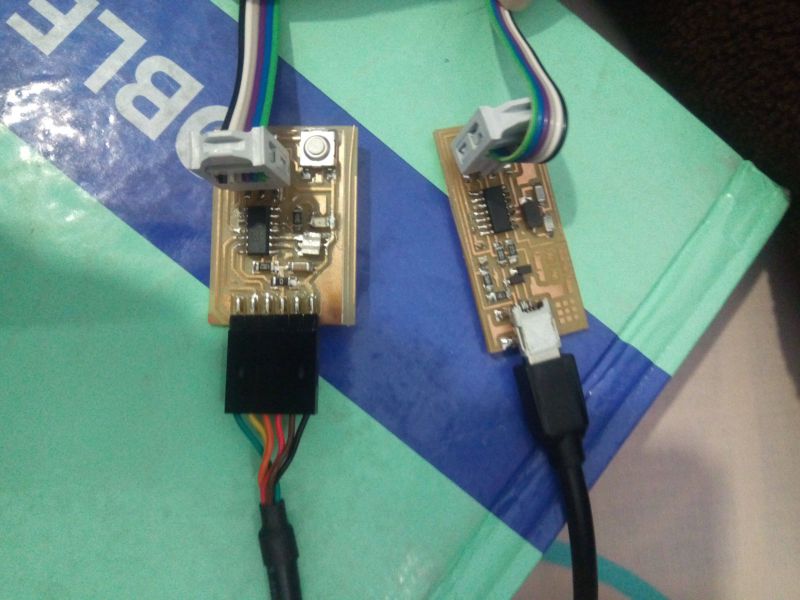
Now, connect the Hello World board using the FTDI cable and to the PC,Now check the PORT by clicking on Tools > Port > in this case COM3.
As we are using FabISP as our programmer, So now its time to connect the FabISP and Hello World board.
The next step is burning bootloader.The bootloader is the little program that runs when you turn the Arduino on, or press the reset button. Its main function is to wait for the Arduino software on your computer to send it a new program for the Arduino, which it then writes to the memory on the Arduino. This is important, because normally you need a special device to program the Arduino. The bootloader is what enables you to program the Arduino using just the USB cable. When we refer to "bootloading" the Arduino, we are talking about using a special device (called an In-System Programmer or ISP) to replace the bootloader software.
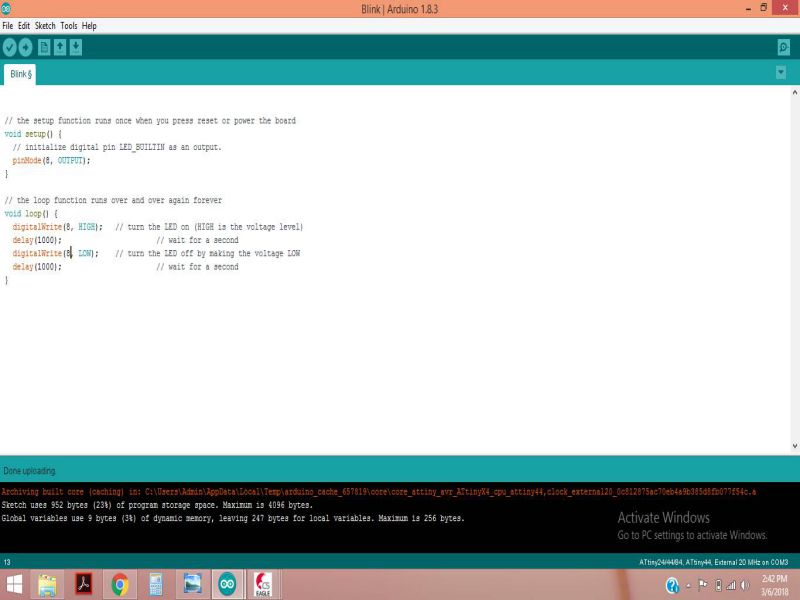
Following result shows that blink has been successfully uploaded
Following code is used for glowing an led "ON" with pushbutton
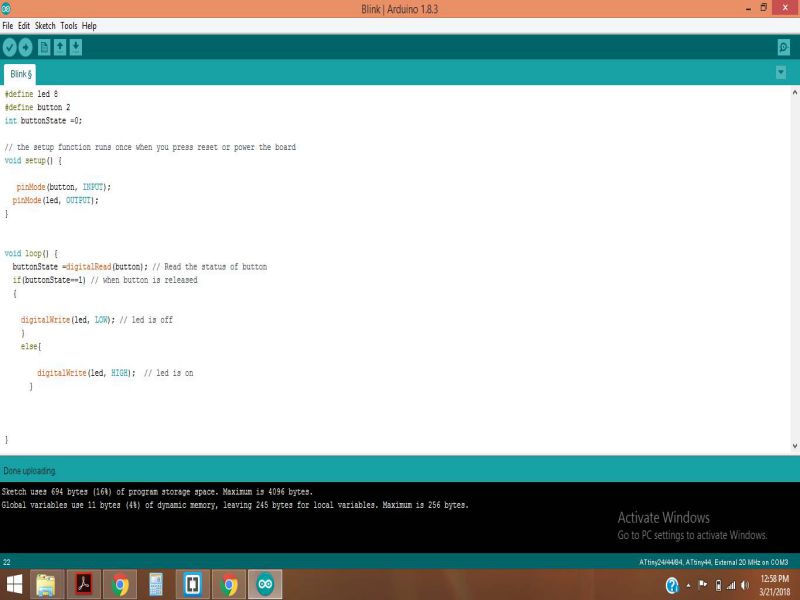
The result is shown below:
Burning Hex File Using Avrdude
While Uploading the code using Arduino IDE, we can check the Hex file location in the command window. It is not necessary to use Arduino IDE only, we can simply push the Hex file generated through any other software and push it through Avrdude. Following steps are required to do so. For now, I am using the same Hex file of arduino which is given above and the file is attached at the bottom of page too.
- Download the Avrdude from HereAvrDude Download
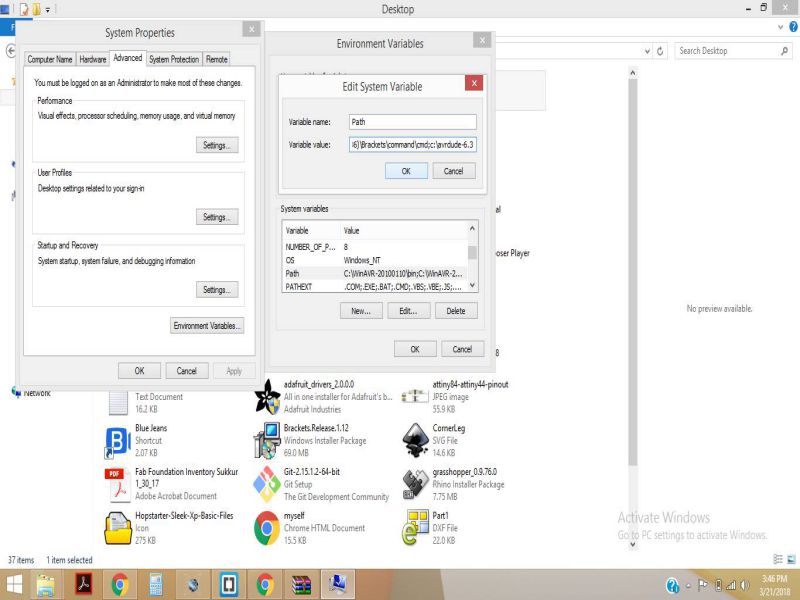
- After installing the Avrdude, Add the path as shown below
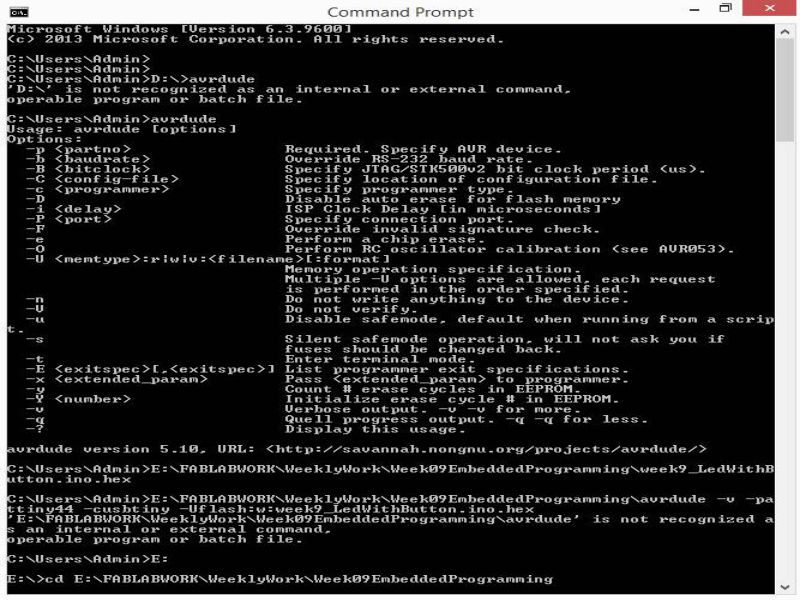
- To check if avrdude has been added successfully, type avrdude in command propmt, and you should see something like shown below:
- Now, go to the location of your Hex file, in my case it is "E:\FABLABWORK\WeeklyWork\Week09EmbeddedProgramming" . Simply type cd and the hex file location
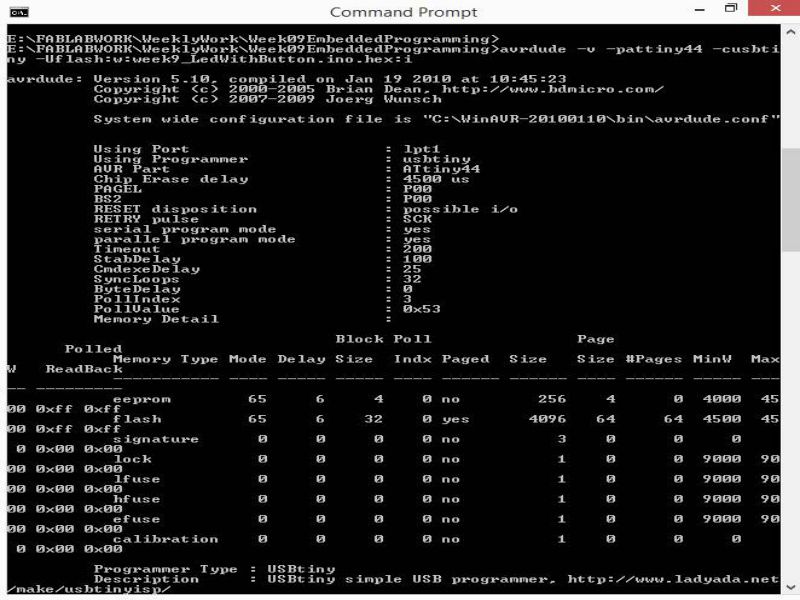
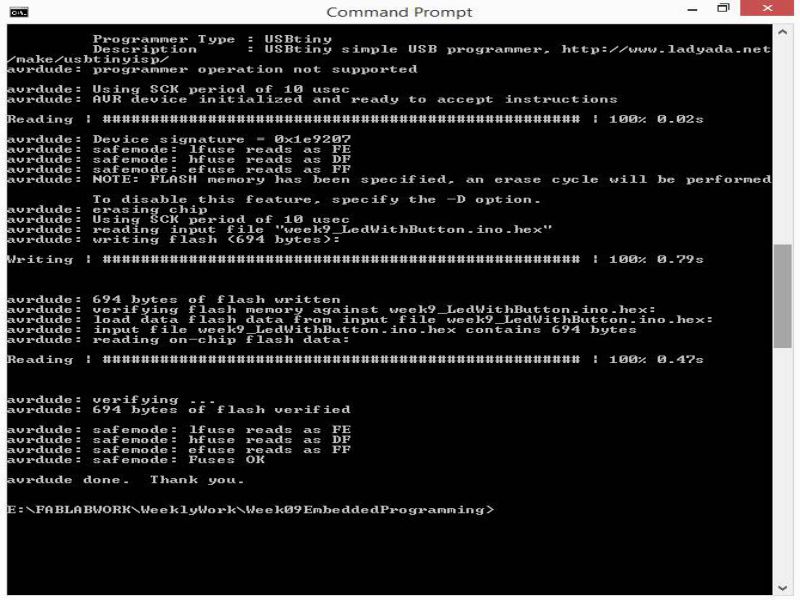
- Now type the given command , "avrdude -v -pattiny44 -cusbtiny -Uflash:w:YOUR_FILE_NAME.hex:i"
This command works if you are using FabISP as programer , and ATtiny44 microcontoller - Following are the results on successfully uploading the Hex file
Group Assignment
compare the performance and development workflows for other architectures
Following are a few different microcontroller architectures available in the market.
- 8051
- ARM
- AVR
- PIC
They are differentiated on the basis of their operation at the lower level. While 8051, AVR and PIC come in 8-bit, 16-bit and 32-bit, the ARMs generally come in 32-bit and even 64-bit. The 8051, AVR and PIC work closer with the I/O peripherals and can be lower power and faster as a result.
RISC and CISC Architectures
RISC (Reduced Instruction Set Computer) performs more instructions with lower cycles as compared to CISC architectures. CISC processors include the Intel x86 and 8051, Motorola 68000 and Zilog Z80 families.One of the key advantages to RISC is the load/store architecture which separates memory access and ALU operations (arithmetic logic unit). This improves cost, power consumption and heat dissipation, making them desirable for light, battery operated devices. RISC processors can be found in the ARM, AVR and PIC microcontrollers.
AVR
AVR is a family of microcontrollers developed by Atmel that use the RISC processors. AVR are most commonly used in the Arduino line of open source board designs. These are available in 8-bit tinyAVR, megaAVR and XMEGA. AVR32 is the 32-bit offering, which was intended to compete with ARM processors. These are not compatible with the original ARM and include additional SIMD and DSP instructions as well as audio and video processing features. One of the nice features of most AVR models is that they can reserve a bootloader region to store re-programming code. The code can then re-program through any interface available.
PIC
PIC stands for Peripheral Interface Controller. It is a family of microcontrollers developed by Microchip with a wide variety of options available. They are not strictly RISC processors as they differ very slightly in their operation. The product range includes the 8-bit PIC10, PIC12, PIC 16 and PIC18, the 16-bit PIC24 and dsPIC and the 32-bit PIC32MX, PIC32MZ, PIC32MM and PIC32MK. The 8-bit range focuses on lower cost, the dsPIC focuses on digital signal processing. The PIC32 series of microcontrollers uses the MIPS32-M4K core technology, which is a 32-bit RISC architecture. MIPS is a direct competitor to the ARM processors covering all types of applications in home entertainment, embedded and networking products, mobile, wearable and IoT devices.
8051
The Intel MCS-51 (also known as 8051) is a CISC architecture. These are available in 8-bit, 16-bit and 32-bit microcontrollers. 8051 silicon IP cores are typically smaller size, lower power compared to ARM Cortex-M and MIPS processors. They are used in everything from USB flash drives to washing machines and complex wireless communications systems-on-chip
The Files for this week are attached: Week 09 File

This work is licensed under a Creative Commons Attribution-NonCommercial 4.0 International License.