Project
Highlights
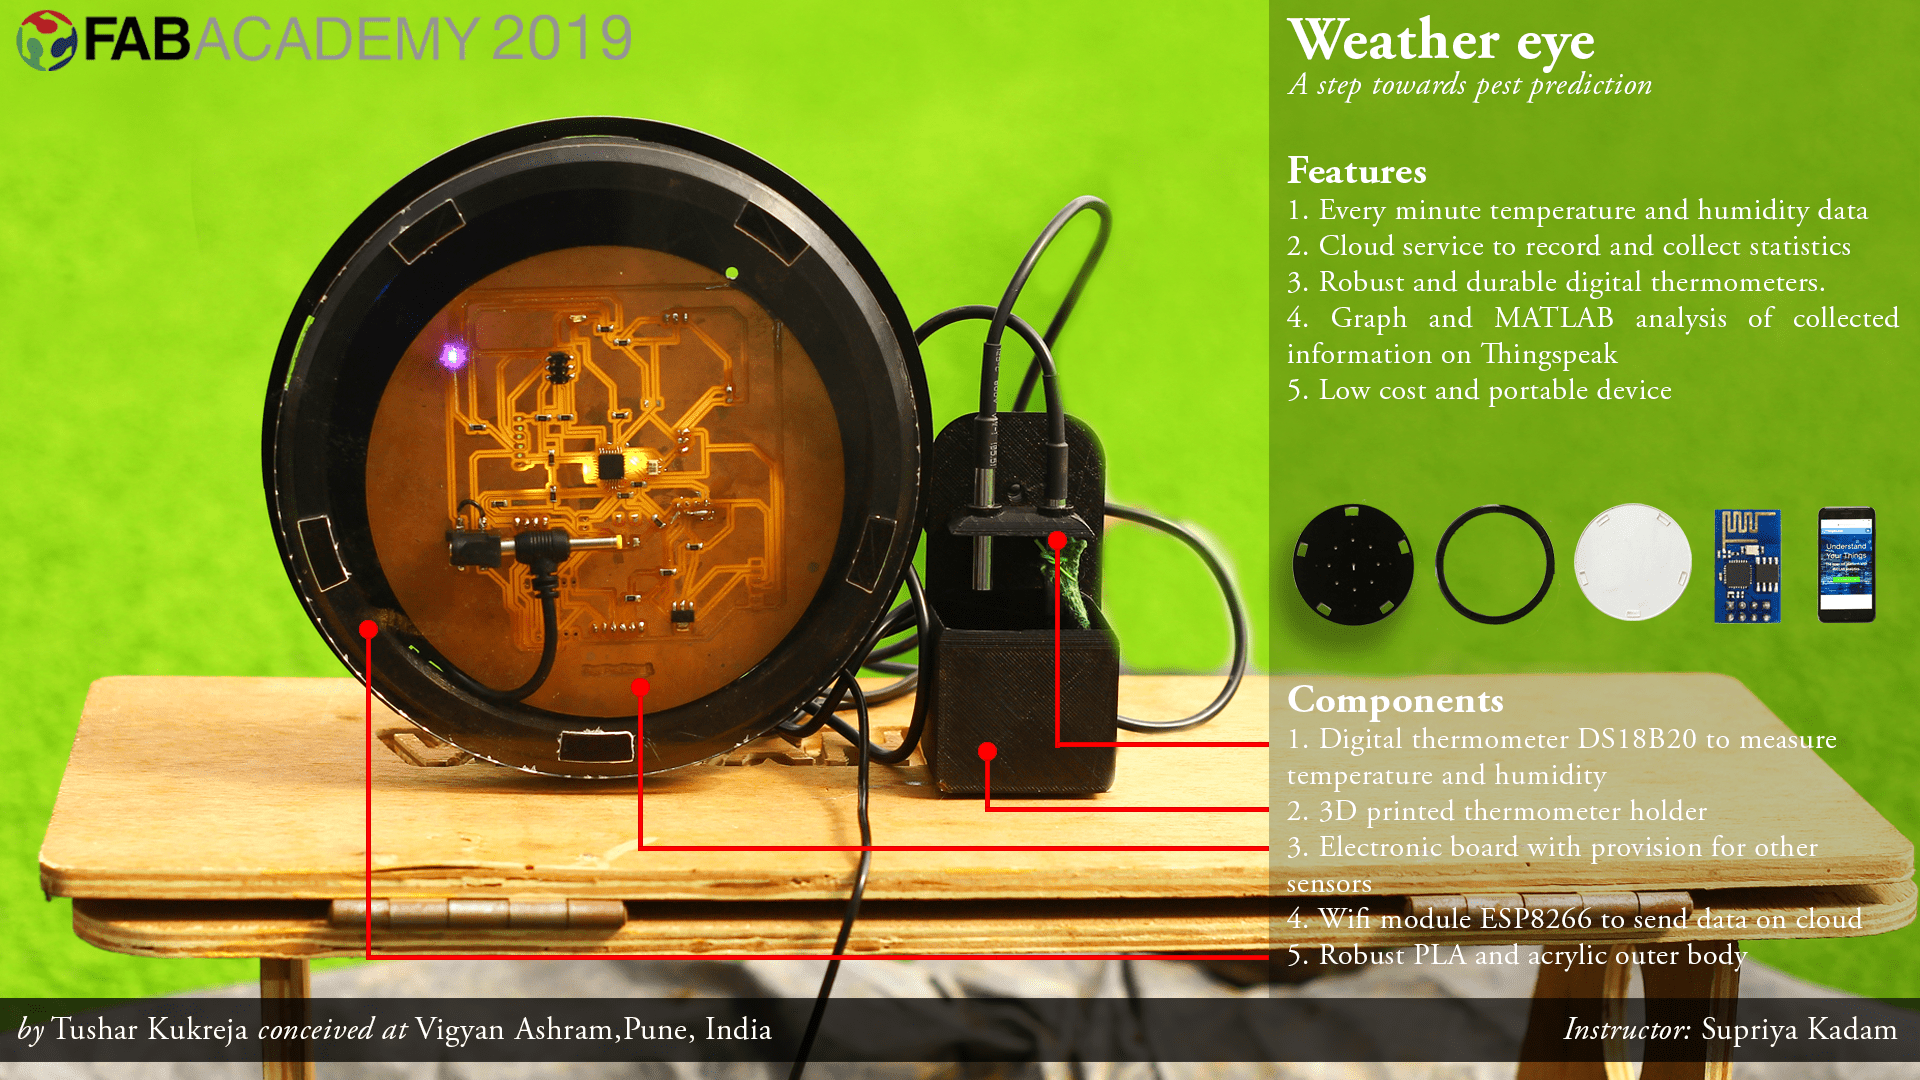
Project Introduction:
“Weather Eye” will measure,record and analyze every minute weather data. It will sense the temperature using digital thermometer. Embedded microcontroller will calculate humidity on the basis of dry and wet bulb temperature whiich will be sent on cloud. Thingspeak, cloud service will record and collect the statistics.
Techical Details
Two of the main components of my project are digital thermometer and wifi module. Also, the cloud “Thingspeak” for recording the data from the device.
1. Digital Thermometer:
The DS18B20 digital thermometer provides 9-bit to 12-bit Celsius temperature measurements and has an alarm function with nonvolatile user-programmable upper and lower trigger points. The DS18B20 communicates over a 1-Wire bus that by definition requires only one data line (and ground) for communication with a central microprocessor.
A. Pin Configurations:Each DS18B20 has a unique 64-bit serial code, which allows multiple DS18B20s to function on the same 1-Wire bus. Thus, it is simple to use one microprocessor to control many DS18B20s distributed over a large area.

B. Features: Measures Temperatures from -55°C to +125°C (-67°F to +257°F) ±0.5°C Accuracy from -10°C to +85°C Programmable Resolution from 9 Bits to 12 Bits. No External Components Required.
C. Applications: The datasheet specifies the thermometer can be used for the following applications. Thermostatic Controls
a. Industrial Systems
b. Consumer Products
c. Thermometers
d. Thermally Sensitive Systems
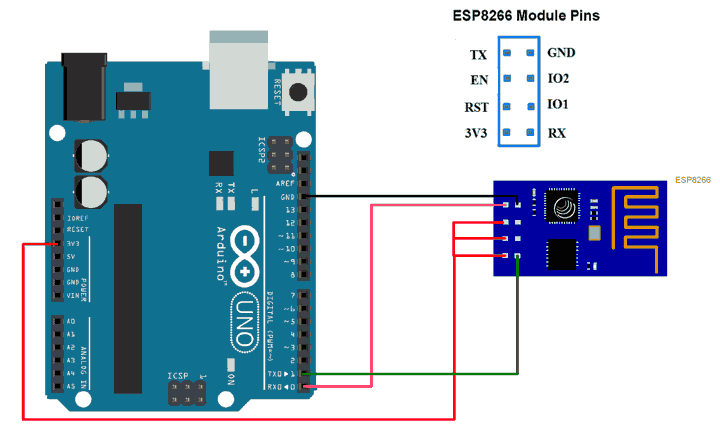
2.WIfi Module:
ESP8266 wifi module is low cost standalone wireless transceiver that can be used for end-point IoT developments. It enables internet connectivity to embedded applications. It uses TCP/UDP communication protocol to connect with server/client.
Interfacing with Arduino:
Connect ESP8266 module transmit pin (TX) to the receive pin (RX) of Arduino UNO and to receive pin (RX) of USB to serial converter.
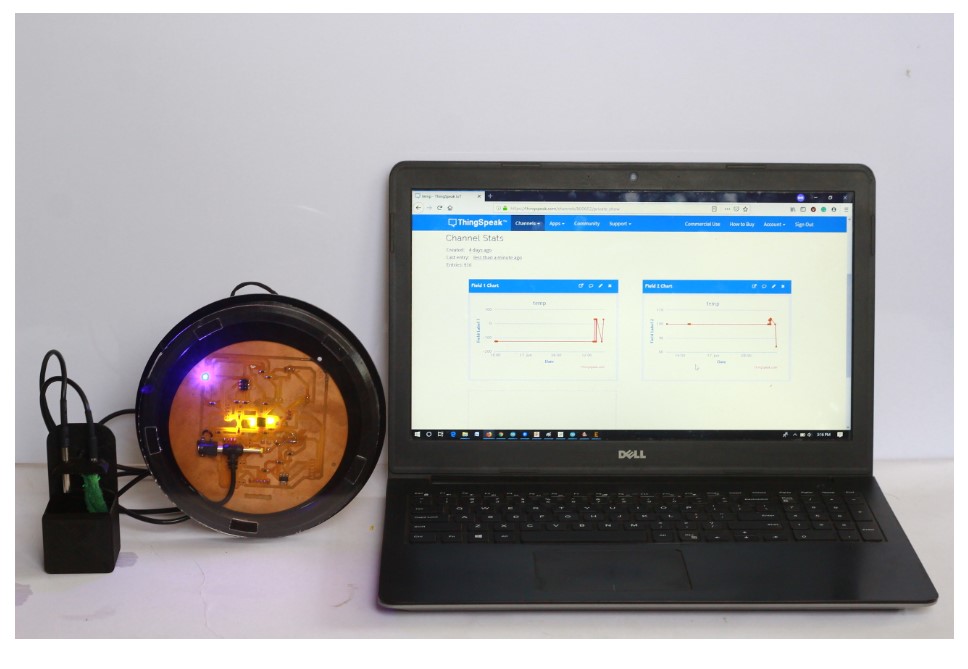
3.Thingspeak:
ThingSpeak is an IoT analytics platform service that allows you to aggregate, visualize and analyze live data streams in the cloud. ThingSpeak provides instant visualizations of data posted by your devices to ThingSpeak. With the ability to execute MATLAB® code in ThingSpeak we can perform online analysis and processing of the data as it comes in. ThingSpeak is often used for prototyping and proof of concept IoT systems that require analytics.
On Thingspeak we have to sign up and create channel which gives us details of channel ID and wifi key. This is to be used in the wifi code.
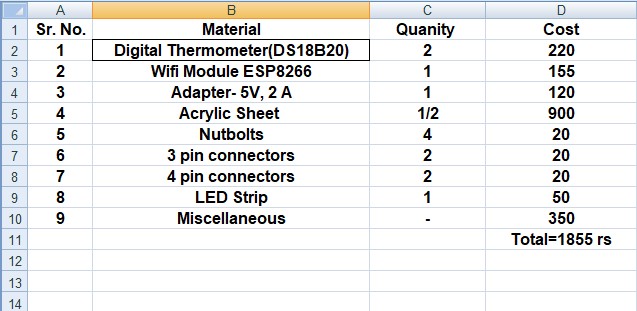
Bill of Material
I listed majority of things that will be used in final project. Added their cost to 1855rs which is well below the amount allowed for Fab Academy project.
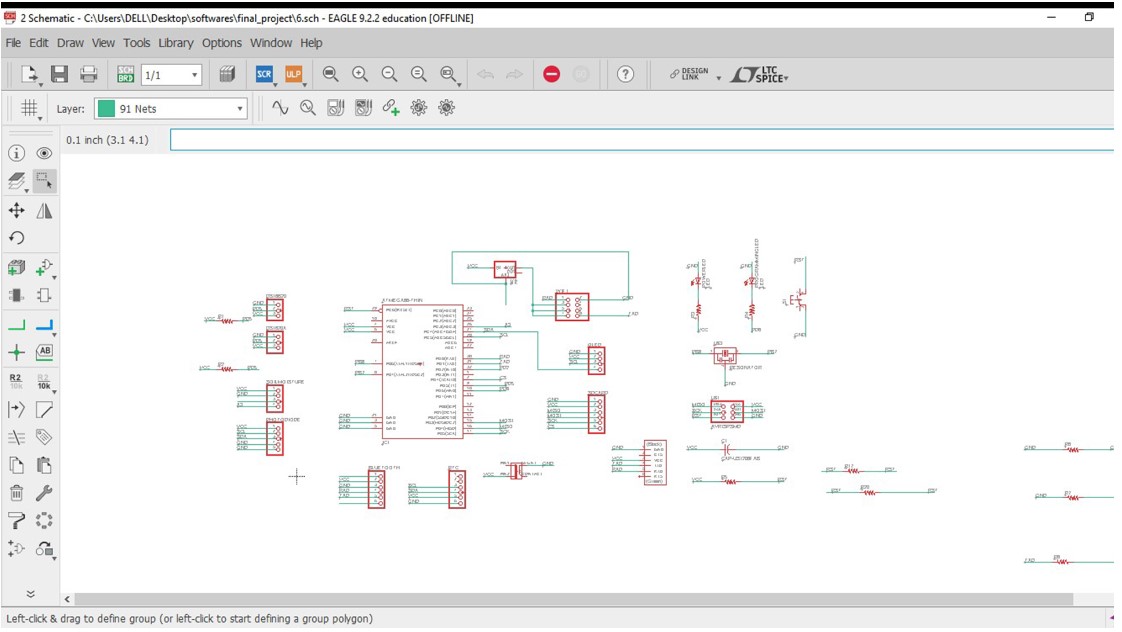
PCB Designing
A. Design:
In schematic design I have given provision for DS18B20 digital thermometer, soil moisture, photodiode, bluetooth, RTC, SD card, OLED, AVR ISP, Power LED, Programming LED, Wifi, resonator , Jack and FTDI.
Presently, the digital thermometer and wifi module will be used. But the plan is to collect the data for Pest Predictor so I have given other provisions of photodiode and soil moisture.
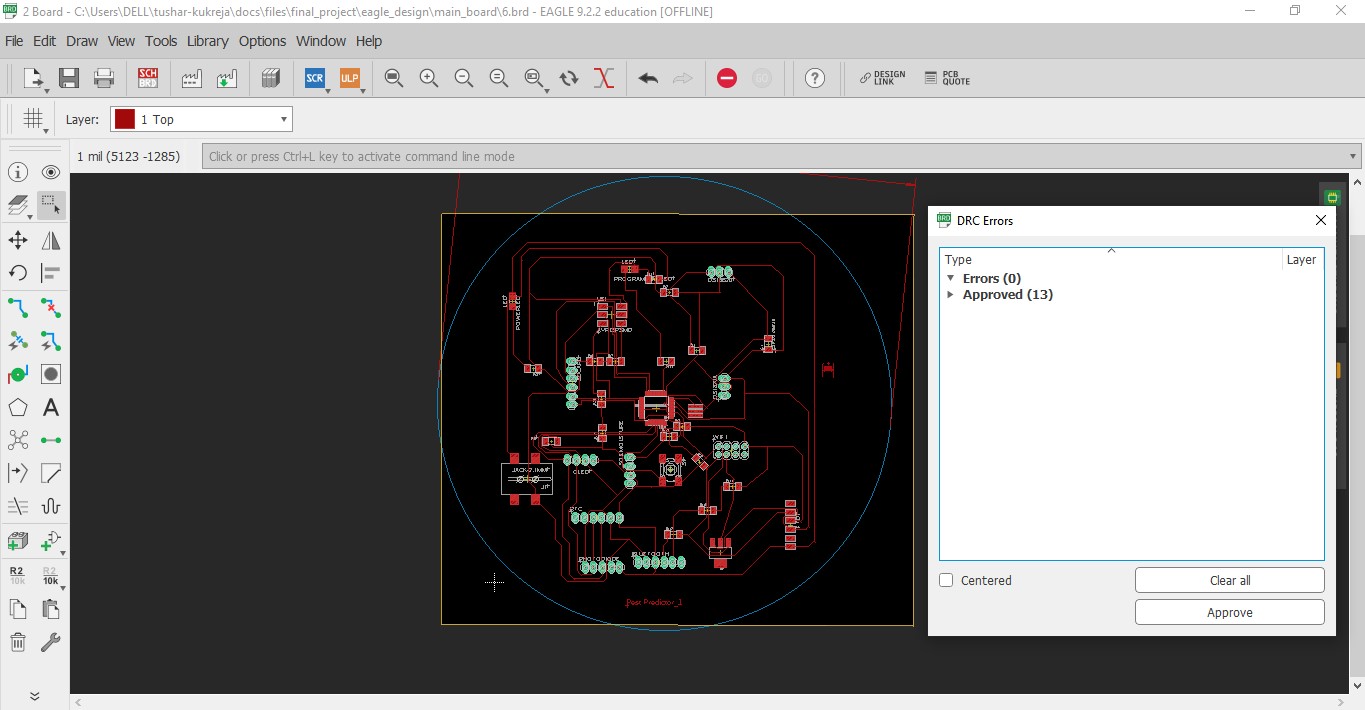
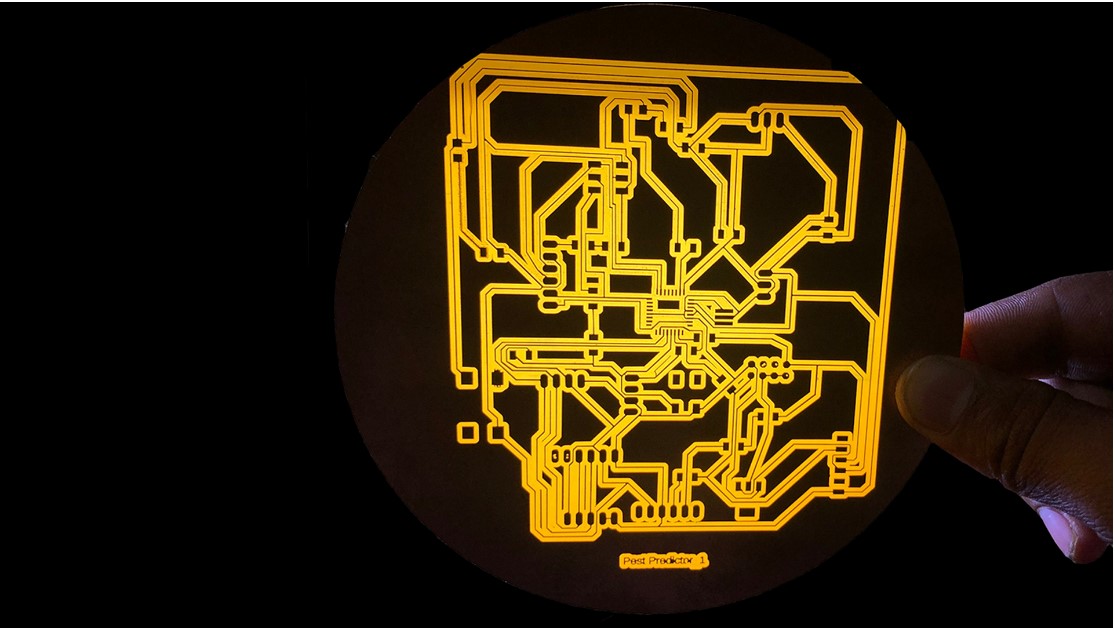
B. Board:
I tried auto-route feature but failed because it showed path in Blue for double sided PCB. So, manually routed the PCB. After the clear DRC check saved file to png and converted to rml file.
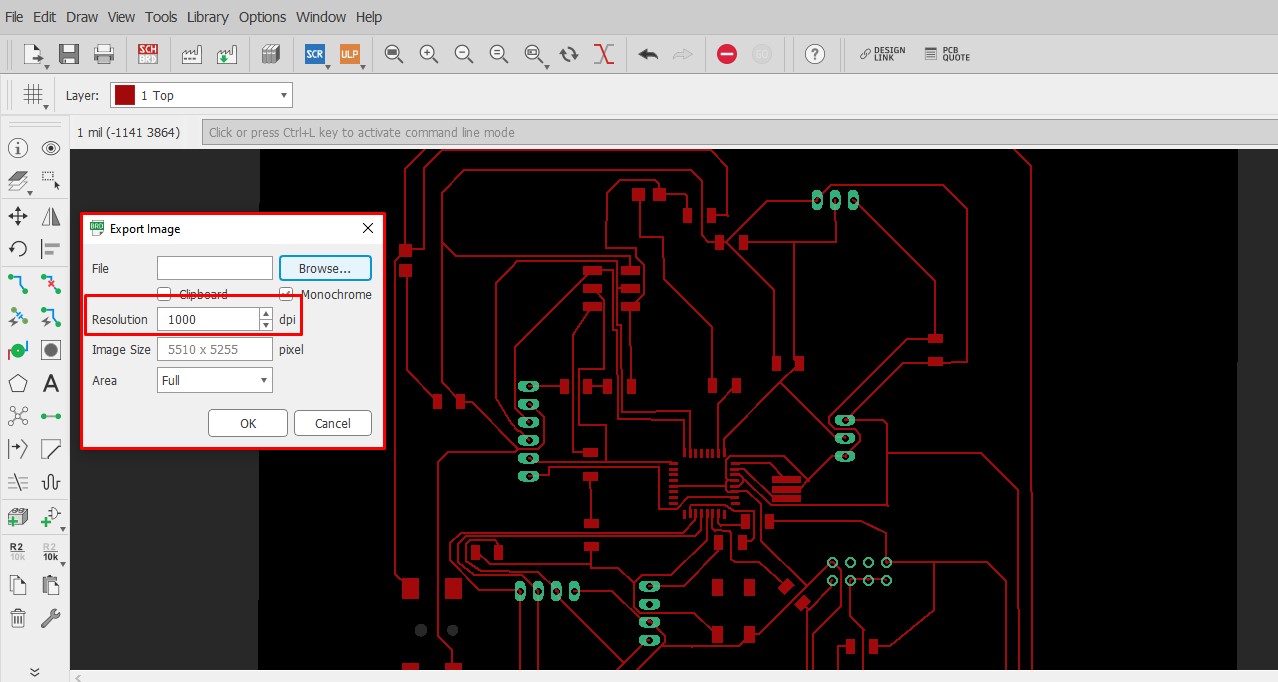
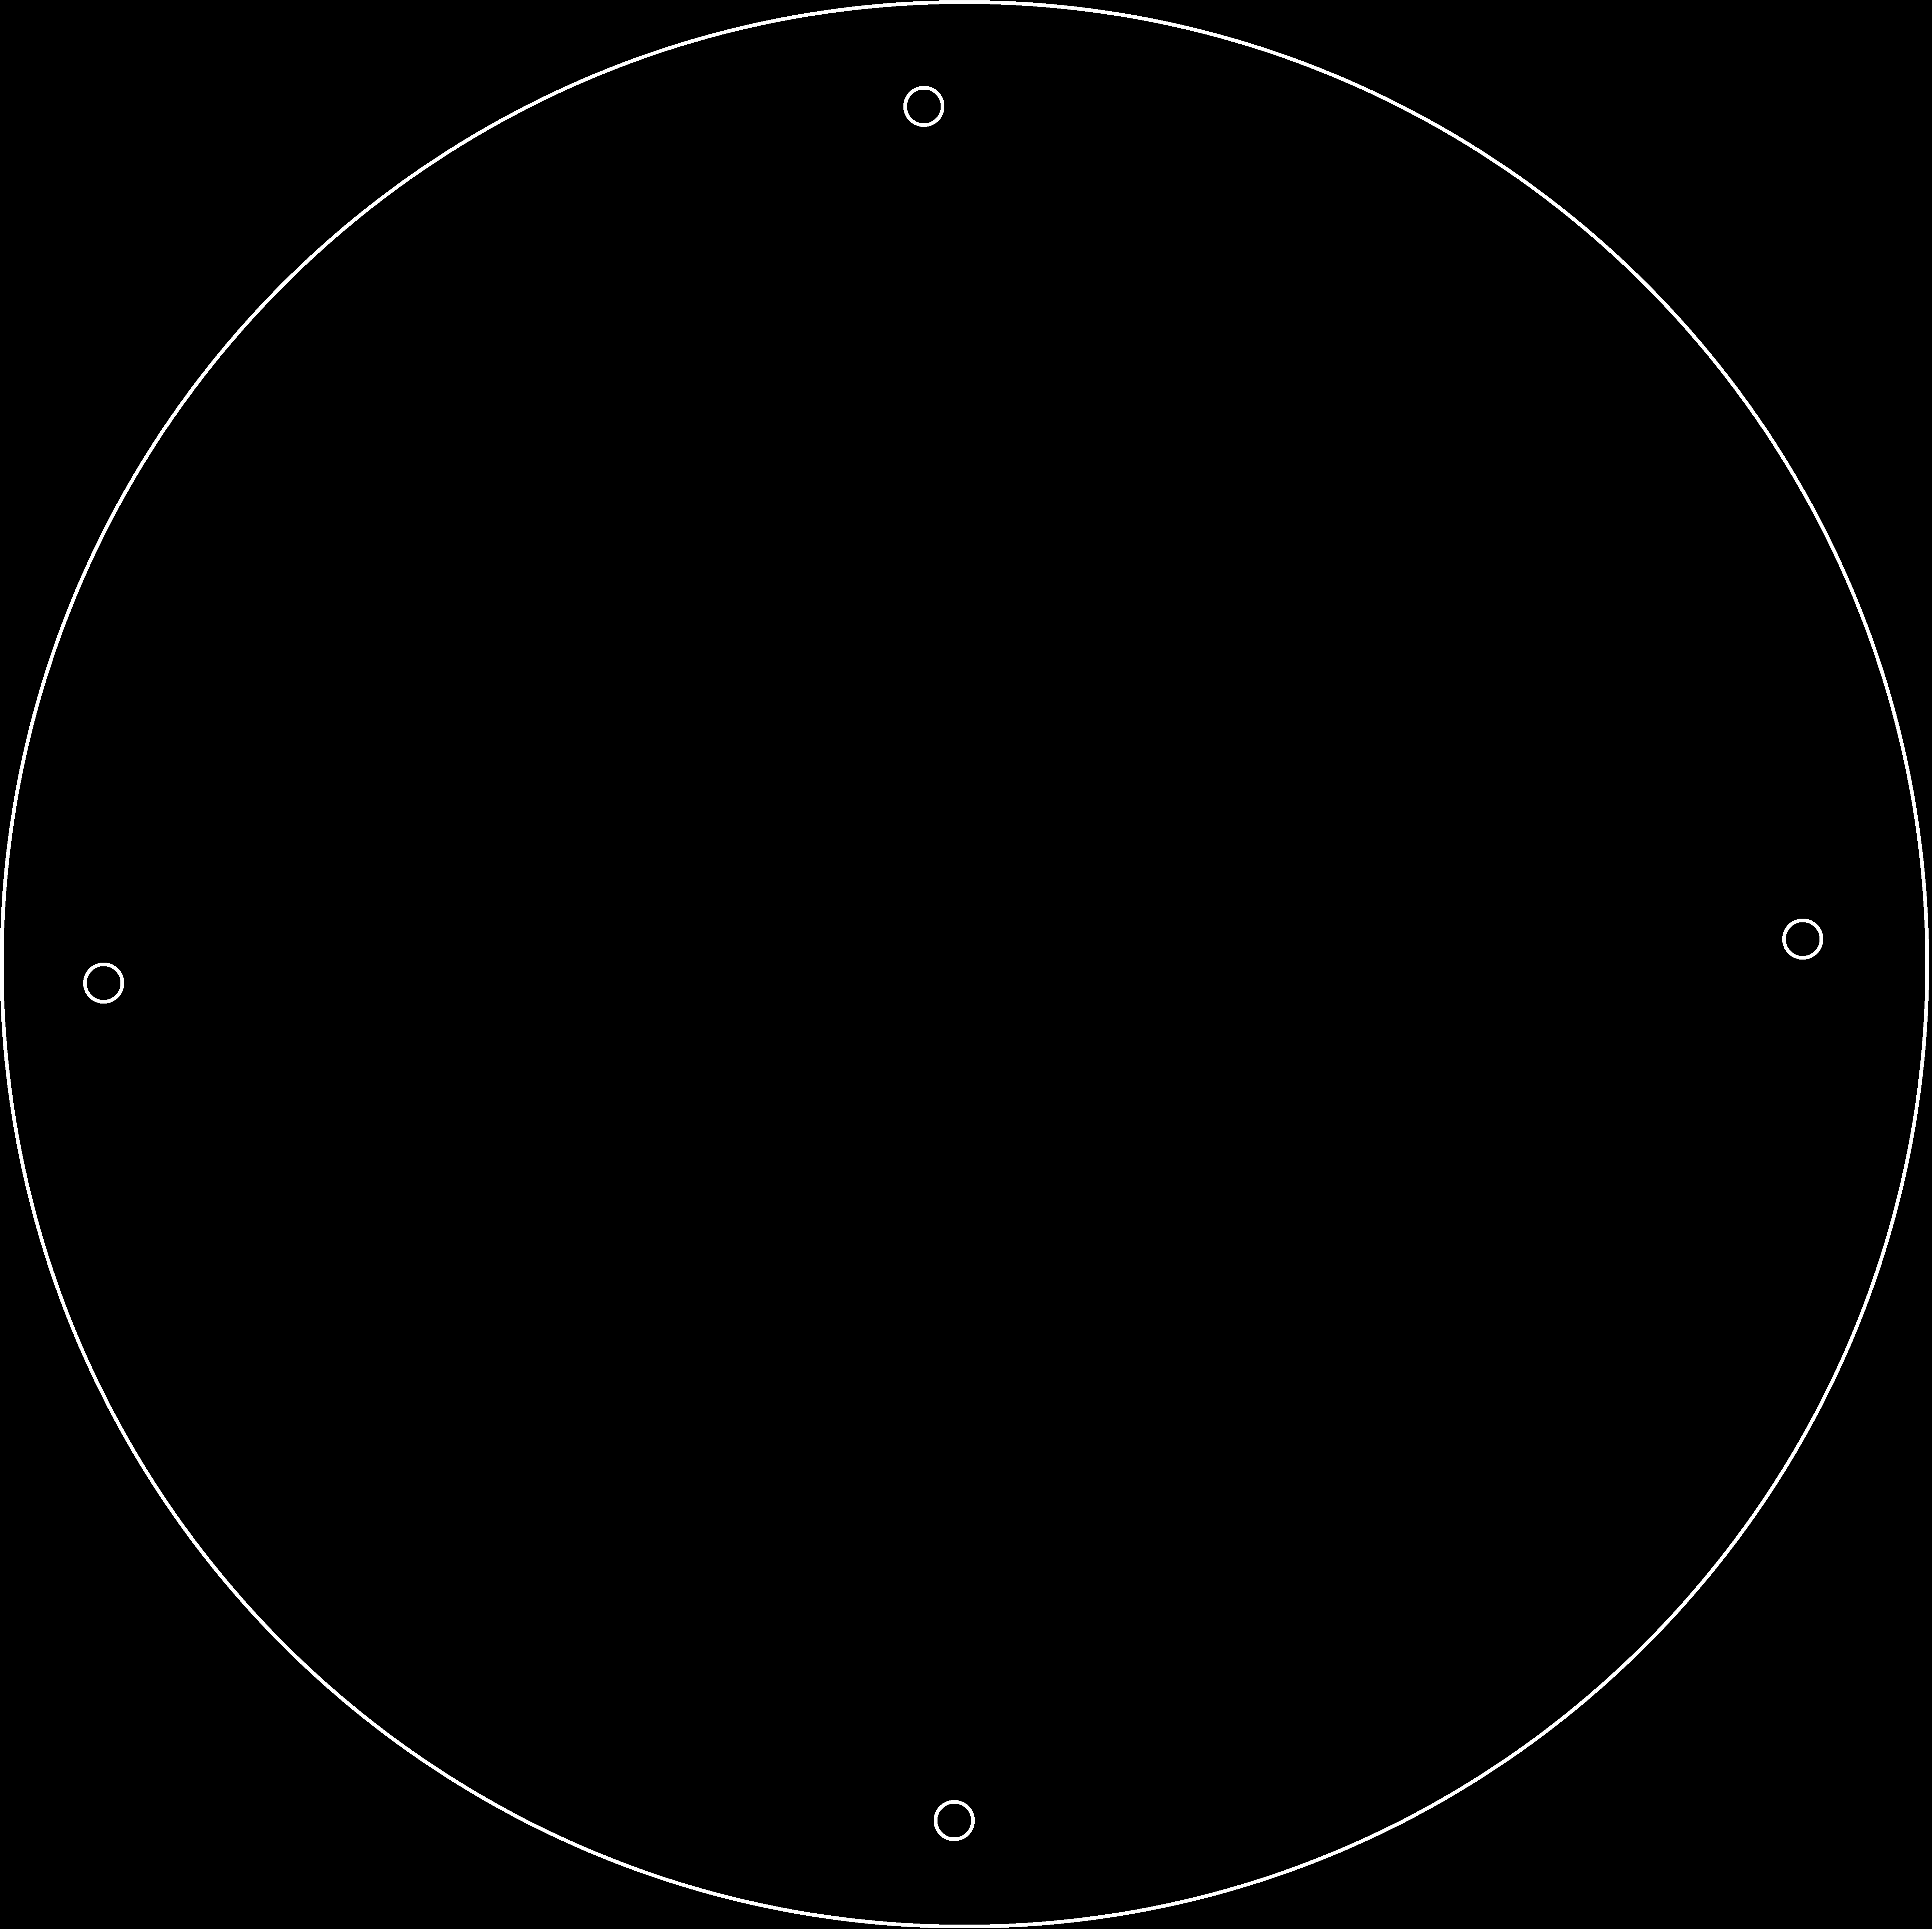
C. Image Export:
The final board and the outline were exported to save in .png format with 1000dpi resolution and monochrome image.

Eagle Design Files Available Here
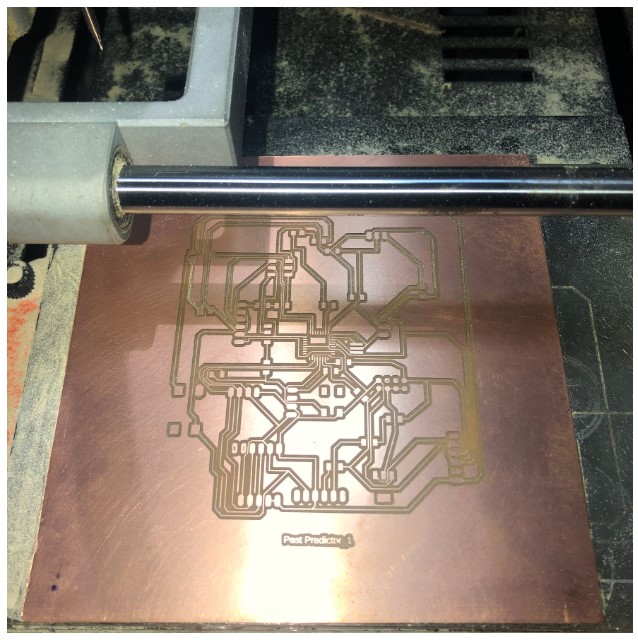
PCB Milling
A. Sticked FR1 board to sacrifical layer:
Double side tape sticked on the bottom of the FR1 board and I sticked it on the sacrifical layer.
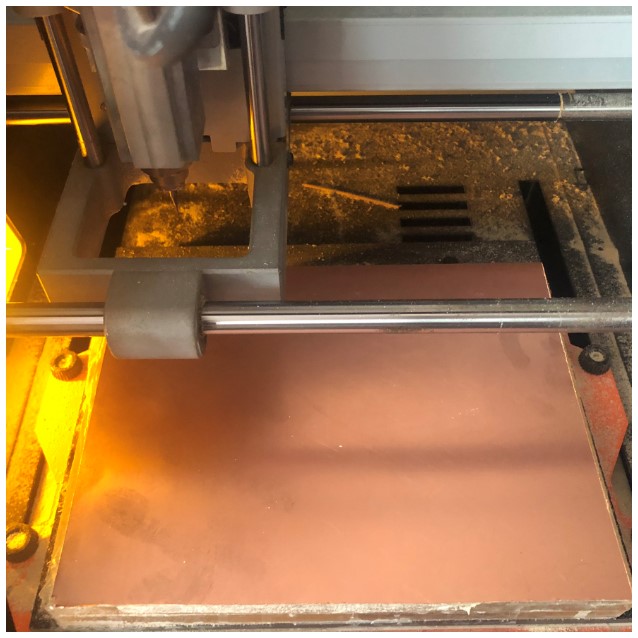
B. Traces:
The end mill moved and traced the board. The speed and spnidle value was visible on the software.
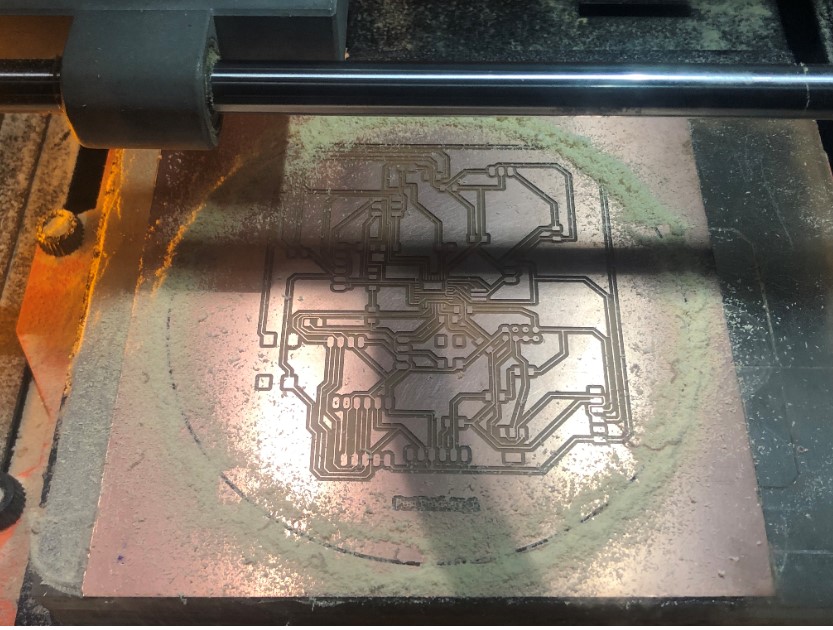
C. Outline:
The end mill was changed from 1/64 to 1/32 for cutting the outline.Keept the X,Y origin positions constant.The Z origin was marked again because the position may have slightly shifted while changing the end mill.
Eagle Design Files Available Here
Designing
1. Digital Thermometer Carrier
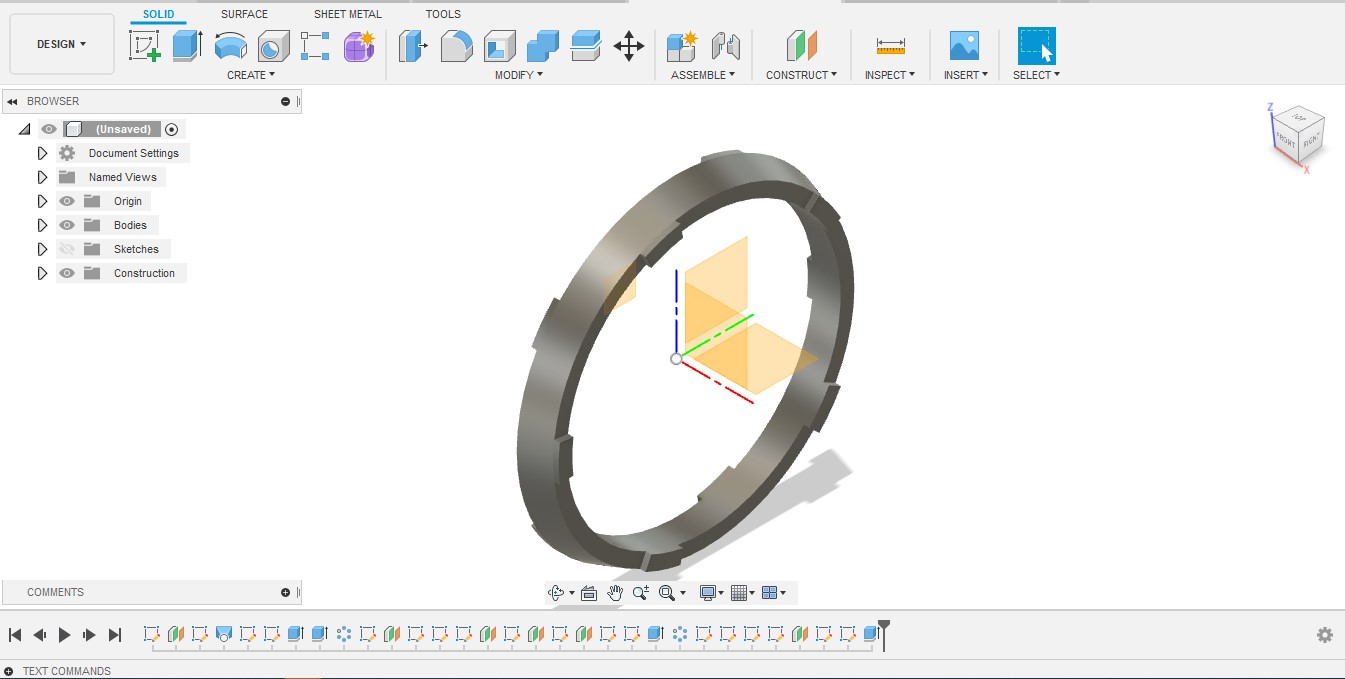
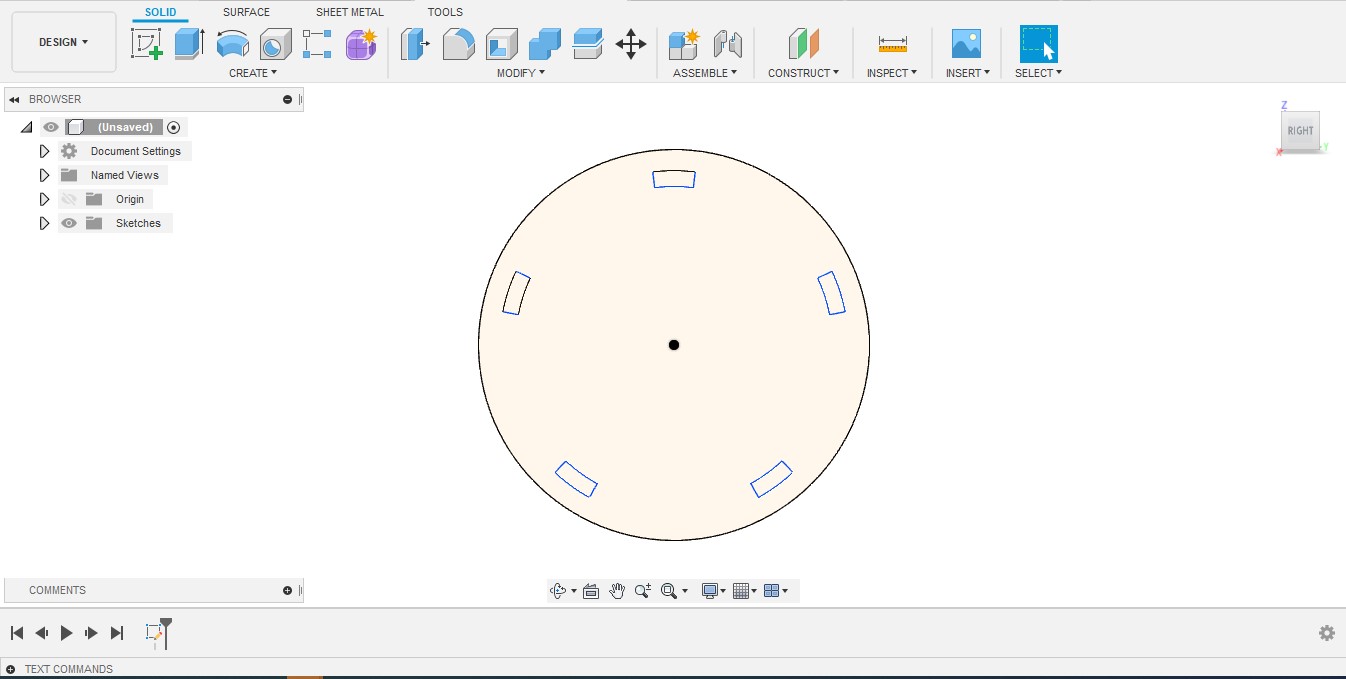
Have designed the holder for the thermometer to hold water in void space for wet bulb temperature. The thermometer will fit in the holes. And I have given it support from the back too. Create>Extrude.Converted sketch from 2D to 3D giving it thickness and saved as .stl file.
 Carrier Design Files Available Here
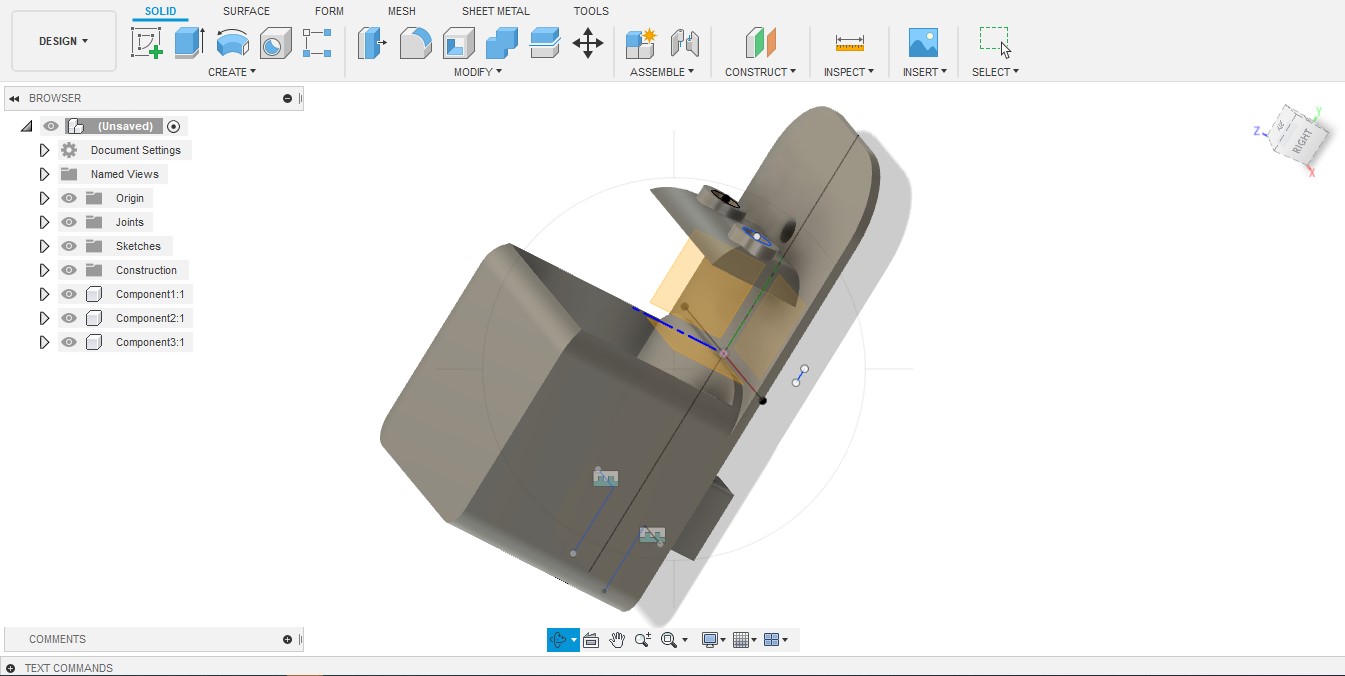
2. Project body
I selected the axis, viewport to single view and the display settings comfortable to me. Designed the top and back body 2D sketch for laser cut and middle body for 3D print to fit inbetween.

Project Body Design Files Available Here
Additive Manufacturing-3D printing
3D printed the important components of project on Fracktal Julia.
1. 3D Printing Digital Thermometer Carrier
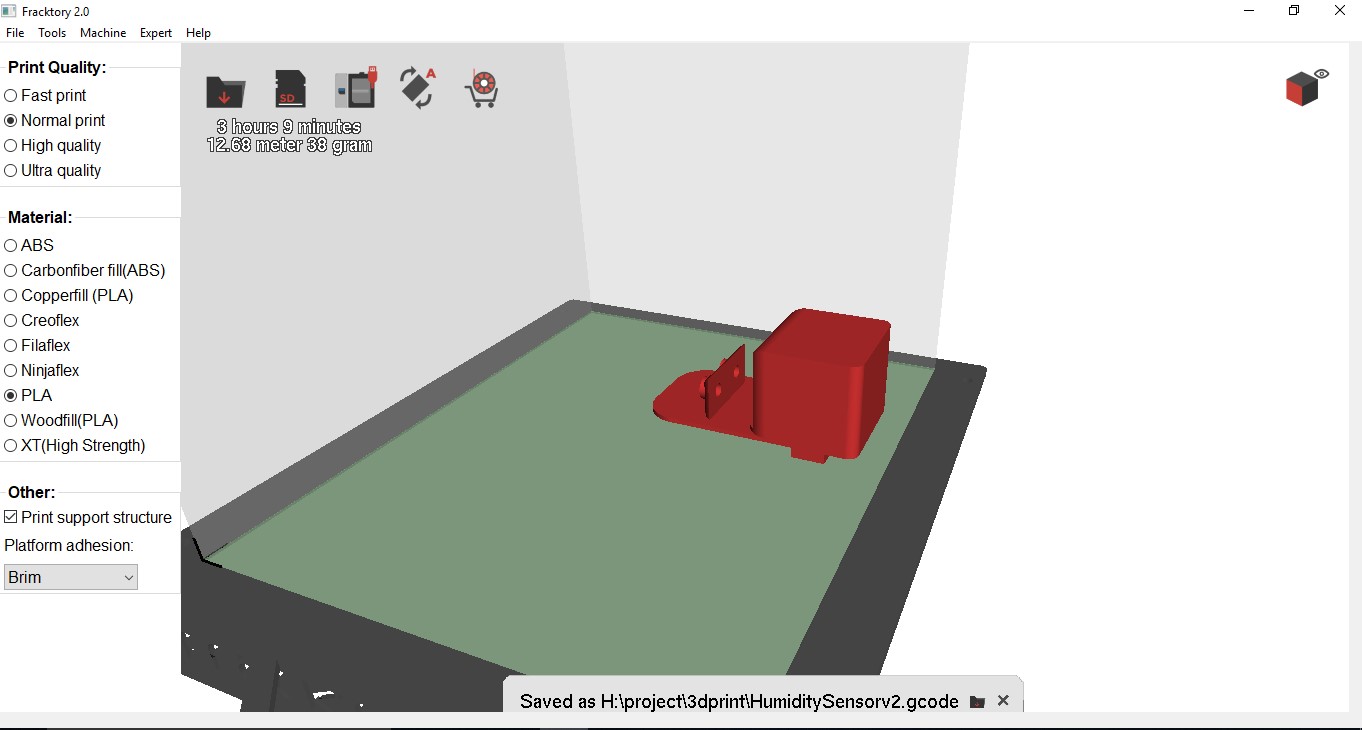
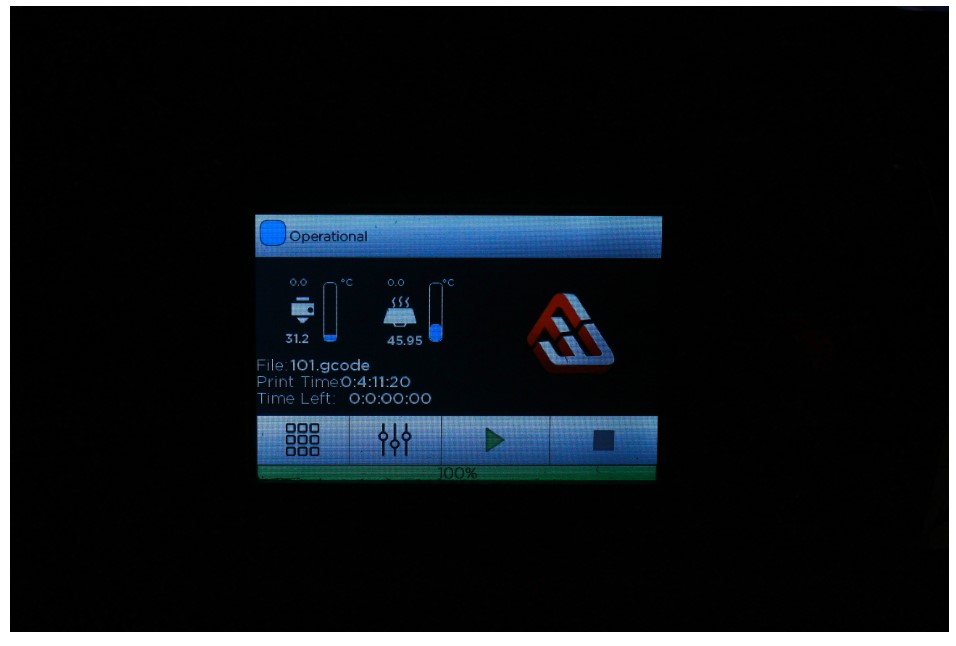
A. GCode: The “.stl” file is saved in “GCode” format which is legible to the 3D printing machine Fracktal Works-Julia.
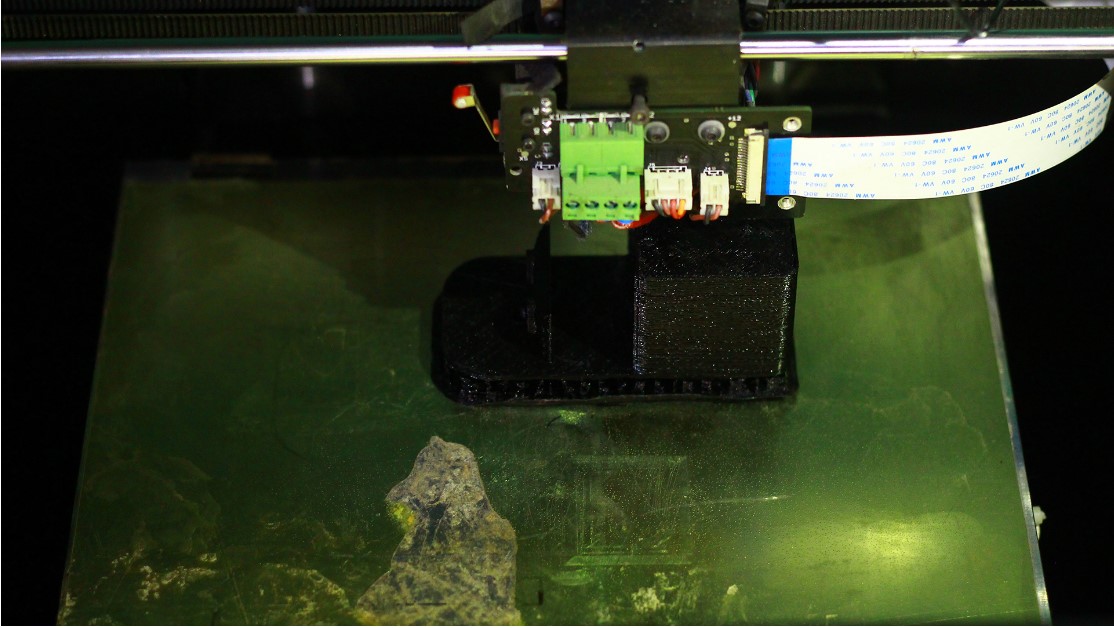
 B.Printing: The nozzle moved with PLA flowing out and slowly making the design on the hot bed.
2. 3D Printing Project Body
A. Printing: Printed the project body without support.
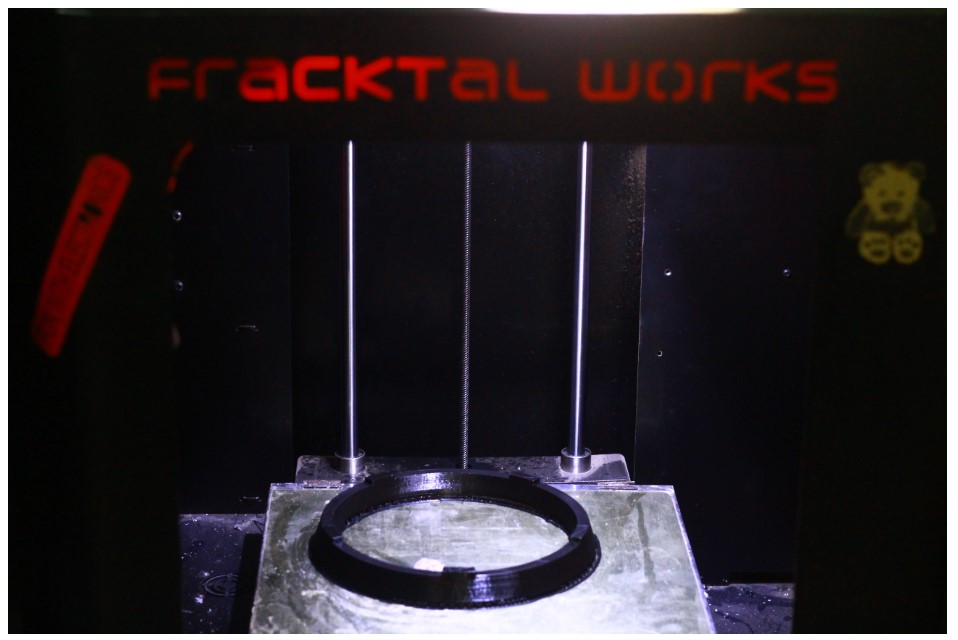 B. Time Required: The file showed 4 hours 11 minutes for printing the middle part of the body. Further, the bed temperature was set to 90°C and nozzle temperature to 225°C.
 G-code Files Available Here
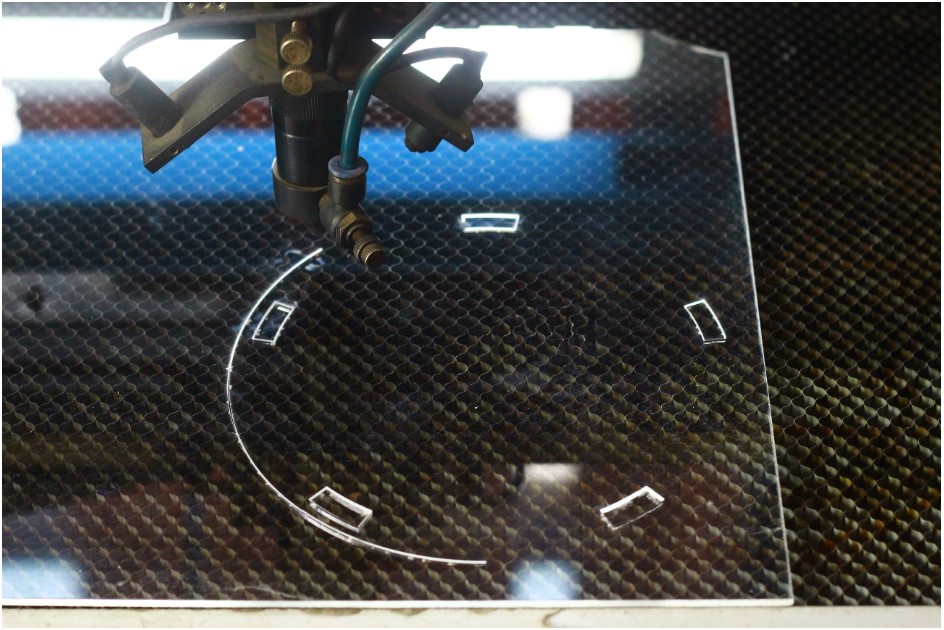
Subtractive Manufacturing-Laser Cut
Used RDWorks to specify the power and speed for cutting acrlyic. Set the “origin” and tested “frame” which gave me an approximation of the space of acrylic used. It was absolute pleasure to watch the back and top body being cut by CO2 laser.
Programming
1. Code
In week 11- Input Devices weekly project I had written the code for digital thermometer showing data on serial monitor. Further, in Week 12-Output Devices the data is shown on OLED.
For the final project I have built further on these 2 weeks to send the temperature and humidity data on Thingspeak.
// Weather Eye
// made by Tushar kukreja
// Date : 15/06/2019

#include <stdlib.h>
#include <OneWire.h>
#include <DallasTemperature.h>
#define ONE_WIRE_BUS 2
OneWire oneWire(ONE_WIRE_BUS);
DallasTemperature sensors(&oneWire);
#define SSID "SUHAS"     // "WiFi Name"
#define PASS "suhas123"       // "Password"
#define IP "184.106.153.149"// thingspeak.com ip

String msg = "GET /update?key=TKADPWBWNRVOF8RC"; //change it with your key...
float t;
int n;

String tempC;
String humC;

int error;

void setup()

{

  sensors.begin();
  Serial.begin(115200); // use default 115200.
  Serial.println("AT");
  delay(5000);
  if(Serial.find("OK")){
  connectWiFi();
  }

}

void loop(){


  // display a pixel in each corner of the screen
  start:
  error=0;

  sensors.requestTemperatures(); // Send the command to get temperature readings
  float t = sensors.getTempCByIndex(0);


// Serial.println(sensors.getTempCByIndex(0));
   // You can have more than one DS18B20 on the same bus.
   // 0 refers to the first IC on the wire
  //delay(4000);
/********************************************************************/
  float u = sensors.getTempCByIndex(1);
  float d = ((17.502*t)/(240.97+t)); // Equation for Humidity
  float e = 2.7183;
  float g = 6.112*(pow(e,d));
  float j = ((17.502*u)/(240.97+u));
  float k = 2.7183;
  float m = 6.112*(pow(k,j));
  int n = (m-(0.6687*(1+0.00115*u)*(t-u)))/g*100; //Humidity upto 2 digit
  delay(2000);
  char buffer[10];
  tempC = dtostrf(t, 4, 1, buffer);
  humC = dtostrf(n, 4, 1, buffer);

  updateTemp();
  //delay(2000);

 // display.begin(SSD1306_SWITCHCAPVCC, 0x3C);


  if (error==1){

    goto start;
}
delay(5000);

}


void updateTemp(){

  String cmd = "AT+CIPSTART=\"TCP\",\"";

  cmd += IP;

  cmd += "\",80";

  Serial.println(cmd);

  delay(2000);


  if(Serial.find("Error")){

    return;

  }

  cmd = msg ;

  cmd += "&field1=";

  cmd += tempC;

  cmd += "&field2=";

  cmd += humC;

  cmd += "\r\n";

  Serial.print("AT+CIPSEND=");

  Serial.println(cmd.length());

  if(Serial.find(">")){

    Serial.print(cmd);

  }

  else{

    Serial.println("AT+CIPCLOSE");

    //Resend...

    error=1;

  }

}

  boolean connectWiFi(){

  Serial.println("AT+CWMODE=1");

  delay(2000);

  String cmd="AT+CWJAP=\"";

  cmd+=SSID;

  cmd+="\",\"";

  cmd+=PASS;

  cmd+="\"";

  Serial.println(cmd);

  delay(5000);

  if(Serial.find("OK")){

    return true;

  }else{

    return false;

  }

}
2. Code Explaination
A. To communicate microcontroller with the ESP8266 wifi module have used set of AT commands.
B. Microcontroller communicates with ESP8266-01 wifi module using UART having specified Baud rate 115200.
C. The 3 libraries included are stdlib, OneWire and Dallas Temperature.
D. The SSID and Password of the internet connection to which the wifi module will connect have been defined.
E. IP of Thingspeak has been defined to the channel which will recieve the data from the wifi.
F. Float t is the dry bulb temperature.
g. Int n is the calculated relative humidity.
3. Programme Uploading
Uploaded the programme from Arduino IDE with programmmer- Arduino ISP, Board-Atmega 328, Processor-Atmega 328P.
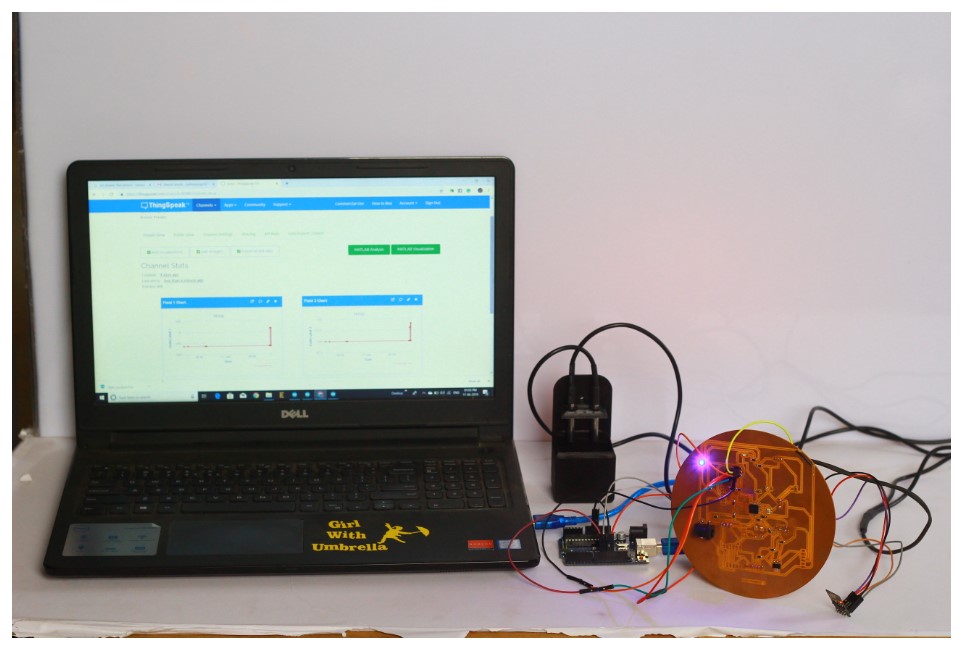
Cloud
Made channel on Thingspeak which recieved data of every minute and made graphs of humidity and tempeartaure.
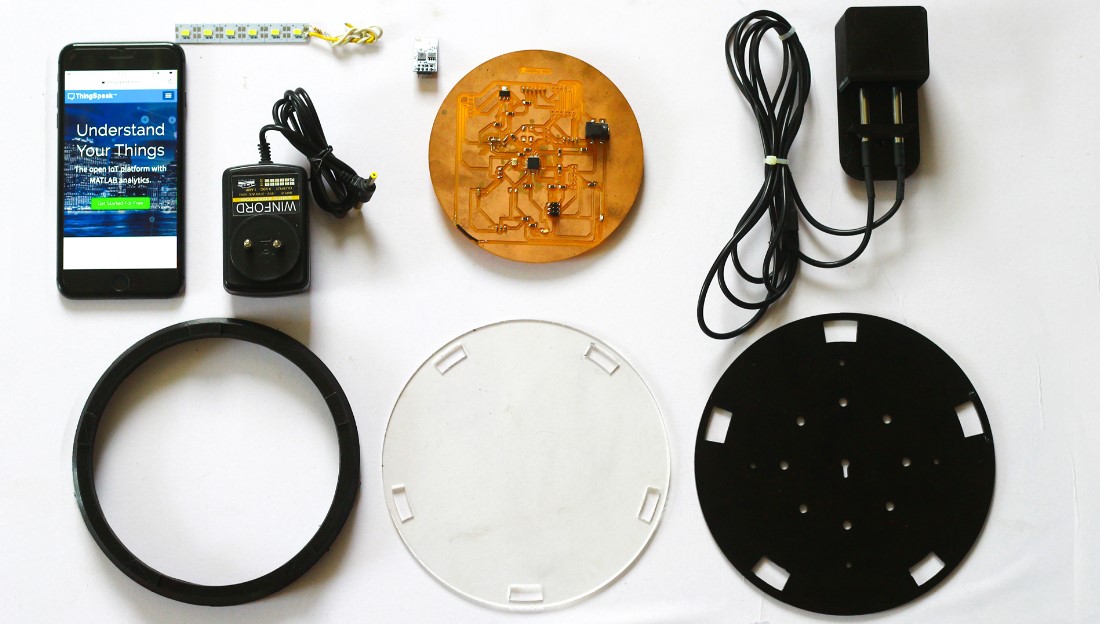
Components and Assmebly 
The picture below shows all the components of “Weather Eye” which I assmebled and were ready to be installed in field.
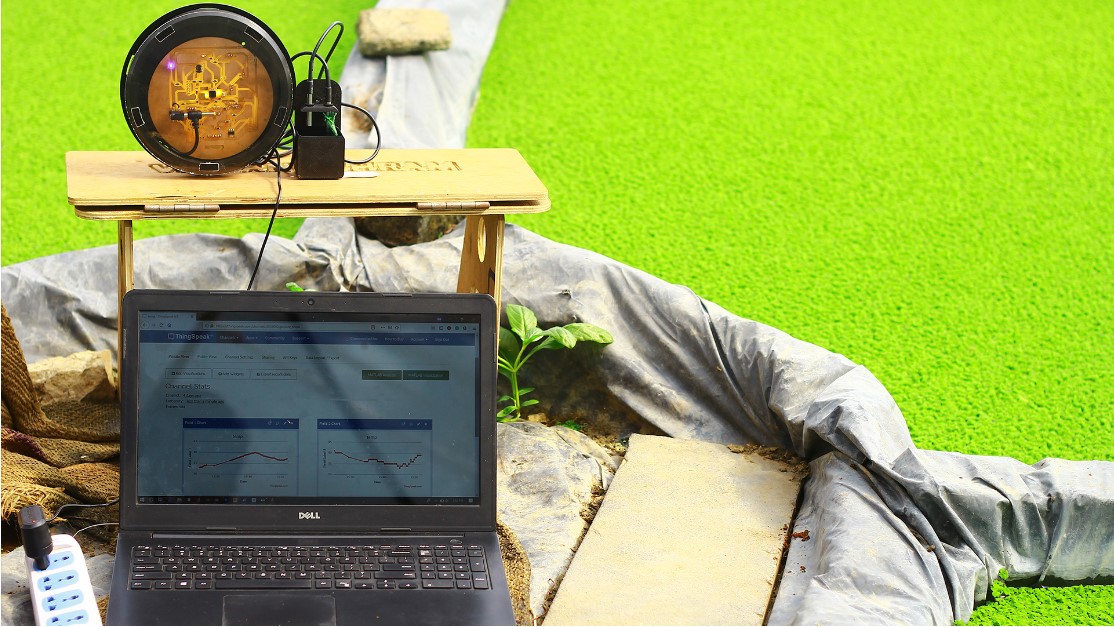
Installation in Azolla Polyhouse
“Weather Eye” was successfully deploed in Azolla and Capsicum Polyhouse at Vigyan Ashram. In Azolla polyhouse it is important to monitor the temperature and humidity data for its growth. Further, in Capsicum Polyhouse it will be observed under what atmospheric condition does the crop get pest attack.
License
As part of Week 19-Invention, Intellectual Property and Income I got Creative Commons license for my project.
Presentation:
Used the skills of Computer Aided Design Week to edit and make final slide in Photoshop. In movie maker software,compiled images and short videos/gifs of processes to make a minute video of entire project.