16. Interface and application programming
This week I wrote an application that interfaces with an output.
I controlled the 4plcc rgb led on a satsha kit I made.
Proccessing & Arduino IDE - RGB LED application
I controlled this output programming the satsha kit on Arduino IDE for variable functions defined in Processing and so making a communication between these softwares. I could test this varibles by serial with Processing interface.
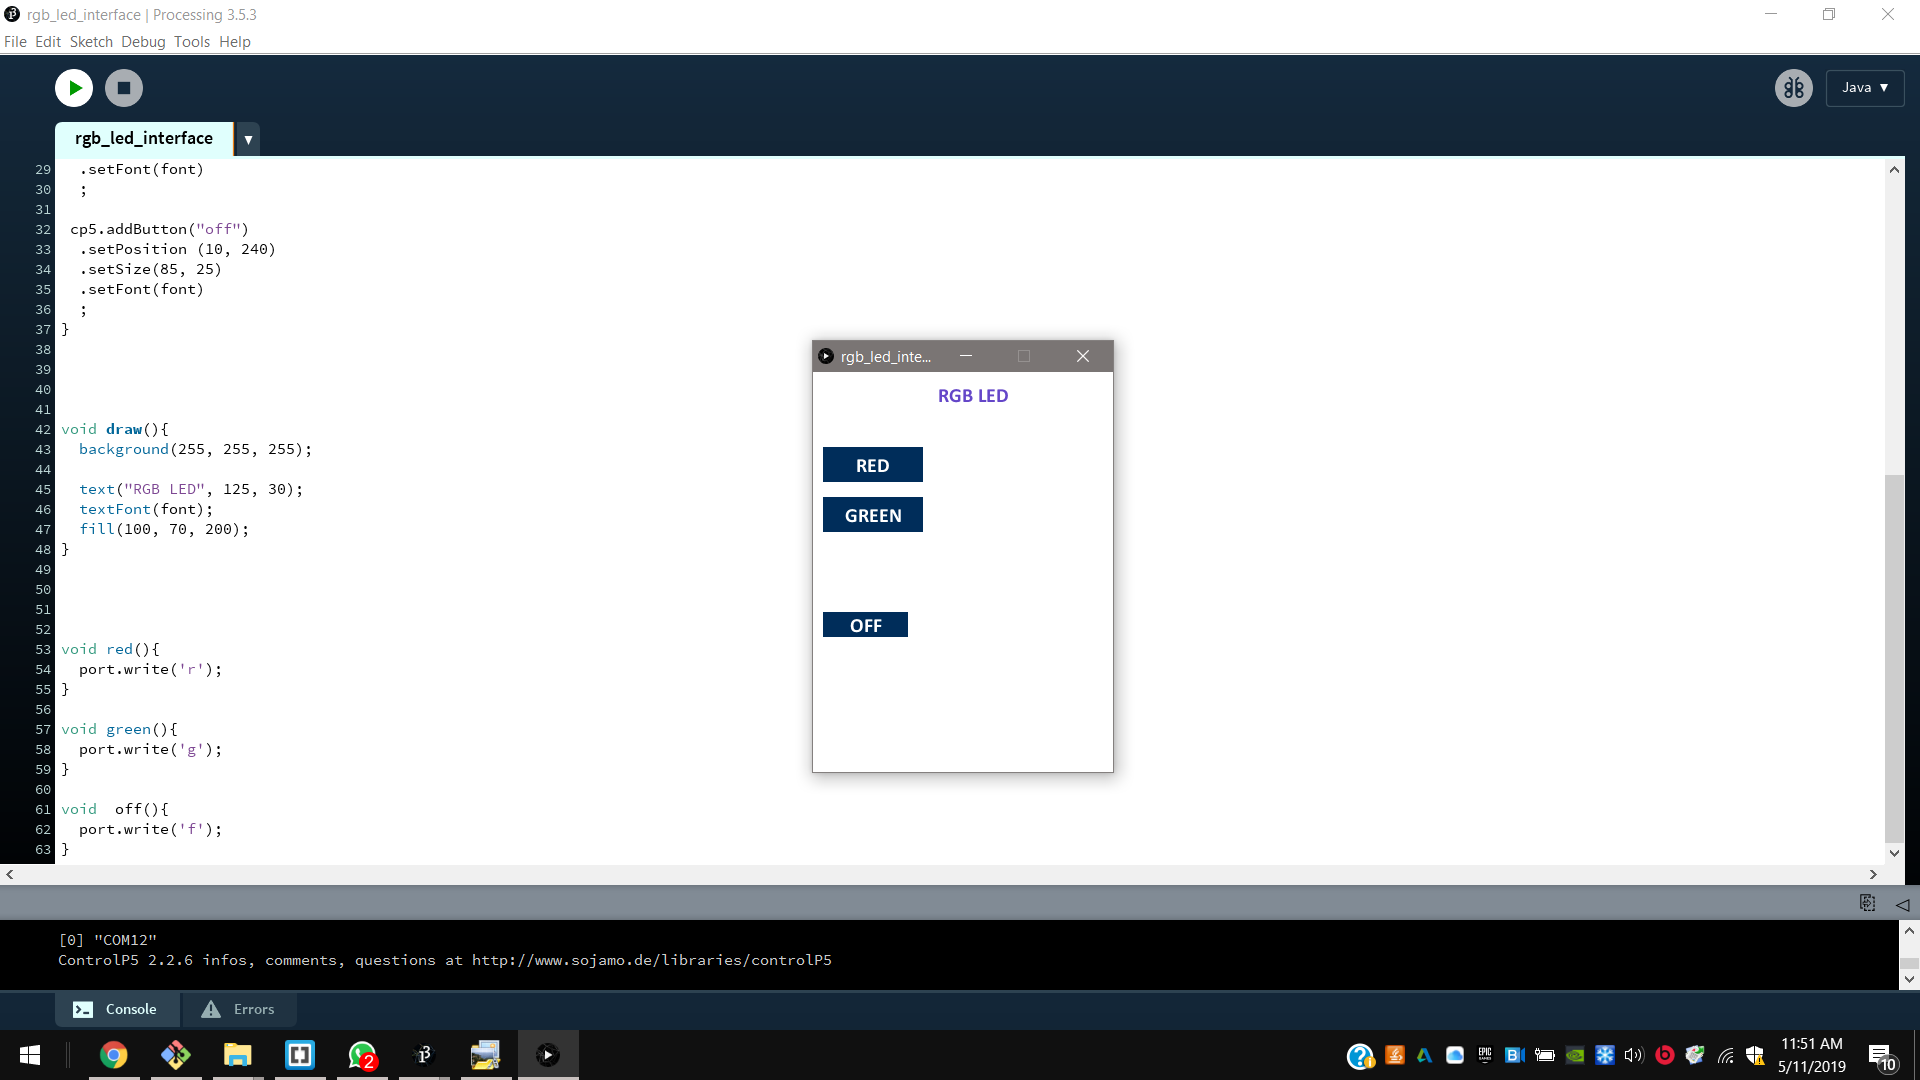
Processing
1st I downloaded [Processing] on my computer and I installed it; The I opened both;
2nd I started approaching to it including GUI libraries, in “example” window, “add library”, to make graphic interfaces. I installed and included the ControlP5 library and I included processing.serial library too, included in Processing already;
3rd so I set size, colors and text of my LED-interface, including buttons too;
4th and respectively on Processing and Arduino IDE I defined for each button variables to send to Arduino.

import processing.serial.*;    // including serial library
Serial port;

import controlP5.*;            // including Controll
ControlP5 cp5;                 // making the interface's window
PFont font;                    // including a new font


void setup(){

size(300, 400);                          //window size, (width, height)
printArray(Serial.list());               //prints all available serial ports
port = new Serial(this, "COM12");        // defining serial port


cp5 = new ControlP5(this);               // ..adding buttons to the interface's window
font = createFont("calibri bold", 20);   // features of the included font

 cp5.addButton("red")                     //"red" is the name of this button
  .setPosition (10, 75)                   // coordinates
  .setSize(100, 35)
  .setFont(font)
  ;

  cp5.addButton("green")                     //"green" is the name of this button
  .setPosition (10, 75)                      // coordinates
  .setSize(100, 35)
  .setFont(font)
  ;

  cp5.addButton("off")                       //"off" is the name of this button
  .setPosition (10, 75)                      // coordinates
  .setSize(100, 35)
  .setFont(font)
  ;
}


void draw(){
  background(255, 255, 255);                   // color for the interface's window

  text("RGB LED", 125, 30);                    // main text and coordinates of the interface's window
  textFont(font);
  fill(100, 70, 200);                          // color for the main text of the interface's window
}


void red(){
  port.write('r');                              //... so respectively, pressing buttons Arduino reads functions defined on IDE.
}

void green(){
  port.write('g');
}

void  off(){
  port.write('f');
}
Arduino IDE
1st On Arduino IDE I defined pins;
2nd I defined the serial communication;
3rd I defined the Serial.read function;
4th and I programmed the satsha kit to respectively turn on my common cathode LEDs reading these variables.
To turn on my common cathode 4plcc LED I had to set respective digitalWrite fuctions as the opposite LOW state…

#define GREEN 10           //defining pins
#define RED 11


void setup(){


  pinMode(GREEN, OUTPUT);   //setting pins as outputs
  pinMode(RED, OUTPUT);

  Serial.begin(9600);    //start serial communication @9600 bps
  }

void loop(){

  if(Serial.available()){            //if serial communication is available,

    char val = Serial.read();        //respectively reads

    if(val == 'g'){                  //..if Arduino reads 'g', turn on LED on pin 10
      digitalWrite(GREEN, LOW);
      }
    if(val == 'r'){                       //..if Arduino reads 'r', turn on LED on pin 10
      digitalWrite(RED, LOW);
      }
    if(val == 'f'){                       //..if Arduino reads 'f', turn off LEDs on pin 10, 11.
      digitalWrite(GREEN, HIGH);
      digitalWrite(RED, HIGH);
      }
    }
  }
Reading the application by serial
So then I used an Arduino UNO to charge the satsha kit and a 5V power supply for the serial communication with a breadboard; and I connected 5V power supply’s RX and TX to the opposite ones of my satsha kit.
I runt the processing interface and tested it.