
Things to do :
- Build a personal site
- Personal presentation
- Describe my final project
- Documentation of the week
- Upload it to the class archive
- Work through a git tutorial
Installation of Linux Mint
I always used Windows. For the Fab Academy I decided to move on Linux. Installing Linux Mint wasn't difficult.I read and follow step by the installation guide
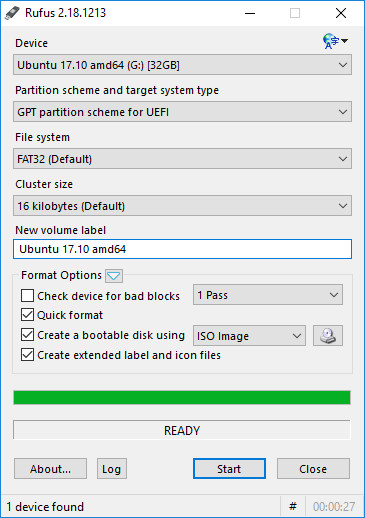
I didn't follow the previous guide for the step Create the bootable media because it takes for granted some information not granted.
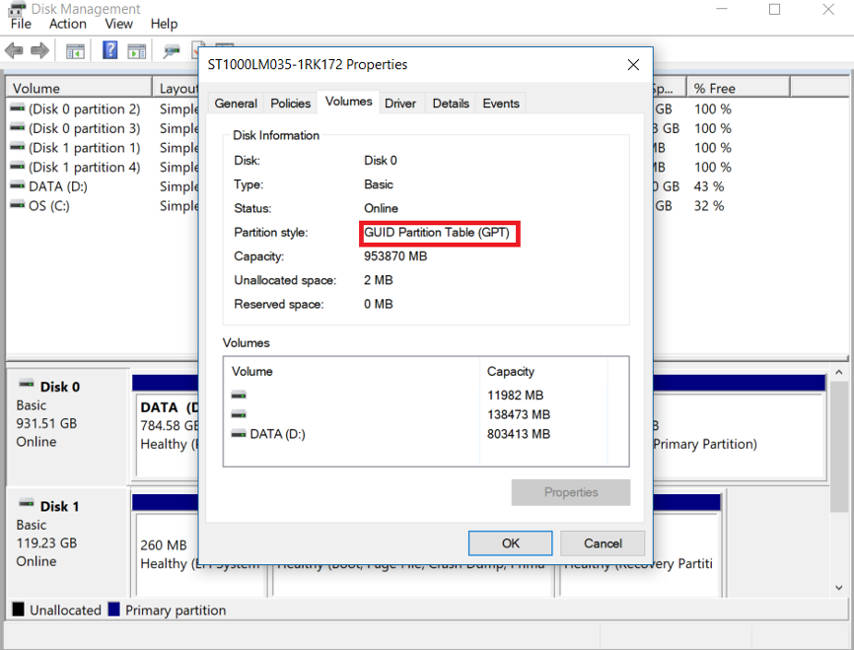
Checked the partition type of my HD (MBR or GPT) by the Disk Manager
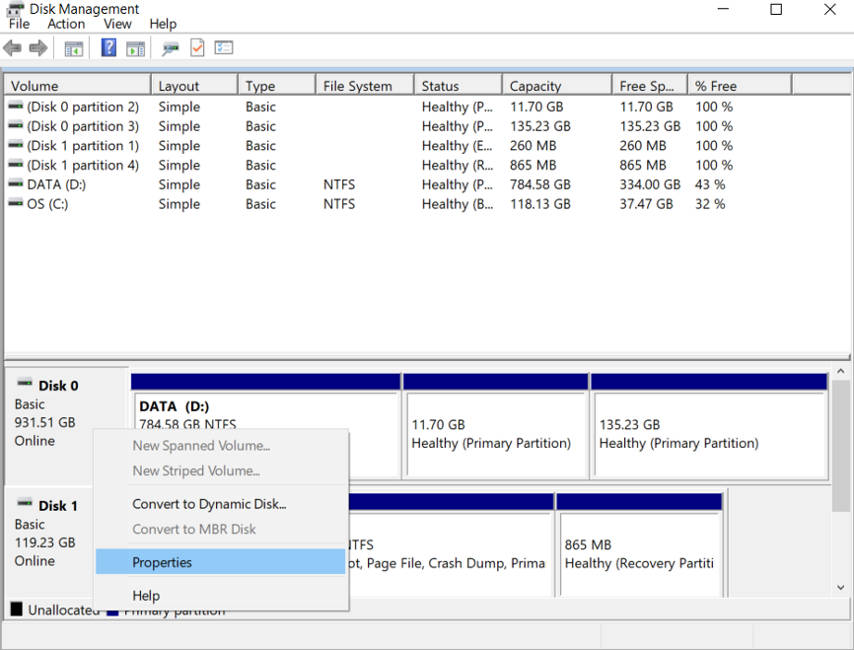
Right button on the Disk : Properties -> Volume
Downloaded Rufus and used it to create the bootable USB pen (Images from the official site of Rufus)
GIT and version control
I have 3 exams left before the degree in computer engeneering but I didn't know nothing about GIT and version control until the first lesson of FabAcademy 2018. Better late than never. VCS gives you the opportunity to :
- Backup and Restore. Files are saved as they are edited, and you can jump to any moment in time.
- Synchronization. Lets people share files and stay up-to-date with the latest version
- Short-term undo. Throw away your changes and go back to the last known good version in the database.
- Long-term undo. Sometimes we mess up bad. Suppose you made a change a year ago, and it had a bug. Jump back to the old version, and see what change was made that day.
- Track Changes. As files are updated, you can leave messages explaining why the change happened (stored in the VCS, not the file). This makes it easy to see how a file is evolving over time, and why.
- Track Ownership. A VCS tags every change with the name of the person who made it.
- Sandboxing, or insurance against yourself. Making a big change? You can make temporary changes in an isolated area, test and work out the kinks before checking in your changes.
- Branching and merging. A larger sandbox. You can branch a copy of your code into a separate area and modify it in isolation (tracking changes separately). Later, you can merge your work back into the common area
You can't build up a project whitout using a VCS unless you want to lose your mind.This is a fantastic tutorial
Installation:
opened the shell andTo autenticate yourself while loading or downloading files, you need a SSH key (Secure Shell Key)
I created a new folder called FabAcademy that will be my repositories in my pc and then i clone my repo stored in gitlab.fabcloud.org
Building the website
I knew something about HTML,css and js when I was in hight school,but these 4 years without reviewing anything have removed everything.I wanted to write some lines of code just for training before moving on some framework like bootstrap.I restarted by reading some tutorials online ( like this for HTML5 , or this for CSS).My plans are to move on bootstrap and learn something about it.I found very usefull this video to understand how the layout of bootstrap works and how you can do it yourself.
Once I was ready I started to build up a simple website for my FabAcademy documentation composed by a navbar at the top of every page and a 3x3 grid structure for the rest of the contents :
My Template :
And the css :
Regarding the text Editor I'm using Sublime Text and I'm pretty satisfied about it.
Update 28/05/2018
Following the advice of my istructor I wanted to make the image zoomable.To do this I wanted to use only css and the only event that could help me were hover or active.The first one works when the cursor pass over something , the second one ( active) works when the left button is held over something. I choosed to use the active event and after reading this tutorial I wrote this line of css:
End of the Update
I saved all the file in my local repo and added to git
I used
Then i commited and pushed all the stuff in my repo online.
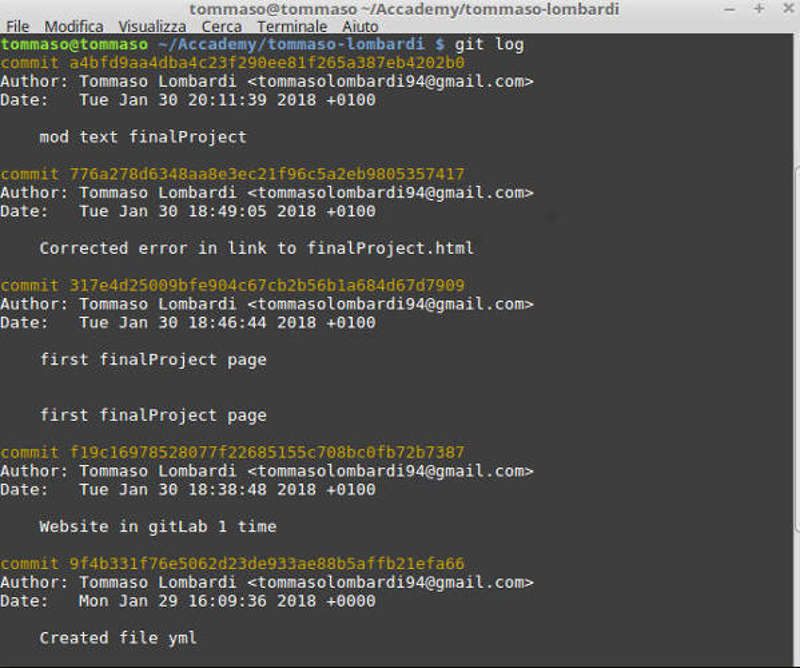
To see the commits I made :
Tips: Press q to exit from the page that the command opens
Example of the iter to follow when someone make a modification :
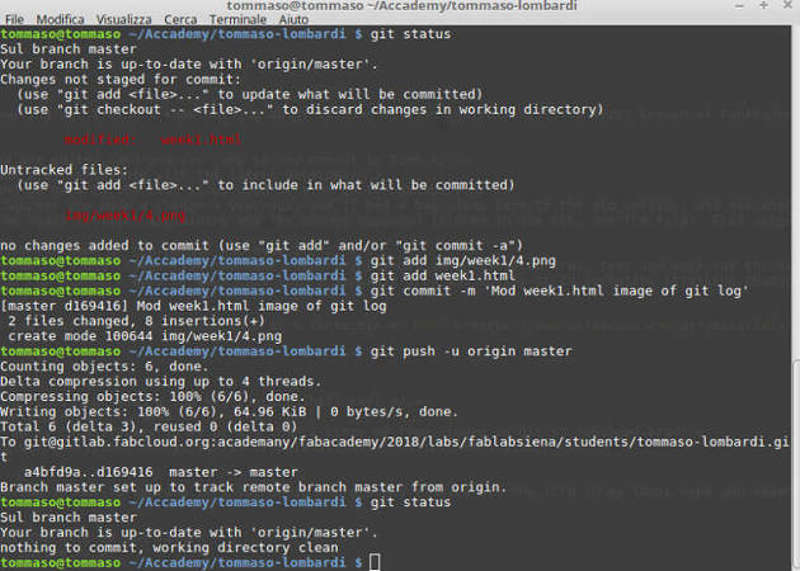
At the end if git status gives you that answer means that everything is allright
