2. Project management
This week there is a lot to take. Not only plan and sketch a possible final project, but also experiment and get used to some tools that we will need along the way. So let's dive into it!
Tasks for the week
- Make a website and describe how you did it.
- Intruduce myself in about page.
- Document steps for uploading files to archive.
- Push to the class archive.
- Sign and upload the student agreement.
Tools of the trade
Linux, Terminal, Bash, GNU nano, Vim, Git, Markdown, MkDocs, Material... and the list goes on forever and fast, as any of Neil's lectures. My first thought was to stay on the safe side: do not take unnecesary risks. But then... what fun would my Fab Academy semester be?
So, let's get hands down to the task, and let's document as you go, even though for me sounds more like, play it by ear, when you don't even know how to play.
Gitlab and Git
Ok, it is true. This Git section was not documented on the fly. But I had to set up Git and clone the repo before being able to edit it locally. Yes, I know I could have document as I went, editing this file directly in GitLab. But, to be honest, I did not realize until a few hours later how much better is to really document as you go than taking notes and writing later.
Since I am working in Xubuntu, Git is already installed in the system. Besides this computer (air), I might use another two: the workstation that is in the basement (earth), and the laptop that URJC provided me with this year (dell). Those two computers run on Windows 10, so I installed the Windows Subsystem for Linux (WSL). Something really useful is the command explorer.exe which opens an explorer window with the current WSL directory. The Linux filesystem appears as a network connection, as if it is a different machine.
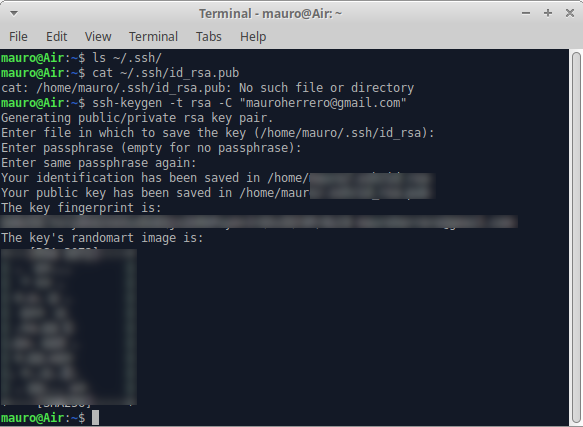
Ssh key for GitLab
I followed last year recitation instructions to add the ssh key in GitLab. Thanks, Kris & Viktor The procces was quite straightforward, and did it without errors. I generated two different keys, one for air and the other for dell; earth will have to wait.
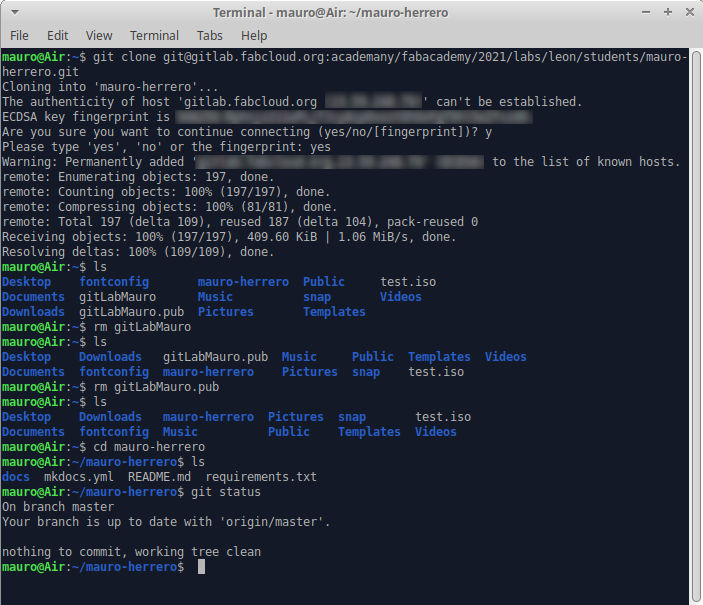
Getting Git to work
So drumroll, please, it's time to clone the repo: from my home directory, I type git clone and paste the address provided in GitLab. Once it is done downloading files, I ran git status.
And now, after some editing today, it is time for my first real commit. So first, lets get the order right, following our local instructors guidence:
ncdu- to check local repo size and avoid messing upgit status- to check we are adding and commiting only wanted changesgit add .- to add the changes - use with caution, will add all filesgit status- to confirm that changes were addedgit commit -m 'descriptionOfTheChange'- to confirm the changesgit push -u origin master- to make the changes effective and finally update the repository online
Of those commands, for now I don't understand the difference between git push -u origin master, and a plain git push. I guess in the first option you are telleing git where (host) and in which branch push the commits made.
This is a great cheat sheet to have around.
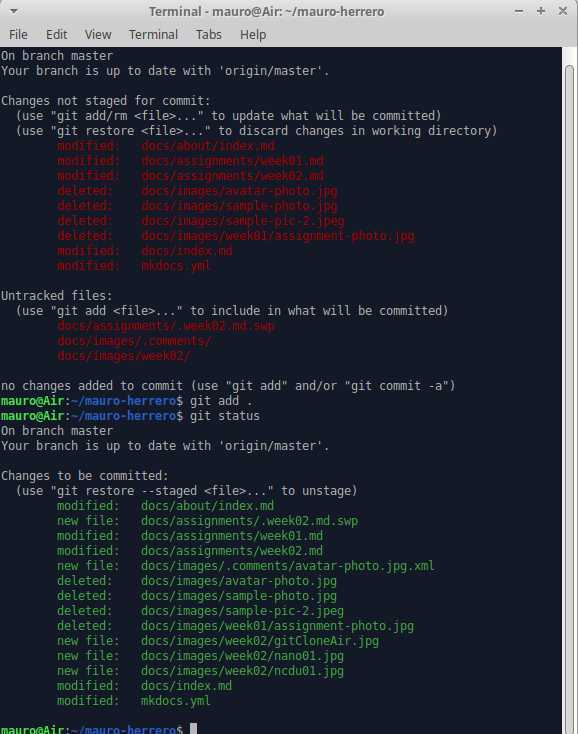
Next day, morning exercise and git mantra:git pull, git status... and, a surprise: Yesterday, as I was really trying hard to document as I was going, I started the Git routine with this very file still open in nano, and I accidentally added and commited a temporary file that later dissapeard. So as I ran git status this mornig, I got this:
I guess there is a way to prevent this for happening, using git ignore, so I'll add an item in my to do list. For now, I will close all files before running the mighty git add . command.
Tutorial on Git
I went through the tutorial linked under the class archive site: tutorial. In my first try, I had a bit of trouble when merging the two branches, because of conflict in modified files. I did not figure out what was excactly going on, so I started over, and when I modified file1 in both branches, I made sure that differences ocurred in different lines. This time, it worked as expected:
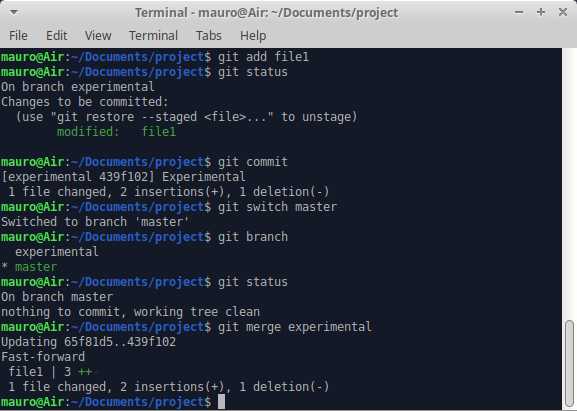
I liked the final statement of this section of the tutorial: Branches are chea and easy, so this is a good way to try something out. I will keep this in mind when the time to move to raw html comes.
I read throgh the Using Git for colaboration section, but did not type the commands. I will have to go over it again whenever I have to collaborate in any repository.
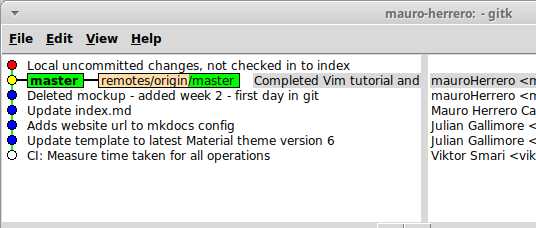
One command that for now I liked was gitk --since="2 weeks ago" (obviously stating whatever time lapse you want, to visualize graphicly the history of commits. I used this info to read the colour circles:
- yellow: HEAD branch
- red: uncommitted changes
- blue: past commited changes
You will make mistakes
Neil dixit. And indeed I made them. Thankfully, the crime I commited was that I pushed without commiting* first (apologies, it was an easy pun), so hopefully it was fixed in the next git mantra iteration.
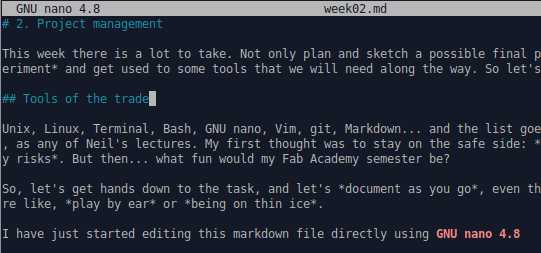
Text Editor: GNU nano
I have just started editing this markdown file directly using GNU nano, and since it is about experimenting, I will continue for a while. Until now I had used nano just a handful of times, mostly in the last week, while setting up a mid 2011 mac book air with Xubuntu to be my workhorse during the semester. Every time the editor opened, it felt quite awkward: I kept all the time trying unsuccessfully to use the mouse to select text, copy and paste stuff around. But yesterday I picked up one comment from Neil, explaining why he would rather use Vim over more modern desktop oriented text editors: in Vim, he could perform almost with his hands 99% on the keyboard, not the mouse. Ever since, I've learning to navigate the text, edit, copy and paste using keyboard entries. Hopefully I'll get faster with some practice.
Along the way, I found a way to enable/disable trackpad from the console, running xinput: first listing the devices, and then acting on them (xinput -list; xinput -disable 11; xinput -enable 11). It is quite useful, so the pointer does not accidentally move around the screen. Probably, there are better ways to achieve the same result, but for now, I am happy with this.
The nice surprise with nano came when I opened this very file, week2.md, and voila, Markdown was recognized and highlighted. Just after inserting the picture, I noticed it was noti Markdown highlighting, so I did a quick search, and used sudo nano /usr/share/nano/markdown.nanorc. Then, pasted the following content: markdown.nanorc by Scopatz.
This is the first time that I am using Markdown, and was really looking forward to test it. So far, so good. So next, I will instal MkDocs, to be able to tinker arond before commiting and pushing the repo.
Overall, using nano for editing Markdown files has been a possitive expirence.
What did I like:
- Once got used to it, fast navigating through content only with the keyboard.
- Sintax highlight, makes document easyly readable.
- Selection of text and copy & paste *within* the edited document.
What I disliked:
- When used in the laptop, the trackpad got in the way. In the end, I just disabled it while typing.
- Though possible, copy & paste text across different nano open files is just too complicated.
MkDocs
Before deciding how I would like my site to be, I will stick to MkDocs for a couple of weeks, just to test something I've never used before. I have basic knoledge of html and css, but it is probably outdated.
To install MkDocs locally in Xubuntu, I typed in a terminal sudo apt install mkdocs. Yeap, it was that easy... I just followed this instructions
After that, I started the built-in dev-server, by running mkdocs serve command. It needs to be done from the same directory as the mkdocs.yml file. After that, opening up http://127.0.0.1:8000/ in the browser will shoe the default home page.
I also needed to install the material theme, using pip3 install mkdocs-material (Tried to use pip instead of pip3, as described )here, but couldn't make pip - Python 2 based - work in my system. It was also needed this plugin.
I am starting to like typing directly on the terminal. Definetly one of my favorites lines so far is sudo find / - name "theNameYouWant". I ran it as sudo since it does not show so many "Permission Denied" warnings. As usual, sure there are better ways to achieve this, but didn't find any.
Final thoughts: after just two days using Markdown here are what I found as pros and cons:
- Pros
- Really easy to use (at least when it was al setup in the server side).
- Fast way to have a decent looking web site.
- Very readeble when editing files, specially in Vim
- Cons
- Still do not know how customazible it is. Material theme CSS file is hardly readeble.
- Ugly looking html code output.
- Theme chosen shows Asignments list and Table of contents for page. Too much side text.
I also edited the mkdocs.yml file, changing some colours and fonts, and dropping the table of contents. It just felt too much text. I will probably stick with it for another week, and try to tweek it a little, just to customize it a little.
Additional CSS
On the material site there is little guidance about how to override CSS default setings, almost no mention to classes or id's, so I will play for a couple of pommodoros trial and error, to see if I can get more or less where I want. The help info is here.
Overall, I like the grey color availible, but this are the things I changed:
- Anchors are great in red when hovering, but I need them to stand out more so I'd like to change the colors of text an anchors.
- Set code a little larger, at 14 px.
- For the color scheme, used )Sanzo Wada's 328 combinationfor now.
Did not make it work yet Output html has a reference to the stylesheet, but no override happened. After two hours debugging, could not extra.css to override. Tried to target anchors, paragraphs and code under classes .md-content__inner and .md-typeset.
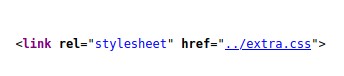
Finally got it working!!!. As usual, a couple of typos and targeting elements under both classes, as noted here.
Posted a question in Mattermost, and got very useful insight on how to procced (thanks a lot, Lars, custom colors. Yes, it was right under my nose and I failed to solve it quickly. This are the color definitions for all the variables used in the Material theme.
The code was there, but It took me a while to override the default color scheme. Finaly, got it by being more specific.
:root a {--md-typeset-a-color: #23c17c}
To be honest, I still haven't figured out *why* now works, so I will have to dig a bit deeper into this. It now works due to CSS Specificity.
Other question that kept me debugging for a while was when I first used the <video> tag. Since the .yml file lives one directory up from the weekXX.md, to correctly target the path using plain html, you need to use an extra ../ (i.e. ../../images/week03/video.mp4 instead of ../images/week03/video.mp4 that is used across the document markdown).
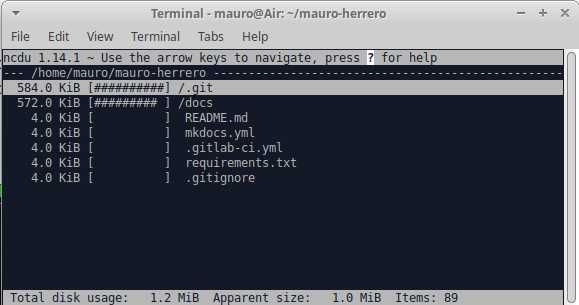
ncdu
Neat utility to check sizes before adding and commiting. Installed using sudo apt install ncdu. It is quite easy to navigate the folders with arrows, and spot where can big files be.
Vim
Using GNU nano as the text editor for a day was a fine experience. I will probably repeat along the semester, and I think is a handy tool to know, since it is installed in almost every Unix like system. But, I feel curious about other cli text editors, and since Neil mentioned he uses most of the time Vim, let give it a shot.
Almost every reference I found about Vim talked about an uphill learning curve. The first thing I did was get Vim installed in Air. As with many other tools, it was as simple in Xubuntu as typing sudo apt install vim.
After a quick search, I completed this interactive tutorial. So now, I really need another cheat sheet at hand.
I then read thorugh help vim, but did not make a lot of sense to me. But, I found, by the end of the help file, that there is a tutoral built in Vim, accesible typing in the console vimtutor. It states the approximate time requiered to complete the tutor is 25-30 minutes, so I think it is worth that pommodoro.

Now, for the first time in my live, I am working using simultaneously two cli programs. The first piece of advice does make a lot of sense: you need to execute the commands to learn them properly. Once again, learning by doing
Ok, tutorial finished! It took me way more time than expeted (~x4), but I think it was definitly worth every minute. I went throug every example serveral times, and also wrote a small summary on every chapter. By the end of the tutorial, I felt way lees clumsy than when using GNU nano.
Final impressions:
I will use Vim as my text editor for now. I really think it is finely designed, and unlike most of the human-machine interfaces that surround us nowadays, the main goal for the design team was definetly not being easy to learn, but rather efficient to use: hands always on the keyboard!
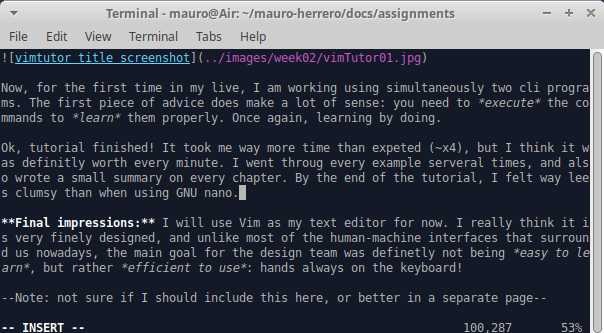
Note: not sure if I should include this here, or better in a separate page
Chapter 1 - Navigating, quiting and saving.
Ok, so I have learned that it actually makes a lot of sense to have normal and editting modes. It is also very useful to have the delete command under the x in normal mode. Using h, j, k and l made me feel clumsy at the beginnig, but as I got used to it, it turned almost natural. Finally, the A (append), is also extremely helpful: once mistakes have been spotted and corrected, is really a fast way to continue in the end of the line. It is also nice that by default it wraps the text, unlike GNU nano, where I had to run Esc+$ a gazillion times. :q! quits without saving, while :wq quits saving the file.
Chapter 2 - Delete, undo and redo.
There are several ways of using the delete command. It has two parts, the operator d and the motion, that can be w (first letter of every word), $ (end of line) or e (last letter of every word). Numbers can be used to multiply the motion. The format used is operator [number] motion. To move to the start of the line use 0. Undo is performed by hitting u, and U undos all the changes on a line. To redo, type ctrl-R.
Chapter 3 - Put, replace and change.
A sort of cut and paste is used using any of the delete commands and the put command, p. With rx you replace with 'x' whatever character you have under the cursor, being 'x' any character you want. c is the change operator, and as the delete operator, can be used with a motion.
Chapter 4 - Location, search and substitution.
Location in the file is known by line number. To display it, use ctrl+G. Typing numberG moves the cursor to that line number. G moves to the end of the file, gg moves to the first line. To search a phrase, type /phrase. Typing ? afterwards searchs backwards. To find the next occurrence in the same direction, n, or N to search in the opposite direction. Typing % while the cursor is ona a (, ), [, ], {, } goes to its match, which is great for debugging missing ones. Substitute is done typing:s/old/new/g. This changes all *old* occurences with *new* ones in a given line. To do so in the whole file, use :%s/old/new/g.
Chapter 5 - External commands, saving, selecting and merging files
Typing :! allows to execute shell commands. It could be ls, find, touch... even vim, to edit another file. My guess is that this opens the possibility to copy & paste from two different files. Later I found way more useful to use different registers, with "xy to yank and "xp to put, being x any letter. The registers are kept across diffeent Vim sessions, and the .vimrc file can be edited to fix sizes.
To save to a file, type :w fileName. If no fileName is given, then it will save to the actual file. You can also select first a portion of text with v, and later save it to a new file with this command. It is blazing fast!
To merge files, place the cursor at the point the new file shold be inserted, and type :r fileName. It is also possible to read the output of an external command, and place it into the file, ie. :r !ls.
Chapter 6 - Yank & put, opening lines, append, big Replace and search flavours
O opens a line above the cursor, o does the same below. As seen in chapter 1, A appends text in the end of the line, a does the same after the cursor. Use e to move the cursor to the end of a word.
Yank & put is Vim's dialect of copy & paste; use v to select chunks of text to be yanked. As seen before, r replaces one character, but R replaces characters until Esc is pressed. :set xxx sets the option xxx. As in ic (ignorecase), is (incsearch), hls(hlsearch). Prepend no to switch an option off.
Chapter 7 - Heeeeeelp!
To get help, just ask for it! :help. Add any command after to get specific help. Once in help, you can switch between the file and help windows, by pressing Ctrl+D. To close the help window, type :q.
It is possible and recommended to create a vimrc startup script to keep custom settings.
When typing any command that makes use of :, pressing Ctrl+D will list possible completions. To use one, press Tab.
Extra - Making photos
How to make decent photos of oneself in the selfie era... This week's assesment guide asks for a personal introduction. That means that we have to upload a photo, and since we are here to be able to make almost anything, let's make instead of take a photo.
Yes, the word make involves fabrication. In the end, a photo is no less than a static bidimensional representation of a moving three-dimensional object. And that representation must be interpreted by the beholder, and here comes perception, and all that's implied. So we have to make sure that we at least try to convey the basics of the real object. In order to do so, those of us that are no photgenic have to work a bit in front of the camera.
Some tips I follwed, by Peter Hurley are in this two videos, one says it's all about the )jaw, and the the other about the squinch I tried both, had quite a good time and liked the outcome. For what I have later read, the key point is to try to convey both confidence and approchability.
To set up the "studio" where I took the pictures, I found the room with the best window light in my house. In order to get good results, the more diffuse de light, the better. I was lucky enough that on Saturday, it was partly cloudy, so just wiht the curtains I could take rid of any harsh light. It happened to be my kids', so I laid the beds aginst the wall, placed the camera right next to the window, a chair in front of it and an off-camera flash right behind the chair to get the white backdrop. I connected the camera to a laptop, using digiCamControl, but I found out there are other alternatives, such as Entangle.
Site in plain html & css
I have to admit it: it took me much longer than I expected to transition from MkDocs to plain html. Firs I had to decide how I wanted my site to look like, and honestly, I did not know if it it was going to get any better than what I alreadey had... But I do want it to be simple, and with a css file that I fully understand. Two sites that I liked a lot in the way they are structured were: Paper.js and one of last year HTMAA student, Cody Paige.
It took me a while to get half decent functional css layout, and was about ready at the end of week 4. But I still needed to change all my previous assignments. I thought that somehow both MkDocs and html pages could be happily mixed in the server, but I found out the opposite: a nasty 404 Not Found message, even though the file was added, committed and pushed in git
I also learned a few mor Vim tricks, specially dealing with multiple registers: it is great to have several clipboards, and the content of them surviving even computer shudown. The other very useful tool in the transition was tpope vim-surround, that really eased the task of adding html tags to my copy.
Finally, my classmate Lorena helped me out with the substitution of the .gitlab-ci.yml file. It was great that she had taken all the key screenshots to get it done
More stuff I'd like to try
Remote desktop: This is something I definetly want to give a shot during the semester. I have a quite powerfull workstation in the basement, and it would be prette neat to be able to access it from the Xubuntu laptop and test how F360 or Rhino behave.
TaskJuggler: While working in architecture, I used to supervise quite a few Gant Diagrams. Now that I am getting used to cli programs, I'd like to give it a run.
Edited May-25th: Used in week 16, applications & implications. Really it is worth it diving into it, is really helpful for organizing long term projects.
Html, css & javascript: In the end, I think I'd rather see what is under the hood of my website. So unless the task renders unbereable, I'll make the switch in a couple of days.
Edited Feb-23rd: I kept using MkDocs up to week 03, and really liked the look of my site. The switch took me not two day, but over two weeks, untill I finally got a half decent looking css. It took me a couple of days to refresh the little I knew about html and css. Converting by hand and eye md files to html was a bit slow. I did use some search and replace, but I reckon that my reg expression knowledge is very limited..
Markdown: I'd like to install it on a server, and get a site up and running. In the future, I think it can be very valuable for my students.
Bash: Here I'am learnig by doing, searching for quick answers whenever I need to complete a task. I'd like to spend some more time going through a tutorial, and start scripting simple tasks.
One of the first tasks useful task to try is to *delete* everything on files week03.md to week20.md, but the firs line, which contains the title for every week. With two searchs delete numbered files in range and delete everything after a line in bash, I came up with the combined expression that got the job done in one line: $ sed -i '2,$d' week{03..20}.md.
