Week assignments
Group assignment
- Test runout, alignment, speeds, feeds, and toolpaths for your machine
Individual assignments
- Make something big on a CNC machine.
Testing the stepcraft840
You can find documentation about our group assignement on our group page.
To test our CNC Machine - a stepcraft840 - we made several dogbone tests while varying the tool diameter inside the software.
The tool we used is a 6mm flat end mill with 3 flutes. With this kingd of tool fusion360 advise a 1400 mm/s feed rate.
After several tests while varying the feed rate into UCCNC software during a job, the machine sound was the best for 1080 mm/s on plywood.
The stock we used is 8mm thick and we were able to cut through it in 2 passes.
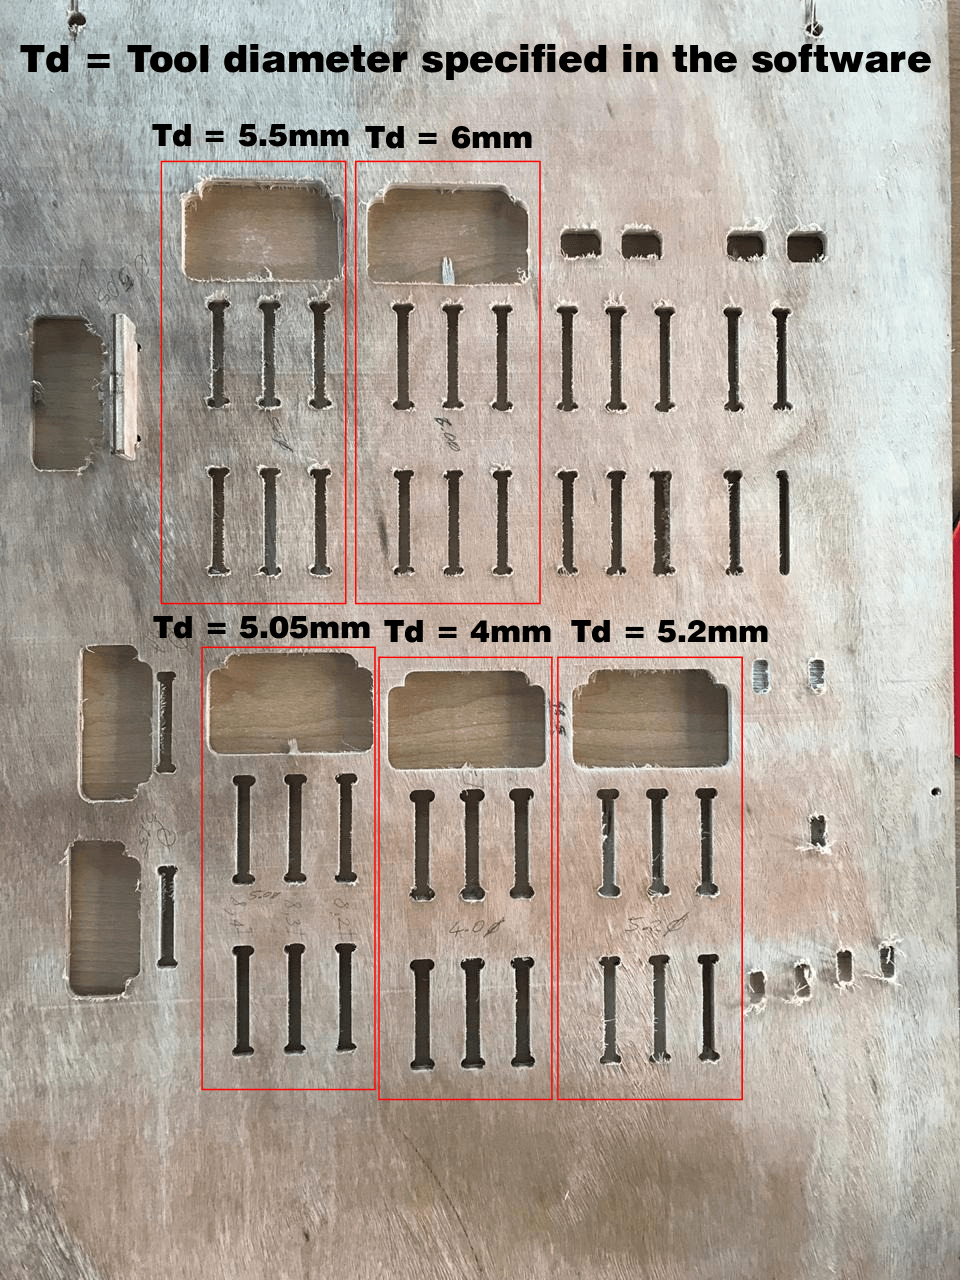
We first tried to use a 6mm tool diameter. After measuring it with a caliper we realised that the exact value is 5.4mm. But, still, the test couldn't fit into the dogbone.
Eventually the test fitted with a tool diameter fixed to 5.05mm.
We were not able to find the reason of that deviation.
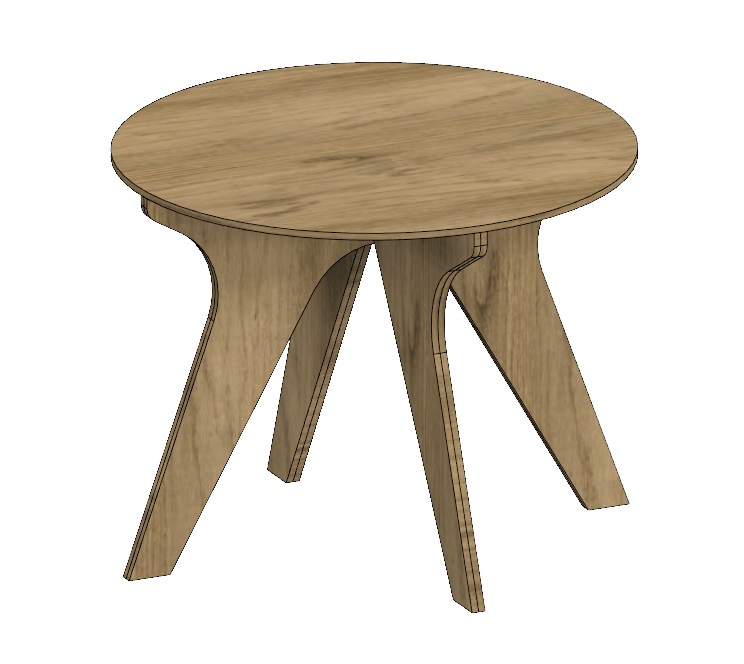
Make a coffe table - Software side
Inspiration
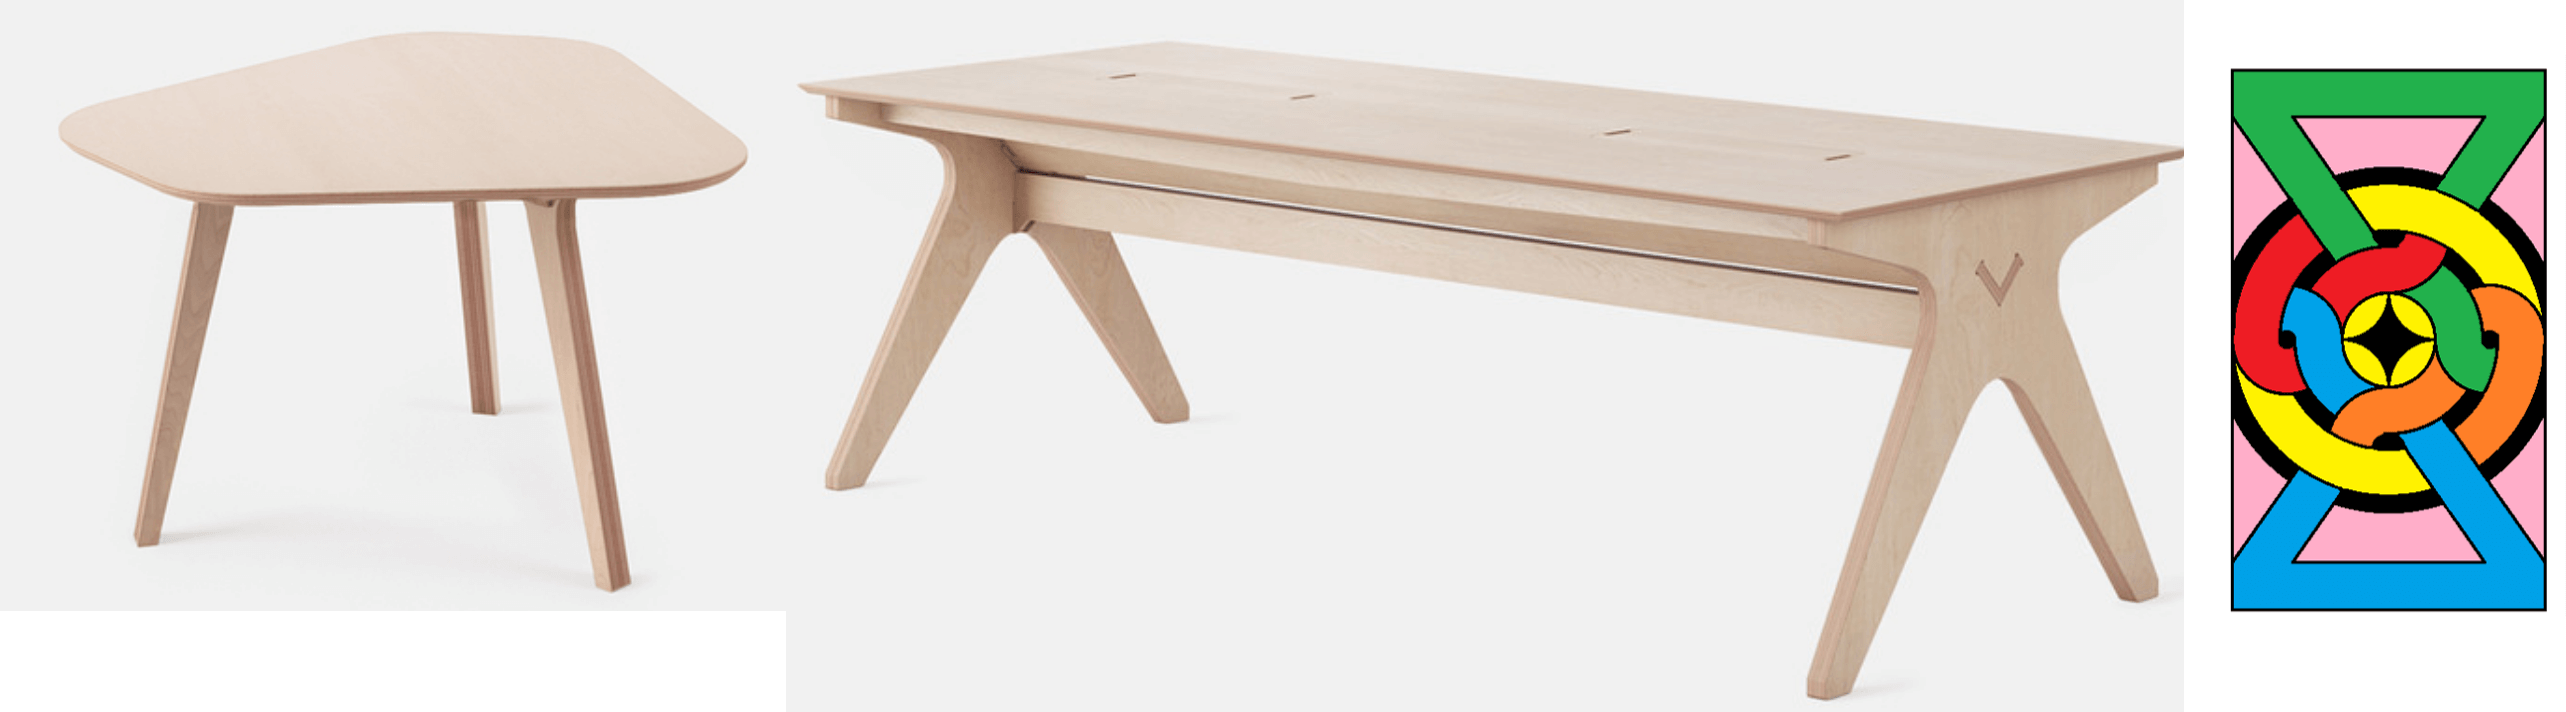
My final project is a chessboard and it is not that big. But, it is always better to play chess on a good table so I decided to design a coffee table.
I wanted my table to be round to be able to engrave tembe art on it. This is a traditionnal art of the Maroon people living in French Guyana and Suriname.
I also used opendesk table to get some inspiration for the design.
Drawing in Fusion360
Parameters
First of all I defined two parameters to be able to adapt my design easily at the tool diameter and stock thickness.

Sketch
Then I designed in 2D the different parts of my table:

The two legs will be mirored and doubled for more solidity. The will fit between each others in a cross way.
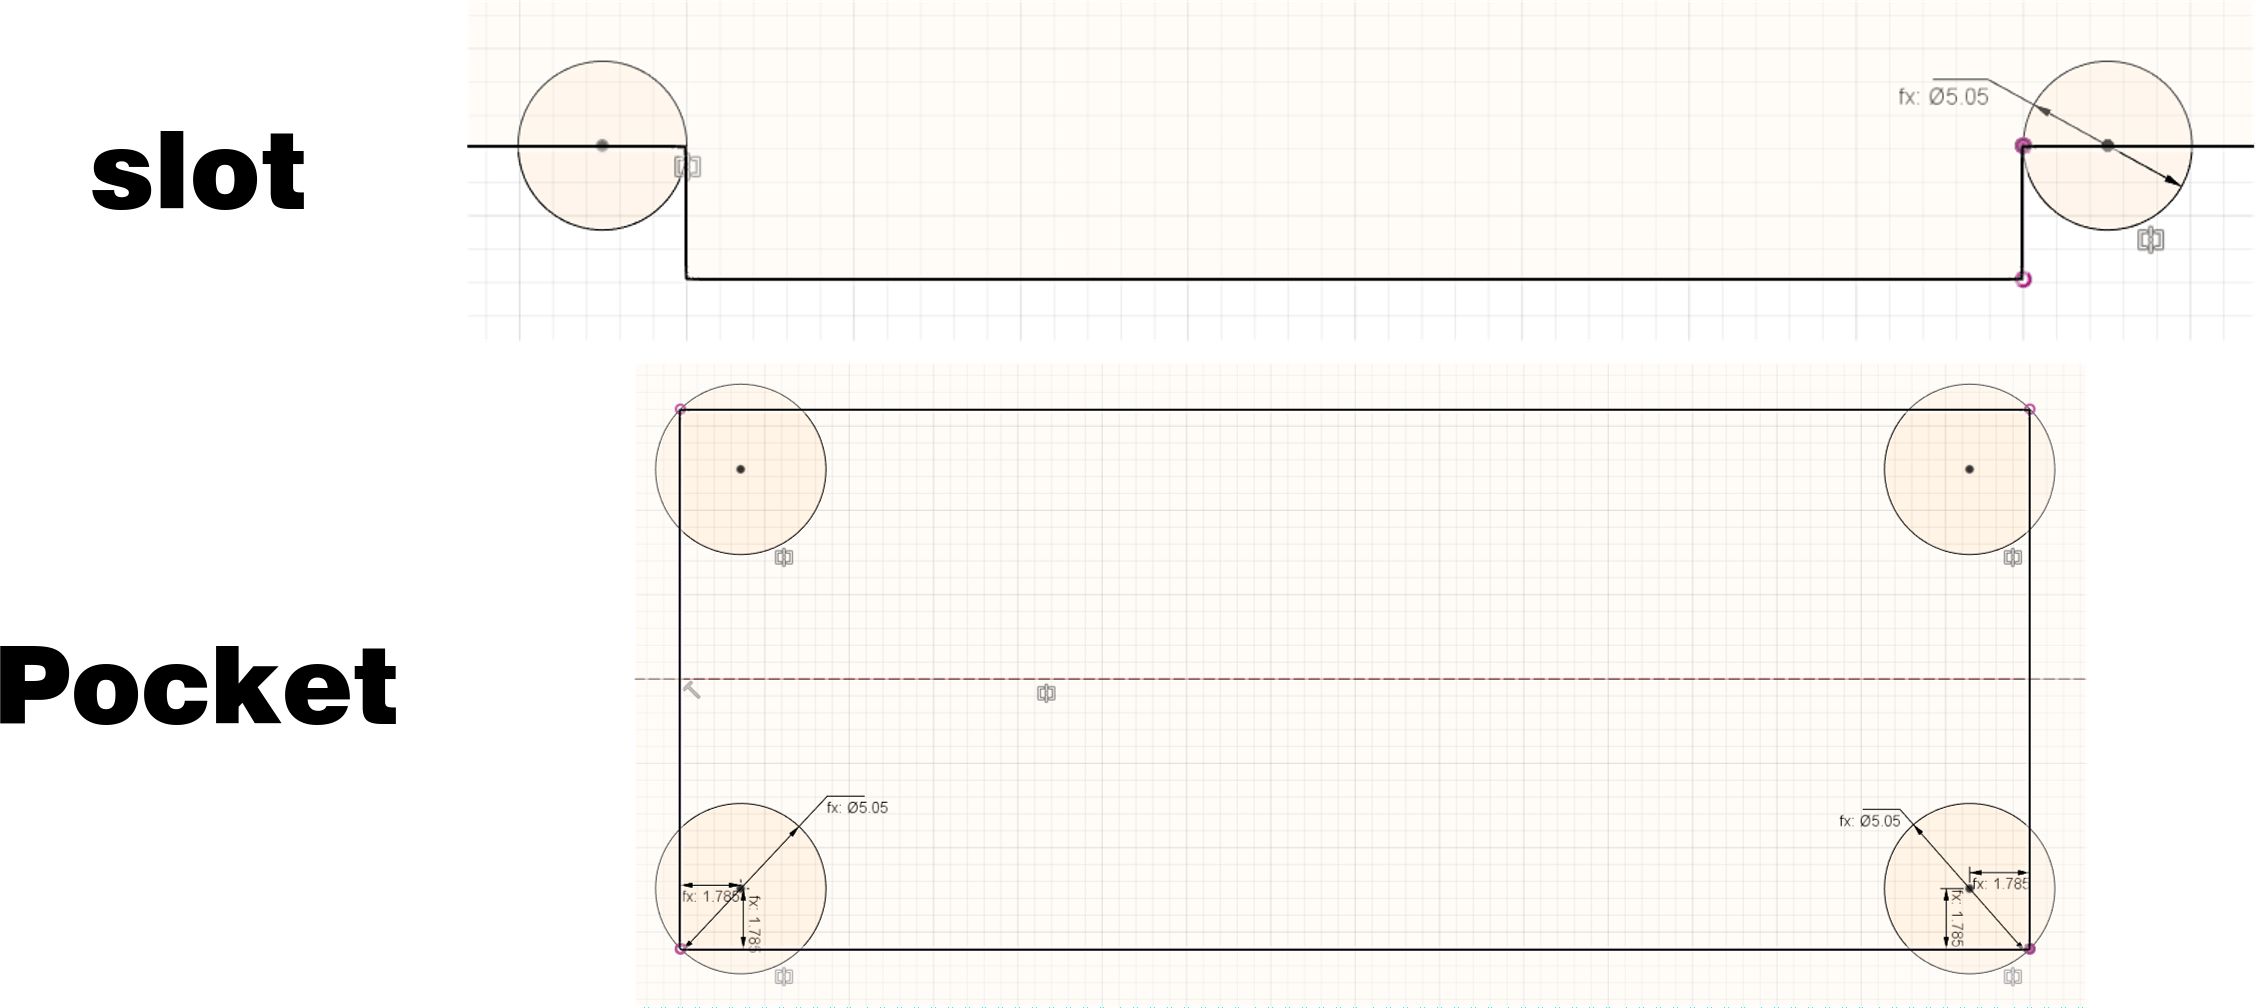
Dogbones
To allow the tool to create the slots with the good dimensions I designed two types of dogbones.
Assembly
Using the joint function of Fusion360 I have been able to assemble the pieces to check the design.
You can access the fusion360 file here.
Tembe Art Engraving
To prepare the tembe art to engrave on the top face of the table plate, I used the canvas option of fusion360 which allow me to import a picture. I draw a sketch upon it and then I used the CAM capabilities to simulate the toolpath.
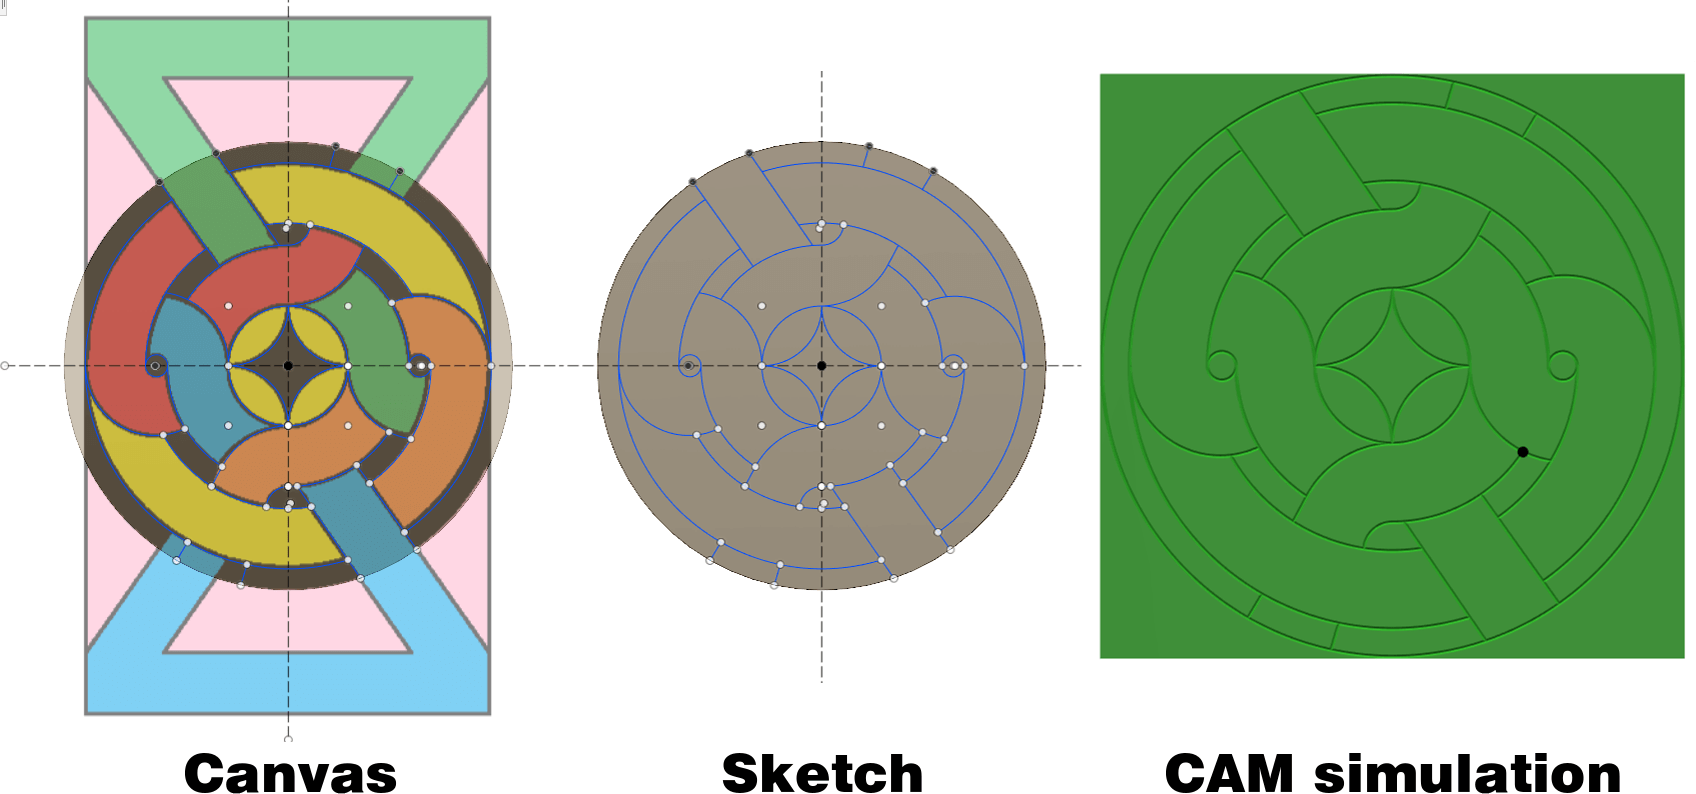
The fusion360 file is accessible here.
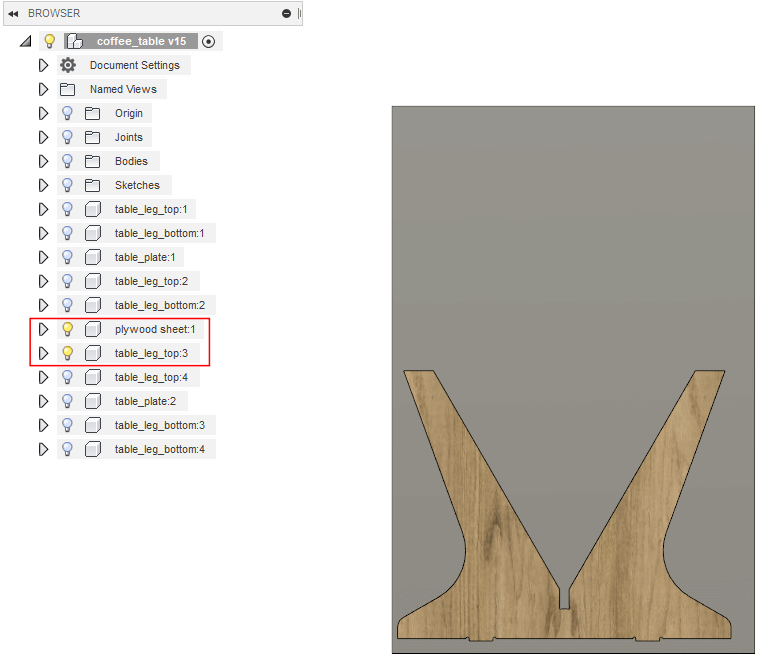
Preparing the CAM file in fusion360
In fusion 360, there is a manufacture workspace in which you can create the toolpath according to your model.
Before going to this workspace it is practical to design the stock and to lay flat the piece you want to cut in it.
For the coffe table I will only have to define 2D contour and 2D pocket toolpaths. 3D tools are usefull only if you fant to define slopes.
Before being able to define 2D toolpath I first have to create a setup in which you define the coordinate system and the stock dimensions.

Then you can define 2D contour.
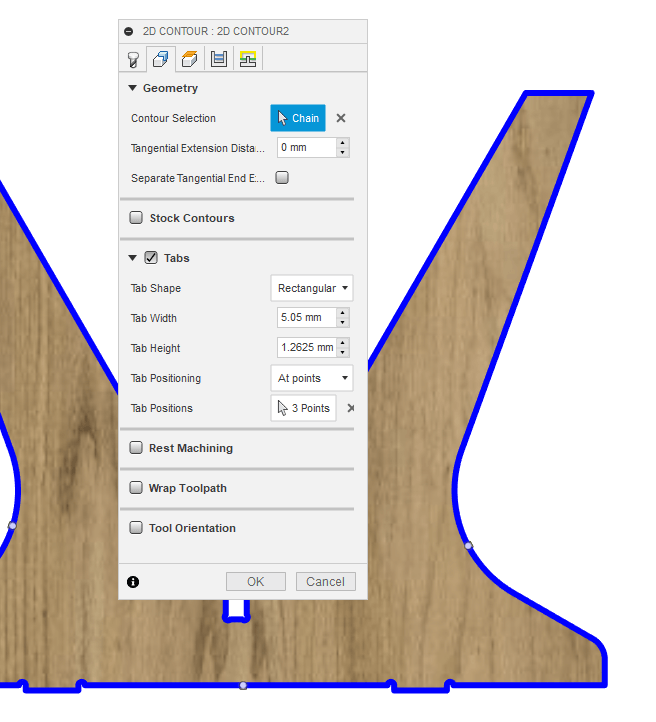
In the configuration window above, I have to change some default parameters and to select some other :
- In the tool tab:
- Select the tool (here a 5.05mm flat end mill with 3 flutes)
- Change the feed-rate (which can be done for the tool itself so you don't have to do it for other toolpath with this tool)
- In the geometry tab:
- Select the contour you want to use
- Tick the tab option because we want to cut through the material (to hold the part in place)
- In the heigh tab:
- Check the bottom heigh:
- If you chose the top contour then you have to specify that you want the bottom heigh to be the stock bottom.
- In the passes tab:
- tick the multiple depth option and define each passes depth
- untick the "stock to leave" option
- I didn't change anything in the linking tab.
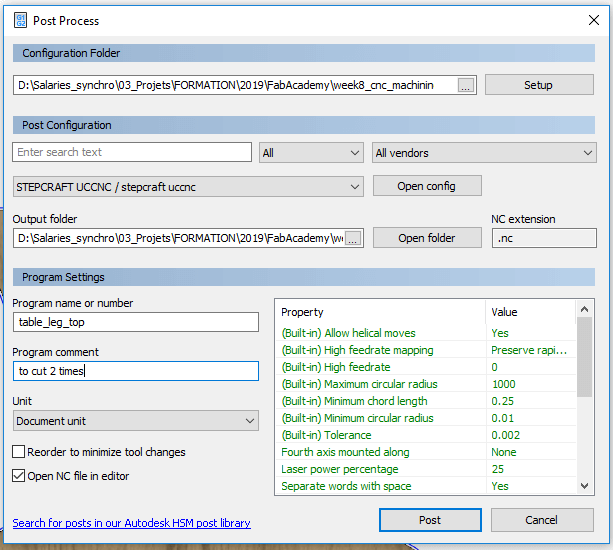
In this window, you have to choose the post process file adapted as your machine and your driver software. These files are accessible in the autodesk website. For popular machines, the conf file is built-in the software.
In my case, I use a stepcraft with UCCNC. You can access the .cps file here.
Then you can define the name and a comment and you can post your .nc file.
The .nc files are lists of coordinates similar to gcode for the lasercutter.
My .nc files for the table are accessible here.
Make a coffe table - Machine side - Stepcraft840
Installing the stock
The first thing to do is to install the stock on the sacrificial board. For that, we used the provided fixtures to attach firmly the board to the machine and if required, I used screws to flatten the board where is was not.

Set the zero in UCCNC
In UCCNC, the first thing we have to do is to set the zero. UCCNC takes care of telling us if the zero is out of limit for our desired toolpath.
We have to jog to the desired zero and then press the zero all button.
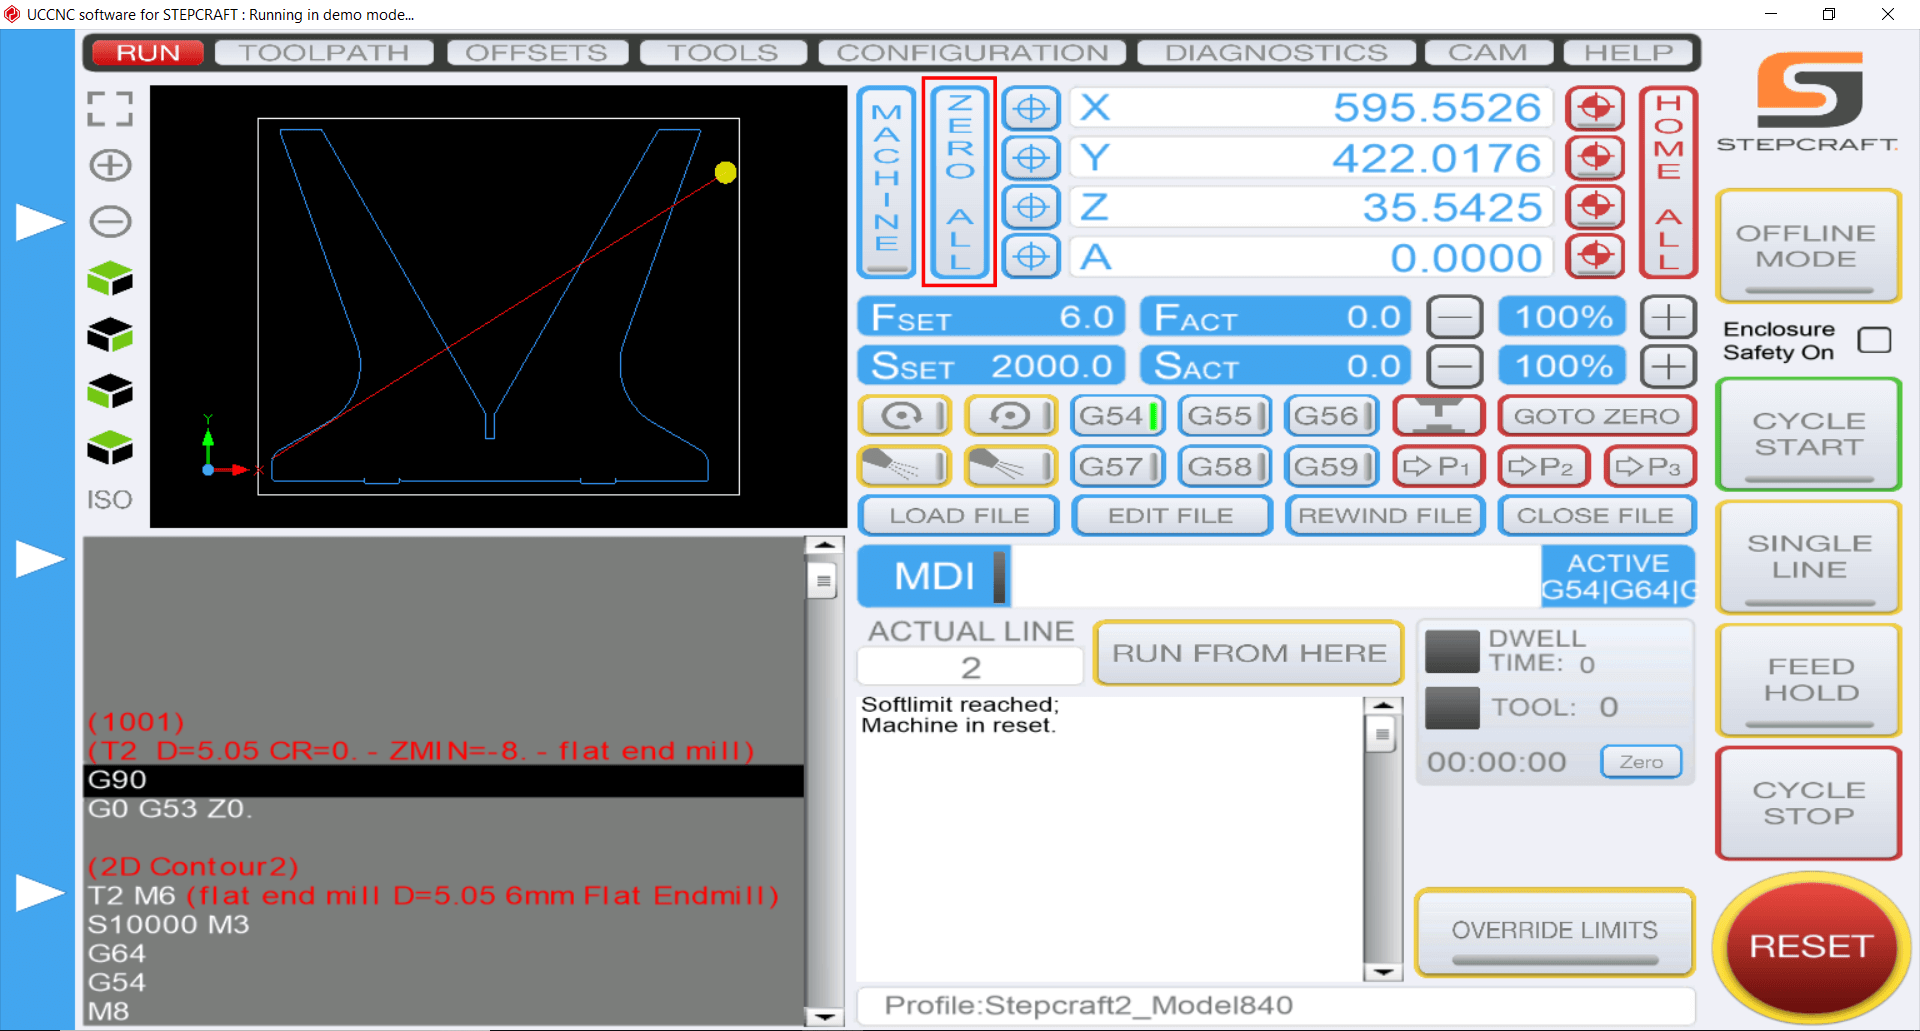
Reading the toolpath and launching the job
The UCCNC interface offers a viewer to check the global shape and dimensions of the toolpath. To open a new one, it is necessary to go to the "toolpath" tab and then click "load file". Like the picture above is showing, it also offers a .nc file viewer in which you can easily check some comments wrote in red by fusion360.
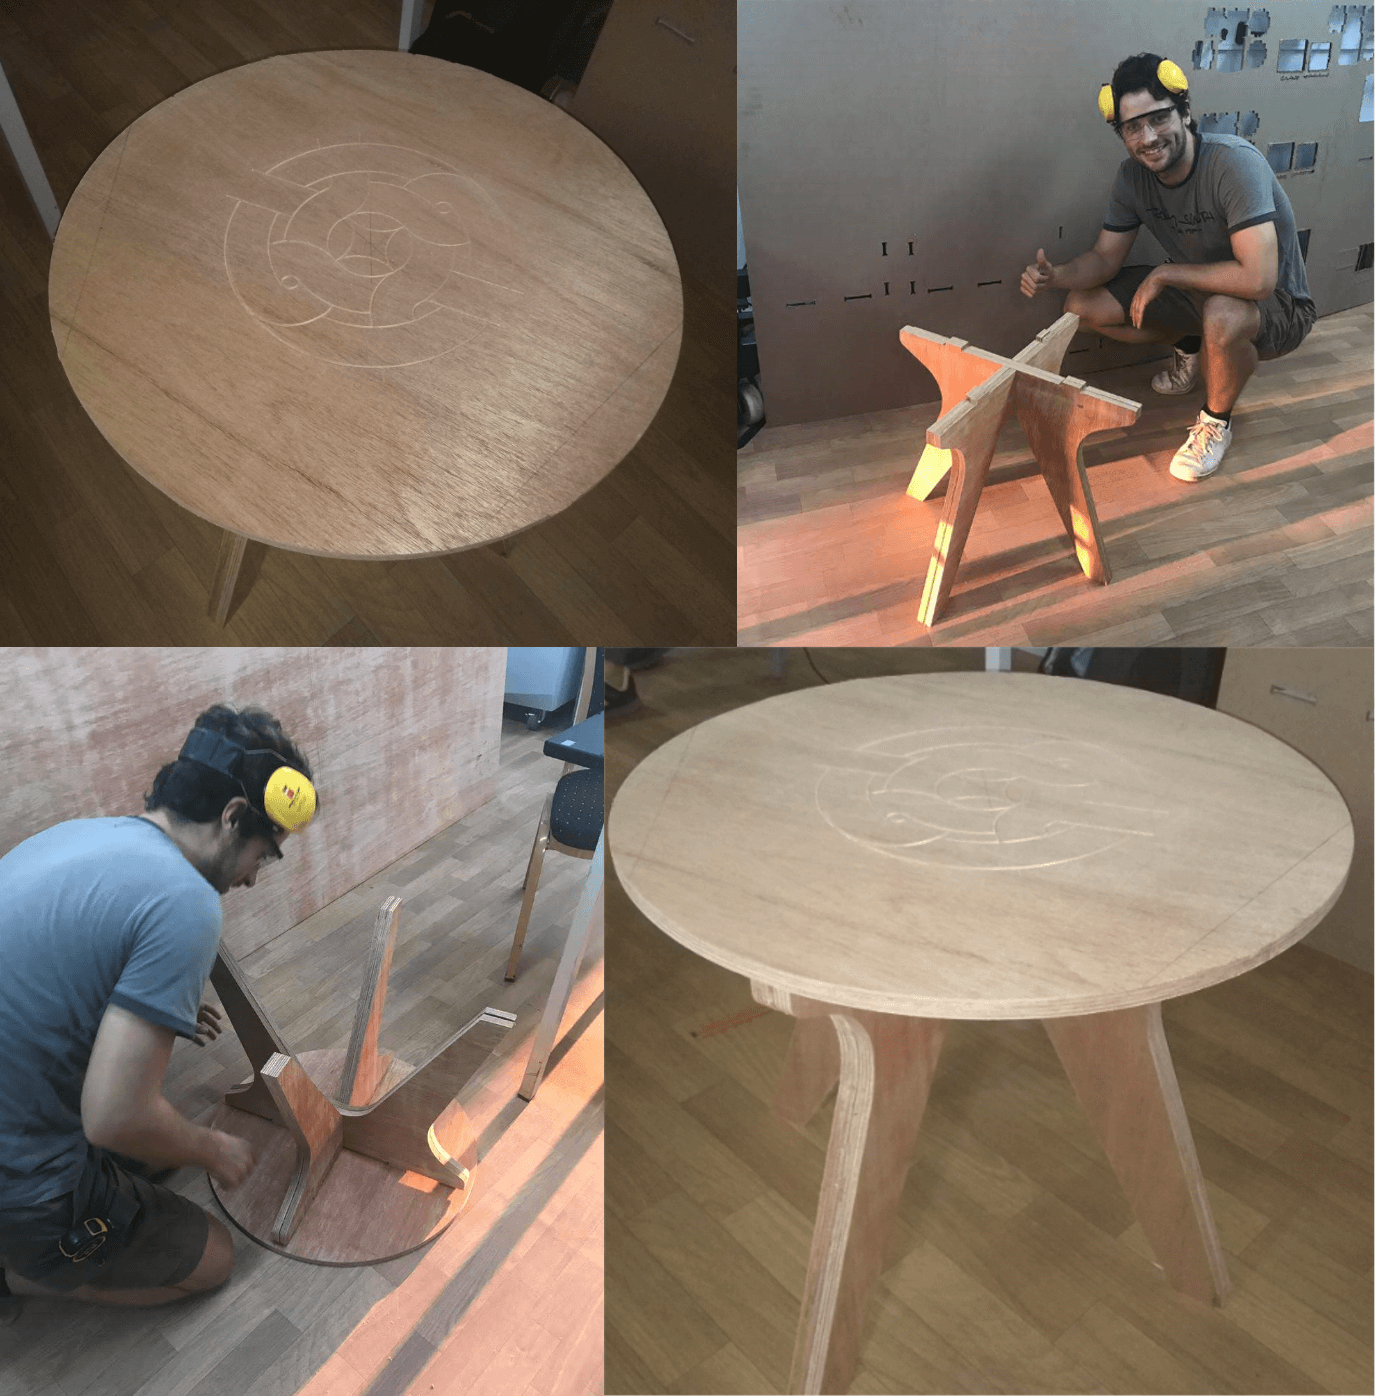
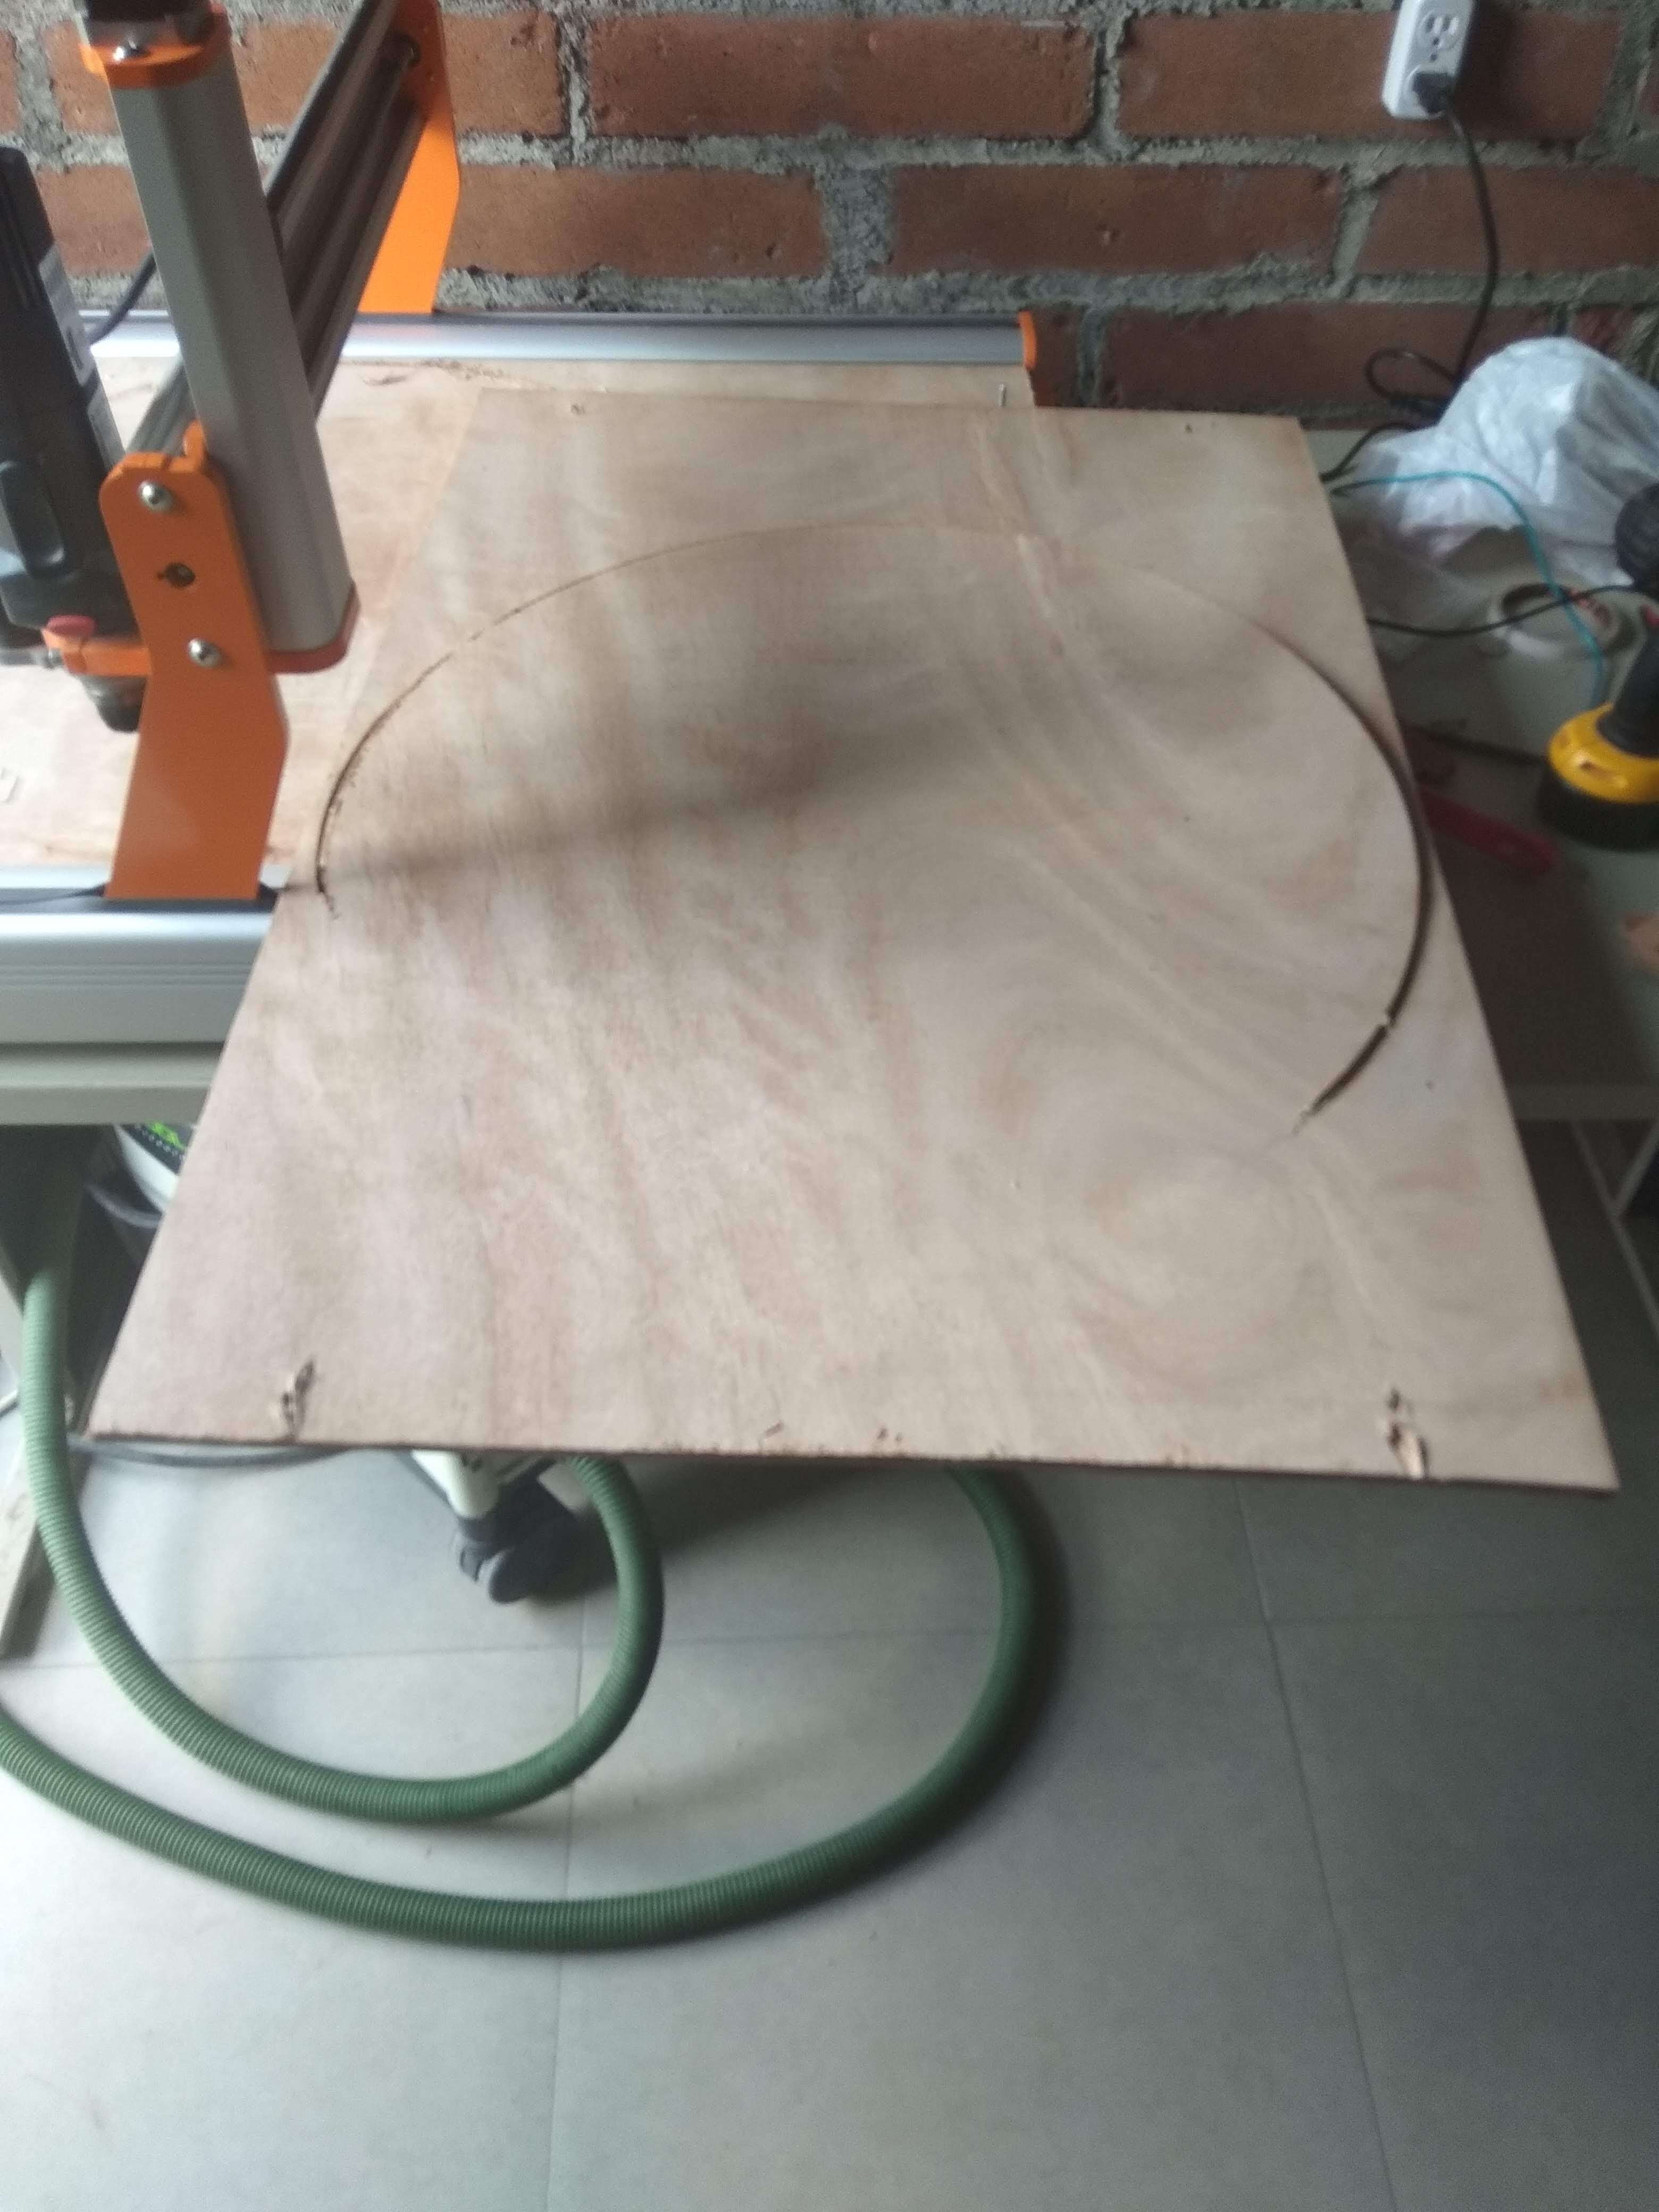
Something Big
Unfortunately, I didn't have the time to complete my project this week. Below is two pictures of the first cuts. Some machine adjustments were still required when I left the lab.
Make a coffe table - Machine side - Shopbot
A shopbot machine is available in another fablab in Paramaribo. I have been granted access a few weeks after week8 to use the machine.
After some troubleshouting on the machine (Y axis slot on electronic card was dead), I have been able to mill my table.
Here are some videos and pictures of the result. Assembling it went like a charm. I made a design mistake engraving the tembe only half of the table plate but the result is still satisfying.
I would like to give my special thanks to Prayas - working at the lab - who helped me a lot that day.