
Week Eight
Assignment
What I did
CNC and Basics
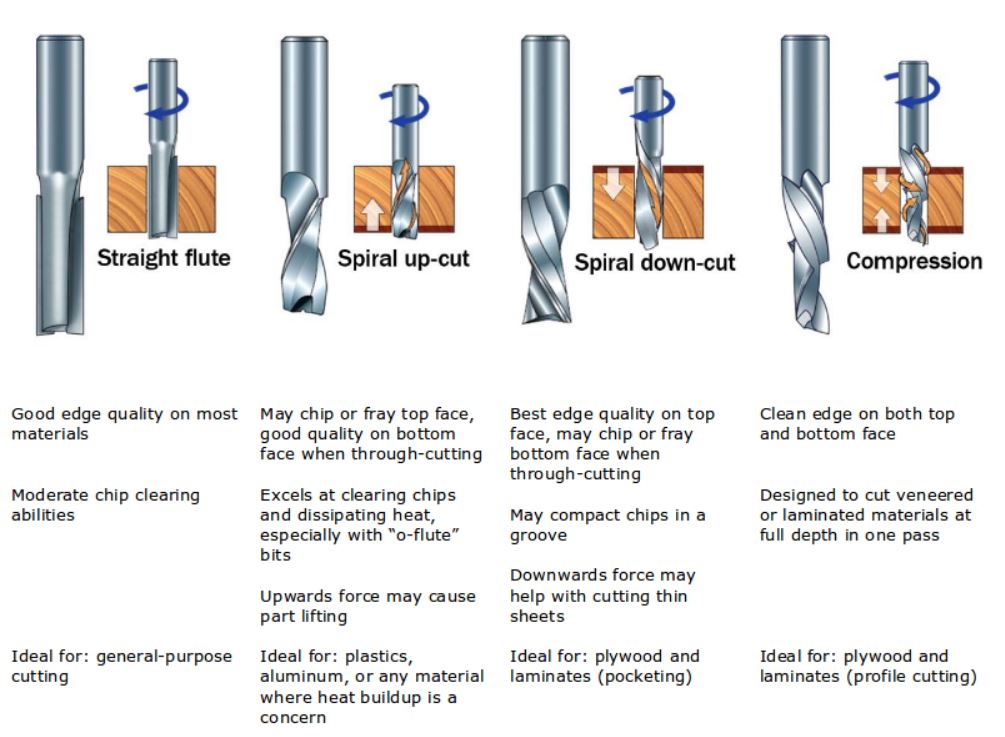
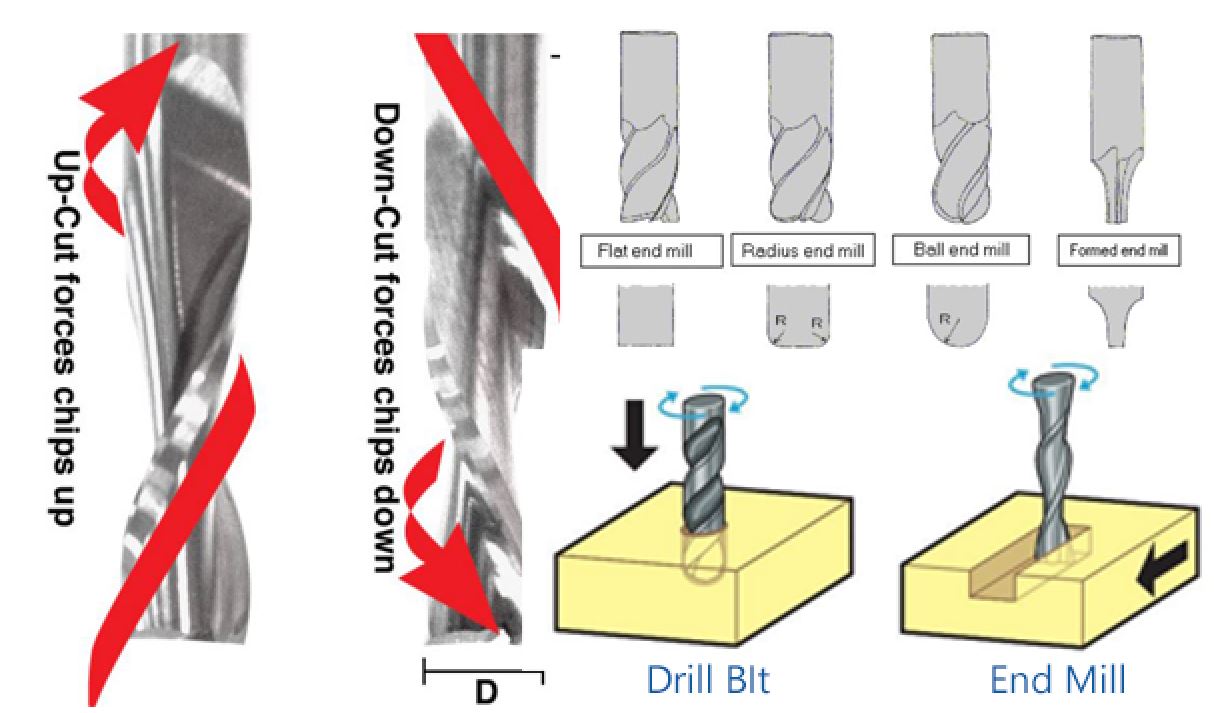
As I was from a mechanical background I already had some experience with the CNC. CNC stands for Computerised Numeric Control is the process by which we use computers to control the tool operations in machining. For this, we use CAD (Computer Aided Design) software to produce our desired model and they are then converted to the codes that machines can understand using specific CAM (Computer Aided Manufacturing) tools. We generate specific G-codes for the machines for this purpose.The following gives you some idea about the different methods and procedures used in CNC operations.
SHOPBOT PRSALPHA CNC
The CNC machine that we used in our lab was Shopbot PRS alpha CNC.The main components of our machine are the following.
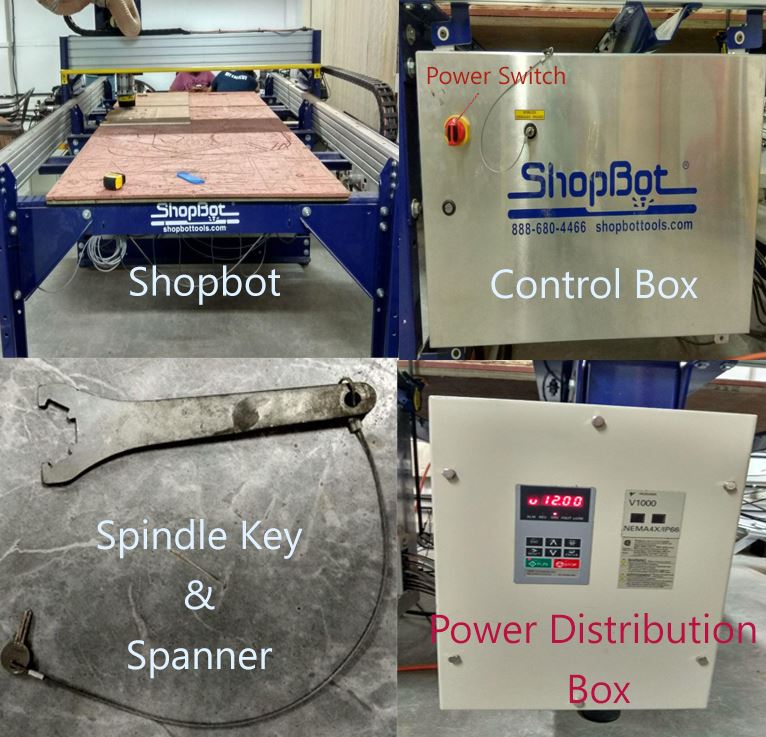
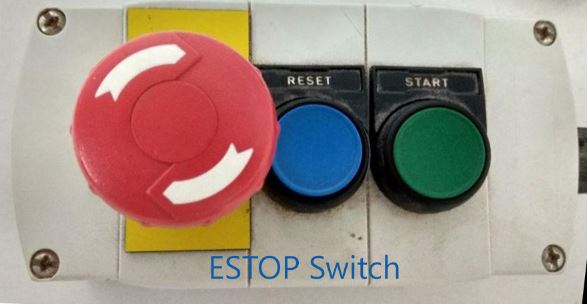
ESTOP switch is used to stop the machine operation in case of emergencies, to reset the machine operation and to start the spindle. To switch on the machine turn the power switch to the right side and to engage the spindle operations we have to turn the spindle key to the right.Always remember to switch on the Vaccum before starting the machine operation.
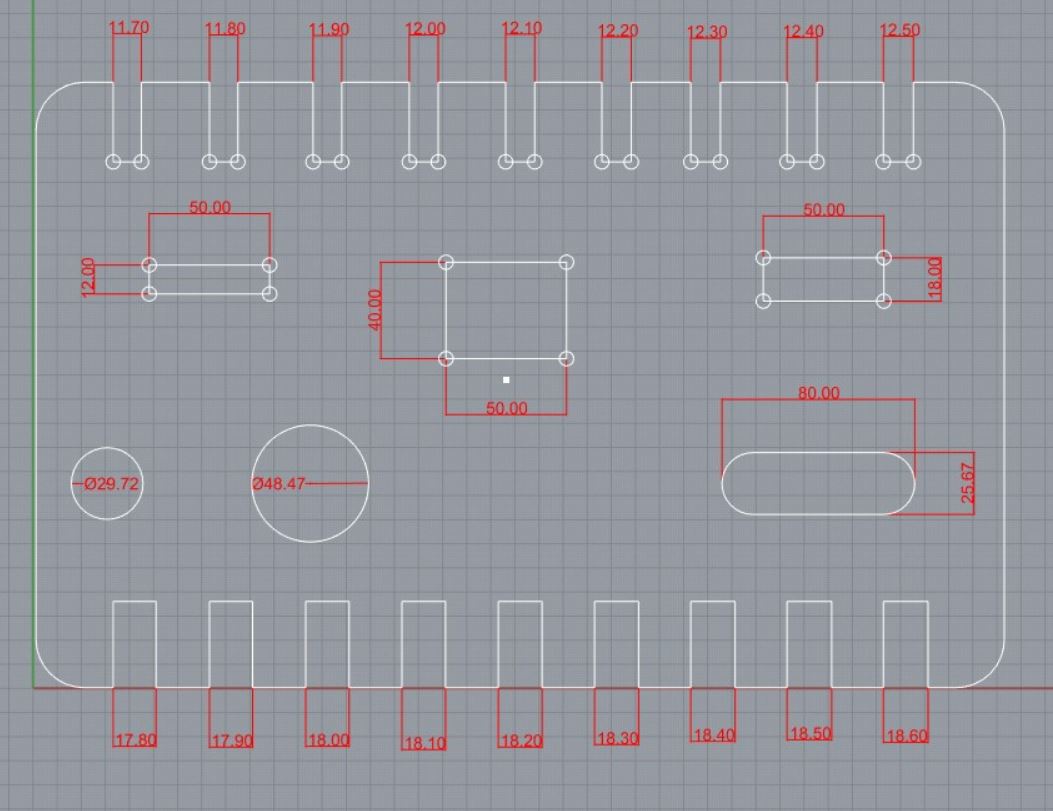
Group Assignment
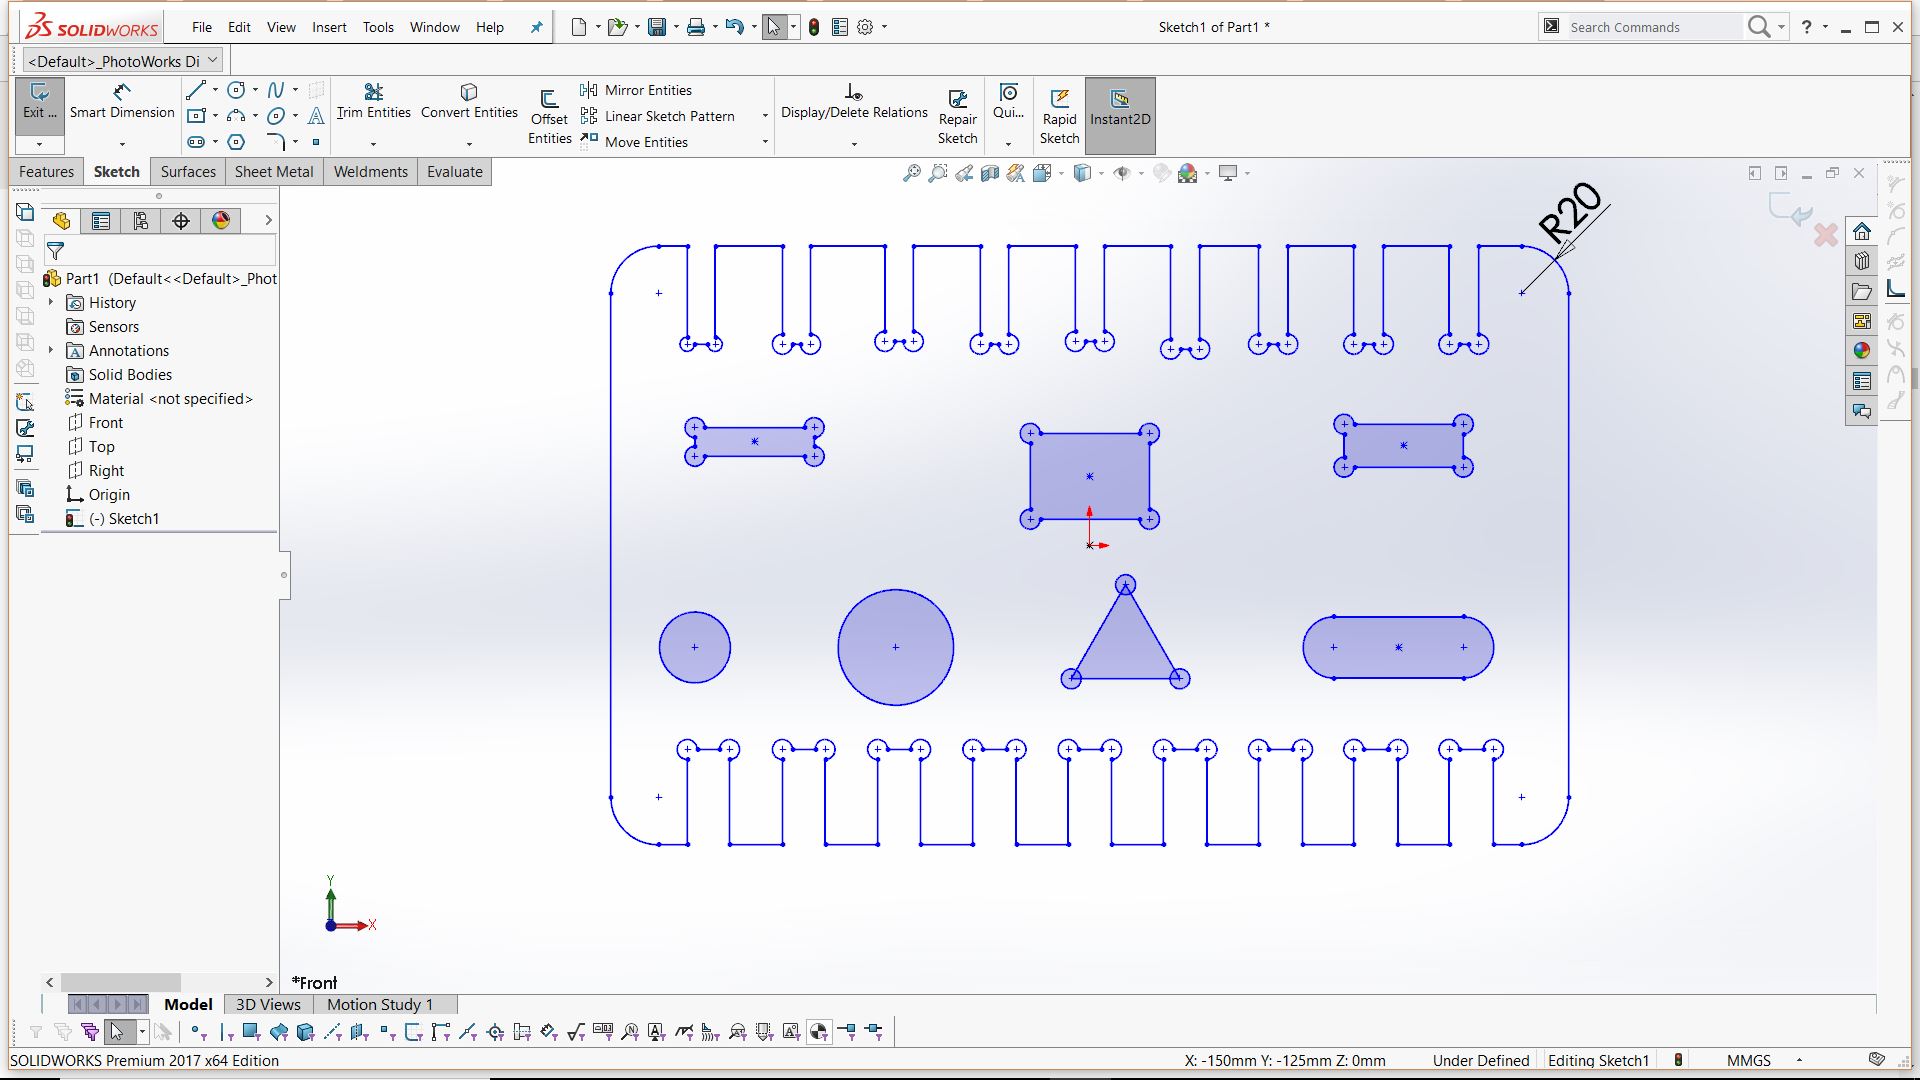
Download Design files here

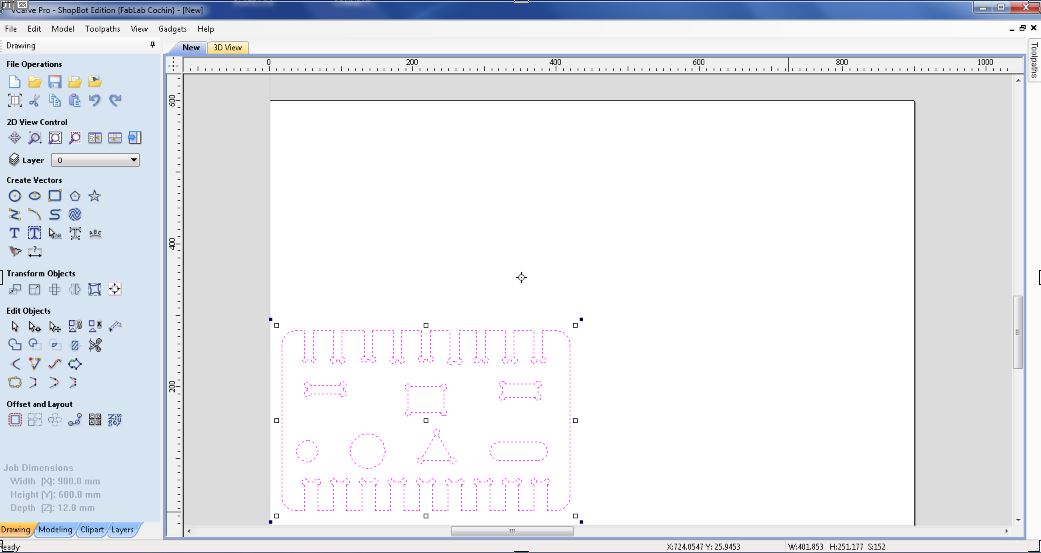
As you can see the tool paths are following a wierd path!. At first I thought it was a problem with the brocken lines. I checked my design in Solidworks again but it was all good.
Fixed the issue by opening the file in Rhino and exporting it ad a dxf file again
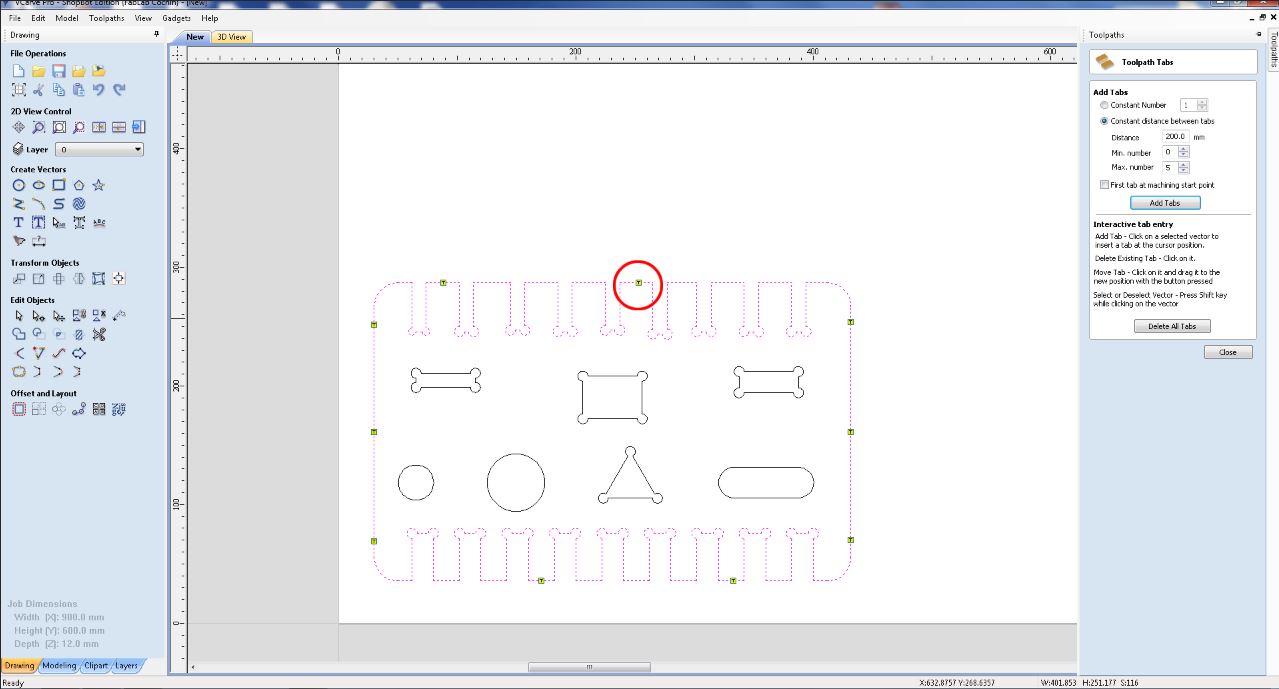
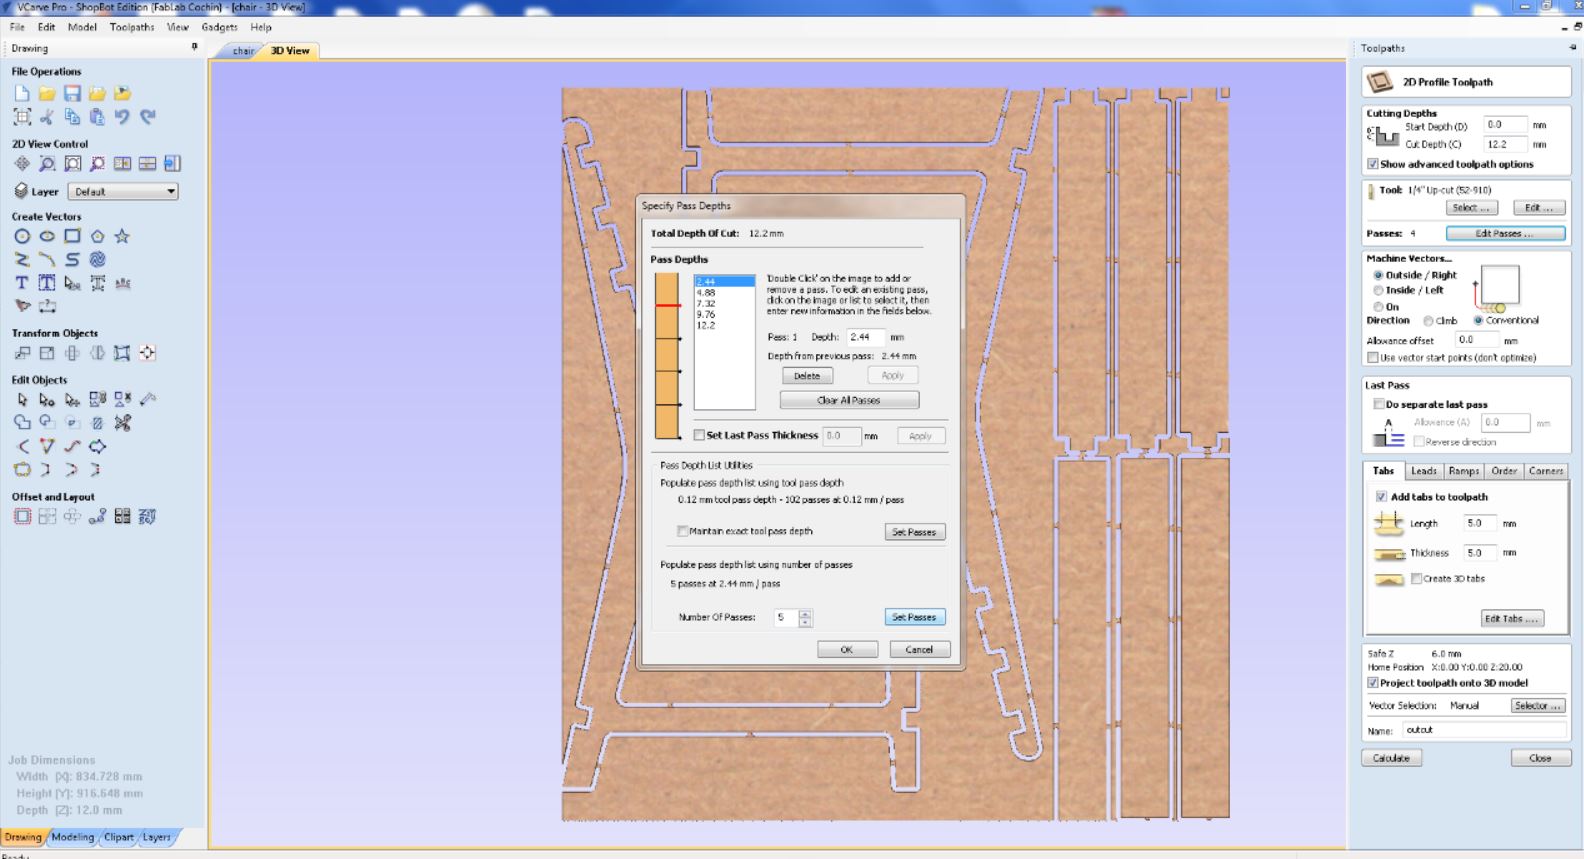
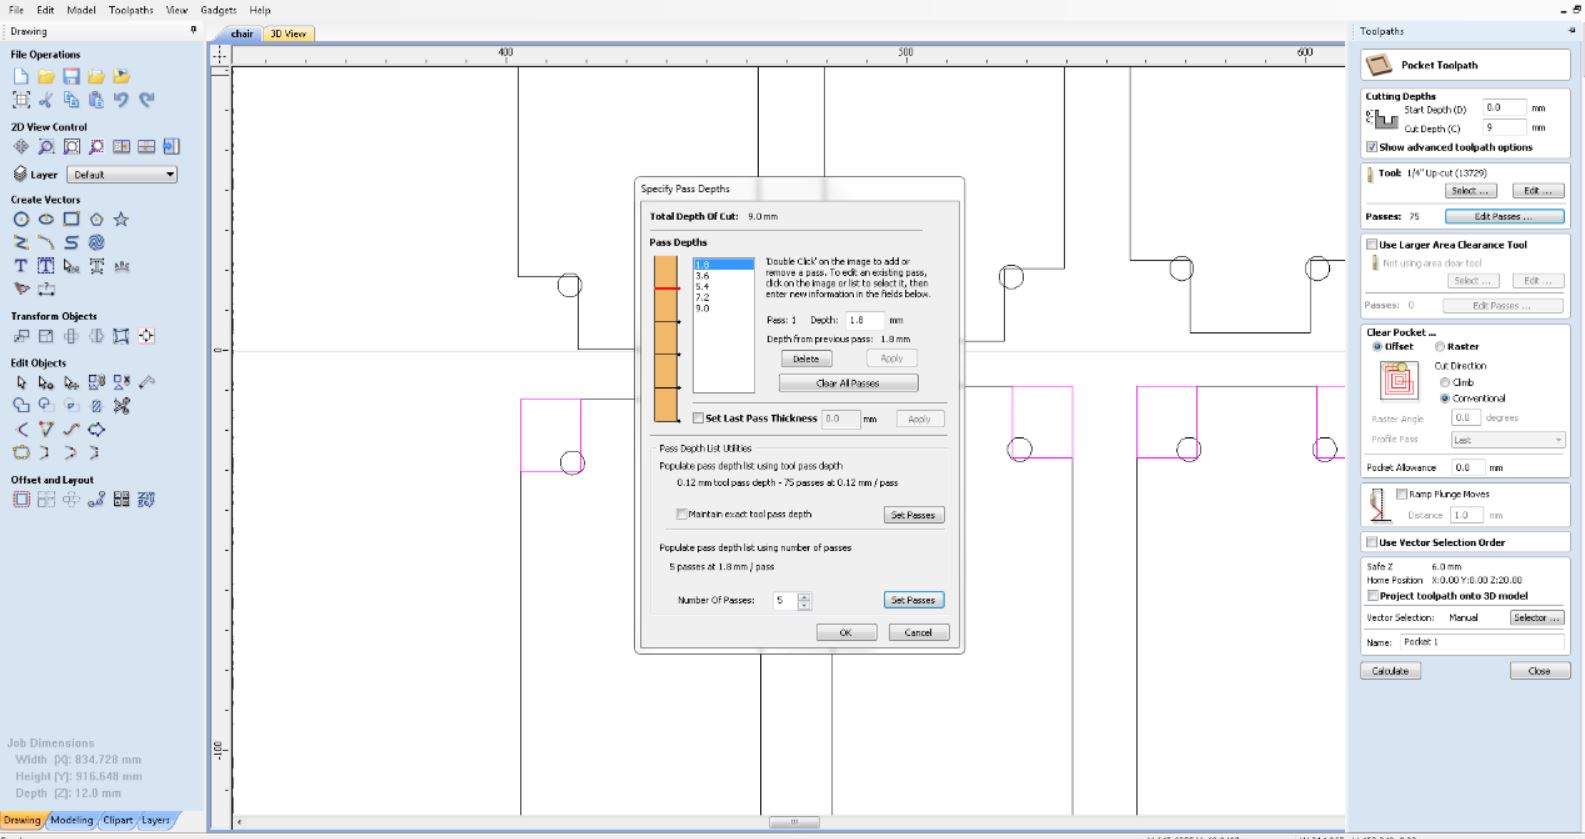
The settings we used were.
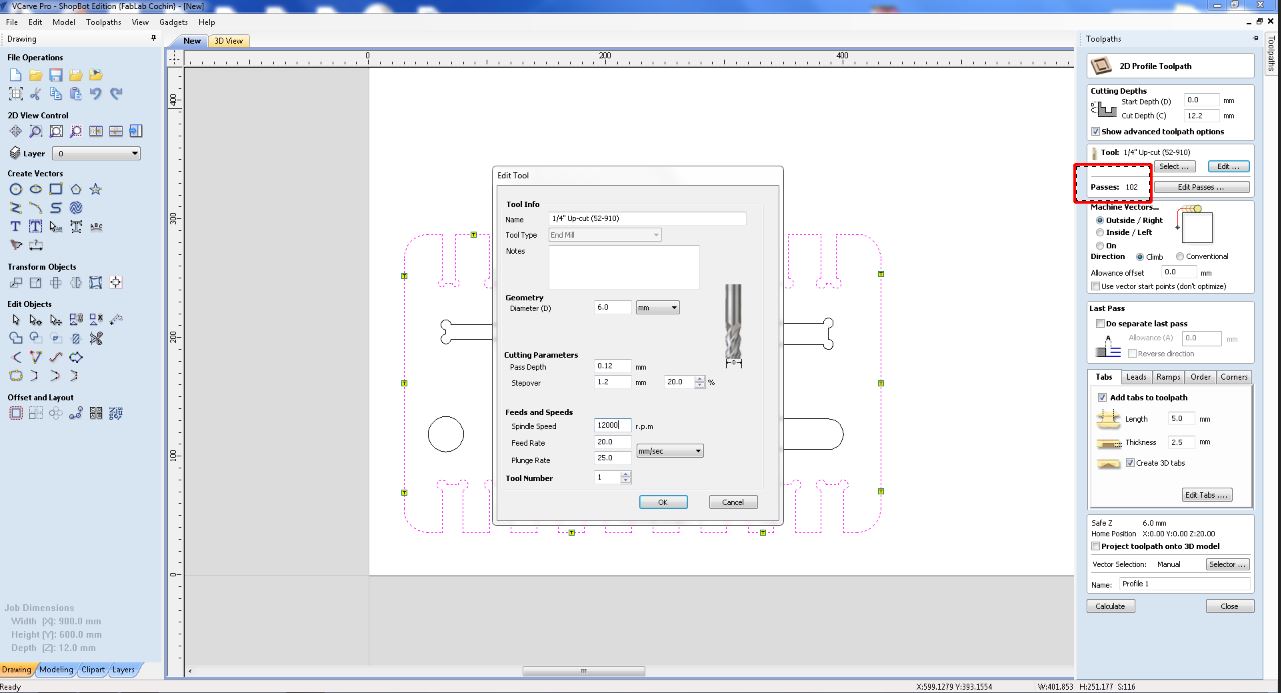
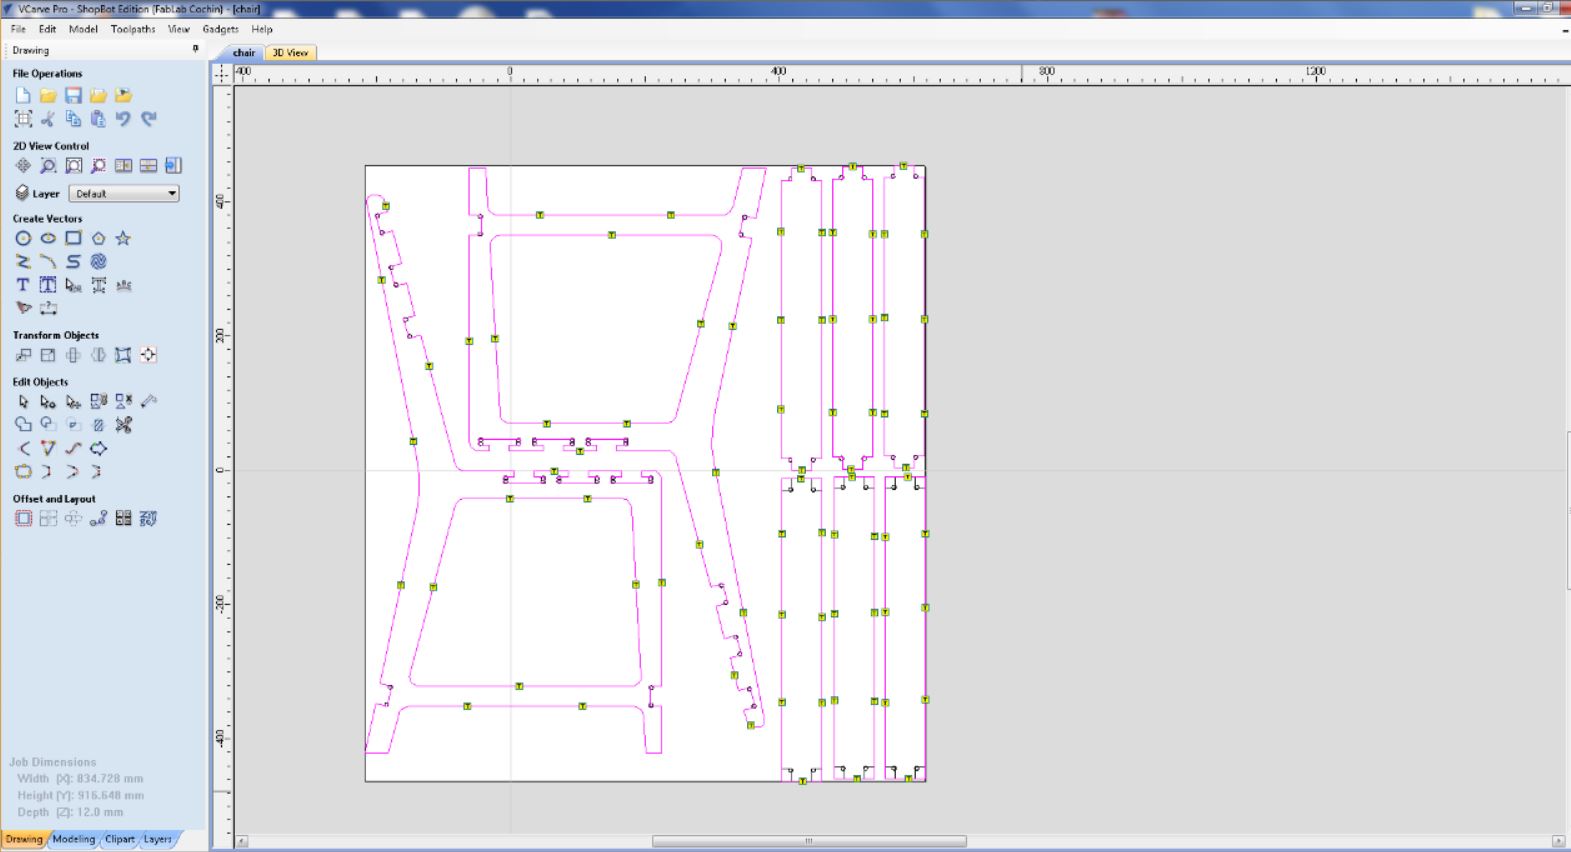
The tool paths were generated and gcodes were saved for seperate drill, outcut and pockets
Generate the .sbp file from our design file usinf Vcarve for this.
Download the Vcarve files from here .
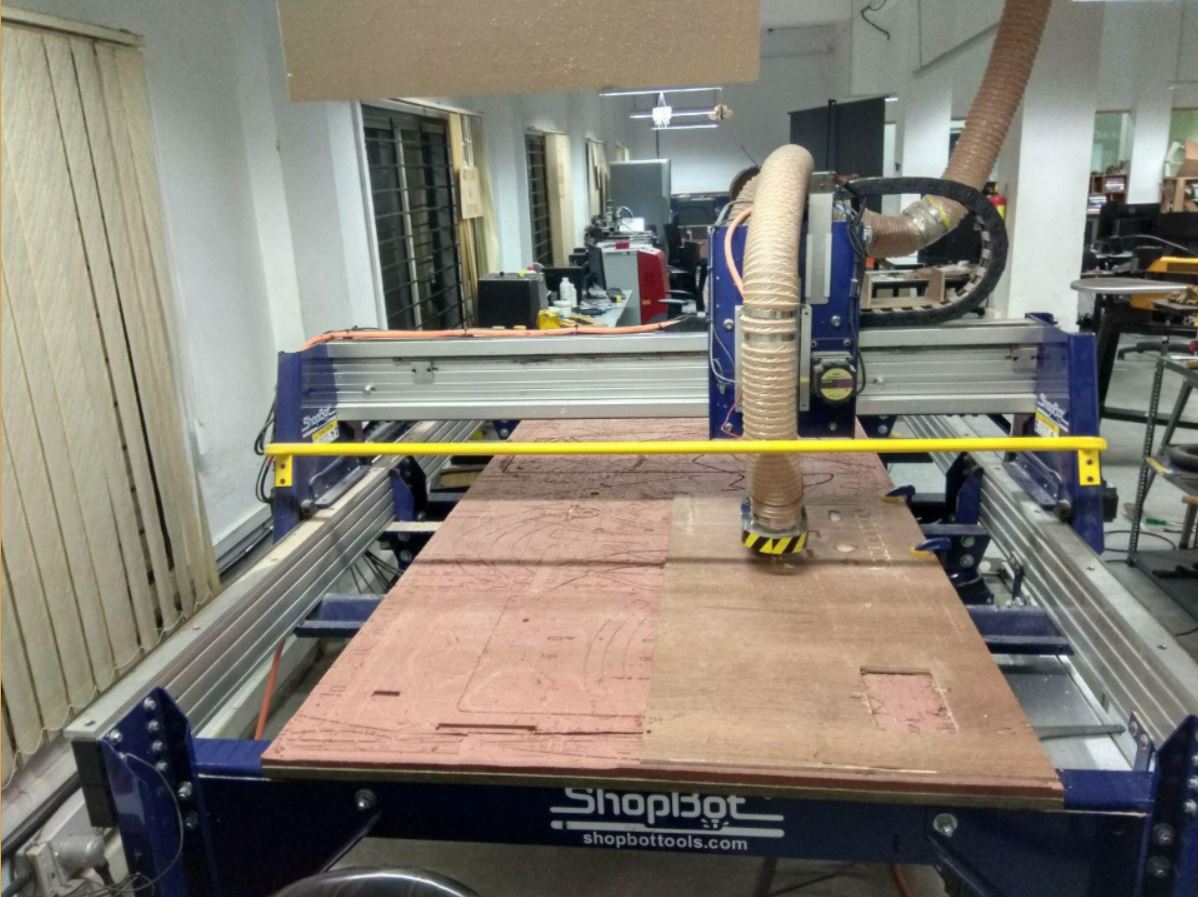
We planned to do the test cut on a 12mm plywood sheet. We took a leftover plywood piece from the previous work since it was just a test cut. It was fixed using screws and vices.

The X , Y and Z axis were fixed for the shopbot. We first made the drills, followed by pocketing and finally the cut.
For setting the X and Y axis, use the arrows in the Shopbot software to move the CNC head to your desired location where you want to set your origin. Then click on the zero axis button on the software and check the X and Y boxes to zero them.Setting the Zero axis is a bit tricky. You have to use the alligator clip and the plate for this. Set the alligator clip on the drill chuck and place the plate on the board below the end mill and click the on the Z setting button on the software. This shows a warning message click on OK to zero the Z axis.
Now click on the Cut Part button and load the tool path files made using Vcarve to start with the machining. CLick on the start button on ESTOP switch console to start the spindle and click OK to start with the milling.
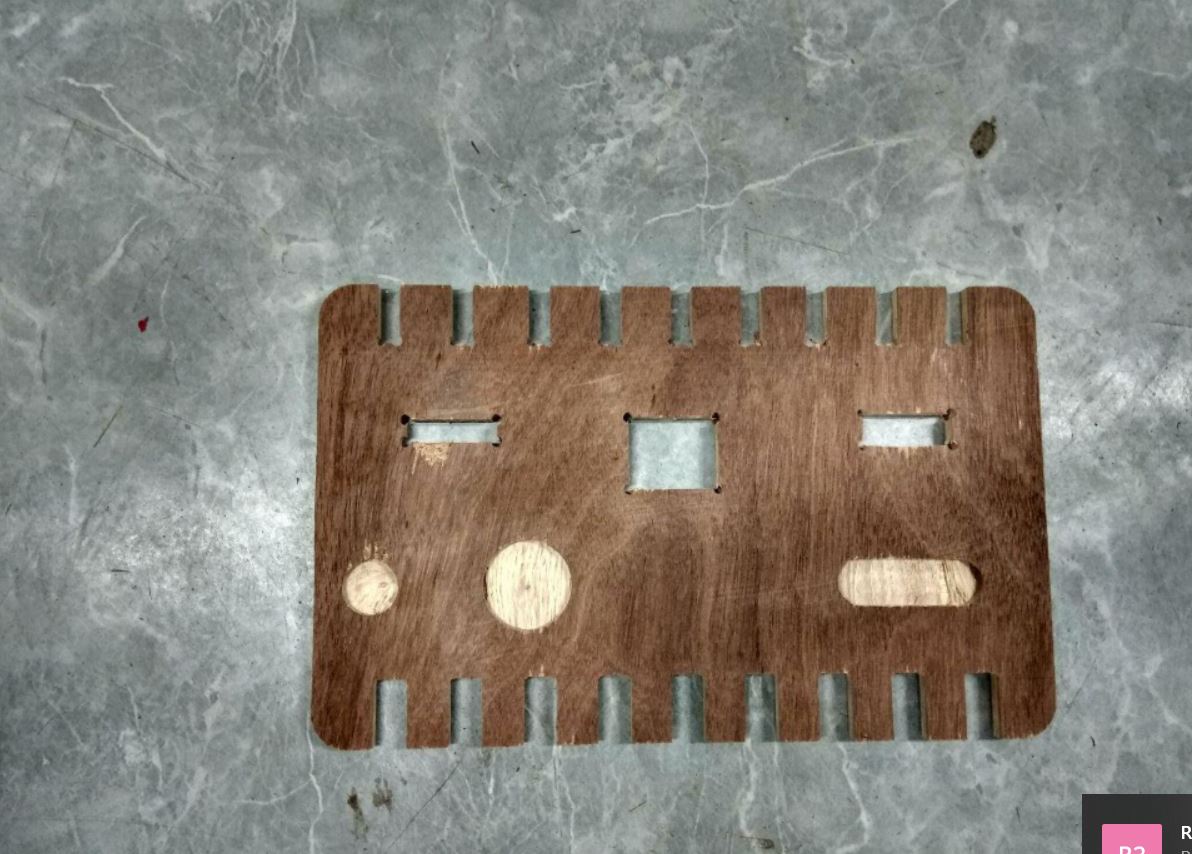
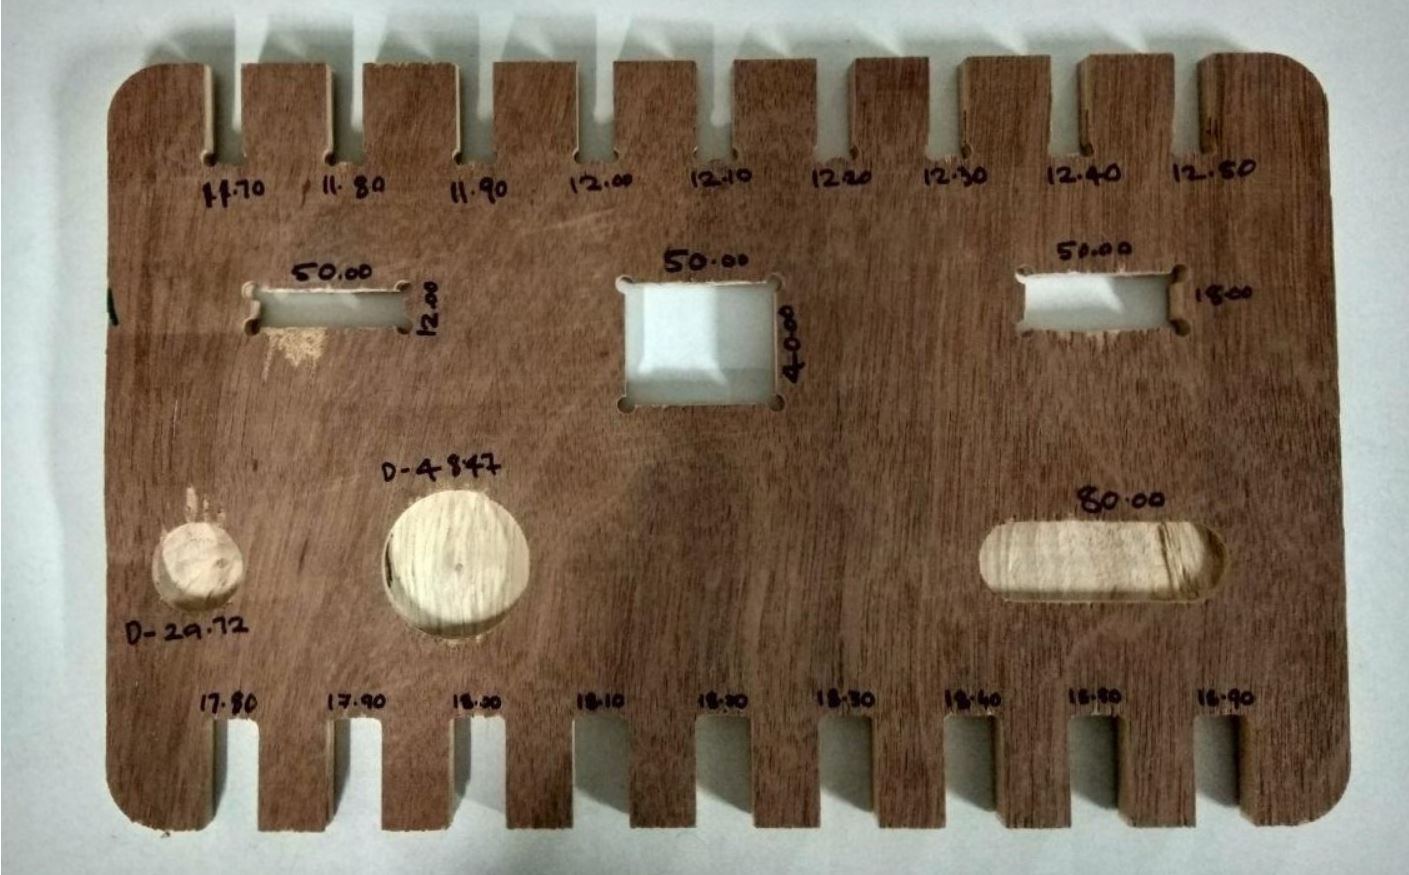
The problems we saw with our test piece were
The first one was due to the uneven bed surface
The second one was due to the poor quality of the plywood and it had some swollen surfaces
Assignment
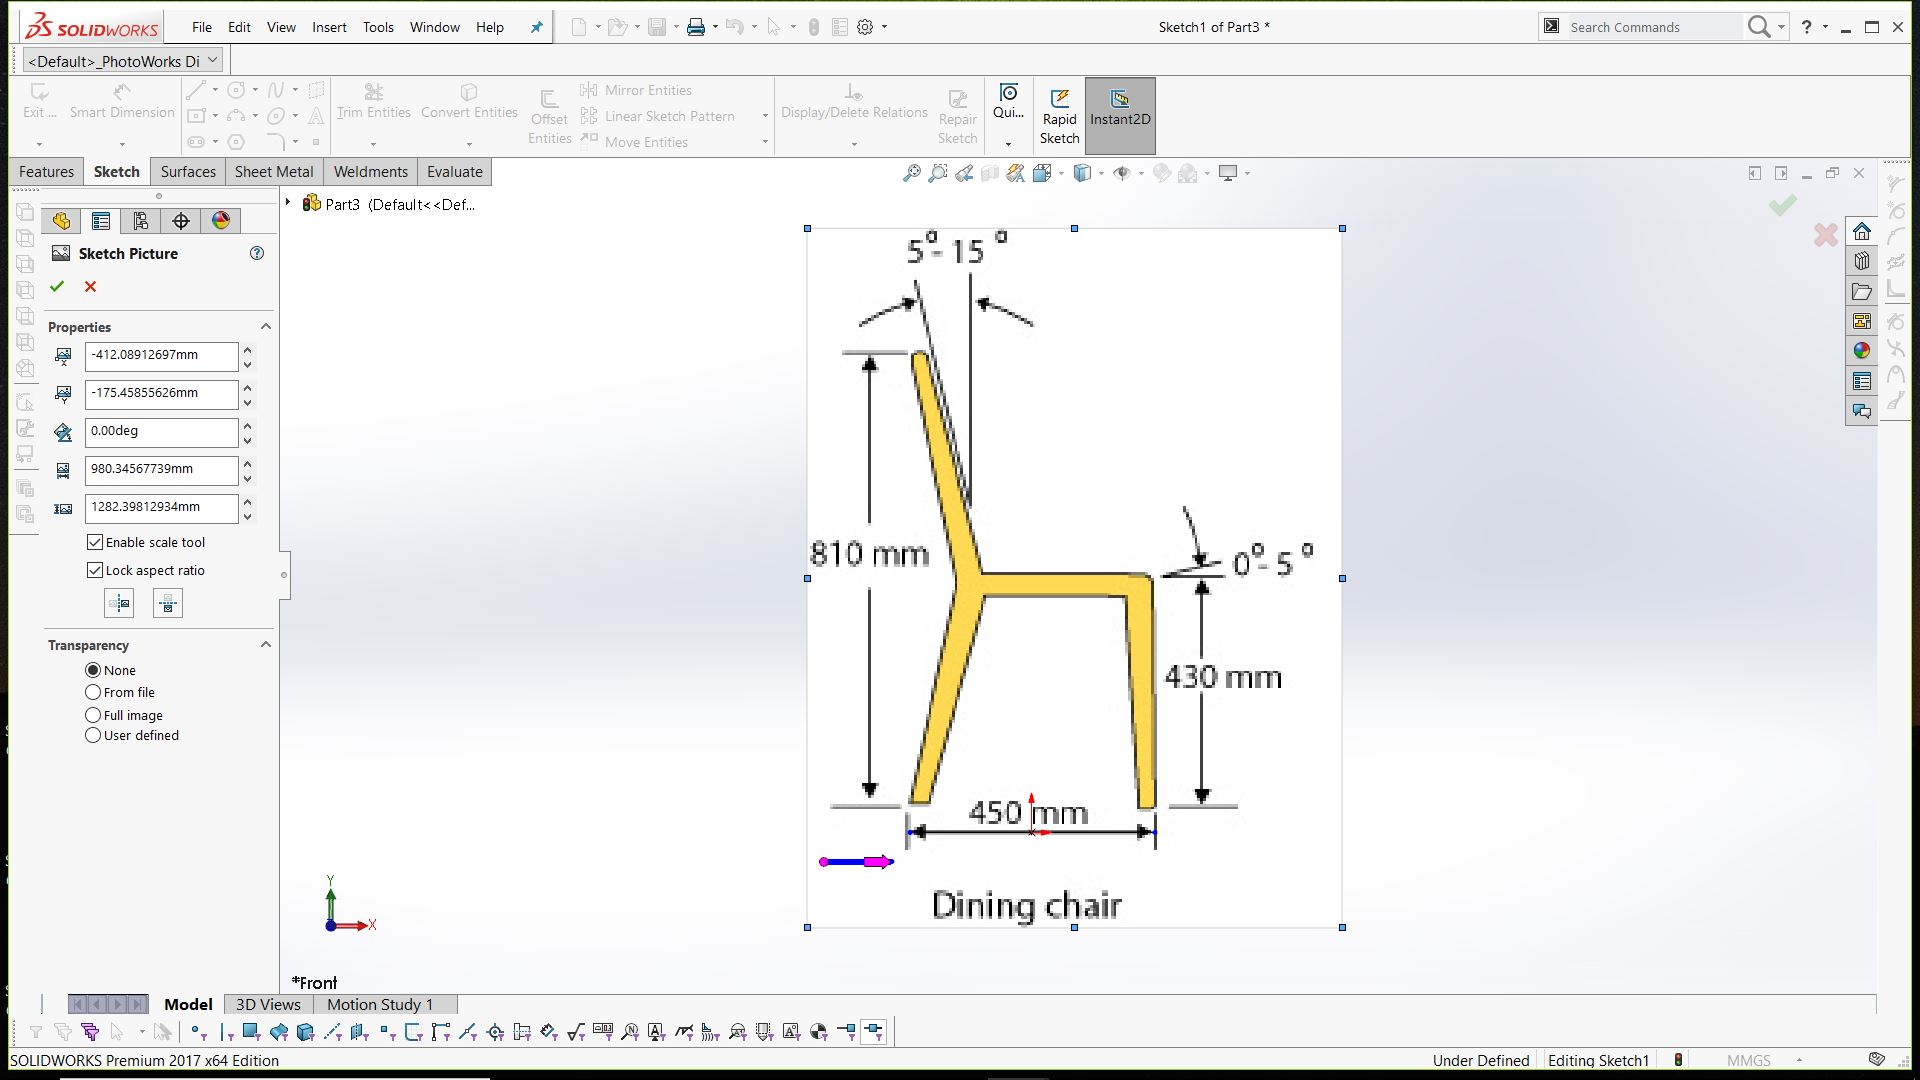
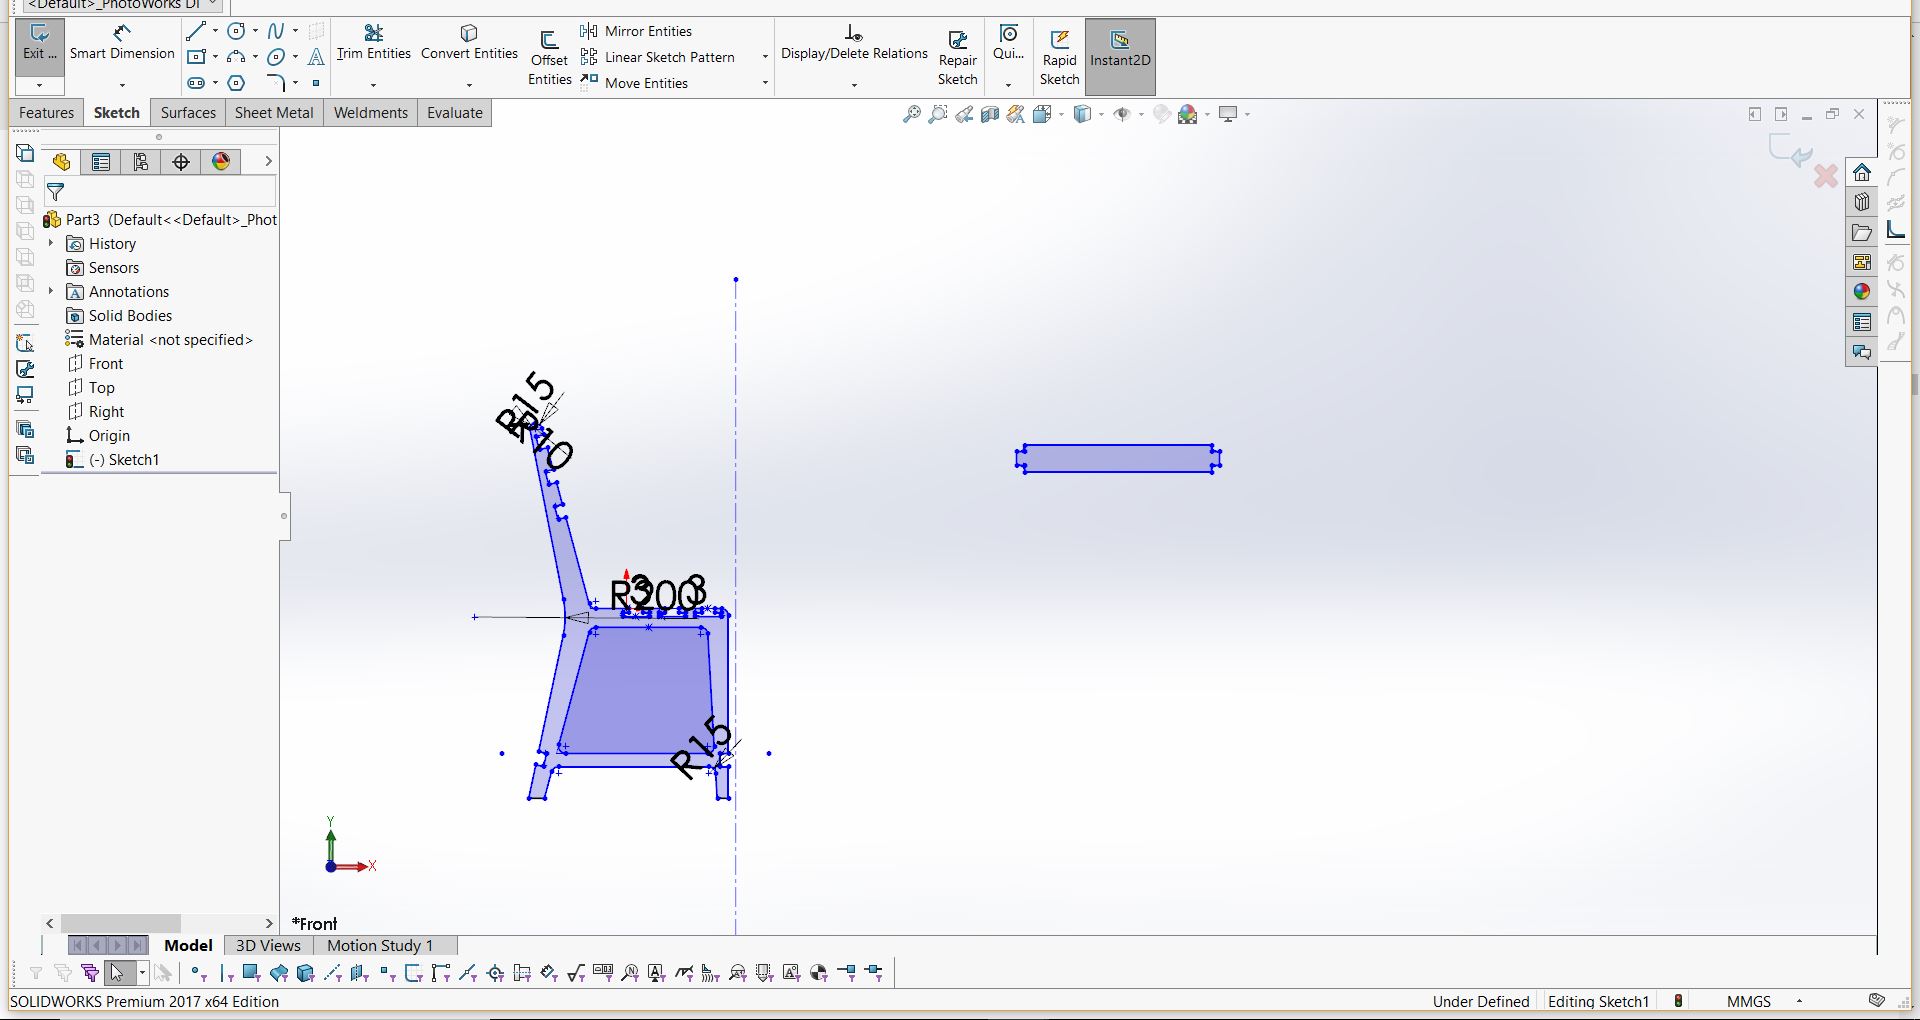
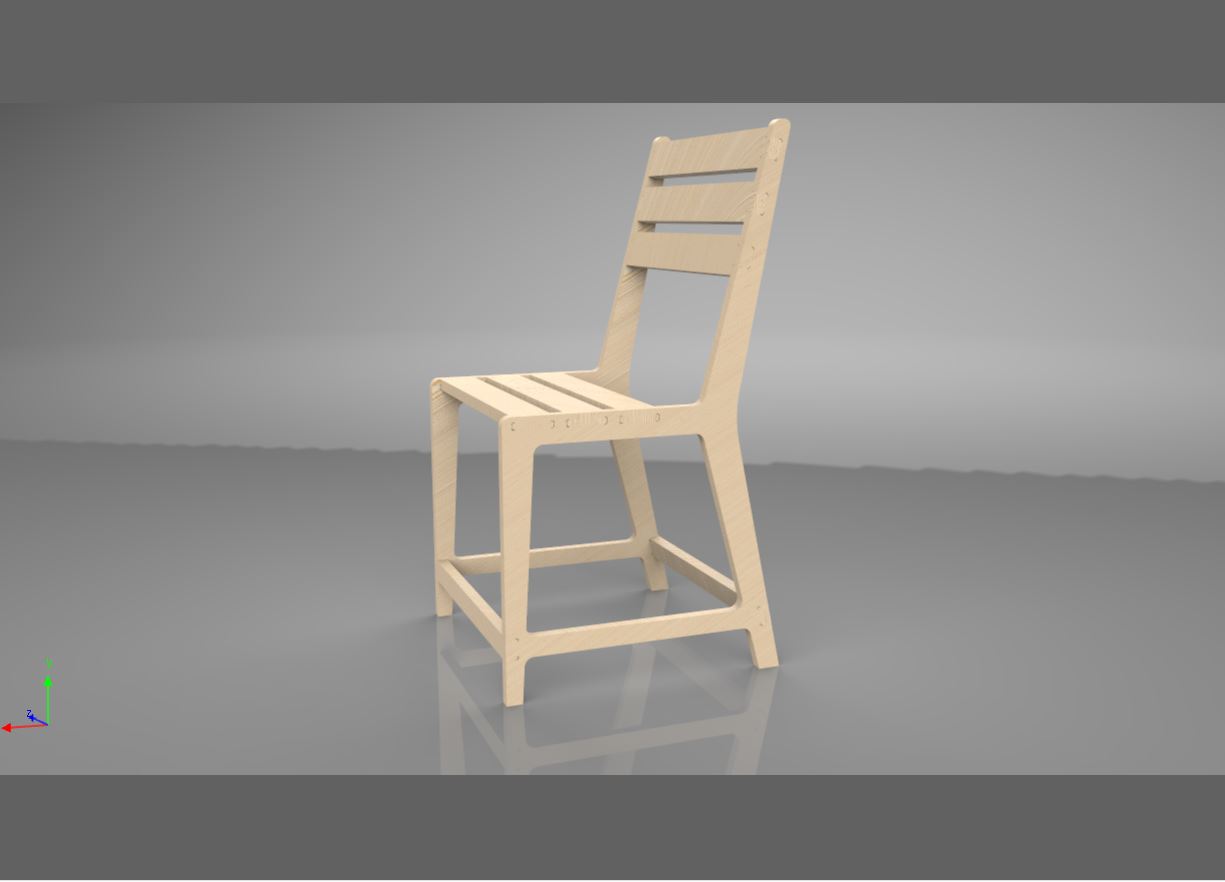
Before going with something big, first I needed to do something small. So I planned to make a small chair at first I also need to expiriment with some carpentry joints that we can make with cnc machines. So I took a standard chair dimension from google and started working on my sketches in Solidworks.
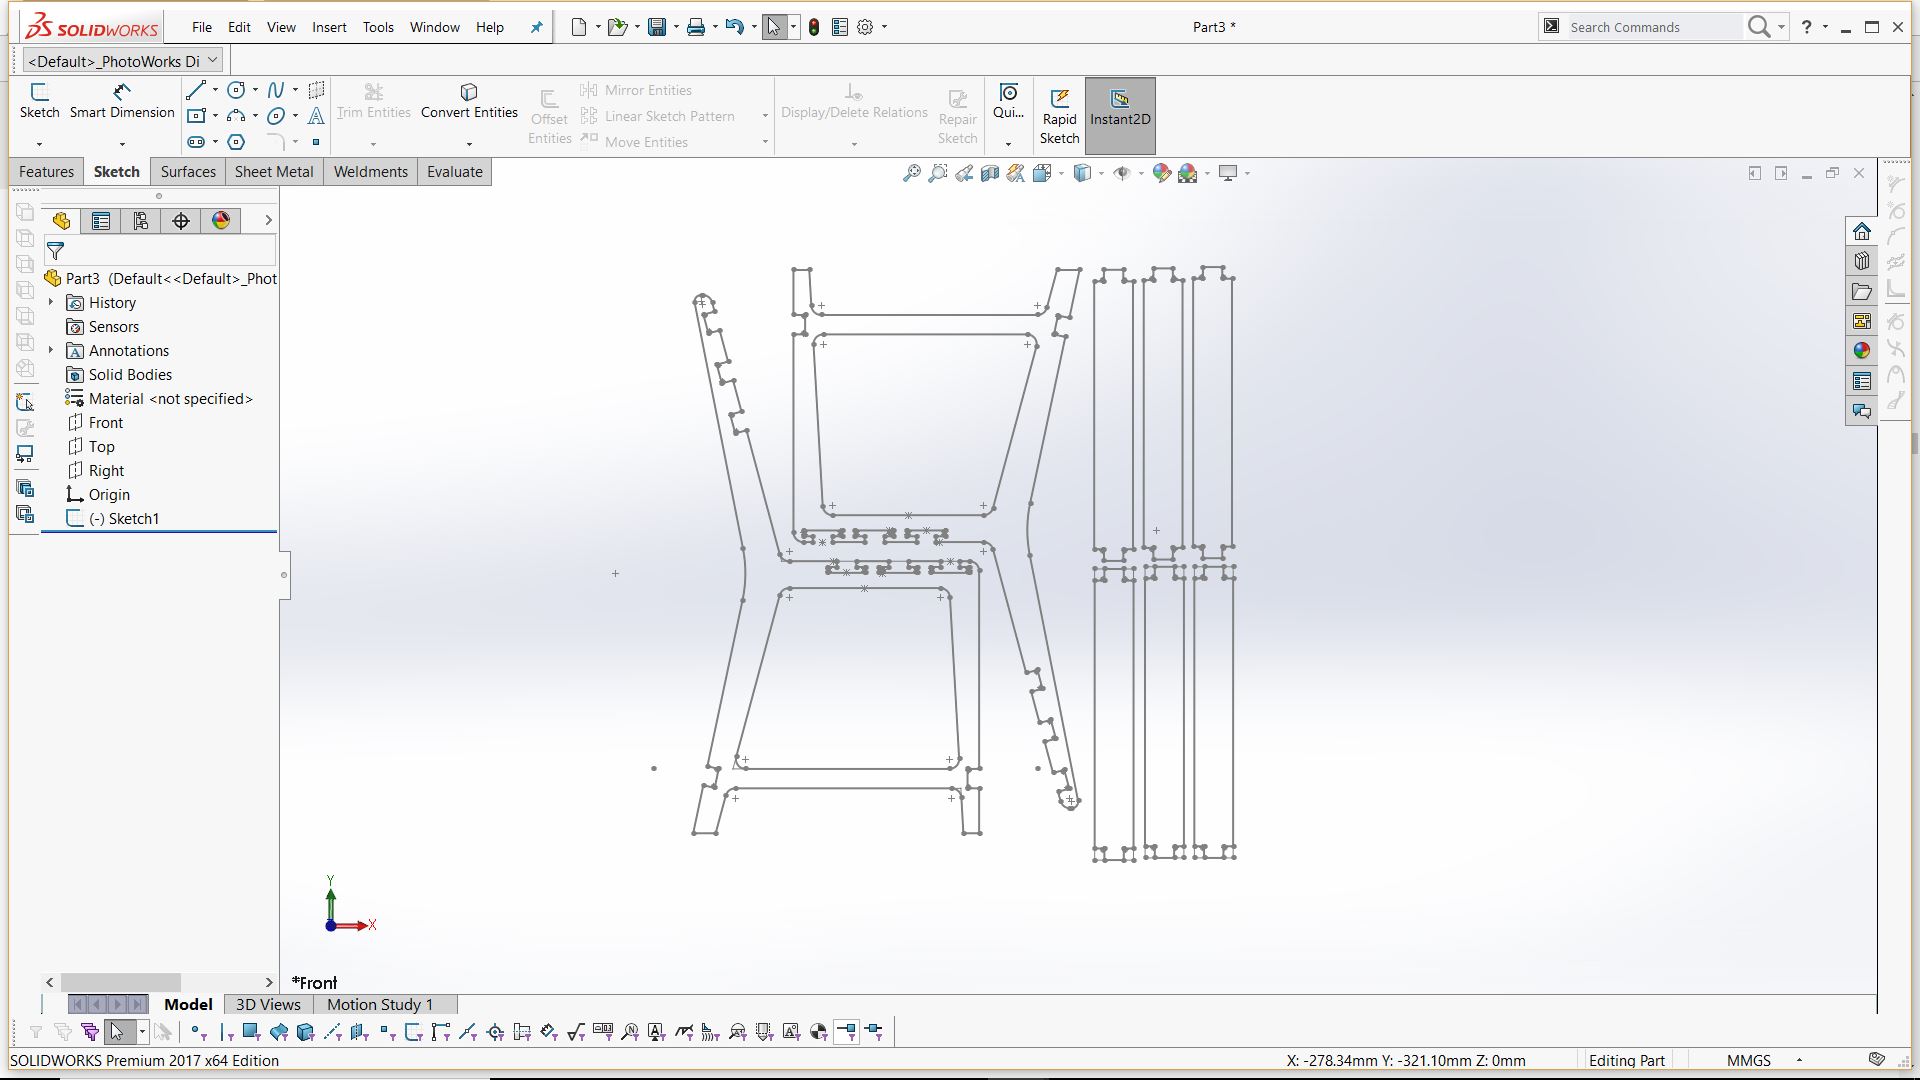
Download the design files from here
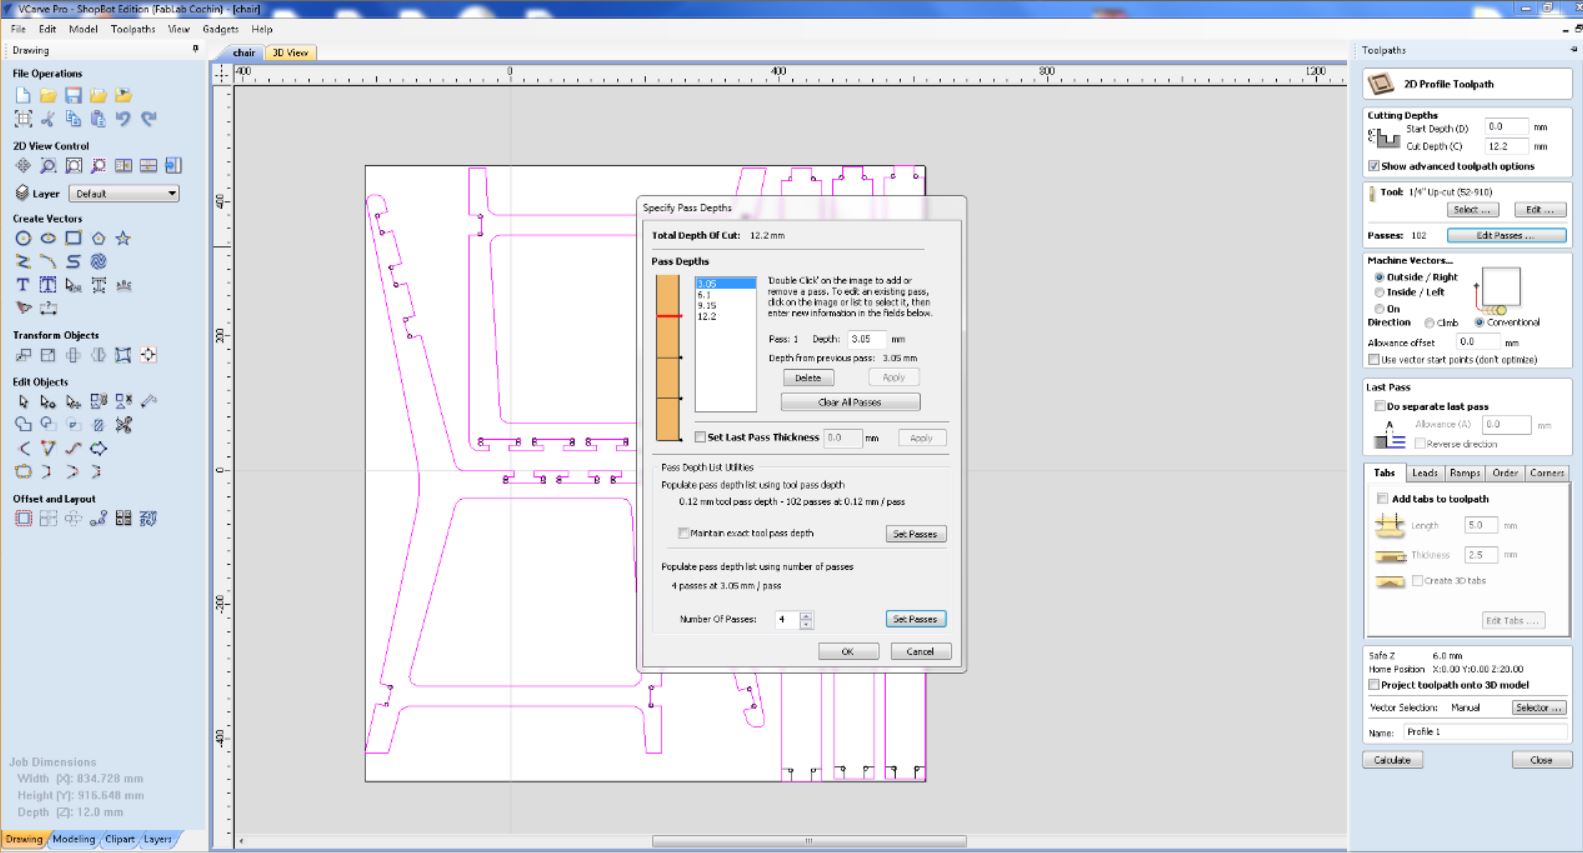


I used the same tool settings I used for my test cut
The shop bot was set and I went with the cutting
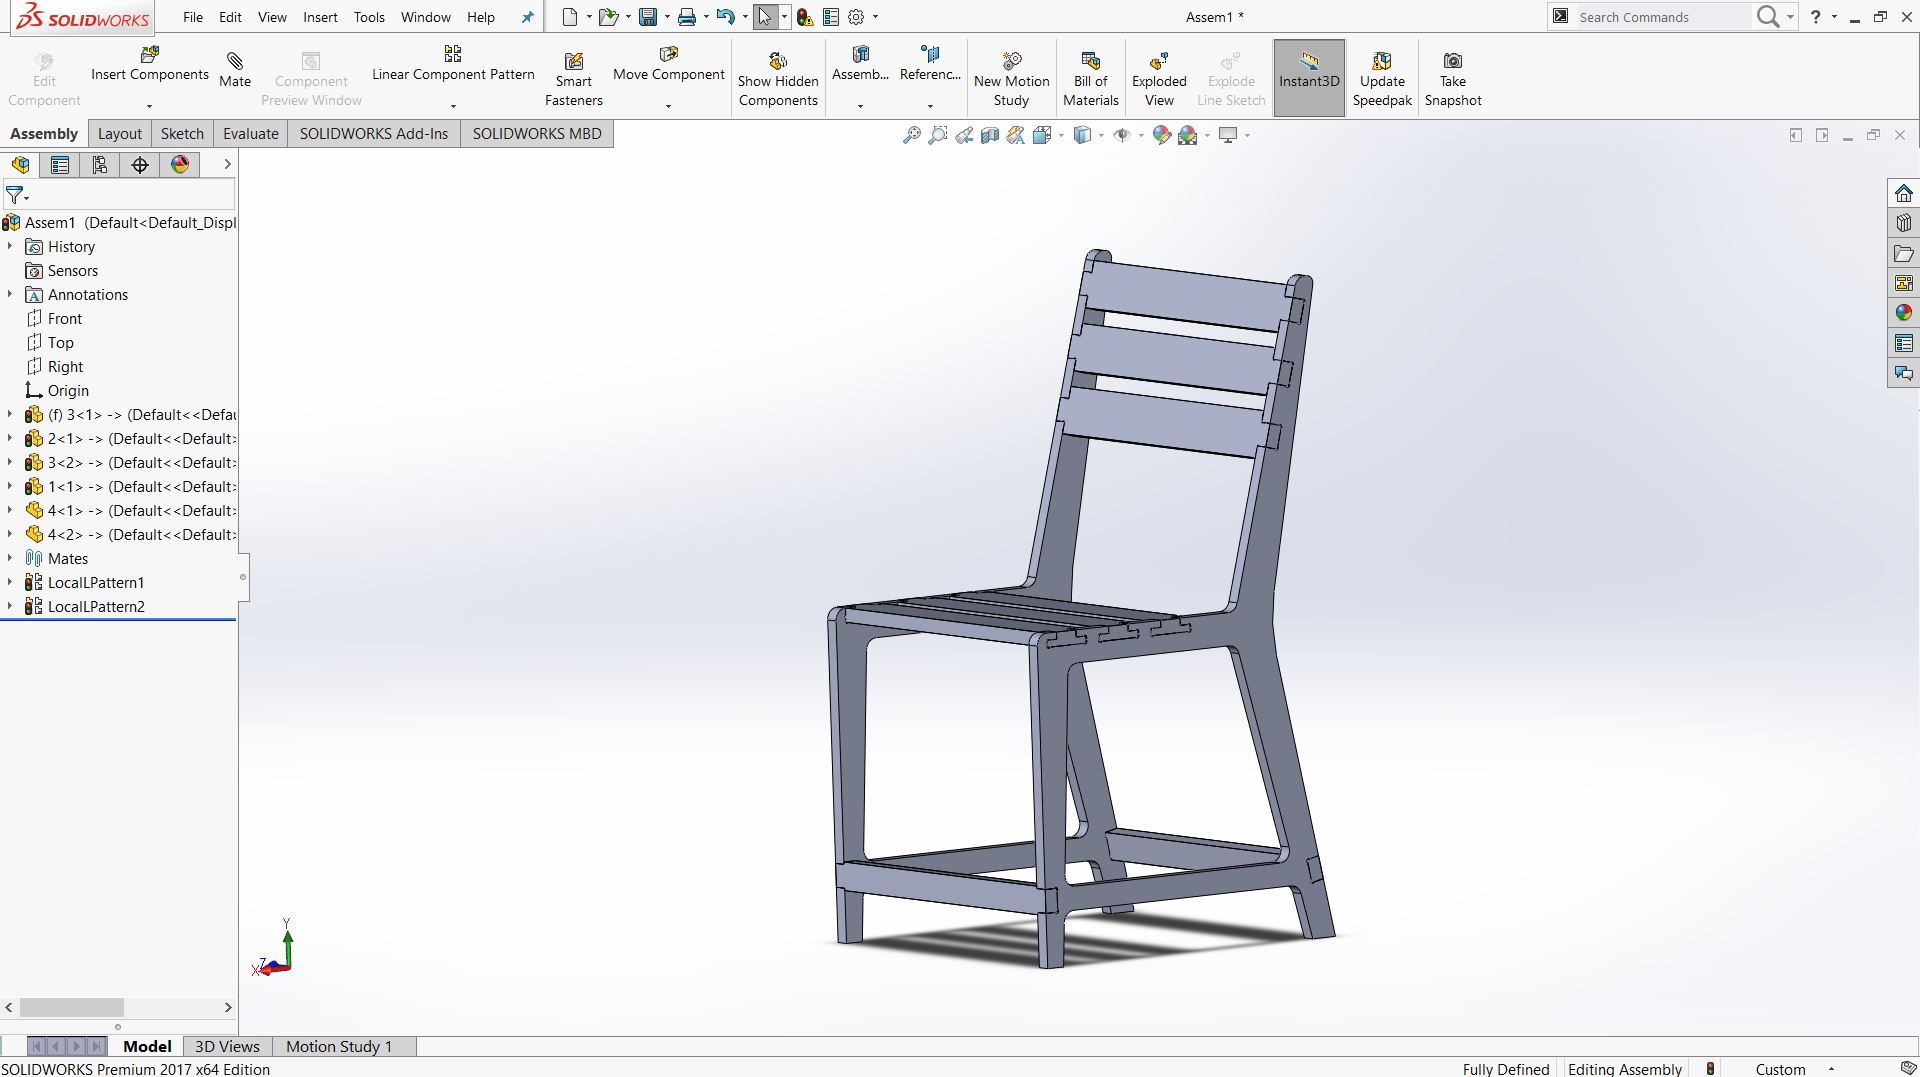
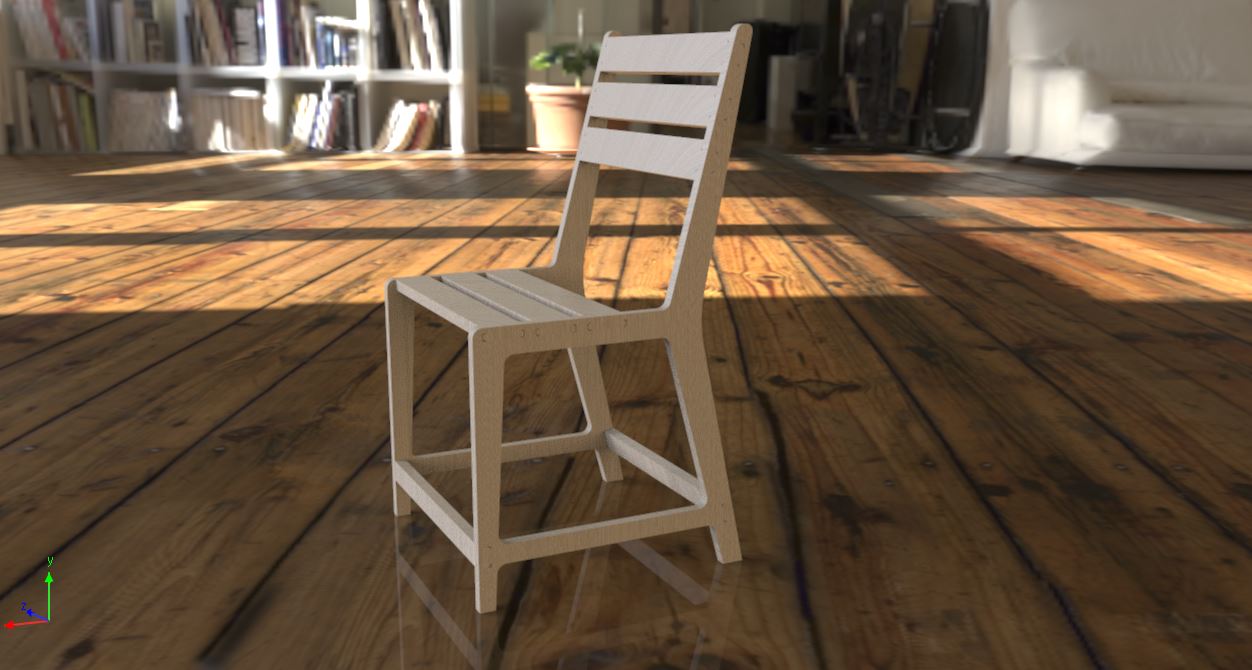
The final result
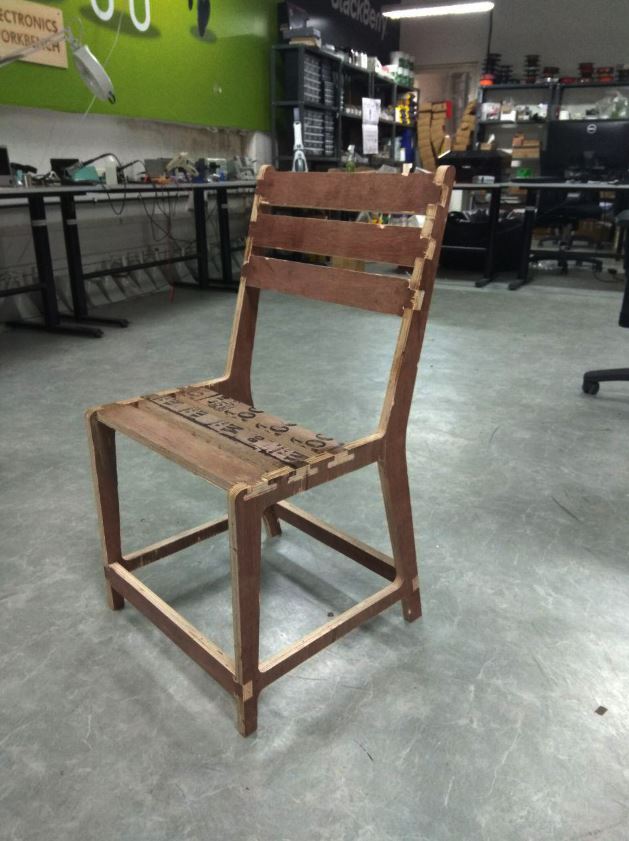
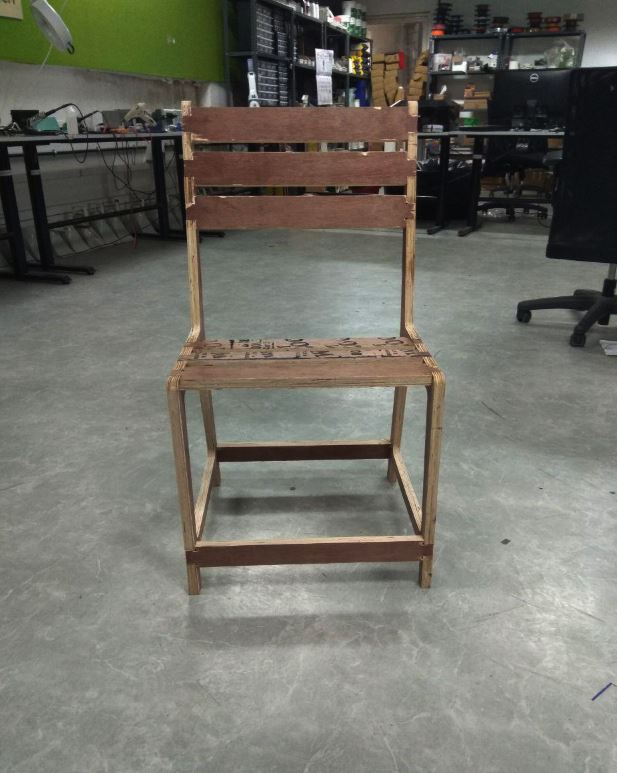
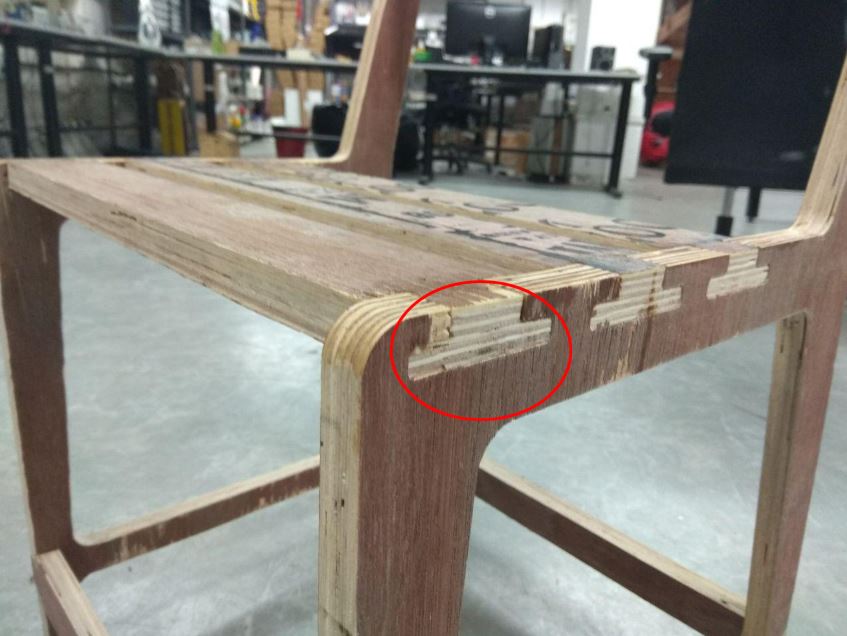
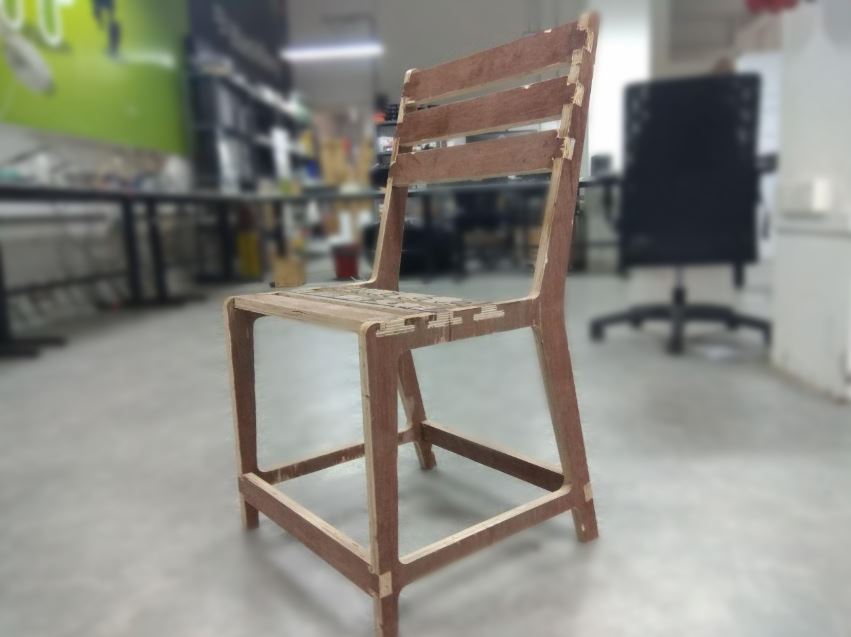

The size of the chair seemed a bit small than I expected . But its the dimension I got from google for a standard dining chair.
Problems faced and Troubleshooting
We had power loss during the milling process a couple of times and we had to restart our machine each time. Once when we restarted our shopbot it started to make unequal movements. For a 20mm input, it was moving about 35mm. To fix this I reset the shopbot referring the user manual and selected the default file of the shopbot PRSalpha 96/48.This fixed the issue.
Halfway through the cut, the machine got stuck once and while trying to restart the machine the bit broke because the spindle was not started before the movement.
The second issue I had was while setting my files in Vcarve. I positioned the files beyond the Y dimensions of the shopbot while creating the layout of my design. I never noticed this because the file dimensions were already smaller than the Plywood sheet I was using. Once when I started the cutting, the head moved towards the Y-axis and stopped. This was fixed by positioning the file properly in Vcarve.
