Menu
HomePrinciples and Practices
Project Management
Computer-aided Design
Computer-controlled Cutting
Electronics Production
3D Scanning and Printing
Electronics Design
Computer-controlled Machining
Embedded Programming
Molding and Casting
Input Devices
Output Devices
Interface and Application Programming
Networking and Communications
Mechanical Design
Machine Design
Wildcard
Applications and Implications
Invention, Intellectual Property, and Income
Project Development
Final Project
Week 8
Computer-controlled Machining
Week Assessment :
Make something big (on a CNC machine).
(we did the session in tha test all material for mold ) It was another busy week I had to catch up with the previous week assignment.
Our mentor Wendy was busy preparing the CNC machine. We ware unable to use the CNC machine. While I am waiting for the CNC machine to be ready to use, I worked on my board and for this week I had to design my module in parametric software and I used Fusion 360.
I looked to other websites in 2017 and that they did, and I saw that most of them they design furniture. I decide to do something new and not furniture at the same time I want to make something I really use it. So, I think that better to do bed tray because my sister has one, but she doesn’t allow me to borrow her bed tray and when she use it I feel jealous. That why I decide to make bed tray.
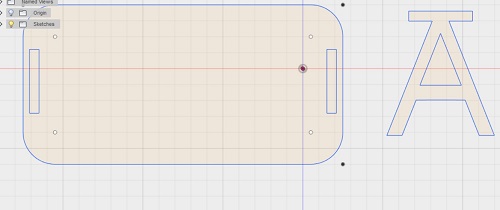
I start modeling in Fusion 360 agine and I change my design three or four times.The first design was the table has a rectangle shape with legs look like A letter.
This is the first design
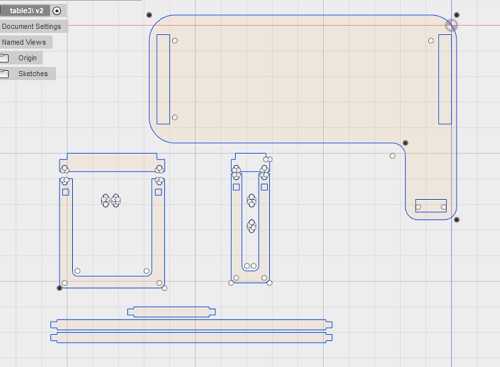
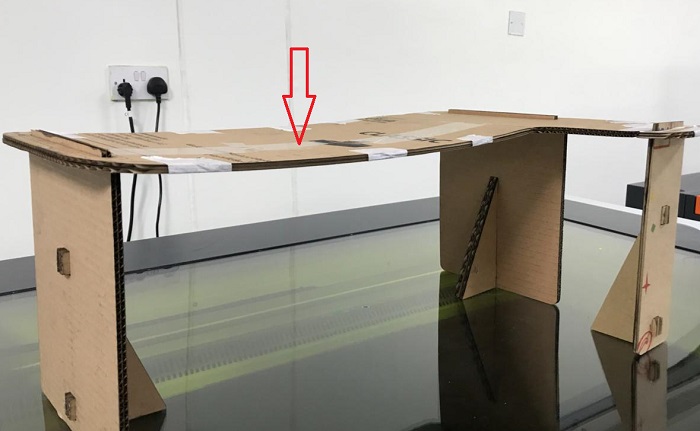
This is the second design.This is how my table design developed, so I extend on side of the table to have extra space for resting a hand and feel more comfortable. I didn't like the legs so I change it later and I did some test in cardboard. I didn't realize that the tray will bend till I see it in cardboard.
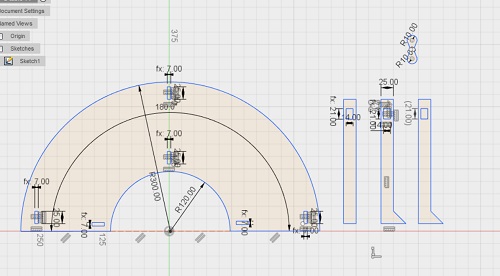
The third design is a half a circle. Everything will be around you but later on, I think that will not work and not practical because of the size limitation besides I did not like the legs.
Anyway, I decided to go with the second design. I did a lot of test in cardboard.
But still, I was stuck in how to keep the tray balanced. As usually, Wendy gave me the solution. she told me to design a peace the will hold the legs together and should be under the tray so it doesn't bend.
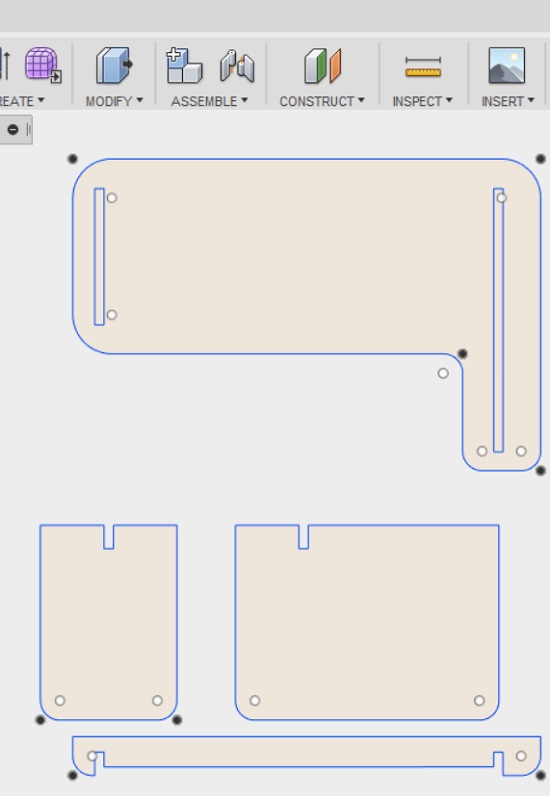
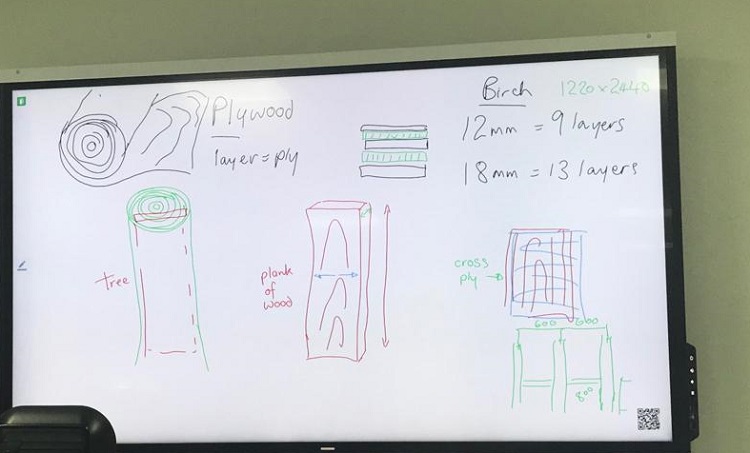
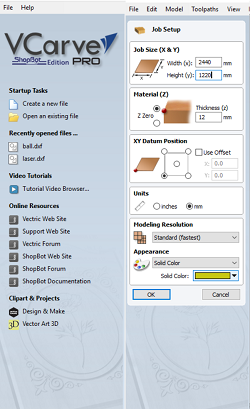
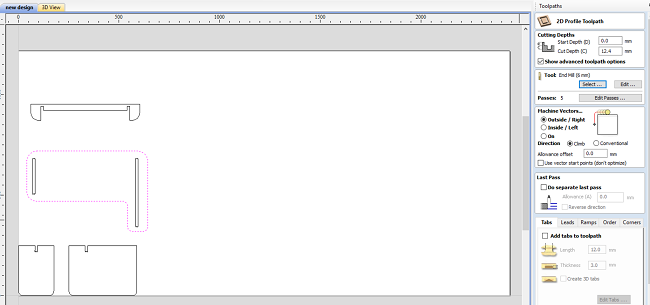
Now I finalized the design I have to convert my file into SBP file for the shopbot. I used Vcarve pro to generate the toolpath for the mill bit. my sheet of pirch plyewood is 2440*1220 mm with 12 mm thickness and 9 layers of ply Wendy gave us a session about different kind of plywood
I had to provide width and the height of my sheet in the job size.
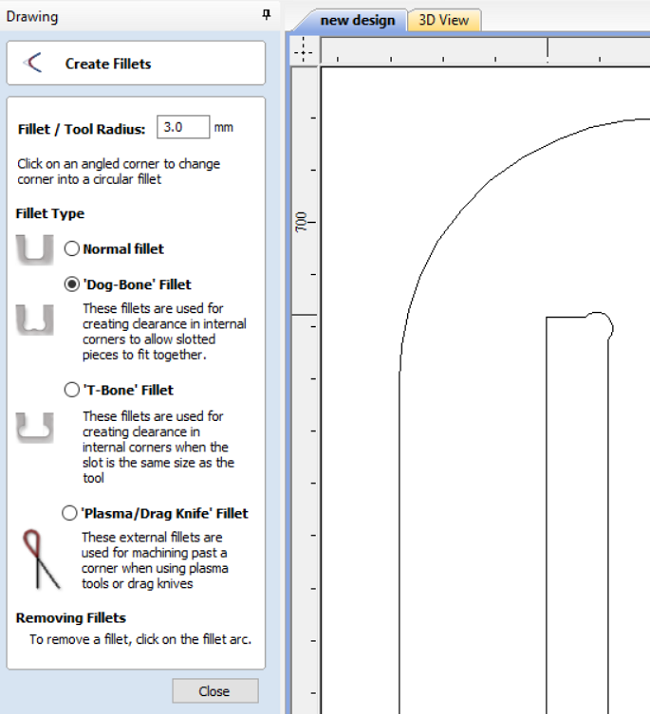
I selected Dog-Bone for the slot so it became easy to assemble.
I had to understand the difference between the drill bit and the mill bit. the drill bit designed to cut vertical into a material, while the mill bit cut horizontal. I found a good explanation in this website . I added the mill bit in the tool list. I used 6mm down cutter with 2 flute mill bit.The Spindle RPM 12000 and
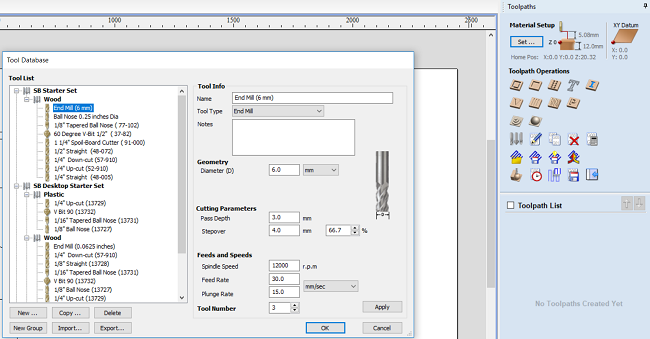
I had 5 passes each pass have 2.48mm depth to keep the same tool path depth in each pass. Because the plywood was too hard.
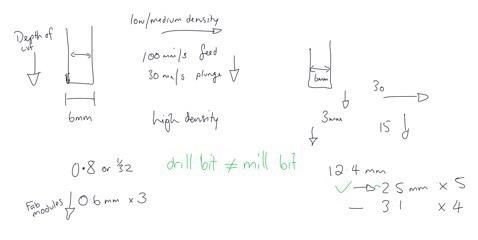
The sheet has a 12mm thickness and I add 12.4 to make sure it will cut it all the way through.
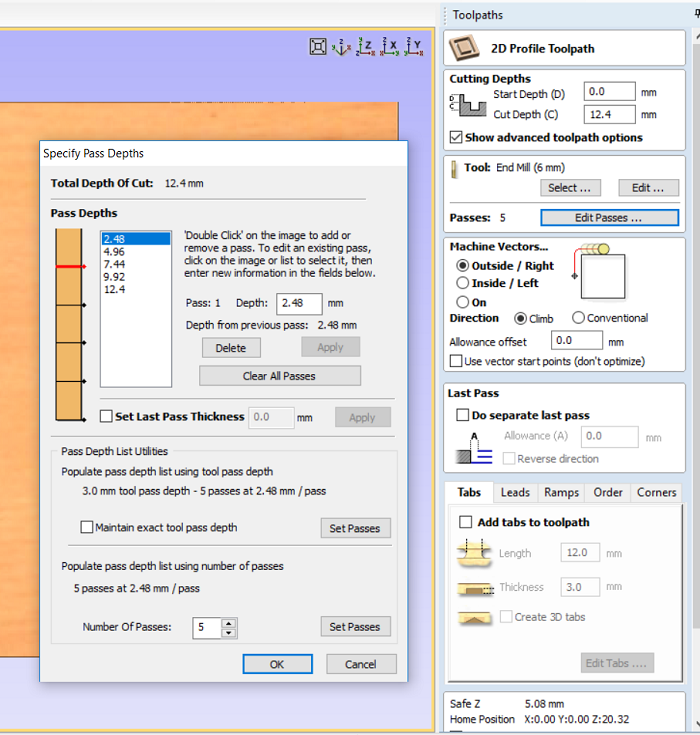
Then I add tabs that will prevent the parts from moving while the mill bit crossing
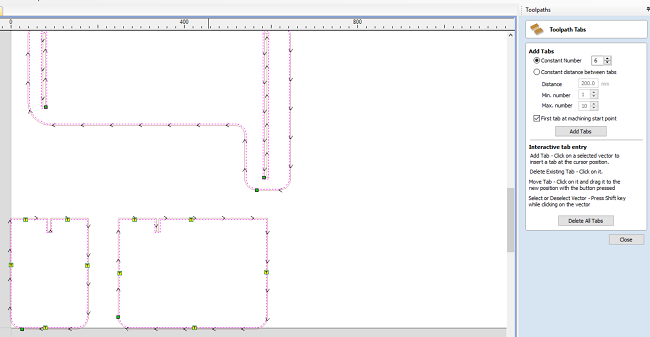
Now I have the toolpath for my design.
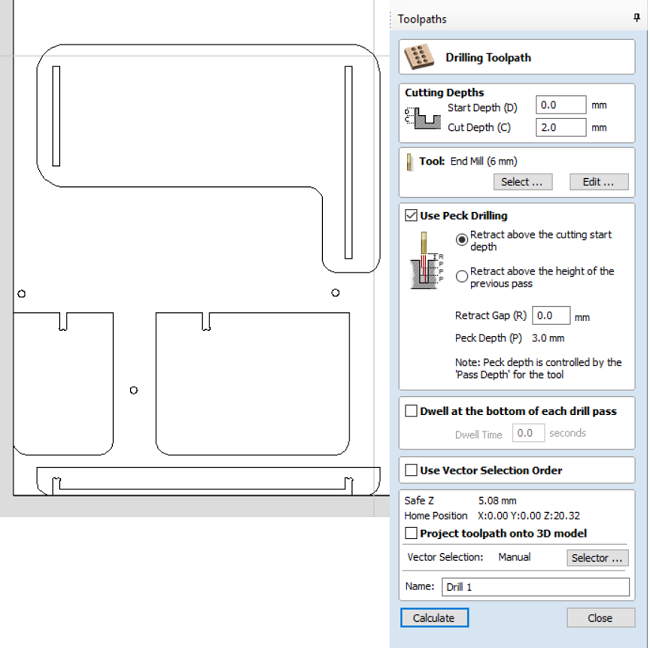
I add circle so I can make drill path and I locked the circle in a separate layer so I dont selected accidentally on my cutting toolpath layer. The 2mm depth cut only to mark where I will place the screws that will attach the sheet to the bed.
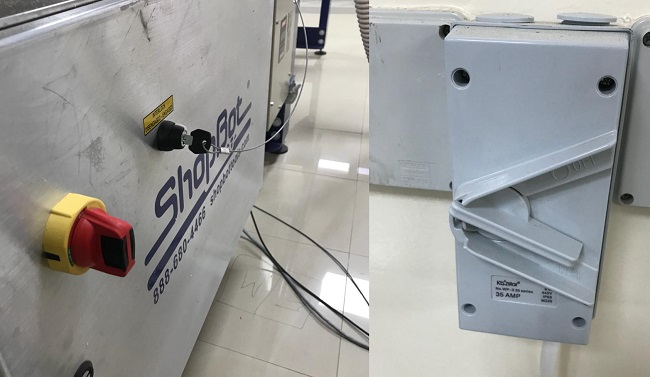
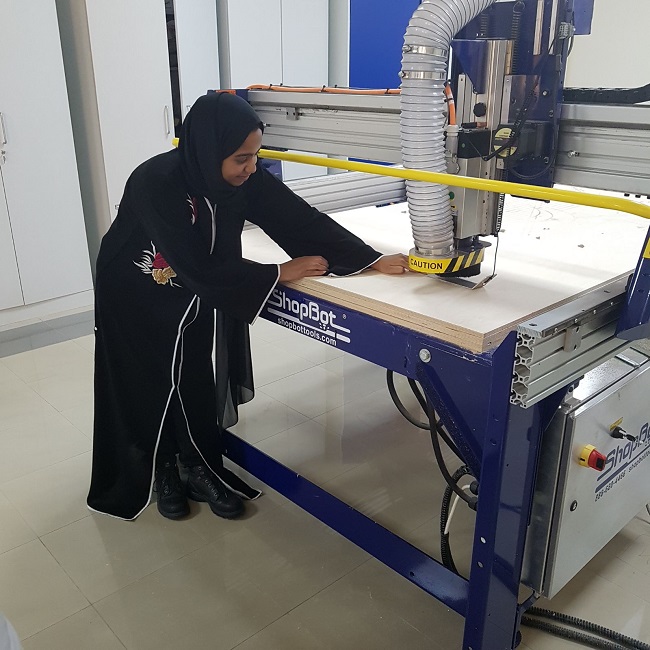
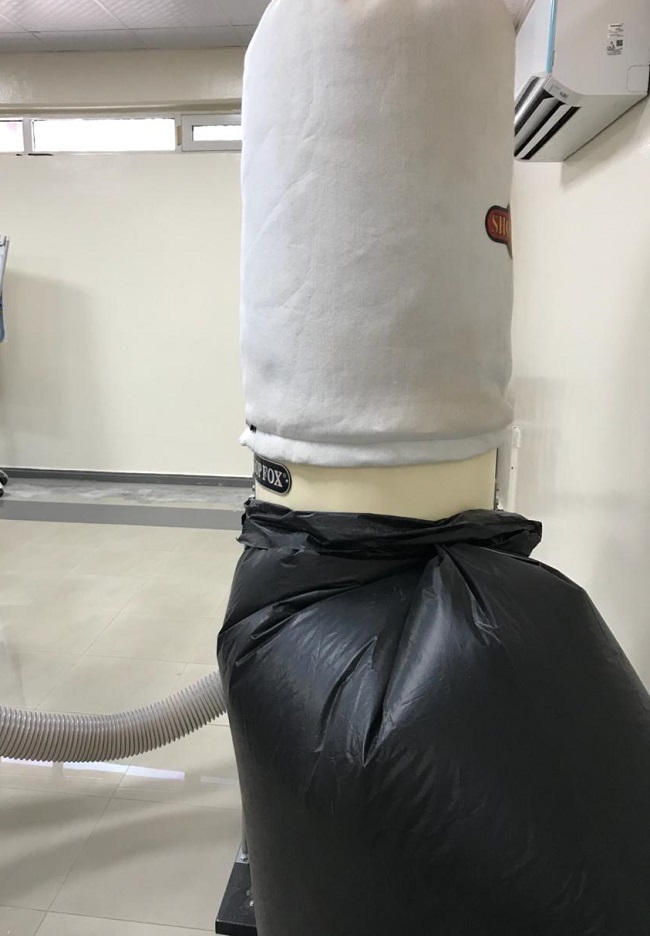
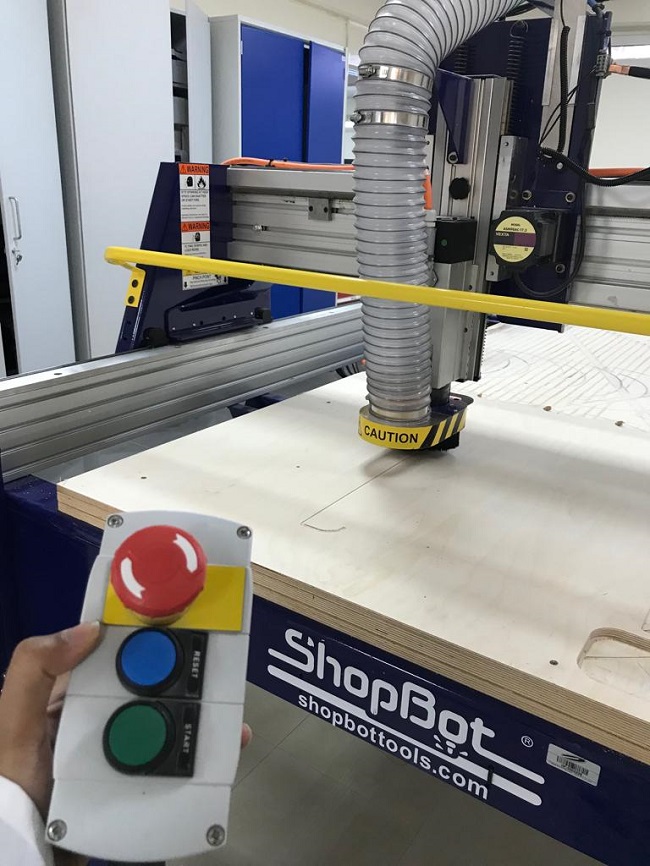
Now I am ready to start shopboting. Safety first, I wear proper shoes and I had an eye and ear protection and I but my scarf inside a lab coat. Then I turn on the shopbot.
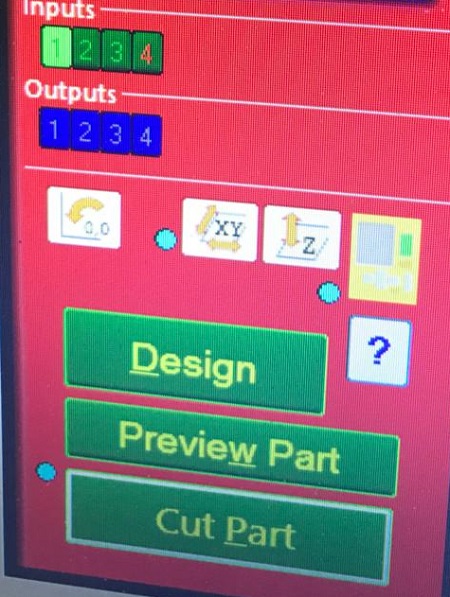
It like any cutting machine need to set the origin. there is two way to set the origion and i used this way by moving the mill bit in the desired place then press zero axes then I select X and Y.
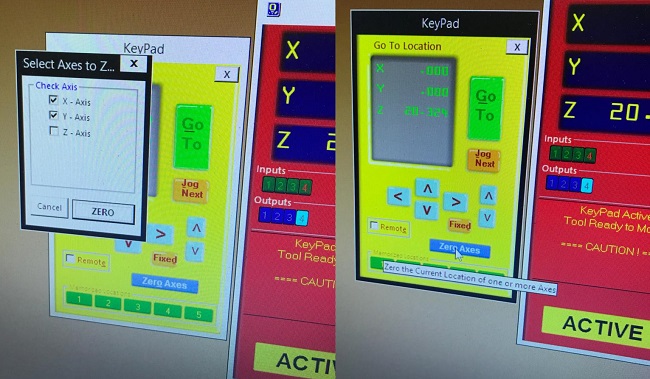
Then I had to zero the Z axis which is different than other machines the mill bit should touch the metal plate twice. This is how I connected after I done zeroing the Z axis I return the metal plate to its place ( like in the first picture).
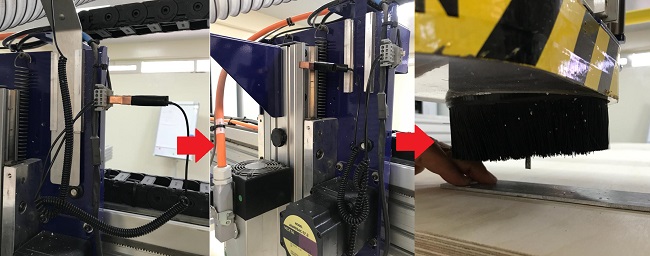
when mill bit touch the metal plate one of the input will light up.
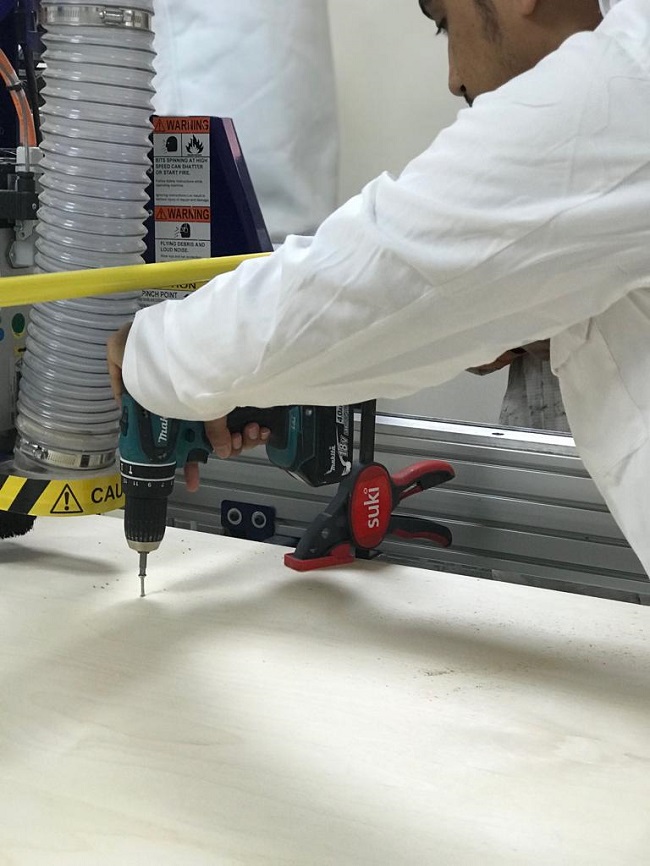
I gave an order to mark the holes where I will place the screws. which is drill file. because Wendy was running a session for FabLab staff on shopbot Waled helps me to fix the screws in the sheet while Wendy explaining how important is this part. The mark was away from me and it was hard for me to reach it that why I needed some help.
Now I am ready for cutting my tray. but before that, I had to switch on the vacuum
An emergency button should always be in my hand while the machine cutting in case if the mill bit hit the screw.
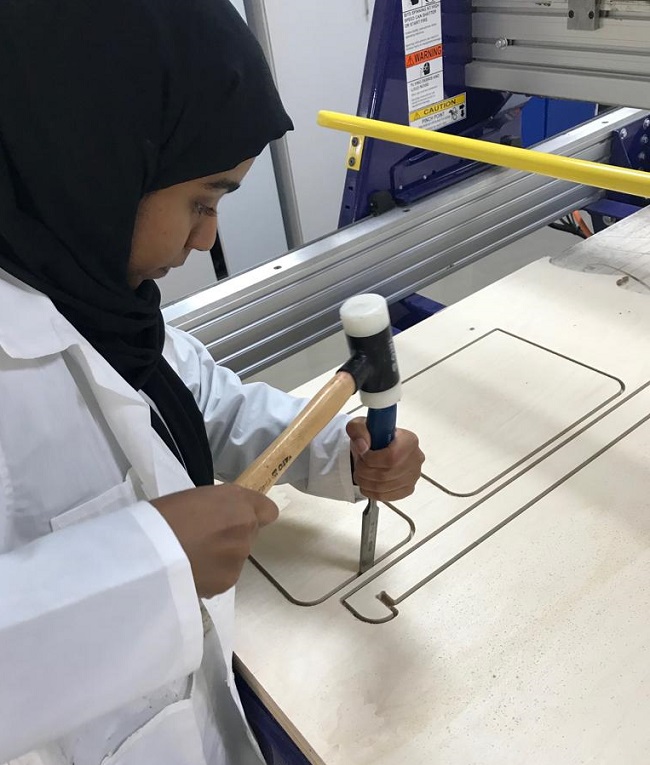
Still, the parts stuck with the sheet because of the tabs that I added now I had to remove the tabs by hummer and chisel.
Now I have all I need to do the documentation
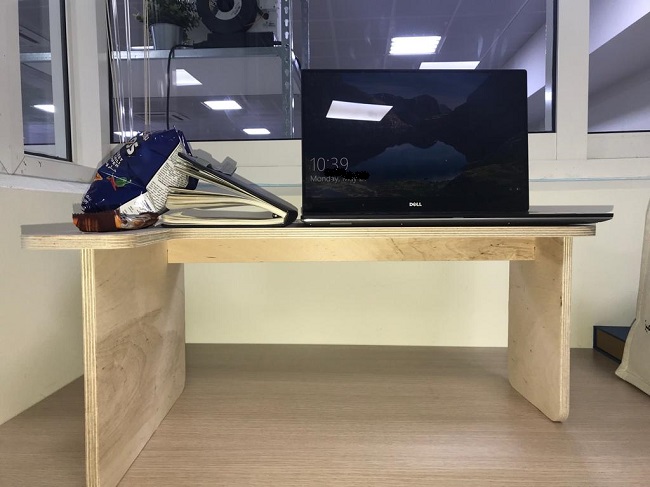
Finally, I have my own bed tray done by me. Im so happy that I reached a point where I can start with my own furniture. This is only the first step for me to enter furniture design world.
File
Fusion360 fileDXF file
Vcarve file