Menu
HomePrinciples and Practices
Project Management
Computer-aided Design
Computer-controlled Cutting
Electronics Production
3D Scanning and Printing
Electronics Design
Computer-controlled Machining
Embedded Programming
Molding and Casting
Input Devices
Output Devices
Interface and Application Programming
Networking and Communications
Mechanical Design
Machine Design
Wildcard
Applications and Implications
Invention, Intellectual Property, and Income
Project Development
Final Project
Week 20
Project Development
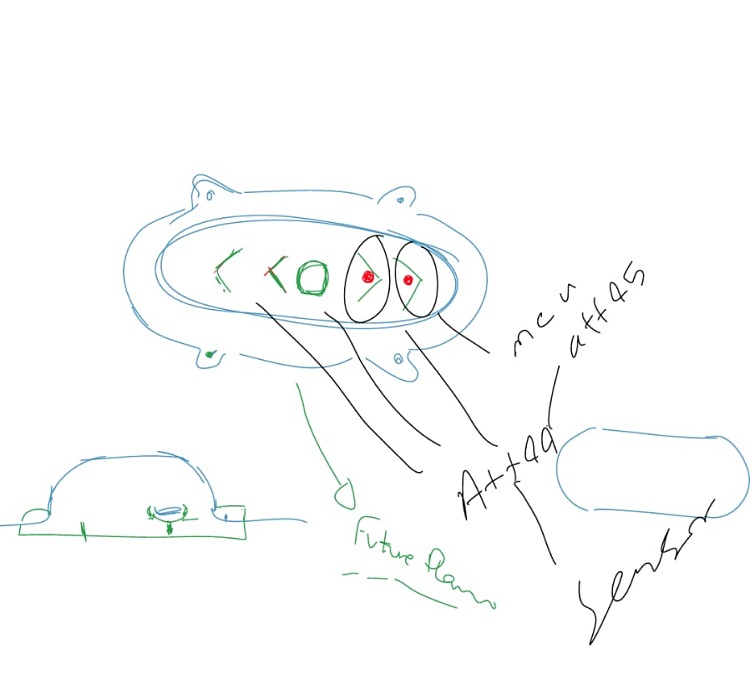
I had to present my idea to Wendy and Hasim to decide if I am ready to present my project in front of a professor. Neil. So I had to prepare all the stuff that I did for my final project. I had all my electronics part and I was missing the sketch and finalized a design for my final project. Then Hasim and Wendy they set together and did me a favor. They draw the sketch for me. They also discussed with my about boing a plan to get done with the project.
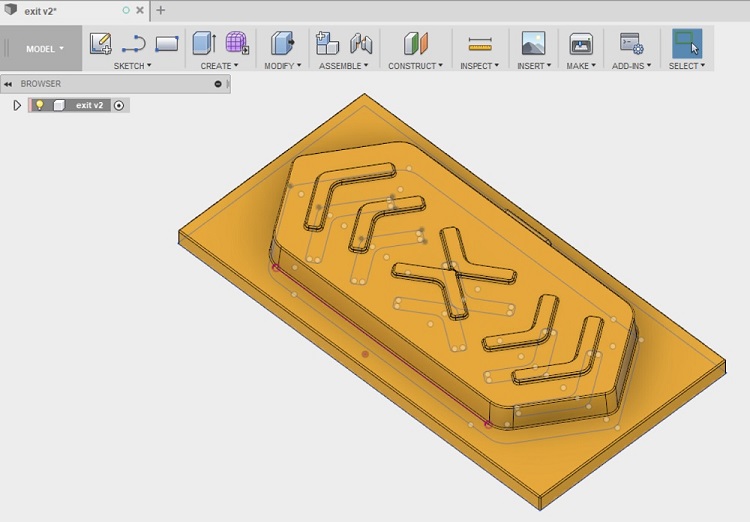
Wendy suggested that we do a test in the vacuum forming machine. for this test, we used a yellow plastic. that helps me to imagine how the process will be. Then I started to create the design for my mold using fusion 360. I used the Draft tool in fusion for the first time MODIFY > Draft. My mold had a draft angle of 7 degree
Test neopixel control each led speratly - first I try by myself with an Uno, and didn't work. I asked Hashem to help me and he test the neopixel and it didn't work the first time. Then he checked the soldering which was wrong. I connect Dout to Uno while it should be Din. He fixed the soldering and tested the LED and it worked fine but he didn't show me the error. He want me to try by my own. He kept the Uno and the neopixe at his desk when he was away I peeked at the connection for the neopixel and I saw that he soldered the Din pin beside GND and VCC. Here I realised that I have to connect the neopixel with Uno with pin Din. And the Dout if need to connect another neopixel or to extend the strip. I did the testing again, and I was able this time to program the neopixel. I showed Hashim he told me that I have to try to control each LED separately. I did it successfully. When I moved to the ATtiny44 I face an issue - I used the same code that I used for the Uno, I upload it using my adorable fabISP it's my favourite one becasue I cannot program any other board without it. It didn't work but the code uploaded successfully, so I don't know what is the issue.
In the Input week I try two sensor. I designed a new board with the sensor only. Then I connected the sensor to pin 8 and uploaded the code I modified to read the sensor. And it didn't work. I felt there was something wrong with the pins and I moved to pin 7. I uploaded the code again and it worked fine. I say whybut I am very happy that it work.
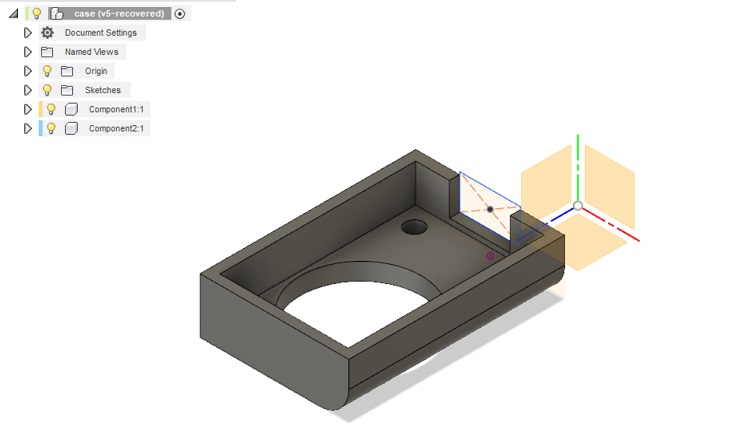
Model a case for sensor before finishing the model for vaccum. I used Fusion 360 and learned a new tool called Draft. in Mold and cast week I started to design a 3D module.
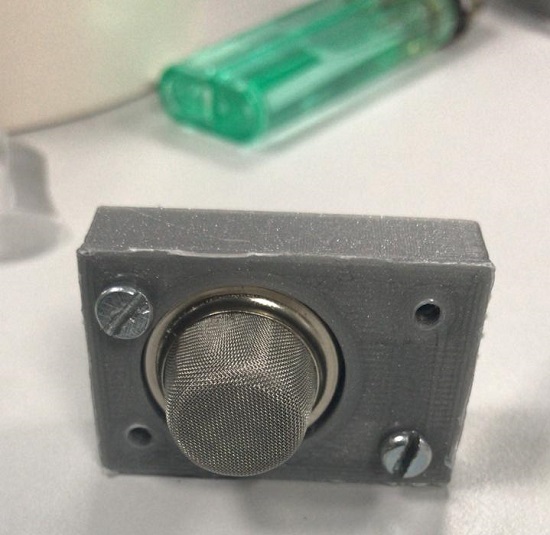
I designed the case for the sensor and I print it out. I tried four times to print it out. Mostly because of the size, to get it to fit in the sensor. I did it in PLA and I have the fit right. I will add fillt and maybe a draft angle if I use it in the vacuum former. I have to reprint the model and I have to change the material to ABS will melt at 250 while PLA it will melt at 200. ABS should last longer in the vacuum former. I want to make sure that my case get it right from the first time because I don't have time to fix it before my presentation and this was wendy's advice
I will change the design the case for the sensor today and I will figure out why I'm unable to program the neopixel with the attiny44. I will be happy if I use today the shopbot.
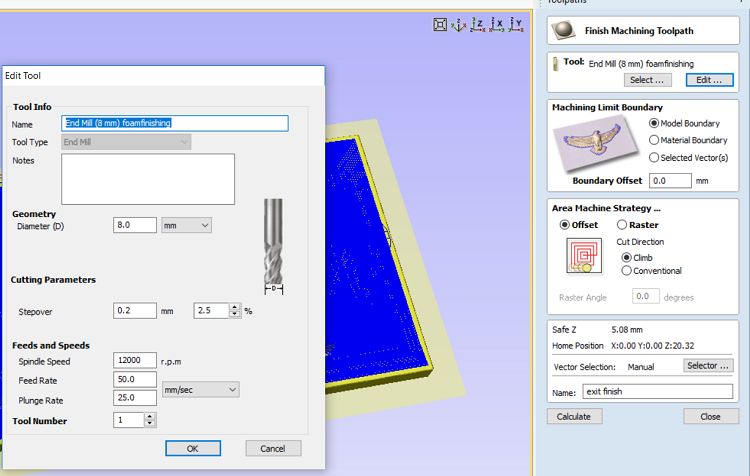
I finished designing my mold and I created the toolpaths for the shopbot with the help of Wendy. We used VCarve. This is the first time I created the toolpath for 3D design. Actually we combined 2D and 3D. Then we moved to the shopbot.
We cut urethane foam. It was annoying becuase there were a lot of holes in the foam. WE shifted and restarted three times to avoid them but still we couldn't avoid them totally.
But anyway, now I have my mould (with some hole) and I have to hack it.
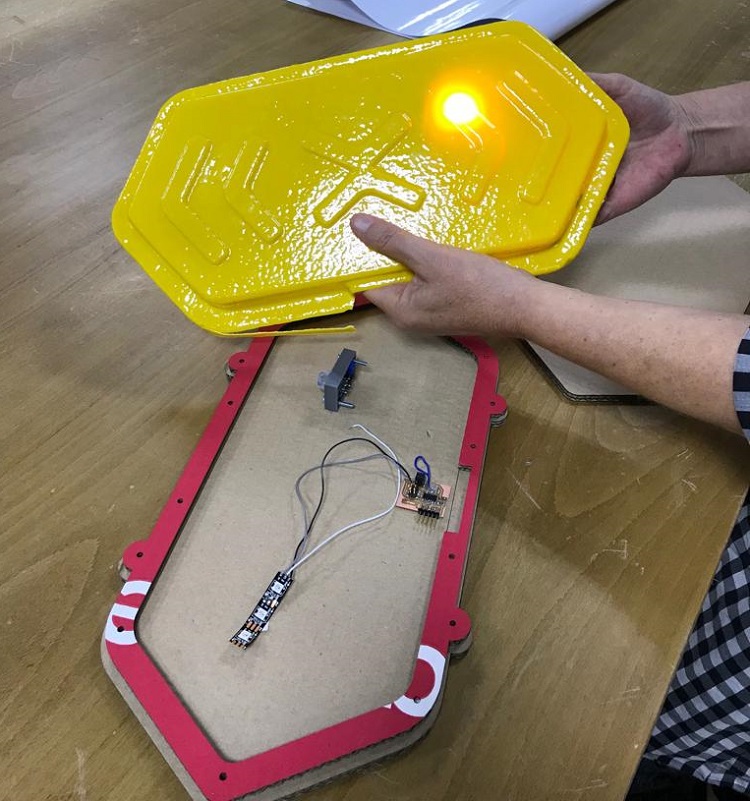
Then we moved the vacuum former. We warm it up then my model was ready in seconds. 40 seconds.
From the test I know where to fit all the electronics parts in and how I can cut the unneeded part, and to make holdes for the sensor and the USB port. The model should be taller becuase we need more space to place the sensor and we know far far should be the LED from the plastic case. I have to find a way to lift the LED up to the desired height. I need the LED to fit the arrows.
I did some testing in the cardboard on the laser, testing the frame. It will pin the plastic case to the wall and hold all the electronics parts.
WE will try to add another layer for the mould so the plastic case will have more space for the sensor.
I fix the design of the case and print it in the ABS. So first, print the case, then do the mould then vacuum form.
That went very well, I'm satisfied by the result. I'ts much better than the first test.
Today I cut the neopixel in three groups, two for the arrows and one for the cross. So the plan for today is to have the arrows cut in vinyl. We will cover the arrows in the plastic case to make it ready for spraying with white lacquer. I will test the LEDs inside the painted case. And I have to make a special case to isolate the middle cross from the rest of the arrows becuase it will have different color from the arrows. I will solder all the neopixels.
I cut the arrows in vinyl cutter machine to cover the needed part from ditting spryed. I placed the stickers in the arrows in their place in the plastic case and I used white spray.

I did three layers and still, it didnot work as it should be maybe because it's my plastic case is also white. I spray it again with silver and its work good.
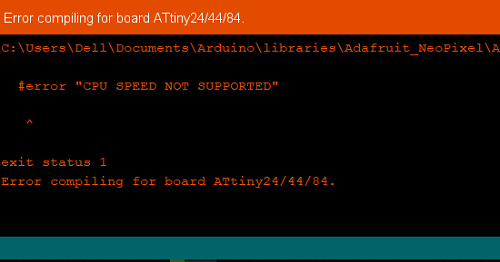
I started working on programming. I did it step by step, the first step is to have the Neopixel works with Attiny 44 to do that I had to download a library for Neopixel from Adafruit in Arduino IDE. Then I found on Adafruit webpage a tutorial. I got some idea about controlling the led but I did not create my own work I started with strandtest file. Which I got it from examples. I verified the code and I was fine but it shows an error when I upload the code to my board. the error said that the "CPU SPEED NOT SUPPORTED" I used external 20 MHZ crystal.
I found the solution written here
I had to change the clock to 8 internal. I did that and the code was uploaded successfully to the board but the Neopixel didn't work. the Neopixel was connected to pin 7 on Attiny 44 and I was connecting my sensor in pin 8 at this stage I didn't programme my sensor. I tried with Hashim to program the Neopixel with other pins like pin 2 and 3 still it didn't work. Hasim try to program the Neopixel with pin 8 and suddenly the Noepixel worked then I discovered that the Neopixel works only with port B in Attiny 44 still I don't know why. The next step was to control each led separately and I did it. Then I moved to next step which was connecting the sensor and the Neopixel will react with the sensor and it works fine with this code.
Master code
Slave code
The last step is to add the serial communication. I added the code that I did for Network and communication week to my final project code. I got an error which is said Sketch uses 4548 bytes (111%) of program storage space. Maximum is 4096 bytes. because of this error,
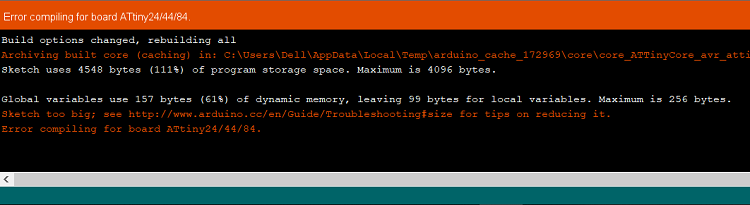
I had to move to Attiny 84 which has duple storage space. I m using now Attiny 84 and I upload my code to it the slave code works pretty well but the master I struggled on it. I spend 3day trying to fix this issue. I and Hashim tried to use Arduino UNO as a master board and its work great with slave board.
I had to mill the internal case to hold up the Neopixel to the desired distance. To give a try Wendy hacked the mold by removing the arrows and adjust the size of the mold to be smaller than the original size. We did another vacuum forming for the internal case. The case was not great but good for now I fixed all Neopixel strips on it. Wendy told me that we have to prepare Vcarve files for the internal mold. I was not excited this time because the shopbot will take a lot of time to mill beside I was under pressure the communication part didn't work yet. I was worried that I don't finish a the time. Anyway, after the file for the shopbot get ready we moved to shopbot and Wendy started up the machine but she faced a problem that the machine does not return to the origin. She's fixed it three times already this issue but she could not fix it in this time. She said "someone has bashed one of the axis too much and the drivers have lost their way and that I have to reset everything when there’s time". I had to use the old case.
I'm happy that I get my project done. I go through a lot of challenges. The first challenge was designing the case, I didn't experience that before. I face a lot of issues with the programming and the electronics. I had to change the board several times. I did a lot of mistakes that I learned from. I'm now more aware about doing the troubleshooting and I'm much better at it. I started to understand how the machines in the Lab works. I'm glad that I'm surrounded by people who suport me and motivate me. I enjoy the time that Wendy and I hacked the mould and the case. It was the best part of the project. I learnt how to use the tools and my hands and how can I hack it without damaging the whole thing. Good tips.
I had to change my presentation timing with from 15th to 18th of June. This not gonna be happening if Wendy didn't find Jean-Luc Pierite