Molding & Casting.
Resin vs Silicone Case.
Since the output device of the system is having a matrix of LED, it made sense from the beginning to create an outer case that is transparent. In order to achieve that, either a transparent resin could be used or silicon itself. To create a resin mold, several steps are required that are discussed in the Molding and Casting week.
A finalized resin mold can result in having different physical properties aside from transparency, it can also be more solid or more elastic, depending on the material used. In contrast, the silicone material used in the lab, gives one physical property of silicone - soft/rubber like. This softness can vary according to the thickness of the silicone.
Preparing the Mold.
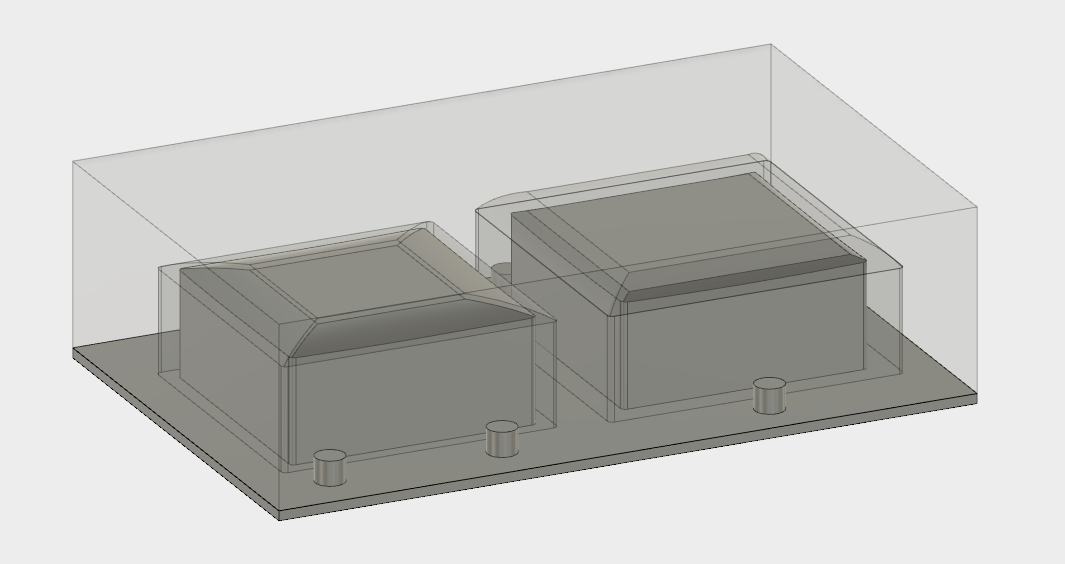
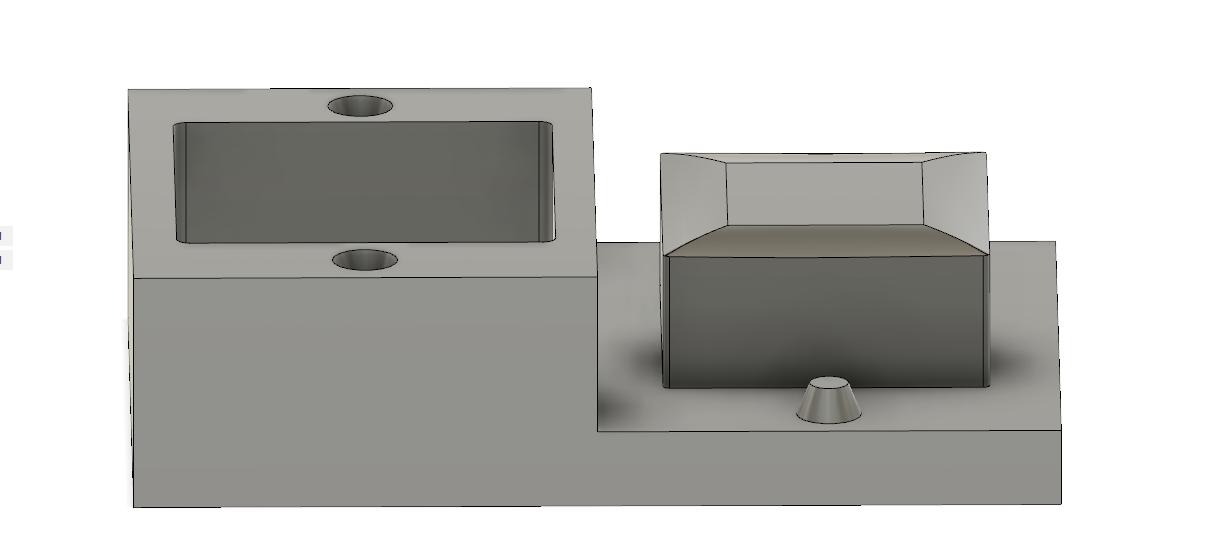
Using the model of wax block, two shapes of the cubes were cut inside, one with 3mm wall thickness and another one with 5mm.
As a reslt, two negative spaces are created into which we can later pour the resin.

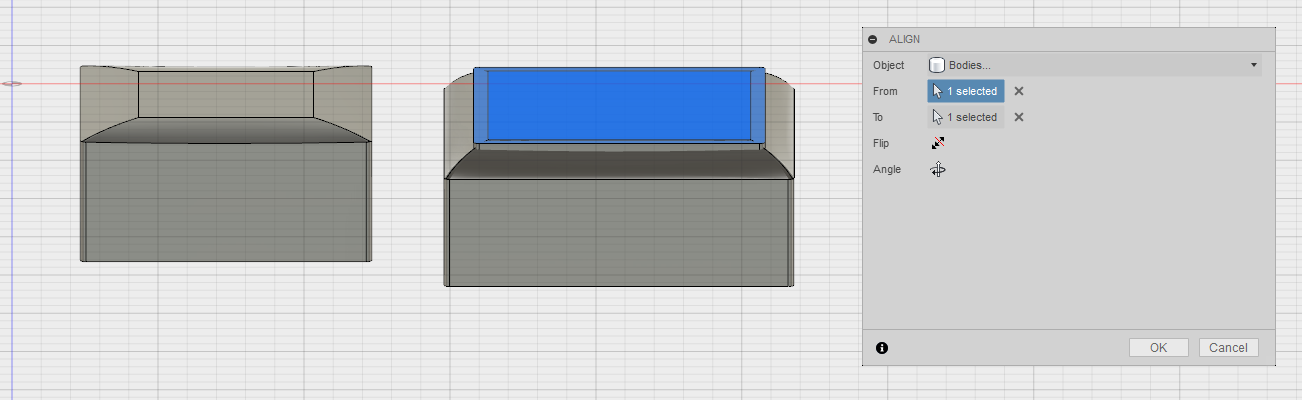
In order to create a thin case of 3mm or 5mm wall, another mold was required in order to press the resin in between.
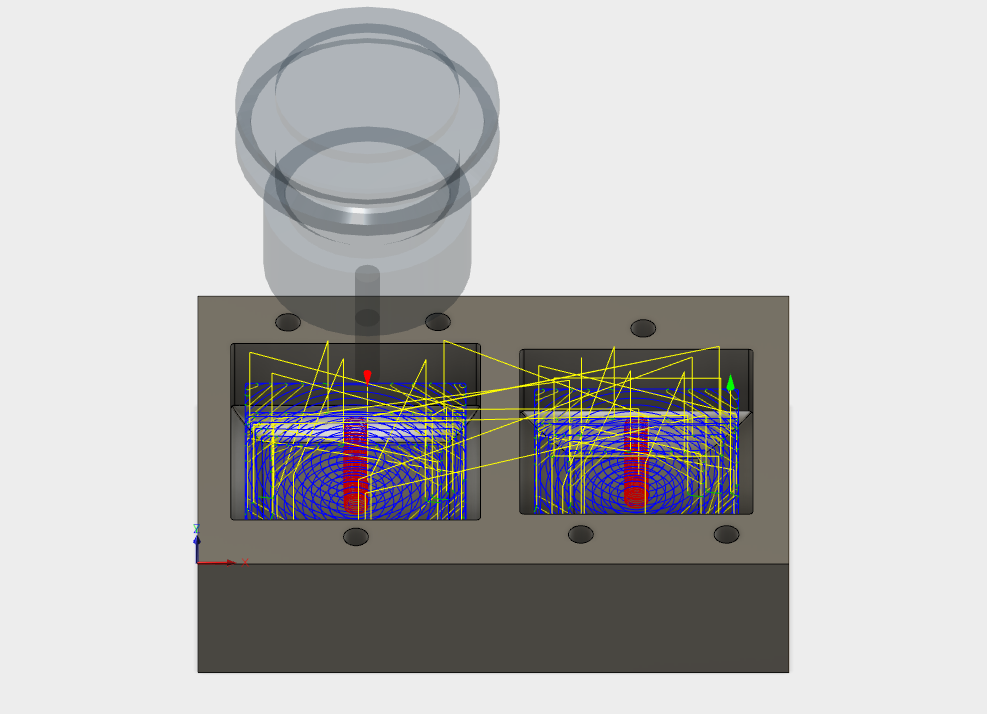
The mold is first milled using Adaptive Clearing and 6mm tool, then cleaned using Parallel Milling and 3mm tool.
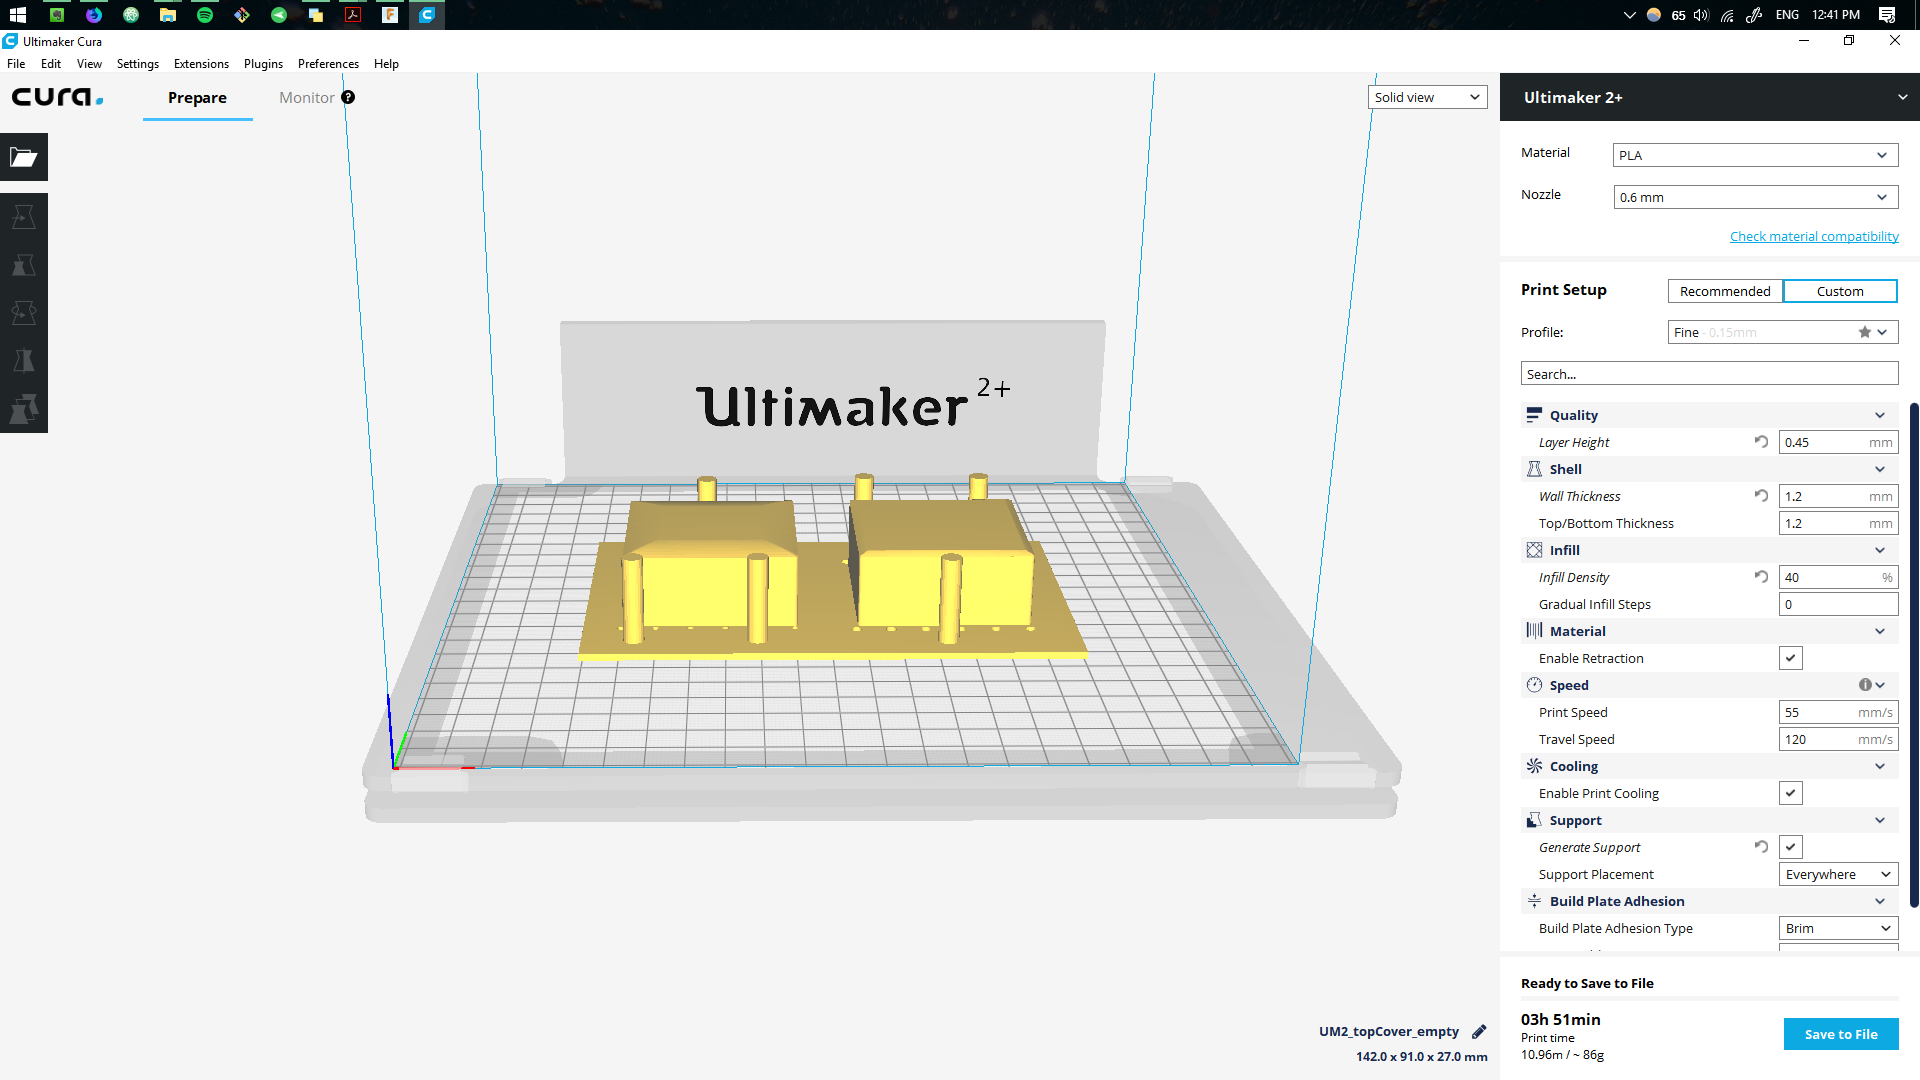
For the top mold, the part was 3D printed using the following settings.
Resin Mold.
To achieve a transparent mold
.jpg)
.jpg)
Once the mold was milled the, the resin was mixed and poured inside. The material is placed in vacuum chambed. After which the 3D printed part was placed on top as a lid and casted over night.
.jpg)
.jpg)
Once done, the 3D part got stuck inside the cast, which required to manually remove all the pieces.
.jpg)
The final results came out nice, however more transparency was wanted and another mold is created to experiment with the silicone material.
.jpg)
Silicone Mold.
Since last time the 3D part got stuck together with the mold, the decision was to avoid 3D part for this process and use only wax insted. From the previous mold I learned about the size of the cube that is desired, leaning more towards 3mm than towards 5mm. Another model is created, which will cointain both the bottom and the top part of the cast.
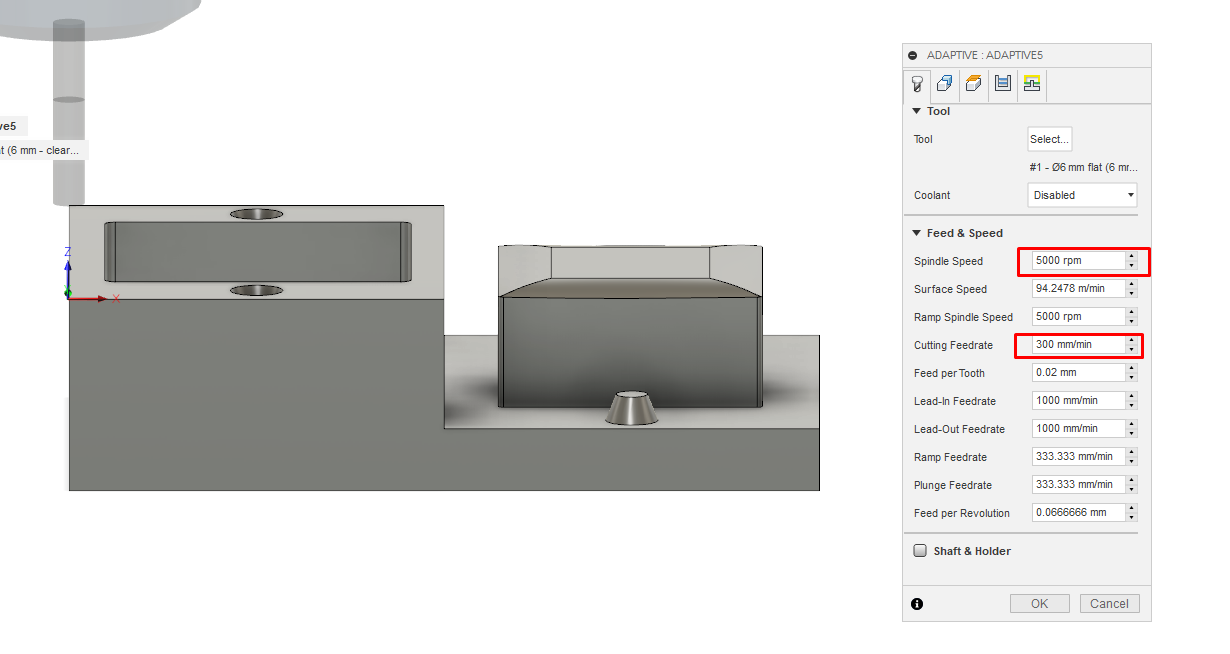
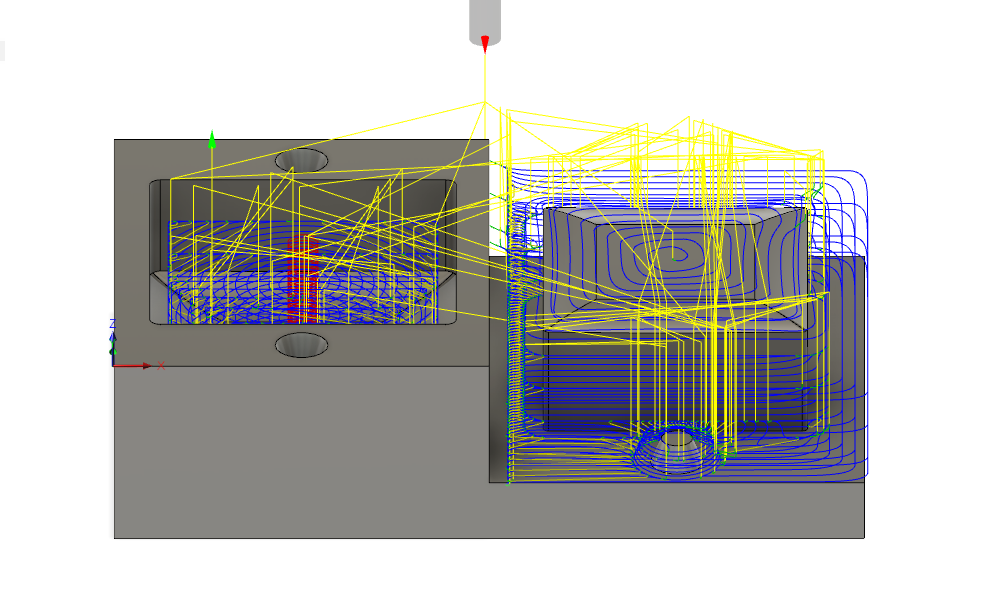
A new setup is created in Fusion 360 to achieve first an Adaptive Clearing job. The folliwing settings are used:
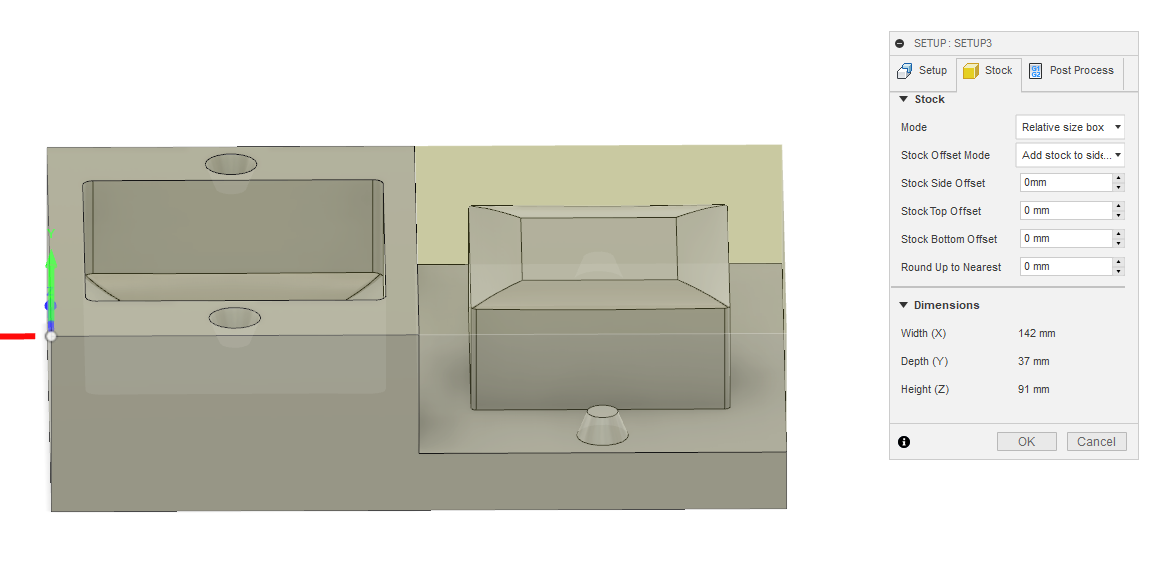
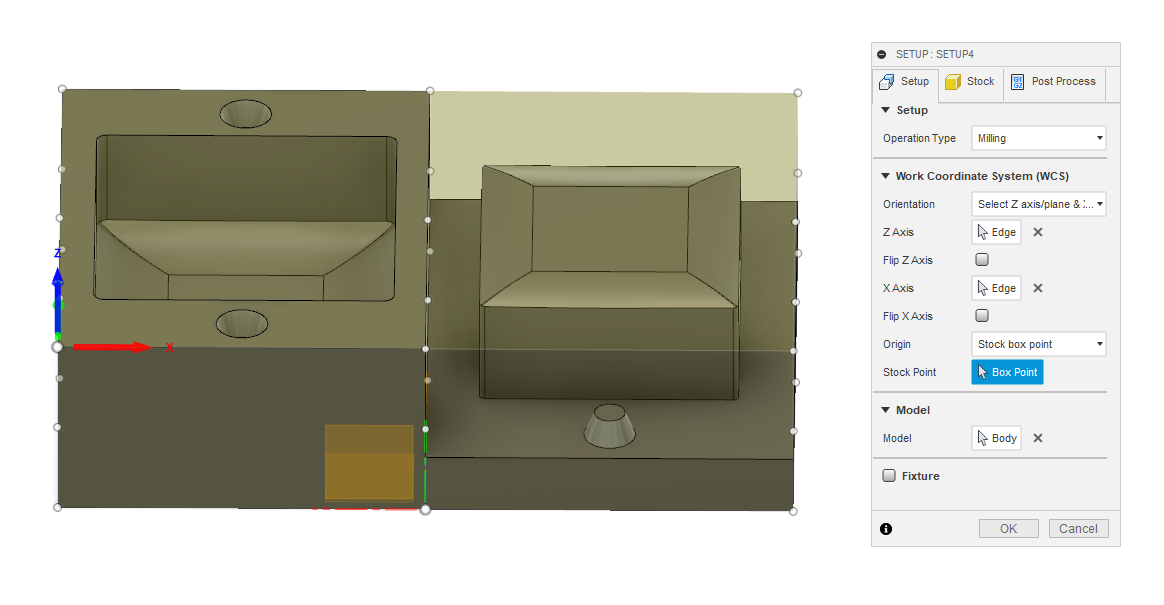
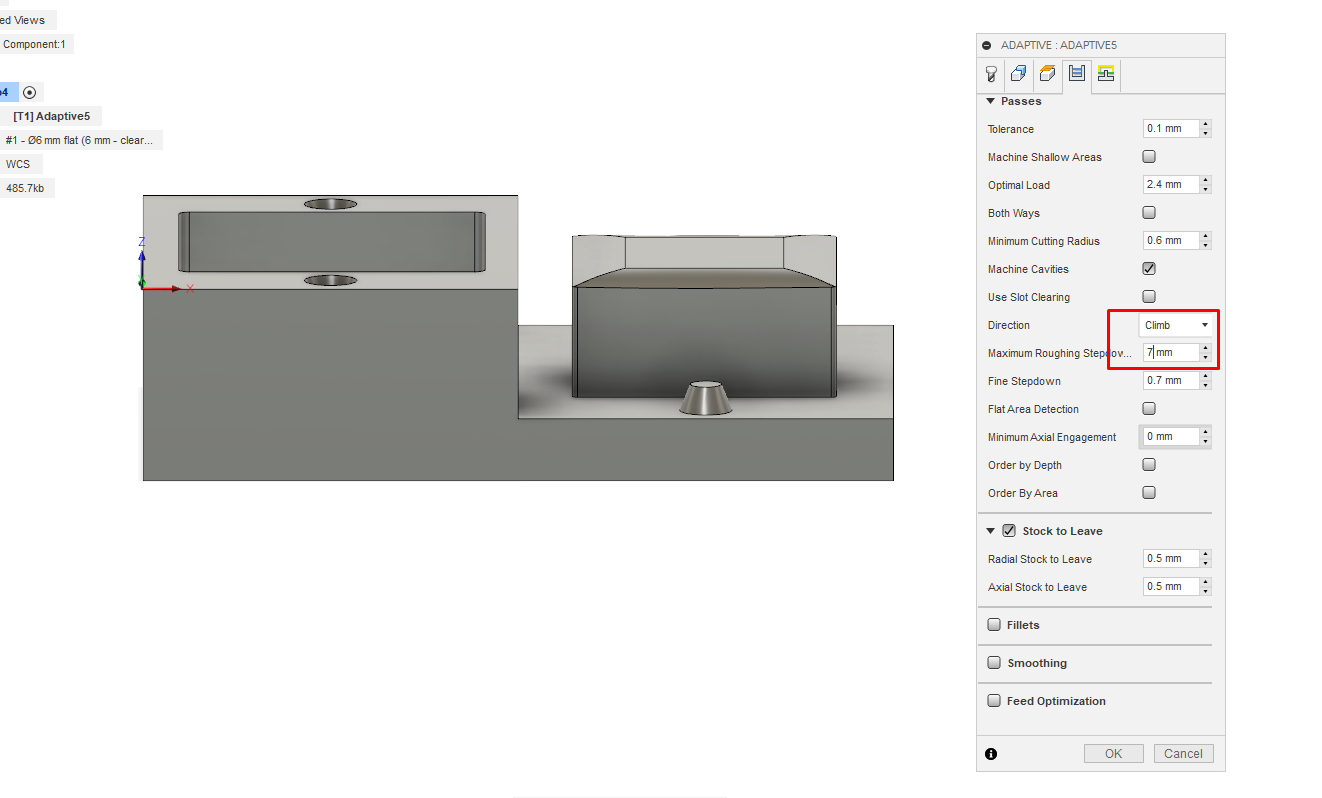
Once the simulation gives a good result, we can proceed with milling out the wax cube.
The settings of the tools:

6mm milling tool.

3mm milling tool.
As a result, the milling looks like this.
.jpg )
.jpg )
Similar techniques and material is used to produce the silicone as in the Molding and Casting week assignment. This time the silicone is however the end result of the process.
.jpg )
The material is poured inside.
.jpg )
The top part of the mold is placed. This way the difference created between the wax will result in the silicone case.
End Results.
The final case came out transparent, with some blue shade take from the wax. It is flexible, but strong at the same time. It is a good way to create the case for this solution.
.jpg )
.jpg )