Interface and Application Programming.
Concept.
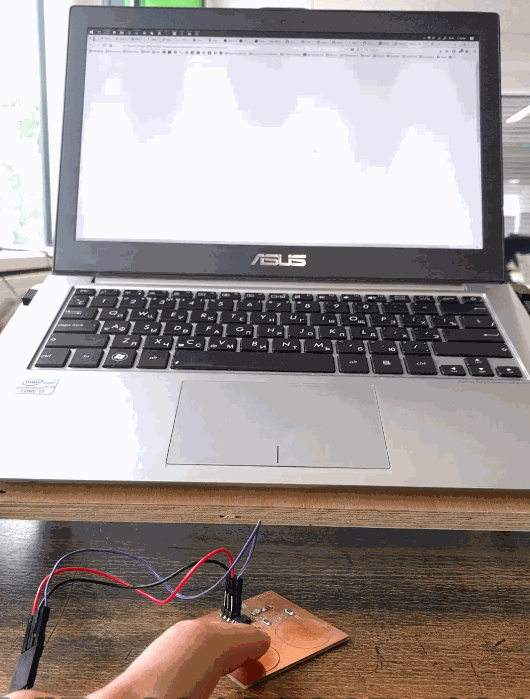
The scope of visualization for this project was to create a responsive interface that would display the data read from the Touch Sensor built during the Input Device week. The idea is to visualize the data in the browser locally, by reading the data from the serial port of the FTDI and parsing it using websocket to an HTML file on the browser site.
Reading Data using Python.
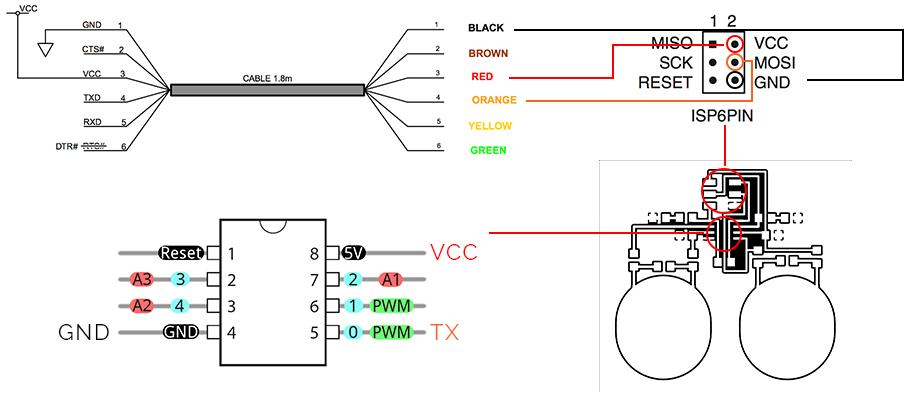
The data is read from the MCU using an FTDI cable.
Since Python is an ubiquituous tool when it comes to programming and especially web applications, it will be used to read and pass the data from the Touch Sensor board.
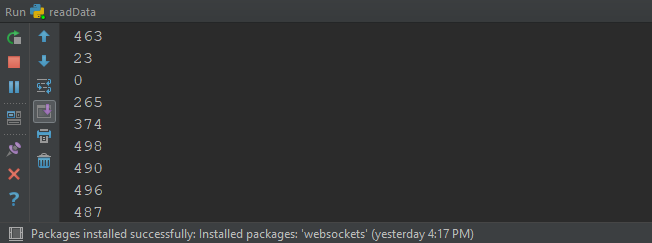
Previously, the data was successfully read in the Arduino IDE. Knowing that data travels through
                        import serial

                        ser = serial.Serial('COM14', 9600)
Now we are going to print the string as it is, by attributing the values to a new string value.
                        import serial

                        ser = serial.Serial('COM14', 9600)
                        string = ''
                        print(string)
As a result we get this.

We have values printed, but they still carry some tails of data. We will filter that data by adding the line.
string = string.replace("b", "").replace("\\r", "").replace("\\n", "").replace("'", "")
Passing Data through Websocket.
Here is a good implementation code that was used as a base to write the code for this solution. First data is taken from the serial path, then using a websocket, we declare a new server adress with specific IP through which the data is sent and printed using a javascript code.
To allow passing of the data, some libraries are imported, such as asyncio, websockets, and time. After which a while loop is created that passes the filtered data as long as it reads it, prints it to the terminal and then creates a small delay of 0.05 seconds to synchronize the communication with MCU. Finally it creates a new server to which it publishes the data and enables it to run as long as it is not stopped.
                      import asyncio
                      import websockets
                      import serial

                      ser = serial.Serial('COM14', 9600)
                      string = ''

                      async def time(websocket, path):
                          while True:
                              string = ser.readline()
                              string = str(string)
                              string = string.replace("b", "").replace("\\r", "").replace("\\n", "").replace("'", "")
                              print(string)
                              await websocket.send(string)
                              await asyncio.sleep(0.05)

                      start_server = websockets.serve(time, '127.0.0.1', 5678)

                      asyncio.get_event_loop().run_until_complete(start_server)
                      asyncio.get_event_loop().run_forever()
Displaying the Data in Browser.
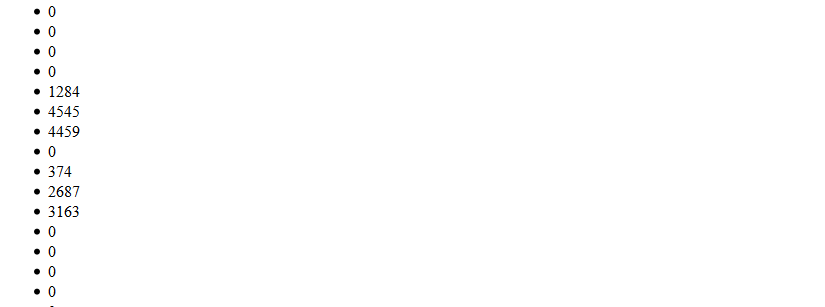
Since there is a connection on the Python side, now we need to establish it on the browser side. Using the example provided below, we are able to directly print the data in a form of a bullet points.
                      <!DOCTYPE html>
                      <html>
                          <head>
                              <title>WebSocket demo</title>
                          </head>
                          <body>

                              <script>
                                  var ws = new WebSocket("ws://127.0.0.1:5678/"),
                                      messages = document.createElement('ul');
                                  ws.onmessage = function (event) {
                                      var messages = document.getElementsByTagName('ul')[0],
                                          message = document.createElement('li'),
                                          content = document.createTextNode(event.data);
                                      message.appendChild(content);
                                      messages.appendChild(message);
                                  };
                                  document.body.appendChild(messages);
                              </script>

                          </body>
                      </html>
Since we already can receive the data on the browser side, the goal is to use an object to visualize the data. For this instance, Two javascript library is used. The idea is to create a circle that will react to the stream of data and since this library allows to draw vector shape objects, we will go ahead and do that.
First, inside the head, we declare the necessary libraries to enable the javascript. The javascript sourcefiles need to be places inside the same directory as the HTML file. These are two.js, underscore.js, backbone.js.
                      <head>
                          <title>WebSocket demo</title>
                          <script src="two.js"></script>
                          <script src="underscore.js"></script>
                          <script src="backbone.js"></script>
                      </head>
Now we create an object that can be readable by the HTML.
<div id="circle"></div>
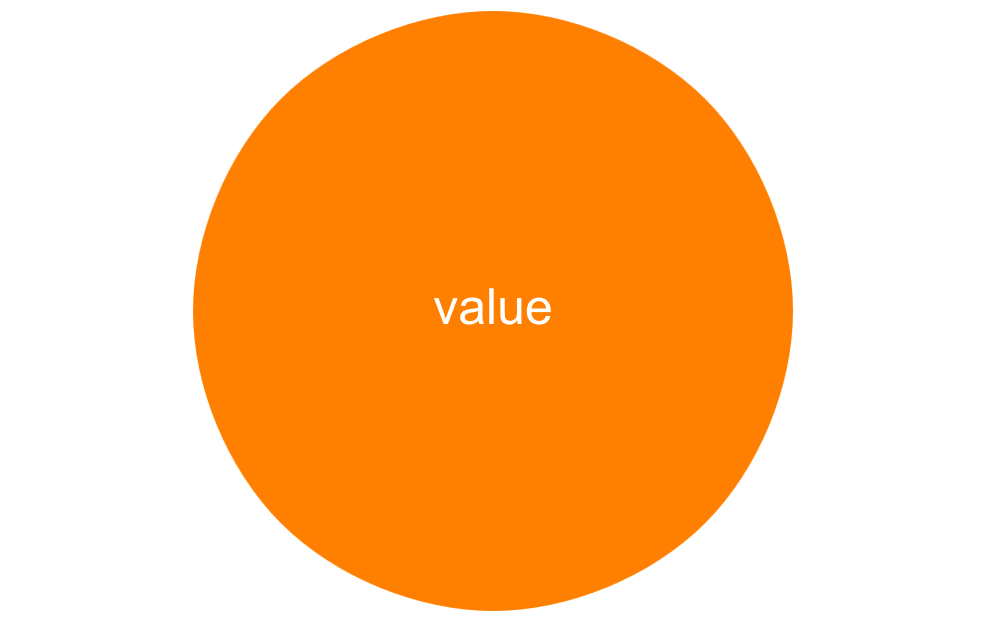
Now follows a script that draws the circle, as well as a plain white text on it. The objects are grouped, as a requirement of the javascript library. This is done using the two.js. The end statement publishes the objects to the website.
                      var elem = document.getElementById('circle');
                       var params = { width: 2000, height: 2000 };
                       var two = new Two(params).appendTo(elem);

                       var circle = two.makeCircle(900, 500, 300);
                           circle.fill = '#FF8000';
                           circle.linewidth = 0;

                       var text = new Two.Text('value', 900, 500, 'normal');
                           text.size = 50;
                           text.fill = '#fff';


                       var group = two.makeGroup(circle,text);

                       two.update();
We get an orange circle wit text inside.
Finally we create a new websocket to send the data to. Follows the ws.onmessage function that tracks the incoming data and changes the behavior of the circle. The shape of the object is controlled by .scale function of the two.js. The text is changed according to the event.data received from the serial port. Also, according to the value the circle changes it's color. Finally an update function to publish the objects.
                       var ws = new WebSocket("ws://127.0.0.1:5690/");

                        ws.onmessage = function (event) {

                           if (event.data > 700){
                                circle.fill = '#ff0000';
                            }
                            else if ( event.data > 300) {
                                circle.fill = '#FF8000';
                            }

                            else {
                                circle.fill = '#0000FF';
                            }

                            circle.scale = event.data/400;

                            text.value = event.data;

                            two.update();
As a result we get a fun visualization inside the browser.

The circle enlarges depending how much of the finger toucher the pad. Almost no touch displays a small circle in blue color. Fully positioned finger in the pad displays the circle in orange in a bigger size. Once the finger touches the ground and the pad, it becomes red.